
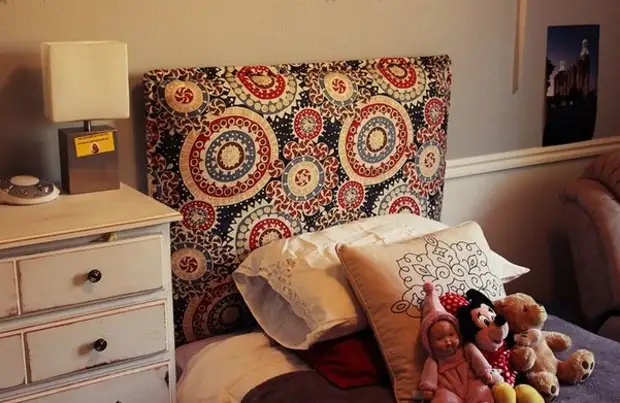
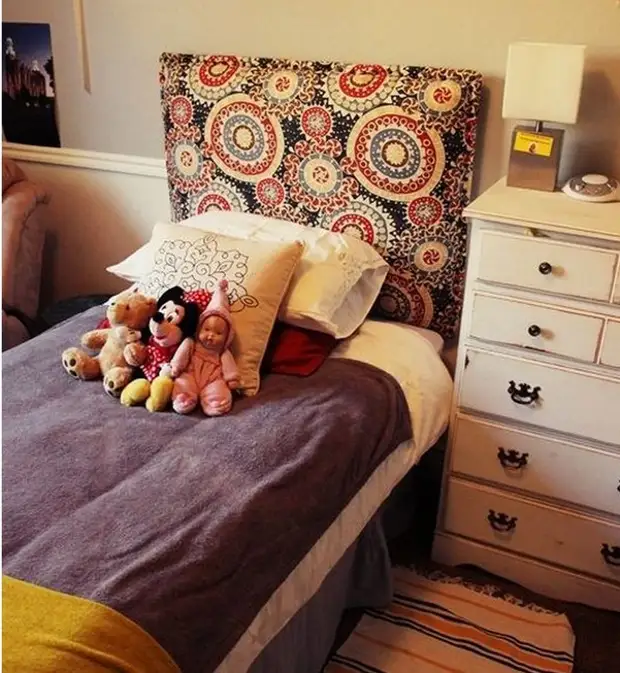
The bed is not without a headboard. A large or small, simple or richly decorated back of the bed can set the tone of the whole bedroom. If you are ready to redo the headboard, we will show the project that you can do in one day. The best in the manufacture of your own headboard is the fact that you can perfectly set it up under your space and your style. Let's do it.
Soft headboard with your own hands. Necessary materials:
Plywood cut to order (for example, for a double bed approximately 100 cm wide by 75 cm height)
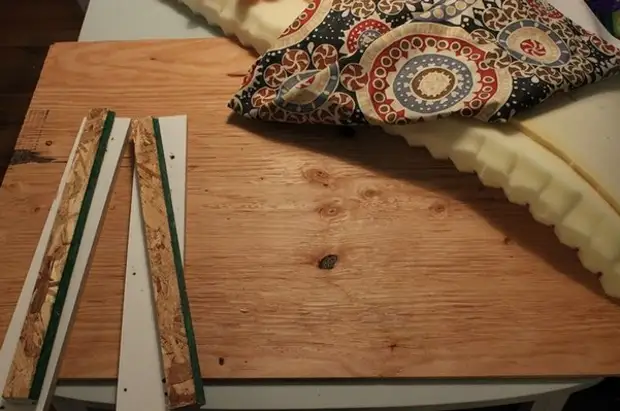
Two plywood strips (about 5 cm in width and 60 cm long)
Two plywood strips (about 9 cm in width and 60 cm long)
Thick foam in size with a large piece of plywood (in this example 100 x 75 cm)
Thin foam or batting (15-20 cm longer and 15-20 cm wider than thick foam)
Fabric with decor according to your choice by 20-30 cm wider and 20-30 cm longer than a large piece of plywood
Screws, drill, level, staples, furniture stapler.
Soft headboard with your own hands, step by step:
Step 1: Creating fasteners. Your back will be mounted on the wall almost like a puzzle, with one L-shaped "bracket", attached to the back of the back of the bed, with another L-shaped "bracket", fixed on the wall. Enclose one thin strip of plywood, retreating 2 cm from the edge . Make sure the screws do not penetrate through.
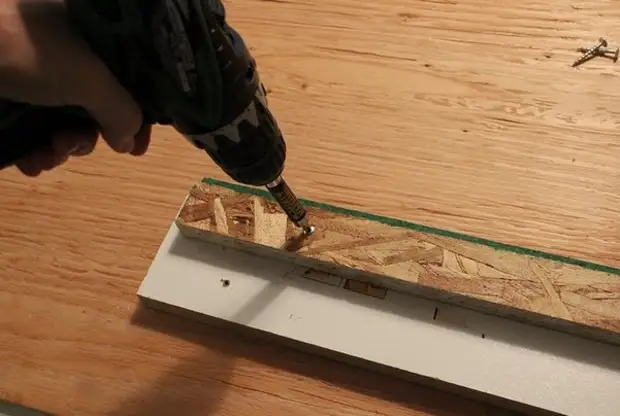
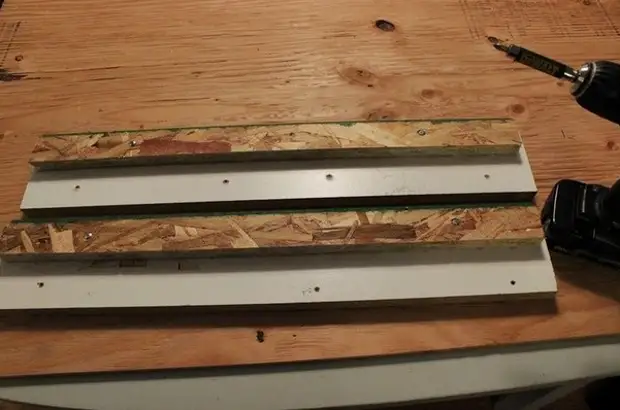
Repeat for another part of the attachment so that you will end up with two M-shaped bracket.
See how they are connected to each other on the wall.
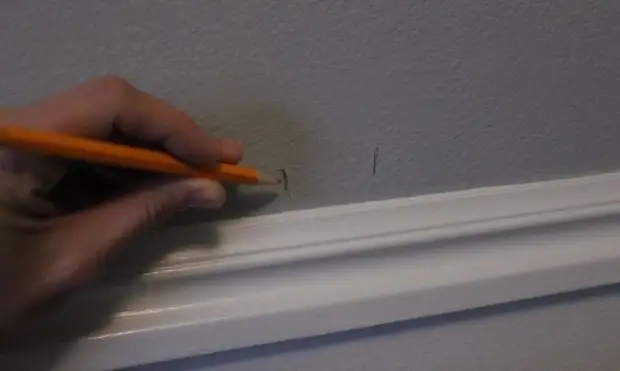
Step 2: Mark on the wall of the place for fastening the head of the head. Put two labels on the wall where your back will be attached.
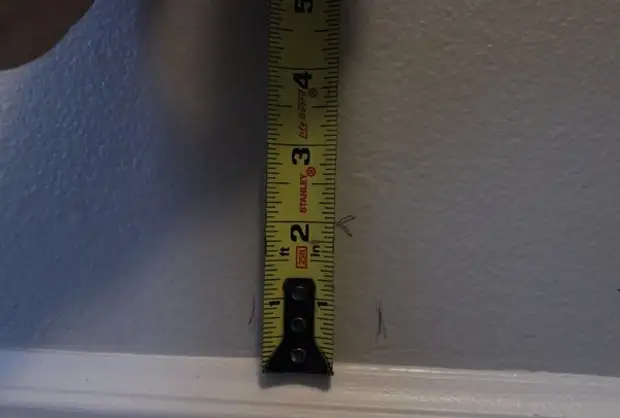
Step 3: Measure how high the wall bracket will be fixed. The example shows that this distance is about two thirds to the bed (50 cm above the top of the mattress, the same 75 cm in height).
Step 4: Screw one screw to secure the bracket on the spot. Make sure the bracket is directed upwards. Then get the second screw to the final installation.
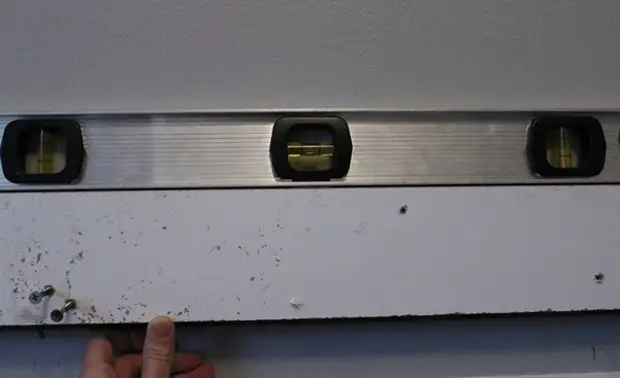
The next step is important if you want the headboard hanging straight. Use the level to align the bracket, the second screw is only granted, so move to achieve the perfect position. Secure the finally screws. It is better to fix four screws for two on each side.
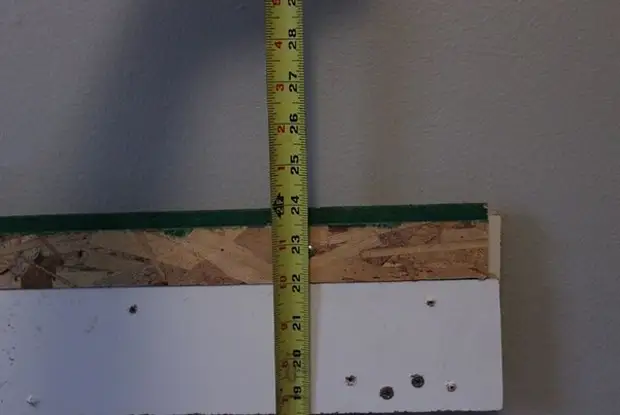
Step 5: Check the landing of two brackets. Near now the free bracket on the wall. Measure the distance from the top of the mattress to the top of the free bracket. In this case, it turned out 60 cm, remember this figure.
Step 6: Note where the other bracket will be located on the back of the bed. We just take the measured distance (in this case 60 cm), measure it from the bottom of the back of the back. Mark and forth the line at this height.

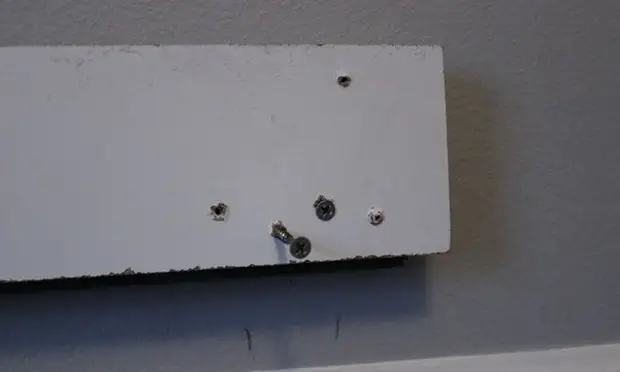
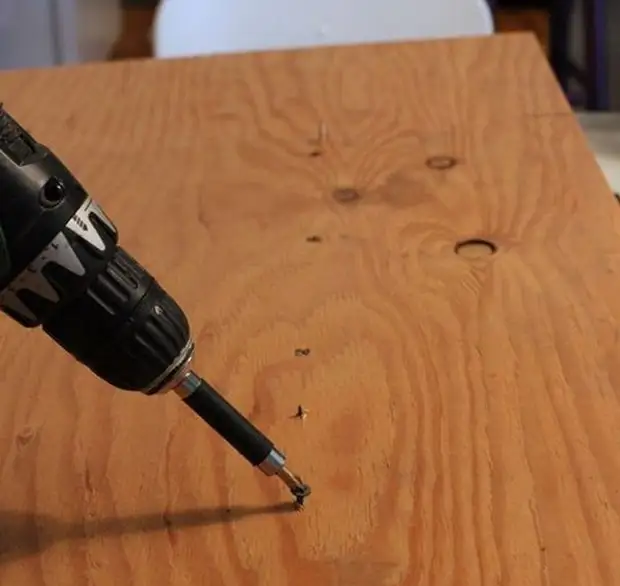
Step 7: Secure the bracket on the back of the bed. For this, 4-5 screws are enough. It should be chosen so long so that they do not pass through the plywood.
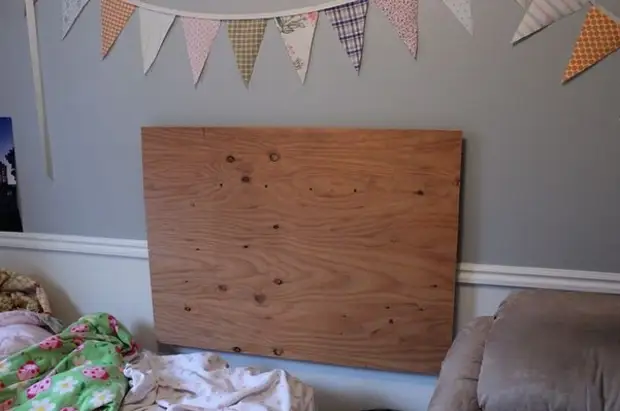
Step 8: Check how the headboard hangs. The goal is that our design is combined firmly and safely.
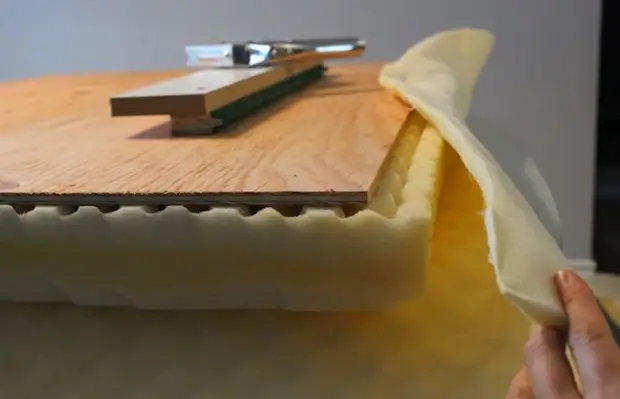
Step 9: Now it's time to catch a headboard. Put thick foam on top of a piece of plywood and cut the edges around the perimeter. Do not worry if it turned out not exactly.
Step 10: Add thin foam or batting. The meaning of this step is to soften the edges of a large piece of plywood, which are not closed with thick foam rubber. Pribe foam rubber or batting furniture stapler.
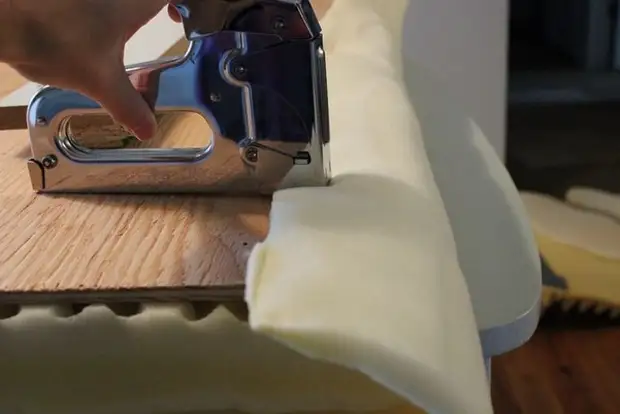
Slide better from the middle to the corners.
We hide a thin foam or vatin throughout the perimeter. It is not necessary to use a ton of brackets, you only need to fix so that it does not move when you have to breathe cloth.
Step 11: Place the fabric on the product. Start from the middle of the hand, then pull the tapping fabric and secure with the bracket, then continue heading to the corner. Do not make the corners until you secure all the parties. Make sure that you stretch the tissue well before each bracket.
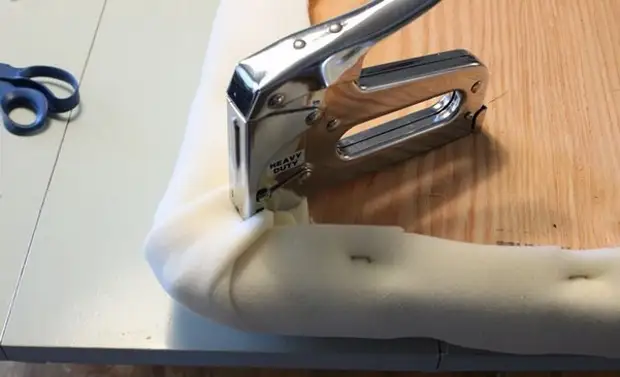
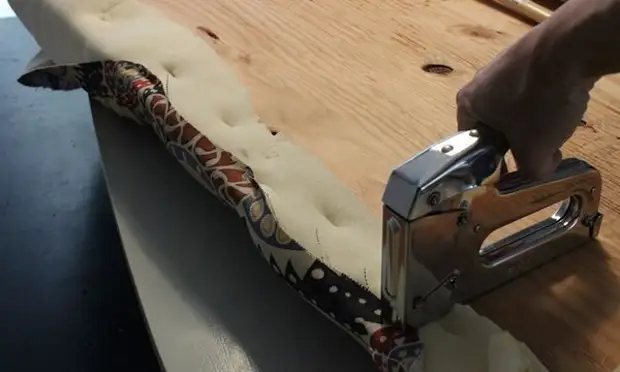
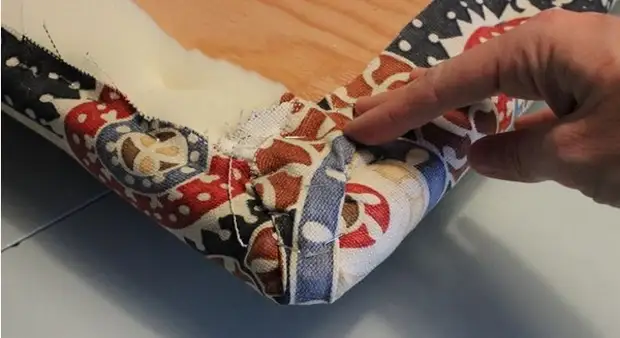
Step 12: Safe angles. The secret of soft angles in a minimum of folds. Pribe the fabric to exactly the corner. Fold in the corner with a small fold and secure.
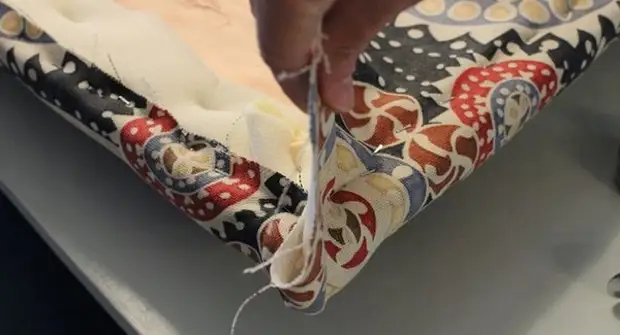
Happened? Take congratulations! Now repeat the remaining three corners.
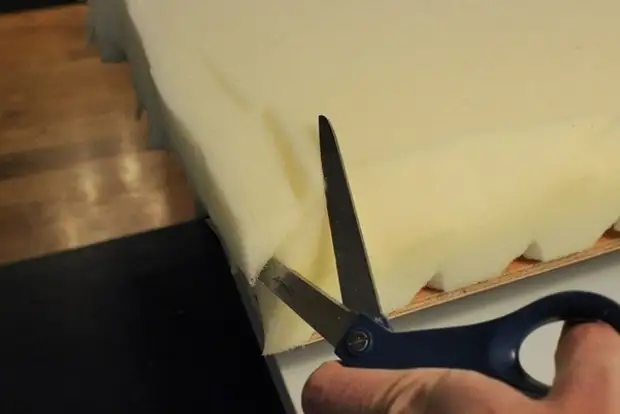
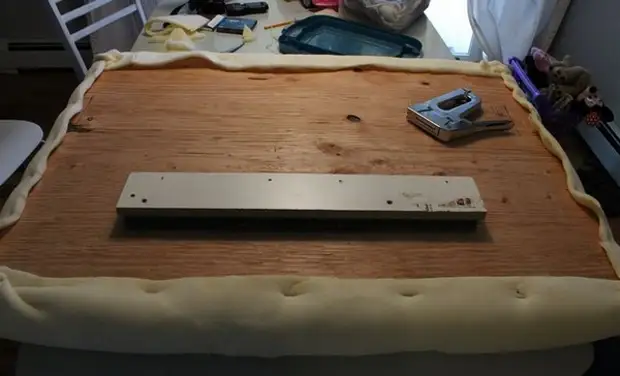
Step 13: Crop the excess fabric, then fasten the finished headboard to the wall. If you carefully and gently performed the corners and edges, you will get an amazing and professionally looking headboard. Additionally: Optionally, you can add a finish along the edge of the head of the head.
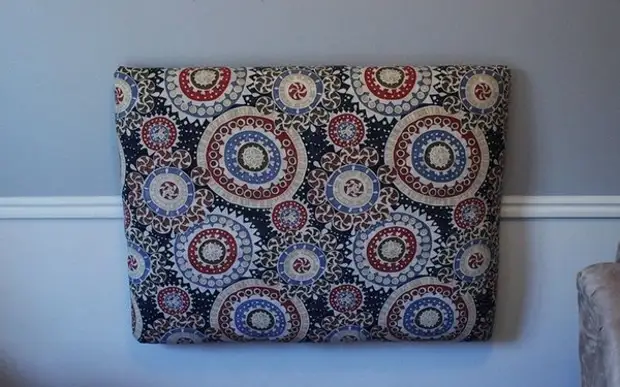
Good luck! Make such a soft headboard with your own hands is simple enough. Just do not hurry, measure carefully, and enjoy the finished product!
Prepared Elena.
A source