

Oh, these Husky ! Probably, most of the inhabitants of the globe considers these dogs with my time creatures. How to keep and not to do toy husky with their own hands ? I think that Dry felting technique Suitable for this purpose, it is impossible better.
So let's get start. To begin with, as usual will list the materials that we need for Flaw.
Materials for felting puppy husky:- Wool for felting: dark gray, black and white. I used the Australian Merinos.
- Sponge or special felting brush.
- Flawers needles: a triangular medium needle (No. 38) for the formation of parts, "Stark" No. 40, twisted triangular No. 40, the average needle of "Crown" and a reverse needle to give fluffiness toy.
- Self-hardening clay (preferably white) for eyes. Paints for painting eye. I used watercolor.
- Varnish. You can use any, but it is desirable that the lacquer was glossy. They will cover the eyes, and with glittering eyes the toy always looks prettier. I used acrylic varnish.
- Little comb and scissors in order to bring the toy in the proper look after processing the reverse needle.
My husky turned out to be small: about 10-12 cm in height. Therefore, I immediately started to equip it from white wool, without using a slurry (or ribbon). If you plan to make a large toy, then I recommend first to equip the parts from less high-quality wool (or use a synthetone, pulling it with threads and giving the necessary form). By this, you will significantly save your money.
How to use a synthetic procession as a basis, can be viewed in the panda rolling lesson:
We begin with the fact that you give a bunch of white wool shape of a bowl on a sponge. First, we work the triangular medium needle, then the "crown". In general, the needle of "Crown", in my opinion, is simply indispensable in felting. It allows you to well treat the surface of the part and at the same time inside the emptiness is not formed, as it sometimes happens when working with a very thick needle.
This ball is the future head.

Now I make a muzzle. That end of the face, which is located spout, blame, and at the opposite end, we leave wool bundles. For them, we will pull the muzzle to the head of the husky.

Take the face in my head. We use a thin needle number 40 for this purpose.

We look out the outline of the nose, smile. I made it a "crown".

Getting to felting the body. We take a larger bunch of white wool. Give him a body shape of a dog. First, as usual, we work on the sponge. Then, when the form is already more or less dense, you can roll, holding the item in your hands. The sequence of using the needles: We start to equip the middle, then the "crown" and end with thin No. 40. The upper edge of the details do not roll, we will take the body to the head for it.

Take the body to the head:

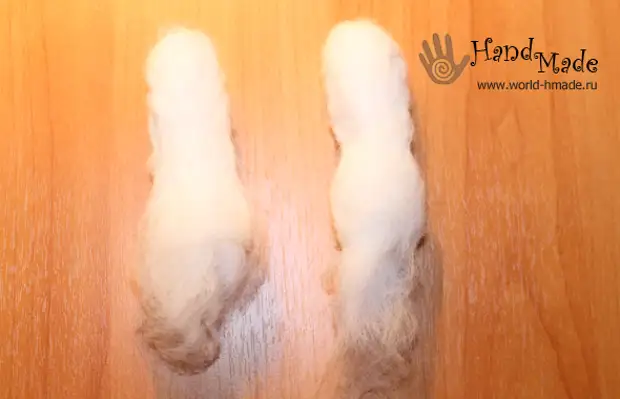
Now we proceed to filling the rear legs. We take two identical wool bundles. It is desirable to work in parallel from the very beginning to work in parallel, because it is difficult to judge how much wool it is necessary to take at the beginning.

On the sponge, we begin to give the wool bunch of the necessary form:

On the one hand, you throw a bunch of a little more. It will be the place of attachment of the legs to the body of a dog.

Periodically apply the leg to the body, trying.

As mentioned above, we will need two such details:

Now it is necessary to make the lower part of the paws (the one on which fingers). To do this, we take a bunch of wool and give it the shape of a foot on the sponge.

We make two details, one side of every detail does not touch - for it we will take a foot to the smoothie earlier the ball.

The unprecedented end is winding around the ball (the back of the leg) and take the foot. For the speed of the process, it is not one, but several needles.

That's what we should get:

Put legs to the body of the puppy. To do this, I pierce several times the paws through.

We apart both legs to the body. As can be seen in the photo, at this stage the border of the body and legs is very noticeable, that is, it can be seen where the leg of the privalyan.

We will try to smooth this border. Take a small bundle of white wool, slightly confusing it in your hands, give the form of the cloud.

Now it is a cloud of a cloud of foot and body, having smoothing the border.

Here is what we did:

Side view:

Let's start riding the front paws of Husky.
We take two of the same wool bundle, medium needle or "crown" by one of the ends of each beam. We work with foot parallel.
Now we start forming a paw. Lightly bend the part and repeatedly poke the needle in the place of bend.

We should have two details:

Take the front paws to the body. It is better to first find a position in which the puppy sits and does not fall.

That's what it turns out:

Getting painting. Begins the most interesting.
For the start of the wool's wool, we welcome the spout. I usually take the fiber of the wool and take it along the outline of the spout, and then the wool bundle fills the emptiness inside.

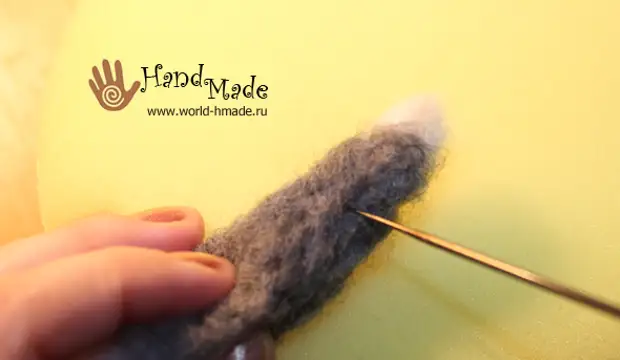
Calculate the dog of gray wool in those places where it is necessary. It is better that during this process you have before the eyes of Huski. Wool with a thin needle. I chose a dark gray wool. The fact is that we will "fluff up" toy with a reverse needle. The reverse needle pulls out the outdoor hairs from the toy. We made the basis of white wool, and therefore, after processing the reverse needle, the toy will become lighter.

The toy is already becoming like husky.

And top view:

It remains very little.
Let's take a tail. We take a bunch of white wool, give it the form of a cone. The end of the beam is falling out.

Ward the tail of gray wool.

On a sponge, we assume gray wool to white, give the bundle shape of the tail. The top end is not necessary.
Take the tail to the body. Again, experiment with the position of the tail. In the event that you barely calculate the position of the feet and the husky sits not very confidently, the correct selected position of the tail will help to fix it.

Tail Privalyan!

Now let's do fingers. We will work with a needle "Crown".

The ears I did in the same principle as in the master class on Raccoon. As this is done, you can see by clicking below:
I made eyes from self-hardening clay. You can purchase ready-made eyes for toys or also try to make them yourself. From clay we make "Lephechki", let them dry. Then shallow emery paper or nail file is removed. Pencil outlining pupils and a rainbow shell. Color paint with paints (first we apply the basic tone - blue - then draw pupils and only after that when the paint dries, draw the glare). Covered with varnish eyes.

While the eyes dry, we will make the grooves for the eyes on the mord of the husky. I do it with a needle number 38. Black wool can be slightly straining the mouth line.

We drip on the opposite side of the eyes a drop of glue "Moment of Rash" and insert into the recesses.

We make brings. To do this, take a small bunch of white wool.

We welcome this bundle above the eye. We work fine needle.

Black wool make stripes on the muzzle:

Now make a toy fluffy. To do this, we use the reverse needle.

Black stripes on the muzzle do not touch.

We process the entire surface of the puppy inverse needle. Usually after this, the toy becomes fluffy, but not too neat, since the needle pulls on the surface of the hairs of different lengths. On the ears, the hairs can smoothly cut with scissors, leaving the "wool" of the required length, and on the body combat the little comb.
That's all. Puppy husky is ready. It's time to photo :)


Master class from Jeiana Johanssen.
A source