
Bulk 3D floors are one of the most relevant tendencies in design. Moreover, if they were previously used exclusively in public buildings, then the apartment expanses are also conquered.
The secret of this popularity is primarily in operational qualities - strength, ease of care, environmental friendliness. But the designers loved this technique also because it allows you to create exclusive, embody the most courageous solutions, to give standard layouts unique chic. And the owner of the apartment will be exactly sure about the uniqueness of his interior, the more he is made with his own hands.
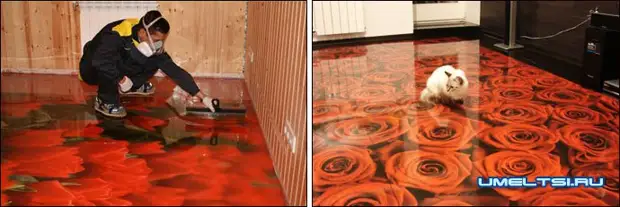
The technology of 3D floors is very complex and is a full-fledged artistic art object. The drawing is applied to the base base, then covered by a special polymer transparent coating, from the thickness of which the depth of the image depends. It is possible to use photos, natural materials, specially designed volumetric images, you can even just wallpaper. This allows you to visually expand small rooms, realize any fantasy of the customer, use it as an advertisement, gallery, etc.
If you decide on repairs and choose a bulk 3D floors as an outdoor coating, it is worth carefully studying the technology of this process and comprehensively soberly evaluate your capabilities. And it is extremely thoughtful to choose a picture - because it will remain with you for very many years. For many interiors, such a floor generally becomes the central component.

Modern materials made it possible to make the manufacture of 3D floors more affordable. But the installation process itself is very laborious and requires certain skills. Therefore, work is still better to entrust professionals. And if still creative itch pushes you to the adventure, it is worth punctually follow the advice of specialists.
Now you can proceed to the creation of a masterpiece . It resembles a multilayer cake with something, and the final ideal result depends on the quality of each layer.
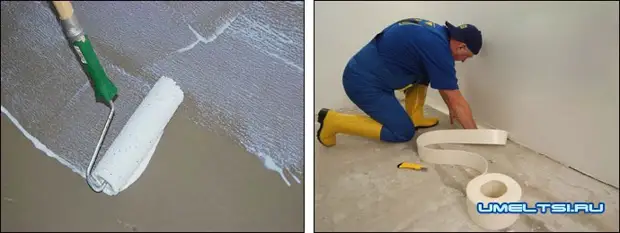
Starts installation from filling base . Since mostly overlapping in houses concrete, then the screed is made. Before this, the overlap is aligned with the grinding machine, close the cracks and chips, then carefully cleaned from dust and debris and degrease the surface.
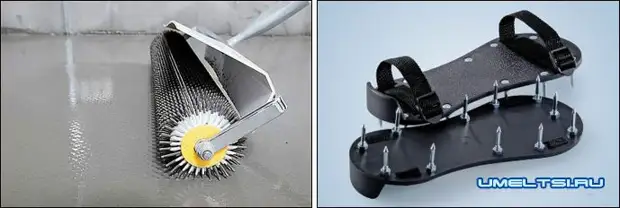
The leveling solution is uniformly distributed over the entire surface and processed with a special needle roller to release air bubbles.
After drying, the screed is grinning and carefully remove even the slightest dust. Then covered with a special primer with very deep penetration. The quality of the drawing directly depends on the quality of the primer, its durability.
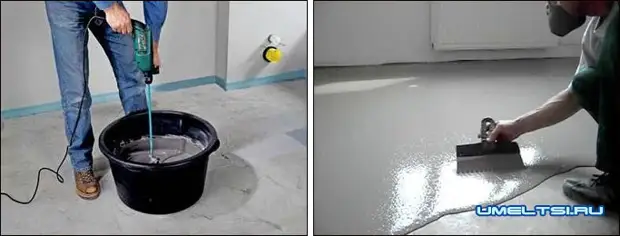
Laying the base layer . Properly executed screed can already serve as the basis for drawing a picture. But it is better to add a special polymer composition, which is placed in terms of level and rule, completely squeezing air bubbles. Quartz sand add certain roughness. The layer must fully harden, it is at least a day.
Applying a colorful layer . Here, your fantasy and thrust for creativity can turn into full force. There are three types of execution of this stage: work with natural materials, painting with paints and a finished image sticker.
Art painting is very expensive and increases the cost of sex at times. Using the finished image simplifies and reduces the process. But simply print a photo in a larger format is not enough, the drawing will be flat and inexpressive. Remember that there is a special technique of bulk major images. In artistic workshops you will help you choose such an image and move it to the vinyl film.

The size of the image should be greater than the floor area so as not to stick individual parts that can also shift during the fill process. The drawing is glued with special glue, it is thoroughly aligned, pressed, further ground.
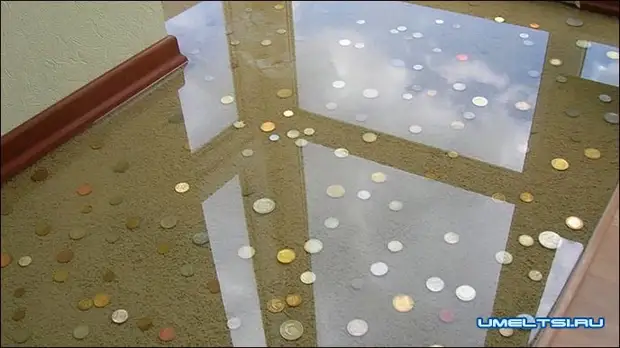
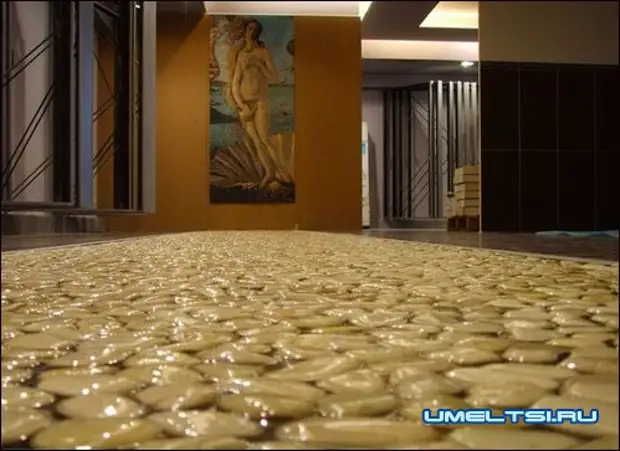
But if you yourself are a good artist, you can try to separate the floor yourself manually. It will not only save money, but also gives the scope of your work. Especially such a way like High-Tek lovers, because it allows you to implement any ideas. And you can also use multicolored decorative sand, river and sea pebbles, shells, leaves, buttons ... Word, create and self-cheese!
Finish layer . All components of the transparent layer are thoroughly mixed and poured into the drawing in compliance with the thickness of the layer over the entire surface. To give an artistic effect in the mixture, you can add sparkles, coins, grains.
The mixture is aligned with the rule. Needle roller (or special ships ships) remove air bubbles. The depth of the picture and its perception depends on the thickness of this layer. After primary solidification (15-30 minutes), the surface is closed with a plastic film for several days. Time may vary depending on the humidity and temperature indoors.
After final drying, the surface of the transparent layer is polished and covered with protective varnish. This will reduce the surface of the floor from mechanical damage, from direct exposure to sunlight, from high humidity. You can give the floor and anti-slip properties. The surface covered with such a varnish requires the most common care, including with the use of detergents.
The whole process of manufacturing 3D floors takes from week to two . His indisputable technical advantages will take durability, immunity to moisture, the absence of dusty, simplicity in cleaning. And, of course, originality and individuality making your home unique.
However, it should be mentioned about some of the shortcomings of bulk artistic floors. it High cost, first of all . And the difficulties you encounter with a possible dismantling: the polymer composition is so firmly connected with the basis that it is extremely difficult to remove it.
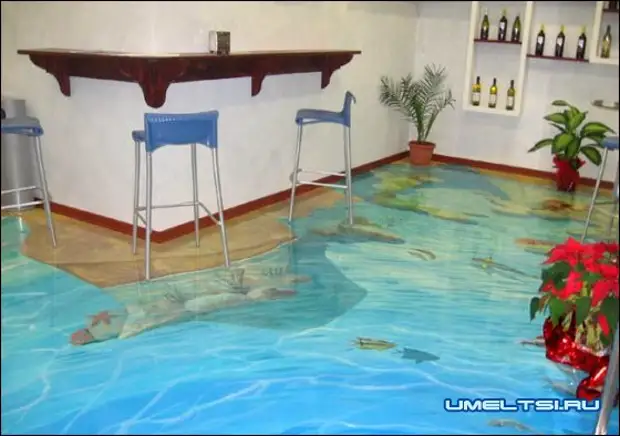
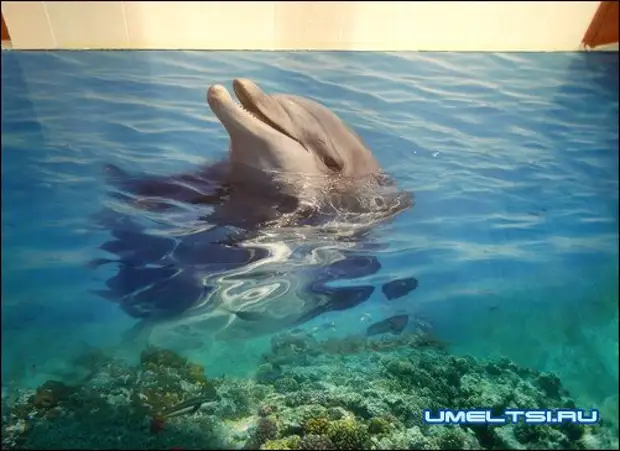
3D Paul Ready Work

3D half form, sequence of work
A source