
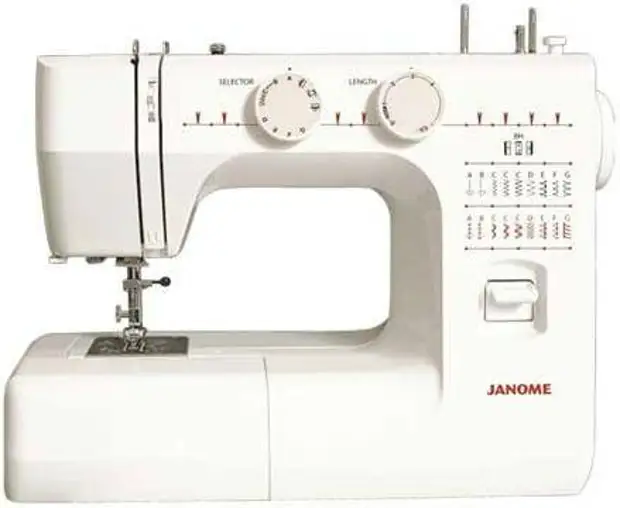
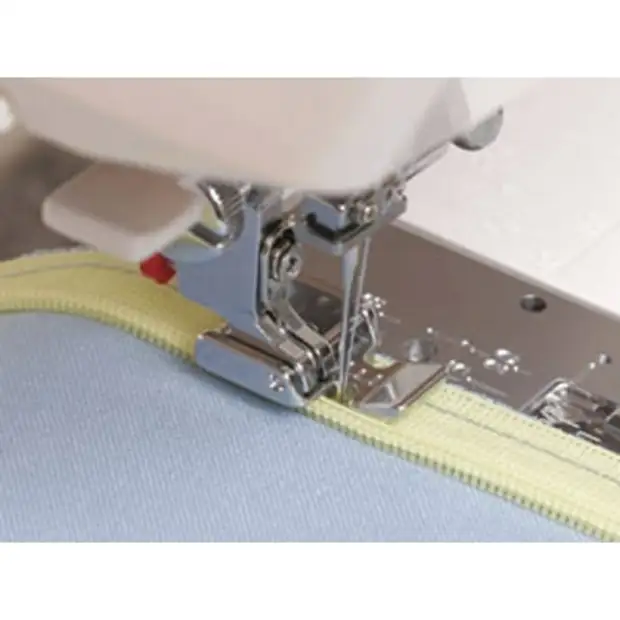
Work description:
1. Open the zipper.
2. Place the right half of the zipper face to face the right side of the product.
3. Beat the teeth to the right and lower the paw so that the teeth lie in the feet of the nap from the needle. Purchase, reaching the end of the cut.
4. Place the left half of the zipper face to the front side of the left side of the product. Make sure in the smooth location of both parts of the product.
5. Bend the teeth to the left and lower the paw so that the teeth lay in the groove to the left of the needle. Purchase, reaching the end of the cut.
6. Install the standard foot and the stack below the zipper.
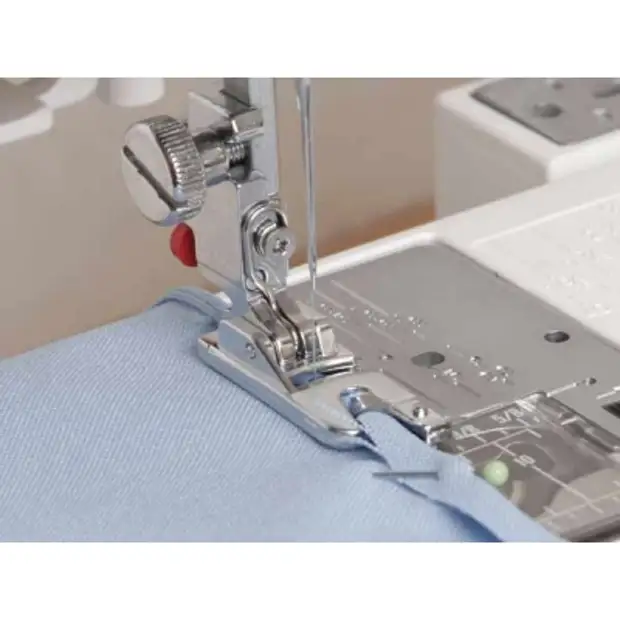
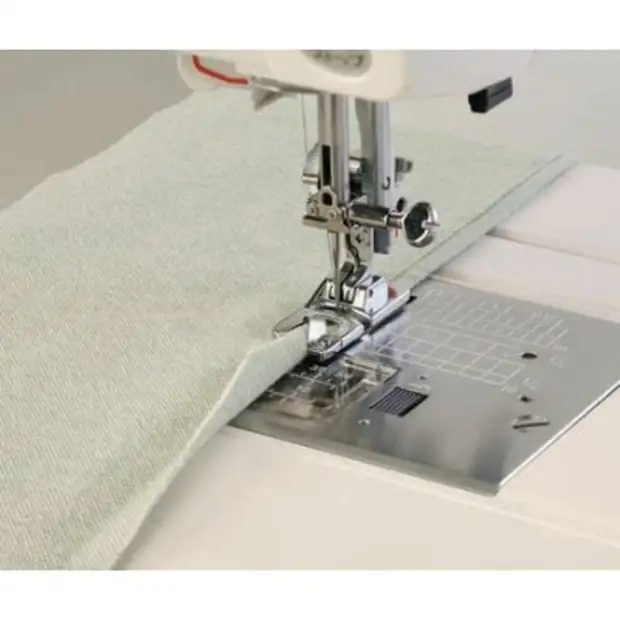
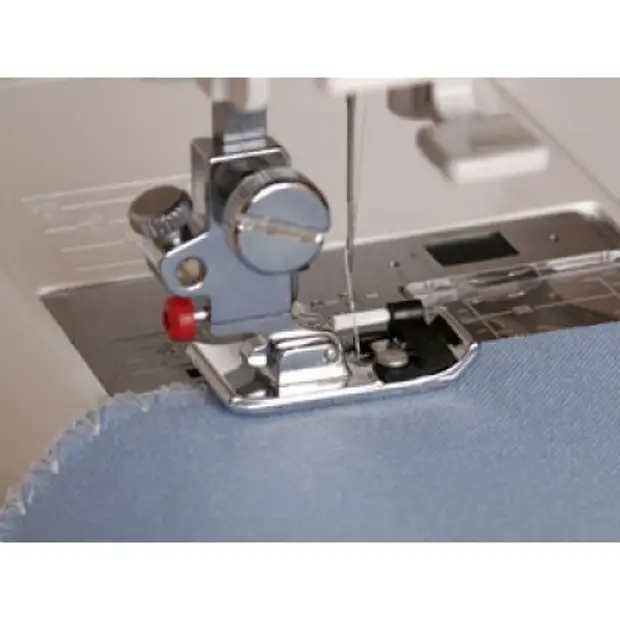
Foot
Foot for a secret line is suitable for an imperceptible to engage of products from dense and medium density of materials.
Work description:
1. Unscrew the edge of the product inside the width of the bending.
2. Now expand the fold so that the edge of the product performed 1 cm.
3. Place the product under the foot with the involving side up and that the fold passes along the guide, as shown in the figure.
4. Install the needle so that it gets exactly in the fold of the fabric, capturing 1-2 filaments of the fabric.
Set of two paws for 5 and 7 hopes
Work description:
With the help of a foot for the hopes and a double needle of 2 mm, you can quickly make the otki on a thin material. The direct line is 2-2.5mm.
The defensive are created when sewing a double needle, while the material is fed with a hopping, which enters into the depression from the bottom on the foot.
Insert the coverage to the bottom on the foot to direct the following fold.
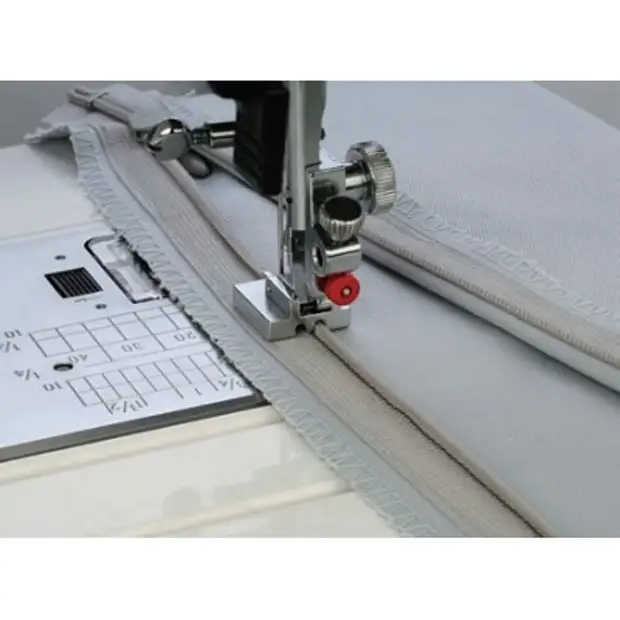
Foot for edging
The edging of the oblique baking is quite simple to give the edges of a smooth and neat look. For this, it is necessary to cut the oblique bay of a width of 24 mm.
Work description:
1. Cut on the diagonal of the beginning of the oblique bey.
2. Watch the sharp corner of the beaks in the snail and pull it out behind the paws.
3. Subject the edging device or shift the needle so that the needle is in the braid at a distance of 1-1.5 mm from the edge of the bent beyond.
4. Place the edged edge of the edentible part between the folded bay in the cutting device for edging.
The oblique beaker will automatically enjoy around the part during sewing.
Cord sewing foot
It is possible to decorate the product with a cord with this paw. At the same time, depending on the thickness of the cord, one, two or three cords can be seen simultaneously.
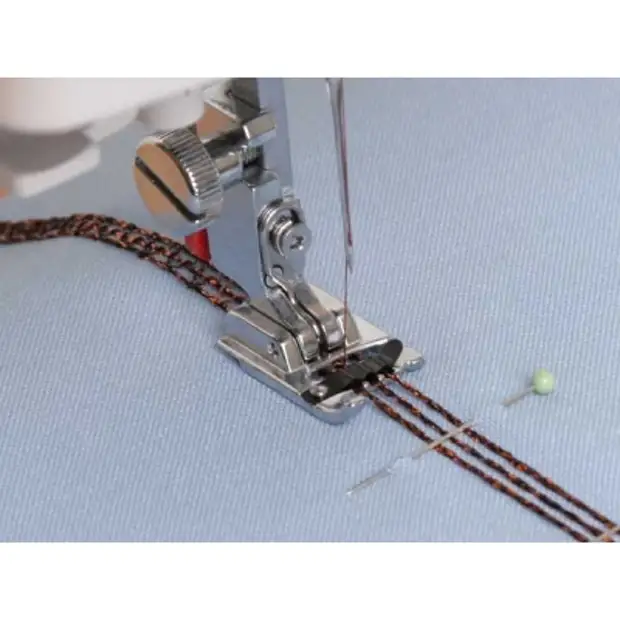
Work description:
1. Follow the cord / cords / in the cord hole on the foot.
2. Place the cloth, lower the paw and make several fixtures, after selecting the line.
3. Shake in the direction of the cord, holding it.
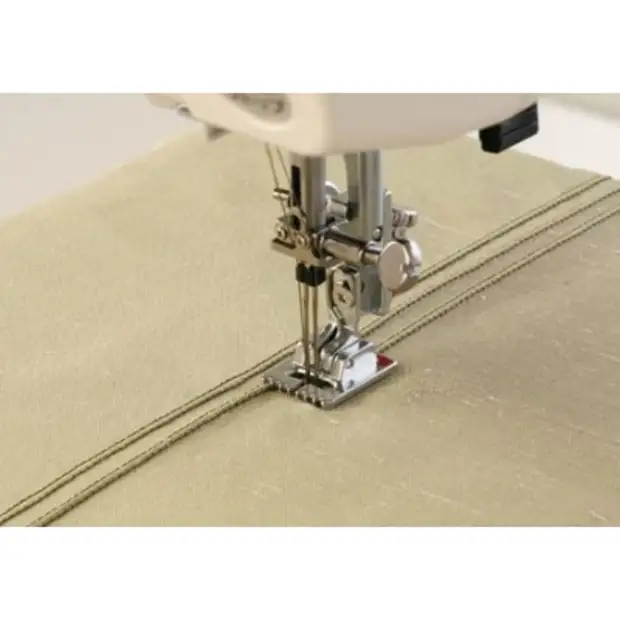
Hand foot 2mm
The edge bending prevents the edges of the tissue from squeezing and thanks to the foot, it turns out beautiful, durable seam. This paw can handle edges of scarves, scarves, clothes and products of the home decor from lightweight materials without prior set of edges.
Work description:
1. Select a straight line.
2. Cut a small piece of fabric at an angle from the side of the processed cut.
3. Follow the cutting angle of the tissue into the hole for the hollow on the foot.
4. Lower the paw and make a few stitches, weighing both threads back. At the same time, the cloth is cutting down and enter the hole for a hollow on the foot.
5. Continue the line, evenly promoting the fabric forward.
Teflon foot paw

This foot is made of a special polymer for the stratification of materials, prone to difficult to promote metal paw - vinyl, artificial and genuine leather, nubuck, etc.
During operation, it will slide on the surface of the fabric, performing any line.
Set of bead thread sewing
With this foot, you can safely and quickly sew beads on the product and decorate it.
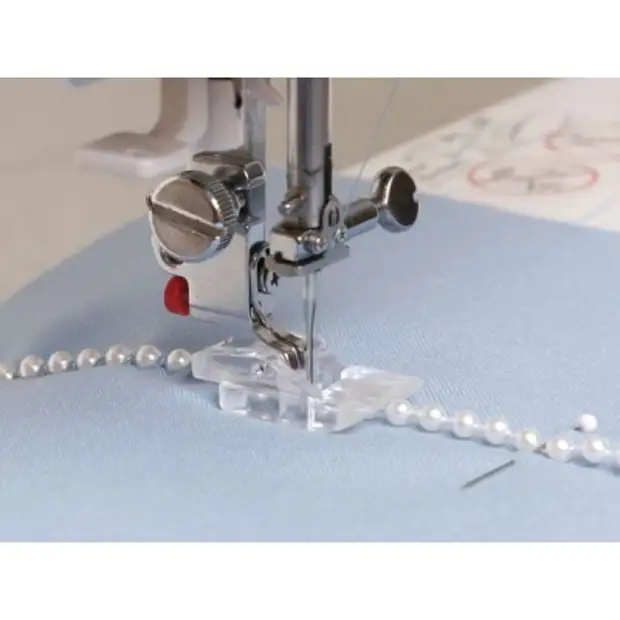
Work description:
1. Place the bead thread under the paw in the groove.
2. Loosen the tension of the needle thread.
3. Select the zig-knit line, respectively, the size of the beads. In this case, the width of the Zig Zag should not be very frequent.
4. At the beginning of the line necessarily follow the scope.
Paw for scabed
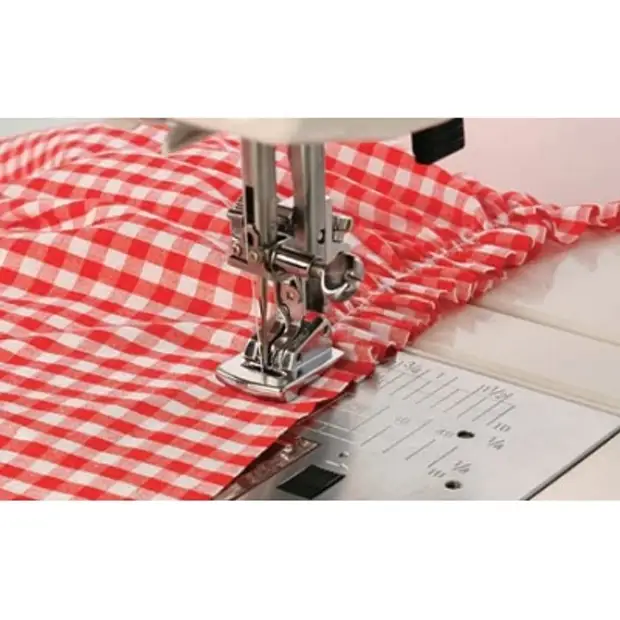
With this foot, you can make assemblies on the fabric or adjust the assembly effect.
In this case, you can also increase or decrease the landing by adjusting the tension of the threads.
Stitch length is better to increase / 3.5 - 4.5 /.
When performing an operation using this paw fabric will be charged.
Foot for fringe, booklet
Educationbook on the surface of the fabric is ensured by the structure of the paw itself.
As the foot has moved along the tissue, stretched threads will appear on its surface, i.e. Book.
Zig Zaba width can be within 3-6 mm.
Stitch length 0.5-1 mm.
Upper thread tension reduce.
After performing a few lines in a row, you can thus decorate any product.
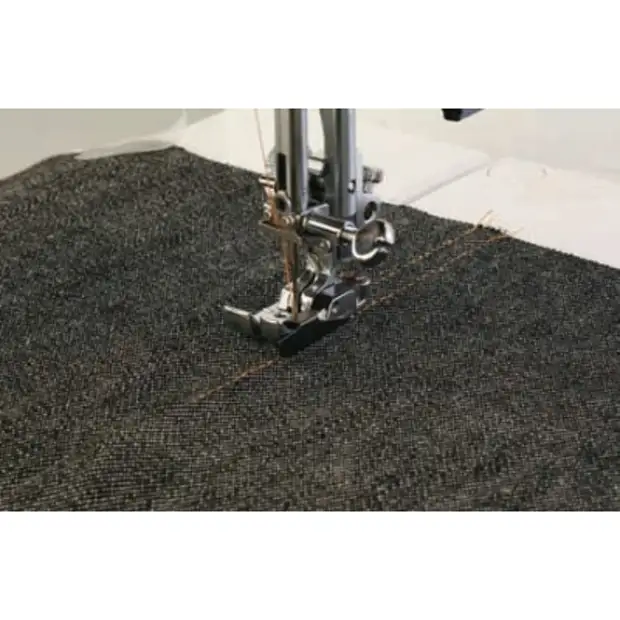
Foot for stopping

Select a straight line with the central position of the needle.
Roll into the fabric and watch the foot move along the seam line.
The next line is parallel to the previous one.
The use of the foot is very convenient when the products are roasted.
Also the foot is indispensable when adding decorative lines along the seam
POOT for sewing buttons
Attention! Only for flat buttons!
Work description:
1. Set the width of the Zig Zab, corresponding to the distance between the button holes.
2. Disconnect the bottom conveyor or install the duct plate.
3. Place the button on the fabric, according to the deficiency, so that the button is fixed / temporarily adhesive for Madeira tissues is able to keep the button at the time of work /.
4. Slowly lower the needle product - so that the needle gets into the left hole of the buttons. Holding the openings of buttons, make a stitch in slow mode so that the needle then hit the right hole of the button.
5. For buttons with 4 holes: transfer the needle to another pair of holes and follow the same actions.
Foot for satin lines
Choose a decorative, finishing or zig zag.
Stitch length should not exceed 0.5mm.
Upper thread tension loosen.
The foot is designed for work with curly lines, monograms, appliqués, can be used to fasten.
Foot
Foot for a secret line is suitable for an imperceptible to engage of products from dense and medium density of materials. Now there is no need to enhance the product manually.
Work description:
1. Unscrew the edge of the product inside the width of the bending.
2. Now expand the fold so that the edge of the product performed 1 cm.
3. Place the product under the foot with the involving side up and that the fold passes along the guide, as shown in the figure.
4. Install the needle so that it gets exactly in the fold of the fabric, capturing 1-2 filaments of the fabric.
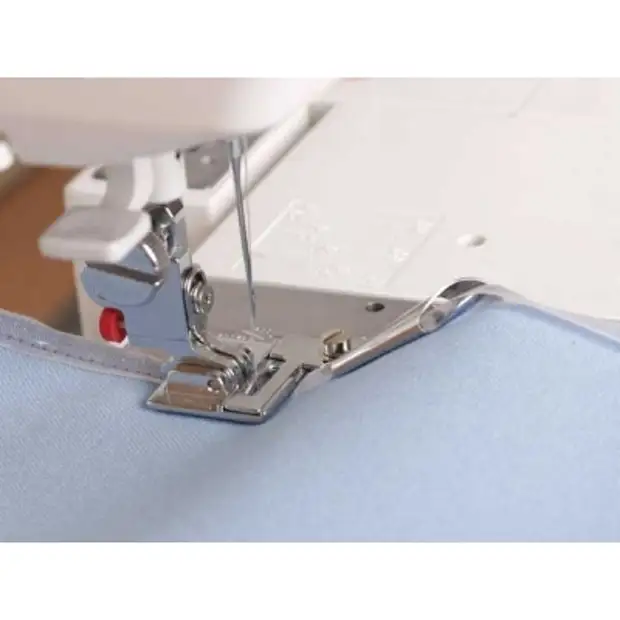
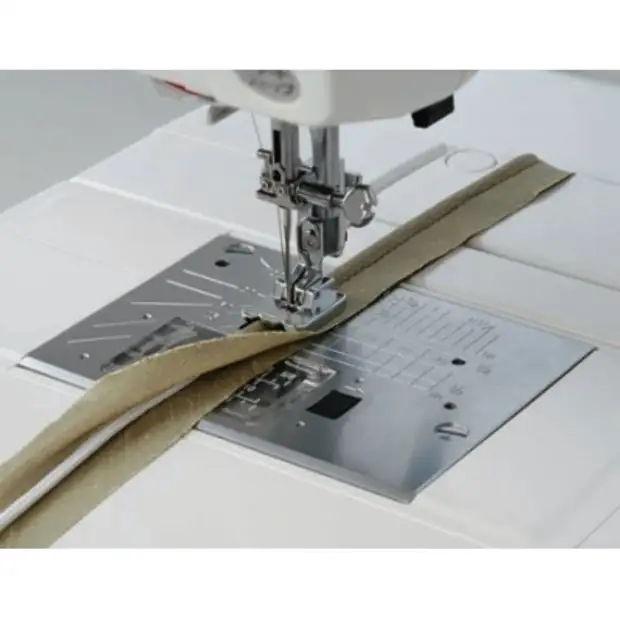
Lightning foot universal
Install the paw depending on the apparatus of the left or right-hand lightning.
Lower the paw at the beginning of the zipper so that the line lay down along the fold of the cloves of the zipper.
Set of two paws for a chamber - 4mm and 6mm
With these paws, you can make a chamber on the material of the middle thickness: on napkins, curtains, linen, etc.
Work description:
1. Select a straight line.
2. Sentify the beginning of the future seam on a width of 4mm or 6mm, depending on the size of the installed paw.
3. Place the wrapped area under the paw and make several stitches.
4. Estate the needle in the fabric to be fixed. Raise the paw and enter the edge of the fabric into the coupling of the paw.
5. Lower the paw and continue to sew, hold and direct the edge of the product.
6. Make sure that the fabric does not come to the right half of the foot.
Roller paw

The roller foot is perfect for working with so-called hard fabrics: leather, nubuck, knitted fabrics, etc., preventing the sticking and formation of chances and folds.
Choose a straight or any decorative line.
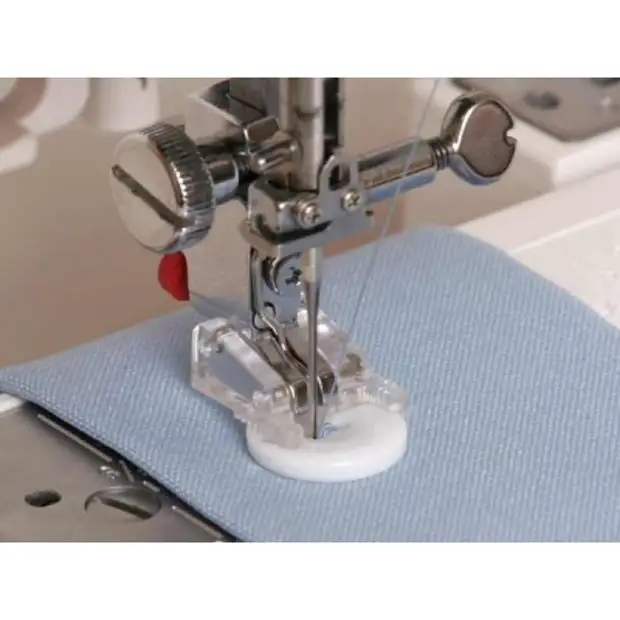
Kant's lap
You can use the finished Cant, or make it yourself from your material.
Work description:
1. Place the ready-made Kant along the seam line on the front side of the product.
2. Put the second part of the product face to face.
3. Place the cloth and Cant under the paw so that Kant passes through the groove on the bottom of the foot.
4. Stop direct line. The groove on the lower side of the foot is the guide for the passage of Kant during sewing.
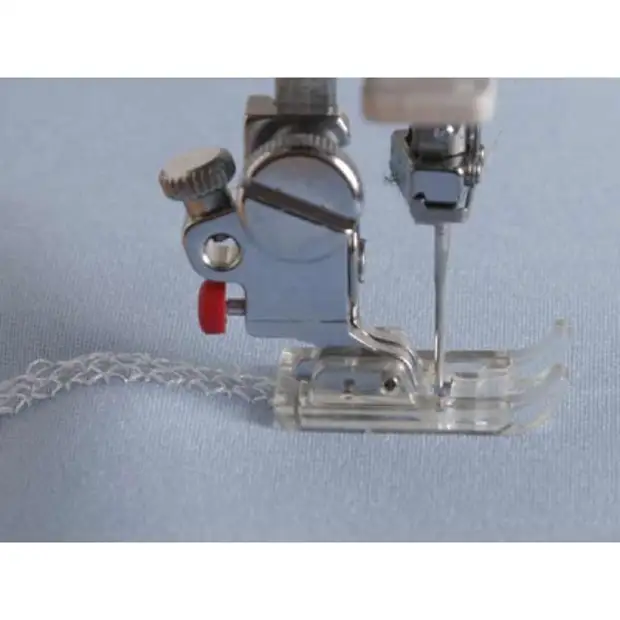
Tape sewing
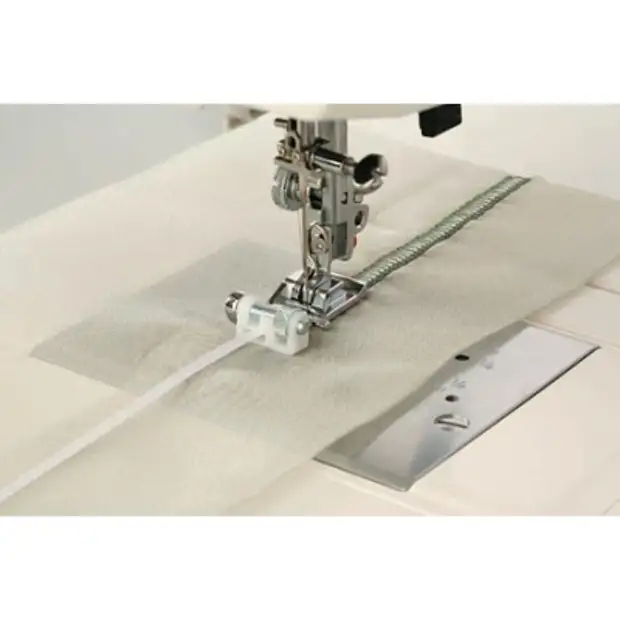
With this paw, it is easy to sew a braid, a sewer thread, a gum. The foot easily sends a braid through the hole in the front of the foot.
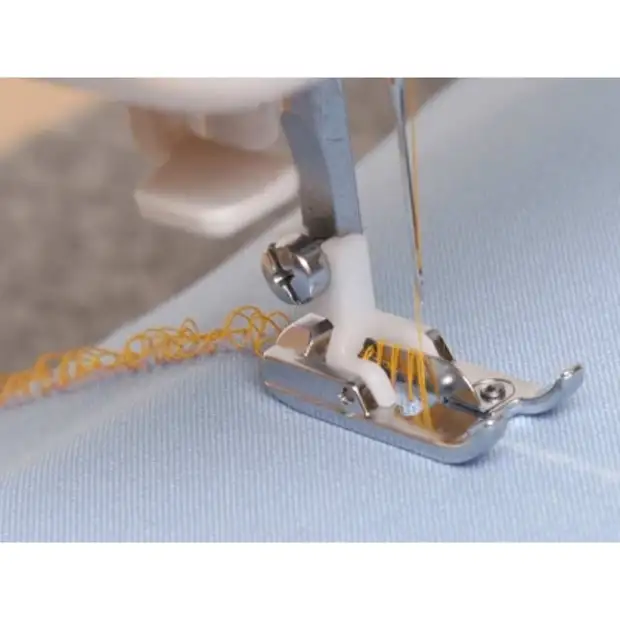
Overlock foot
Overlock foot is designed to mark the edges. The thin plate on the foot prevents the edge of the trigger to be twisted. Having used overlock seam or zig-knit, install the width of Zig Zaba by 5, turn the wheel with the hand to make sure that the needle does not hit the paw.
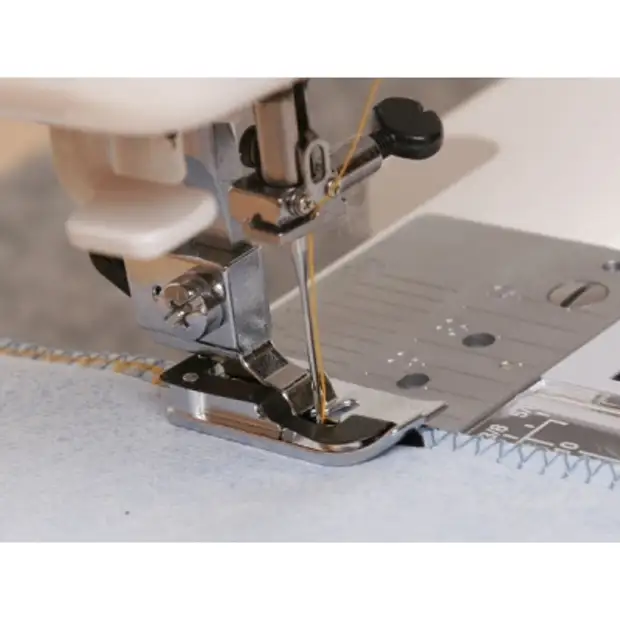
Foot for syns 6 mm
The paw with the right guide is designed to accurately save the battery of 6 mm during the stratification.
The paw also gives excellent results when shooting the product, keeping always accurate distance.
The distance between the needle and the right guide is 6 mm.
A source