
Open the top thread in the sewing line stitch occurs for many reasons. But, the first of them, if the thread is strongly clamped between the washers in the tension regulator of the upper thread. This is the most common and "harmless" reason.
It is enough to loosen the tension of the thread and the thread will not break through. But there are a number of other reasons causing a broken thread.
1. How to adjust the tension of the top thread
First of all, loosen the maximum tension of the upper thread. After that, in several techniques, gradually increase the tension, achieving the appearance of the right, beautiful lines.
The weave of the lower and top thread should be inside the tissue-rated fabric, and not on top or bottom.
You can use another way to adjust the tension of the upper thread.
Before inserting a thread in the needle's ear, pull the upper thread with your hand with a paw lowered. Any thread should pass with a noticeable effort, but not too tight.
To inhale threads in the needle and adjust the more accurate tension on the experienced flap of fabric so that the "nodule" was inside the fabric.
Very convenient for the "fine" adjustment to use a contrasting lower thread. After adjusting the tension, it must be replaced with the "working" thread.
Adjust the tension of the upper thread is necessary when moving to sewing other tissues, replacing the thread, the needle.
The lower thread is desirable to regulate only in cases where it is impossible to do without it. For example, when sewing too thick or thin tissues. In cases where very subtle or very thick threads are used.
In all other cases, seek high-quality stitch adjusting the upper thread.
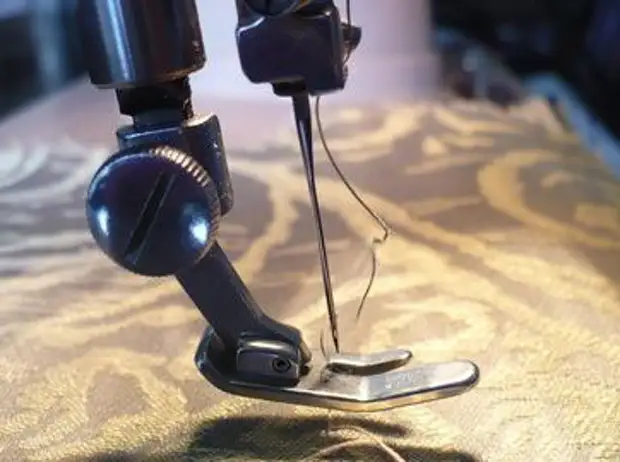
2. The needle should not touch the walls of the needle plate hole
The break of the thread occurs if the needle concerns the hole of the needle plate or it clings for the protruding parts of the details on its path, including the rough sole of the foot or the tap of the bobbin.Most often, this happens at the sewing machines of the old sample Podolsk, Singer. The springs of the bobbing cap lost its properties, and the latch is not fully drawn. As a result, the upper thread clings for it and breaks down.
Carefully on a quiet move trace the path of the upper thread. Pay attention to how the needle comes into the hole of the needle plate. It should not touch the walls of the hole, its perfect position is strictly in the center. It is desirable to use a magnifying glass.
As a rule, it is difficult to eliminate the displacement of the needle (with the exception of the replacement of the needle curve), but you will know how to cause you a wizard or not.
You can try to polish those places for which thread clings or replace the details new. For grinding you need to apply a special paste or fine-grained sandpaper. But it is advisable to do this.
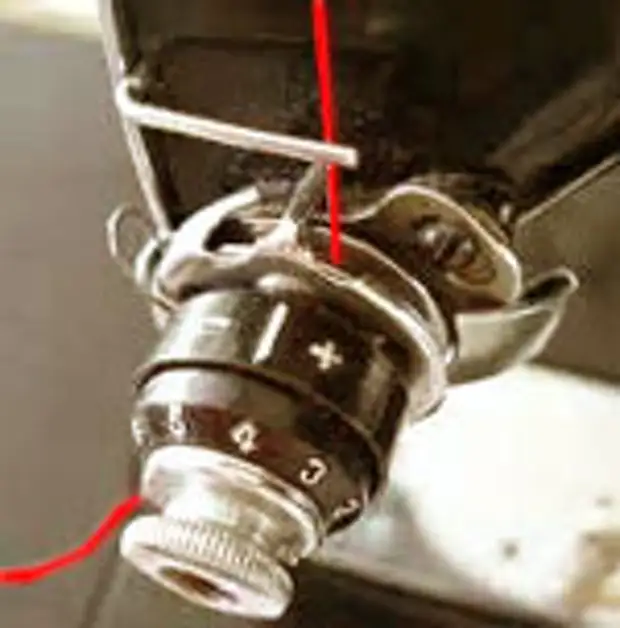
3. Incorrect spring in tension regulator
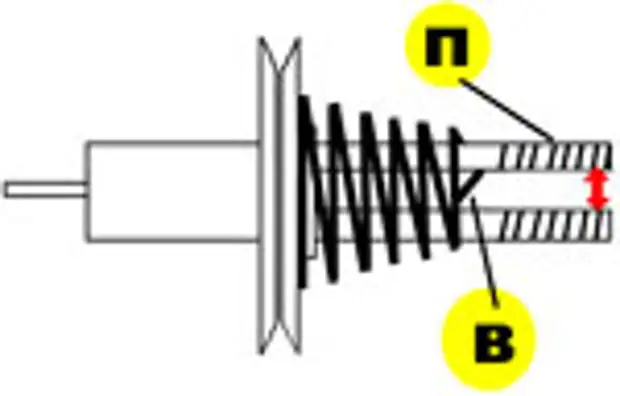
A common reason, due to which the sewing machine tears the thread - the spring is incorrectly delivered in the tension regulator of the upper thread.
Wide springs springs must be closer to the car. Sometimes it is installed on the contrary. Disassemble and collect tensioner sometimes love small children, pay attention to it.
Check if the spring goes easily in the regulator axis (rod with thread). Perhaps the slot of this rod is too clamped on the edge and then the tension will not be adjusted, no matter how much the adjustment nut is.
Insert a screwdriver into the slot and slightly unlock its edges so that the begging spring goes freely.
Use the top thread tension node more attention, check whether it is assembled and there is no dirt or rust on the washers and other parameters.
Often, thread cales are clogged between the washers, interfering with it to clamp a thread. The thread is too weakened and when the sewing machine is working, it also occurs.
This often happens in overlocks, because threads pass through the treads, leaving small fibers. Over the years, they turn into lumps, and happening what they mentioned above.
The sewing machine will turn the sewing stitch thread, if the thread is very twisted.
The easiest way to solve this problem is to bind the typewriter with ordinary lumbering elaboration and skip the "twisted" thread under it. But the most reliable way will be replacing it on a smooth, uniform and elastic thread.
4. Too weak tension of the upper thread - the reason for the break of the thread
Oddly enough, but too weak tension of the upper thread also leads to its cliff. When working, too large loops appear in the shuttle compartment and, intimidated, the thread breaks down.The main indicator of the quality of the machine is the correct stitch formation, so seek stitch to be perfect.
This depends on the end and the appearance of the clothing sewn. And note that the iron is impossible to fix a poor-quality, planted decorating or finishing seam.
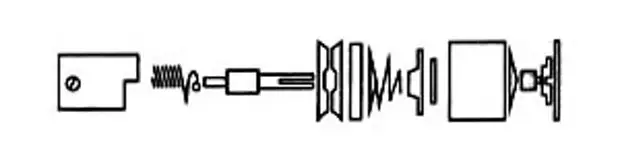
5. Incorrectly assembled upper thread tension regulator
Incorrectly assembled upper thread tension regulator. As a result, the sewing machine when working breaks up the upper thread. Usually, young children love to disassemble this node, and after their assembly, the car starts to work badly.
Each design of the sewing machine has the upper thread tensioners have their own constructive differences. But they have the same principle of work. At the time of the full lifting of the foot, the spring should be pressed, the piling was weakened, freeing the thread from the tension.
When assembling, disassembling the tensioner, note that the pusher (carnations) should stand in the slot of the axis of the regulator with a flattened edge to you.
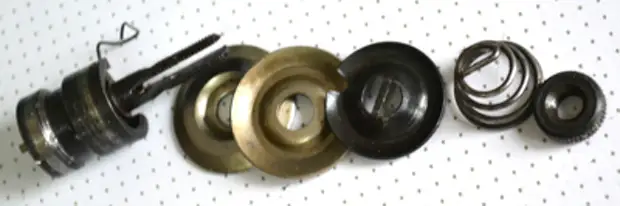
Please note how the squeeze washer is installed, it may be turned over. Look carefully on the rod itself, whether it does not have jar or sleep on it.
Properly install the compensation spring and install the desired effort of its delay.
Be sure to, with full climb, the washers must squeeze the thread and the thread must be freely pulled out at the end of the work.
Often, especially with "CHAKES", this function does not work. The fastening of the plastic tensioner body is fixed by one screw and the tensioner is walking in its nest, and it can also jump out completely from it. Remove the top cover of the machine housing and find the filling tensioner from the end. Remove it and put a slim piece of tin into the clamp.
6. Embossed with nodules thread
Try not to use threads from grandmother's stocks. They are usually cotton and not very durable. In addition, there are often nodules on such threads, it is difficult to notice during operation.
Modern threads are much stronger, thinner and more elastic. Threads at number 40 are preferably not used at all. They are too thick and seams turns rude and ugly. Yes, and not every machine "loves" them, especially imported production.
Experienced seamstres work, as a rule, with the same type of threads, to accounted for less frequent machine.
7. Thin needle works in thick material
Thin needle works in thick material.Always try to change the needles when go to tailoring another thickness or quality of the fabric.
Modern needles are used strictly for their intended purpose.
The needle thickness (number) should correspond to the quality of fabric and thread.
For various types of fabric, needles of a certain type are used. This is especially important to consider when sewing knitted fabrics.
8. Brand needle leads to a cliff of thread
The defective needle also leads to the cliff of the thread, if it has too sharp edges of the ear (holes) or there are other defects.
Detach the needles more attention. The needle should always be acute and smooth. Check the spout of the needle with a magnifying glass.
Do not store defective needles, it's better to throw out such a needle.
9. Incorrect needle
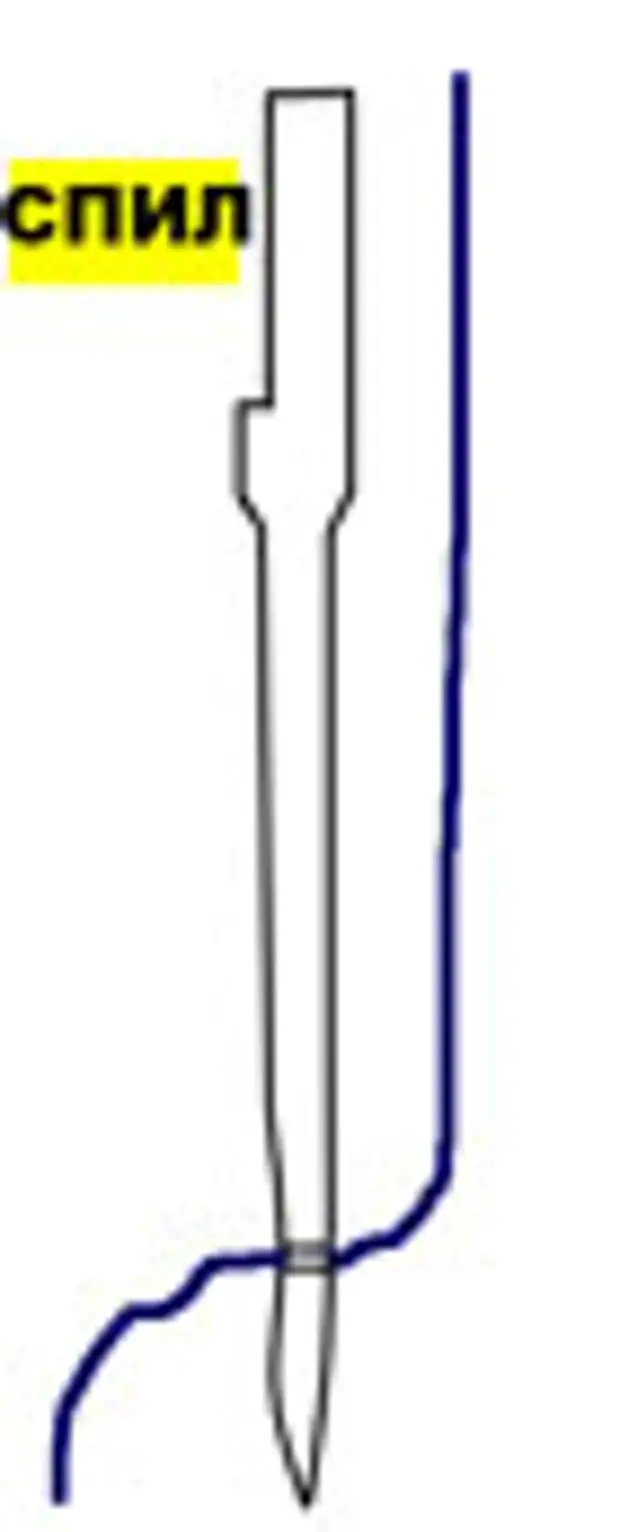
Incorrectly installed needle. The needle should be inserted until it stops, correctly placing the spinal portion of the needle flask. This is a very common error, which is the cause of the wizard call.
This is especially true for rectifying machines Podolsk, Singer and others. Sewing needles in such machines are usually ascended, as shown in this scheme. But some needle models may stand on the contrary.
Remove the needle plate and see which side of the shuttle is suitable for the needle blade. If you need, expand the needle, so that the spout passes next to the recess on the needle, and the long groove was on the reverse side.
10. On the tension regulator there is no compensation spring
On the tension regulator of the top thread there is no compensation spring. Spring This rather important element of the stitch formation line.
Without spring, the upper thread is weakened and looping threads appears, and as a result of a break.
The tension of the compensation spring is adjustable depending on the sewing machine model, and most often, is selected by experimental.
Too strong springs tension can cause the top of the top thread.
To install and adjust the voltage of the spring, a complete disassembly of the tension control is required. It is more convenient to remove it from the machine assembly and after the end of work is re-installed.
11. The jar on the details of the machine "spin" thread and break
The cause of the cliff of the thread can be the hole in the numericality (long rocker with pulling thread).If the sewing machine was intensively used for many years, zzbins (propelles) may appear in the hole of the needle plate, which are split into the thread and break.
You can eliminate the grinding hole with a round diamond nadfyl.
12. Thread can cling to the screw on the bobbin cap
Thread can engage for adjusting screw on the bobbin cap.
This often happens when it is constantly twisted with a not very suitable screwdriver, breaking the slot of the screw head.
Small jar appear and when the thread passes, they cut it with their sharp edges.
In this case, it is better to replace the cap, since the screw is almost impossible to choose.
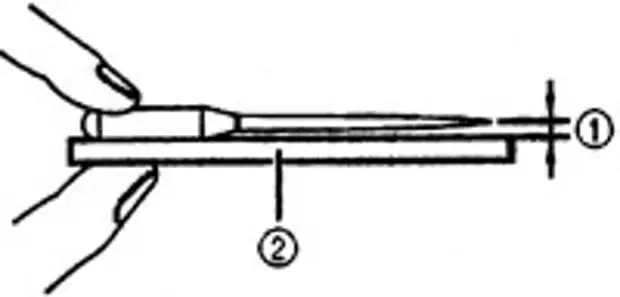
13. Large bobbin sizes can cause cliff
Sometimes, a big bobbin with a thread can cause her cliff, it is desirable to remember this when searching for the reason for the cliff of threads.In order to use a big bobbin with threads, you need a bottle with a high barbell, like industrial machines.
The best way to eliminate this defect is not to use large bobbins on household machines.
14. The thread in the bobbin cap is strongly tightened.
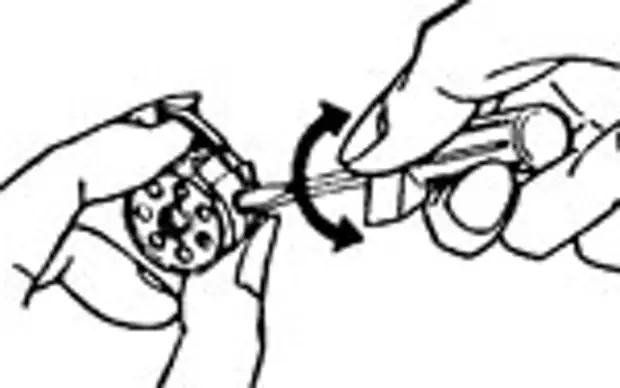
A simple reason, due to which the bottom of the lower thread occurs - the thread is too tightened in the bobbing cap.
The lower thread tension is regulated by the adjusting screw on the bobbin cap, a screwdriver of the finest size. The adjusting screw can not turn into more than half the turnover, otherwise it can spin and get lost from vibration, especially in electric machines.
If the bobbin thickness is more than required, then the thread on the bobbin is clamped or tightly turns inside the cap, which increases its tension and leads to a cliff.
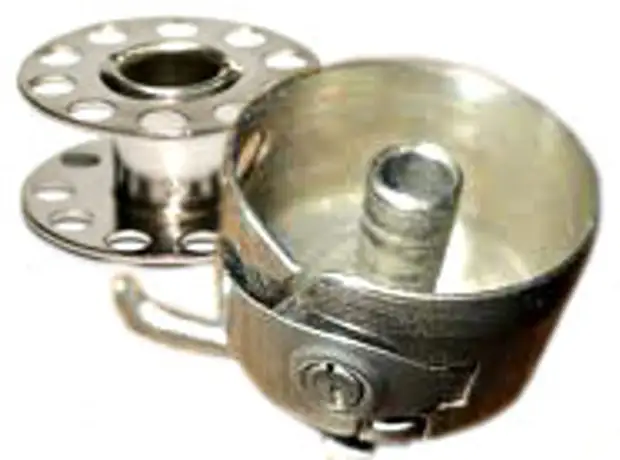
15. Punk cap inside clogged threads
It also occurs when the bobbin cap is inside clogged with tires and mud. The bobbin should easily and effortlessly rotate.
The tension of the lower thread is checked as follows.
Barbell is inserted with thread in the cap. Extending the edge of the thread from the cap, dramatically twisted the bobbing cap hanging on the thread. It should be jerks for 3-5 cm to get out of the cap.
If it is too much tightened, then the thread will be unwinding continuously. Too tight - thread will not pull out at all.
An easier way to adjust the tension of the lower thread. If you pull the thread from the cap, it must be pulled out with a little, barely noticeable effort, but with a clear feeling of small resistance.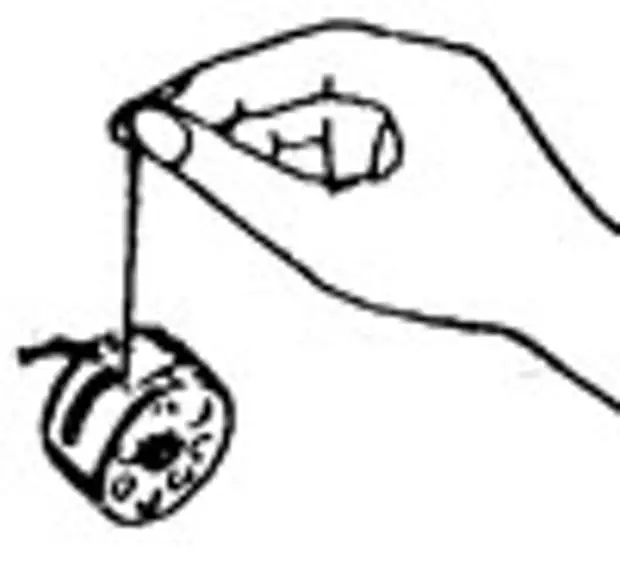
This is a preliminary tension setting. The final value of the tension of the thread adjust the experimental way.
We do not recommend using the old, Soviet sample thread number 40. Nowadays, when there are a large selection of good elastic threads in stores, there is no need to apply fragile, cotton threads.
For different fabrics, threads, the needle requires its setting and tension of both threads. Try to strive to change the tuning of the bobbing cap. Only when it clearly needs to change the tension of the lower thread. For example, when using very thin, or very thick threads.
The broken thread occurs if it is very twisted. Do not use when sewing a thread with a strong twist, they behave very badly at sewing and can cause skips and breaks.
16. The bobbin is too big
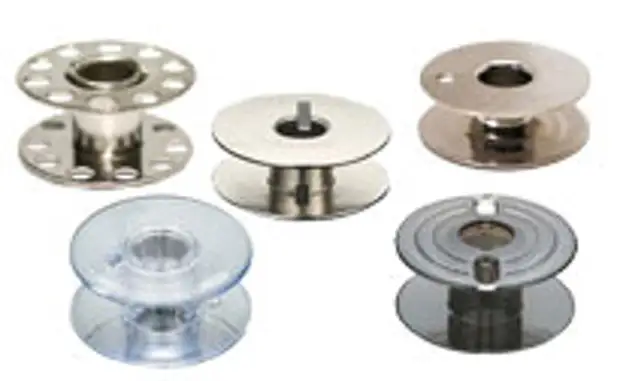
The bobbin is too large both in thickness and height. As a result, the thread comes out and a non-uniform line or a broken thread is obtained.
The bobbin clings the edges inside the bobbin, and the thread comes out with a jerk. Check the thread output is easy. Pull the lower thread from the needle plate slowly, it should easily come out with a uniform force.
When buying new bursts, pay attention to its size. They may differ in both thickness and height.
The reasons for breaking the threads may also be improperly filtered the bottom thread in the bobbin cap.
The bottom thread jumped out of the plug plate of the bobbin plate.
Damaged bobbing, bent or broken its side. The bobbin is cling to jar over the walls of the bobbin and you can look for a bad lines for a long time. Such bobs should not be applied, and repair too.
A source