
In this record, it will be about the transfiguration of the old shelter ... in an old one. It seems to be also on the same, but not quite.
Those who deal with decoupage will understand me, normal people turn the finger at the temple ... But this stool has already been presented to the right to the court, named the beautiful restoration of the old thing, and then they decided that they were really a tree while I did not disappoint them. But first things first.
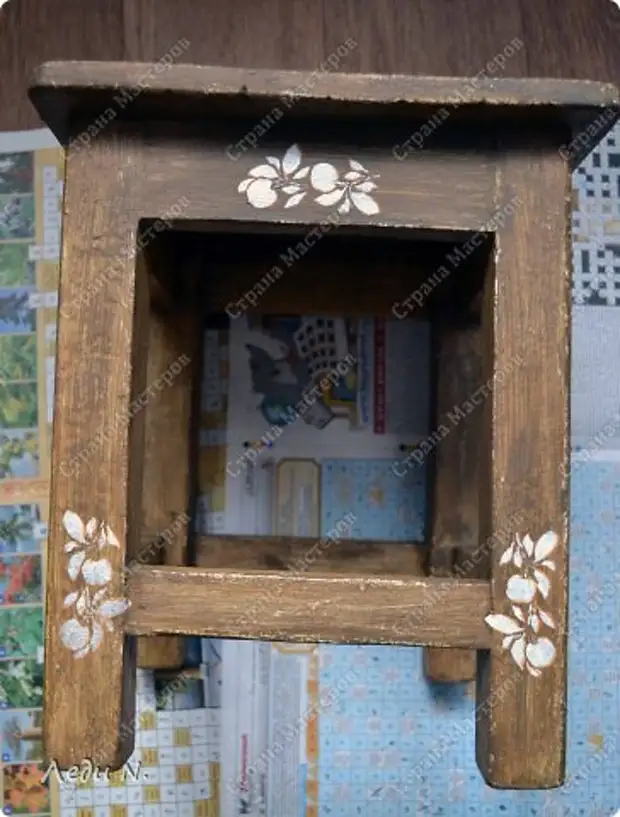
First present the goods face to be clear what we are talking about. The stool is not huge, but still several angles are required to change.
First sitting up. This is the product face, so to speak.

Then the view of the sink, although it is impossible to argue the immense, but you can try ... for a general impression.
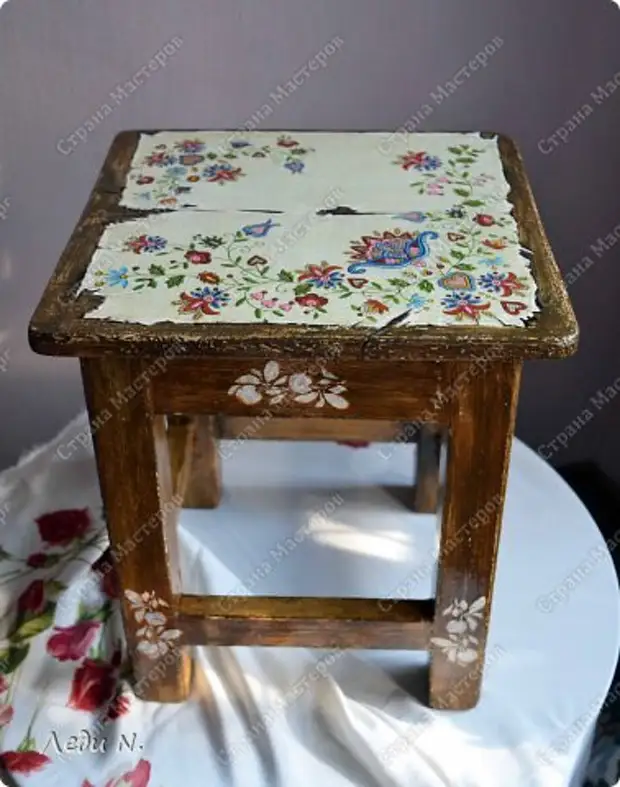
The larger legs and sidewalls, decorated with a stencil - so they are decorated from all sides.

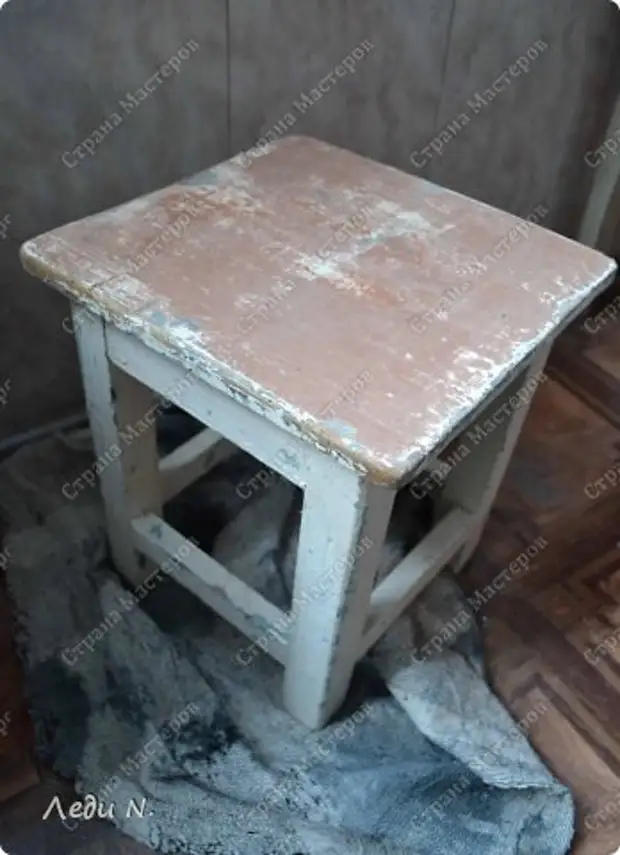
But how it looked initially ... Quiet horror.
For those who are interested in this wondrous metamorphosis, you will need:
- primer (I have gf 021);
- Acrylic paint for radiators (compatible with the above ground, read carefully on the label. This is a guarantee that everything will be done as it should);
- Siena's paints natural and umbrah natural (I have Ladoga, in tubes);
- Round brush bristle number 10;
- Brush number 2, protein;
- the napkin that you like it;
- stencil;
- Sandpaper;
- PVA glue;
- Candle;
- Sponge;
- Means for degreasing.
Few? But we have enough.
So what do we have? Old stool. He is actually wooden, but all this charm turned out to be buried under several layers of oil and nitro colors. In order to proceed with decoration, they need to get rid of them.
Initially, my beautiful dreams were - to remove all the paint, wove the tree, cover with varnish. Oil paint easily moved by layers, yielding to rough strength and sandpaper. Nitro - in any. She seemed to be in a tree. Stool acquired a spotted view - almost all nitrocracy, pieces of wood. It is not possible to extract it.
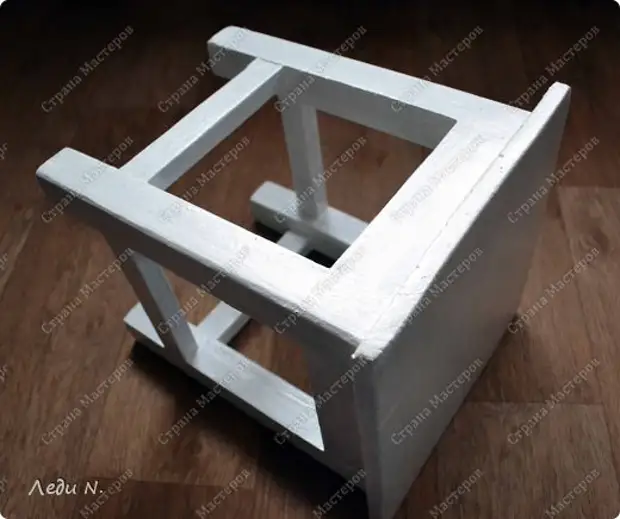
So it became clear - if I want a wooden stool, you will need to imitate a tree ... on a tree, to which you can not get.
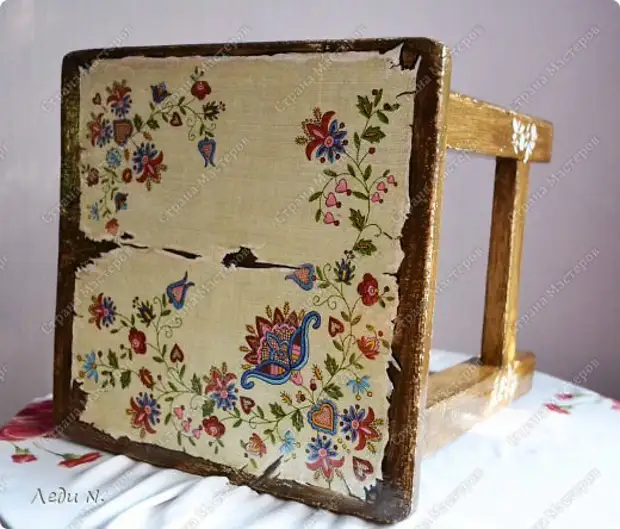
I did not photograph the inner surface, but the entire stool was made completely outside and from the inside. Otherwise, this is no longer an exercise, and so, fake ...
So.
Arming the sandpaper of varying degrees of graininess and bring the surface to the most possibly possible.
I wipe the stool with a cloth, removing particles of wood and paint, and degrease (I use paper handkerchiefs and liquid for removing a varnish with acetone).
Coated with two layers of primer, withstanding the time of each layer according to the instructions.
Then two layers of acrylic paint for radiators. Again waiting time according to the instructions. Even if the paint dries quickly, believe me, you should not hurry. Nothing to risk the possible negative consequences like yellow spots on a napkin, isn't it?
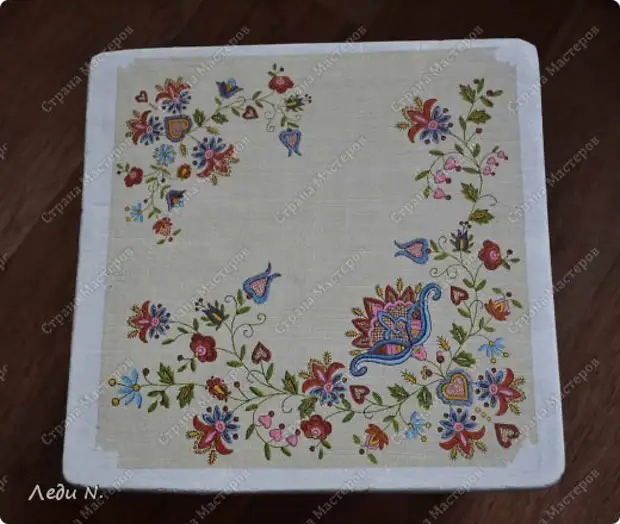
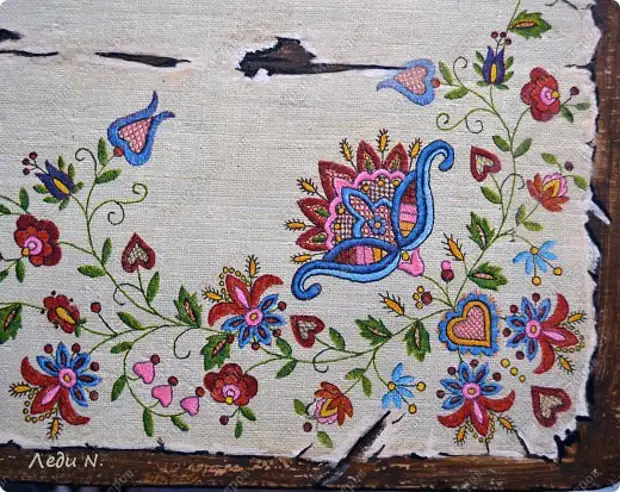
We glue the selected napkin ... more precisely, its upper layer on diluted with water 1: 1 PVA glue.
I make it using the file.
But I initially prefer to splash the napkin on the inside by varnish for hair and stroke the iron, thereby increasing its elasticity. Specifically, these napkins fall perfectly and without dancing with tambourines, but the habit of the second nature ...
Casting the wipes slightly climb, but this can not be done - they still give such a kind of whatever!
We divor into a small amount of Siena and Umbra White Paint so that it turned out weak shade, and cover the entire stool. Accuracy is not needed here. Let the brush move freely!
Envy.
Then, along the edges of the toaster, on the protrusions, slightly pass the candle.
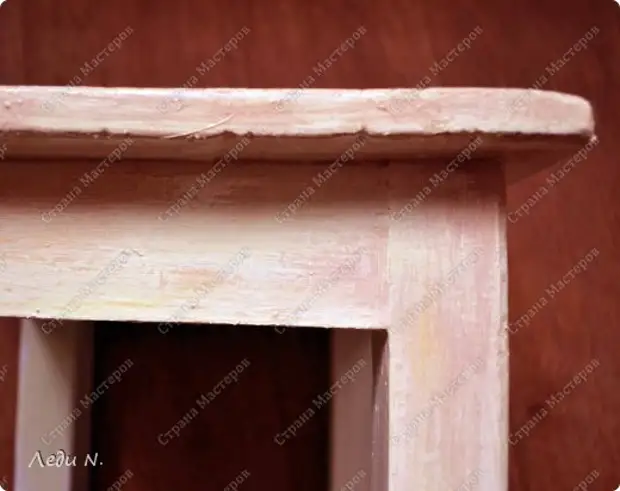
We squeeze out of the tube on the plastic plate of Siena and Umbra. Three parts of Umbra will need one part of the Siena. Everything is not stirred at once, but a dry brush (round, bristle No. 10) take a bit of the same paint and in one layer, but tightly, cover the surface of the toaster. Try not to lead several times one by the same place, the brush should move wide, freely. Then the bristle will leave traces characteristic of the fibers of the real tree.
First, I advise you to cover the jumpers - horizontally. And right there, while the paint did not dry, the legs are vertically. Then the paint, which fell from the horizontal smear on the legs, will be instantly directed into the right, vertical, direction.
Repeat first on the inside of the tools, so as not to clamp the brush in your hand. Click - may get dirt. And we need a tree and, preferably, oak!
Dry paint dries quickly, somewhere after half an hour the stool can be turned over and start up to the other side.

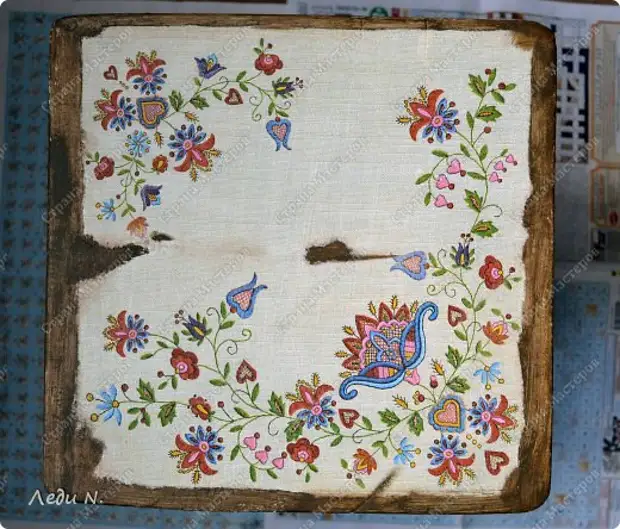
Seat - responsible part. It is necessary to decide whether you will "break" a napkin, and if you are as far as. Or save the whole? Also beautiful.
I found organic more to start the "tree" on the edges and even a little in the middle of the napkins show it. Like, the seat was swatched!
Thinner strokes - "breakthroughs" make a brush number 2.
When the paint dried, we take a small sandpaper and whining the parts where the candle went to this. Skin easily, without fanaticism. The paint will come down herself, giving the stool the look of the old, trembling tree.
Arming with a brush No. 2. Mix a little siena with leaks and highlight, highlight the edges of the torn napkin. And then, by one Umbre, we make shadows in a circle. You can add shortness to short strokes.
So it seems to impress the depth. The napkin is simultaneously visually and implanted into the tree and remains over it, forming a single whole.
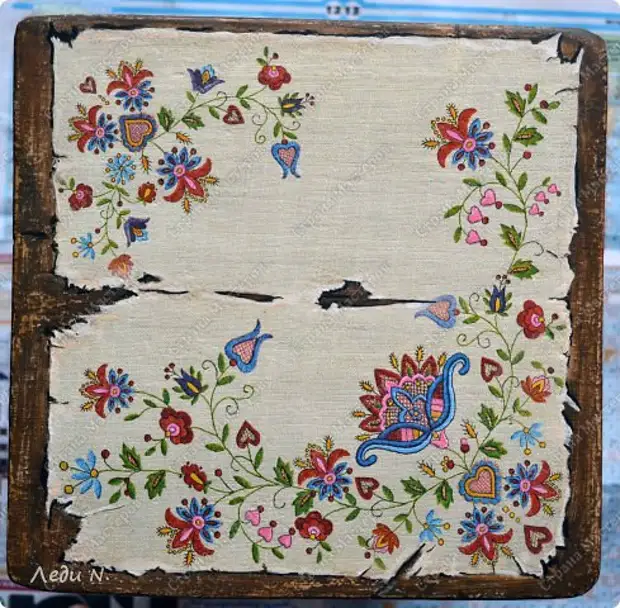
But it's easier to see once - I do a large frame.
Light - over napkins. Dark - down.
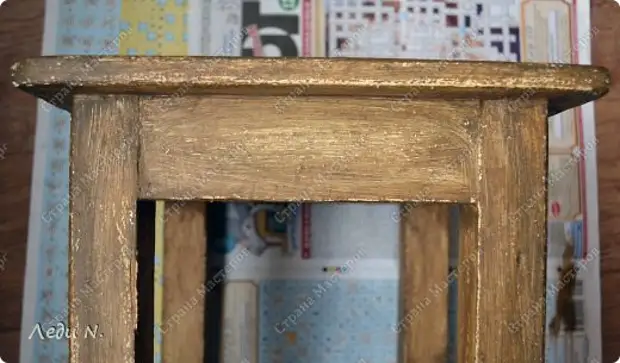
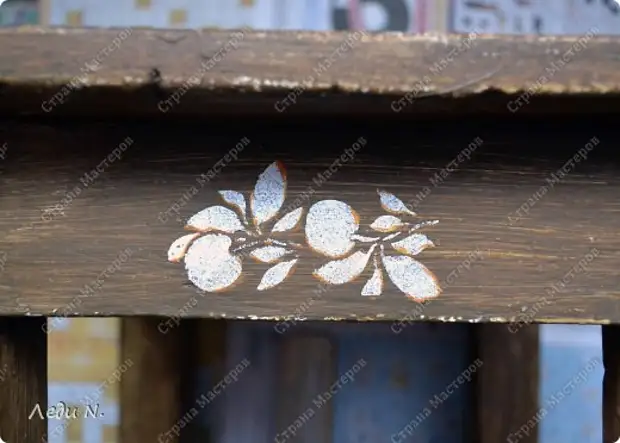
Capture is ready, but the legs look a little gloomy. It is easy to fix by stencil, white paint and sponge.
Tightly press the stencils to our new wooden surface (you can attach with painting scotch) and sometimes you sometimes have a sponge, which was buried into white paint. The sponge should be dry.
You can give an additional volume to screen pattern.
Some for this first make the drawing through the stencil in one color, then shifted and repeat the same ornament once again. I am too lazy for this.
Tassel number 2 KUNEY in Siena and tightly do "shadows" on the edge of the picture.
Imagine that the sun shines left to the left - accordingly the shadows will be from the right. Or how do you want :)
Finish - Yacht varnish. I flush every two layers, but just no more than five layers in total. As practice shows - this is enough.
The author of the master class: Rinacaron.
A source