

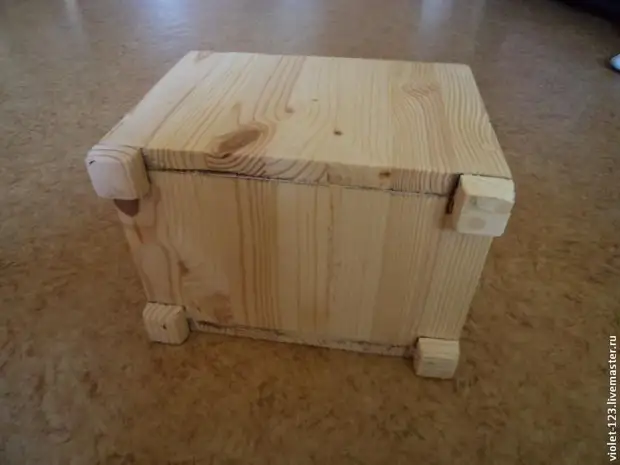
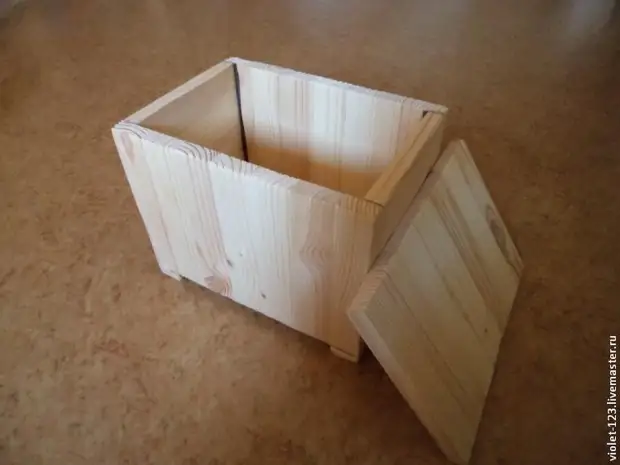
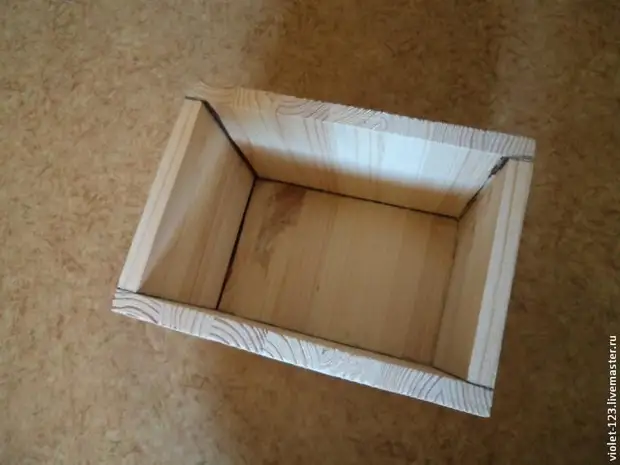
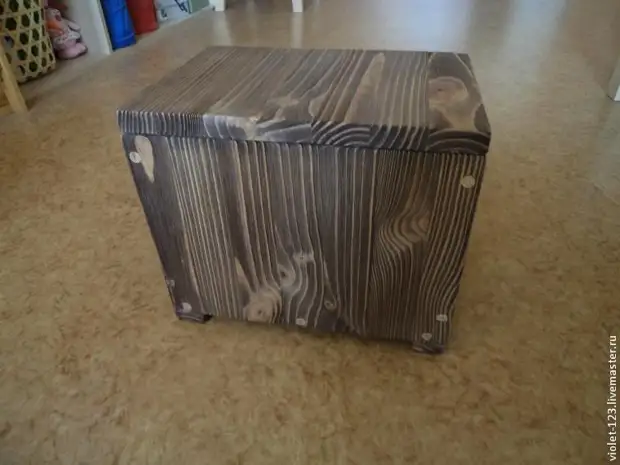
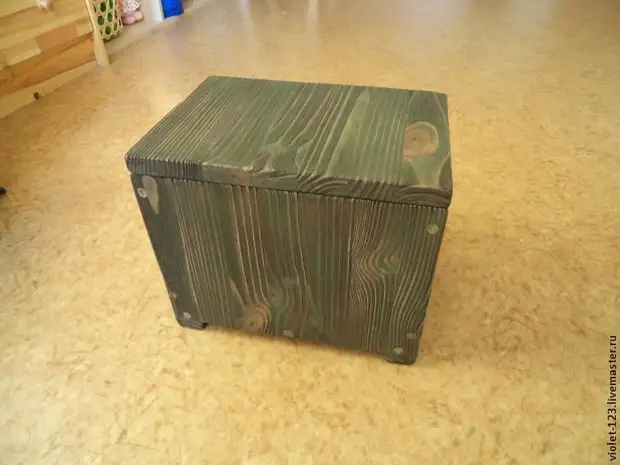
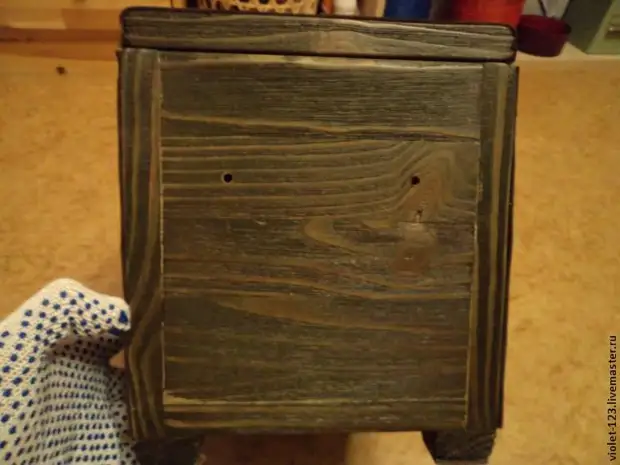
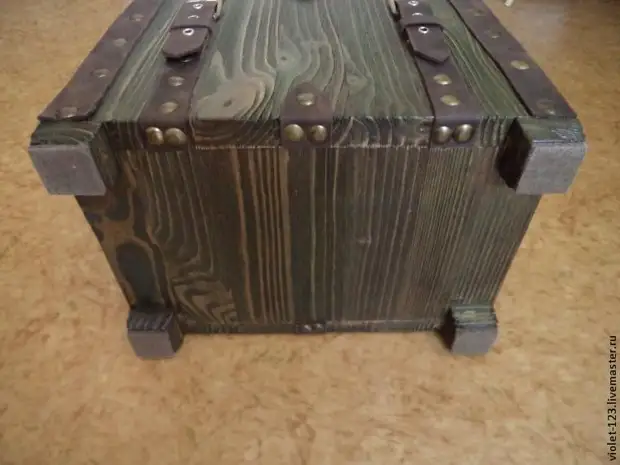
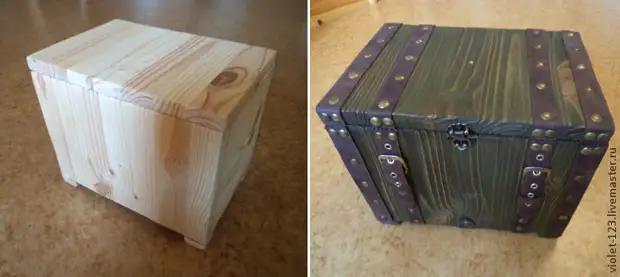
For the manufacture of this chest, we will need a shield from a soft grade of wood of the desired size. This chest has a size: length 28 cm, height 24 cm, depth 20 cm, but you can make it necessary for you size. So, determined with the dimensions, we carry out the cutting of the shield on the walls, the bottom and the lid, as well as four legs. For example, the size of the legs in this product: length 3 cm, depth 3 cm, height 2 cm.
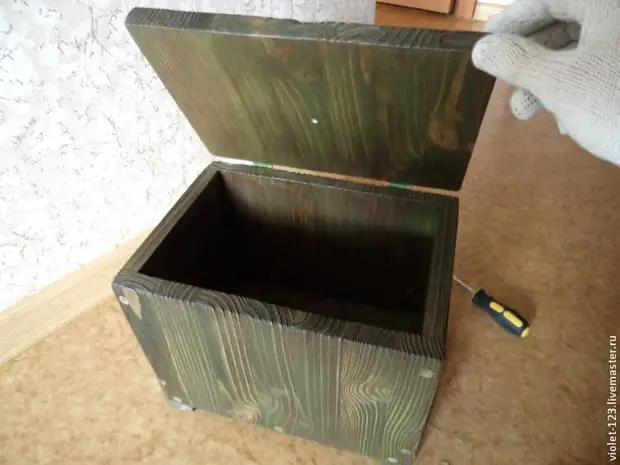
Then stabbing those sides of the walls, bottoms and covers that will be the inside of the chest, otherwise it will be inconvenient after the assembly. Then we collect all parts of the product, except for the cover, with the help of wood screws, the holes are pre-drilled under them with a diameter of slightly smaller than the diameter of the self-press. This is done in order to avoid the split of the wood under the influence of self-press (the effect of the wedge). Make sure that the length of the self-samples does not exceed the wall thickness, in order to avoid through holes. After the assembly, prcribsente the screws of the screws with putty on the tree, it is necessary to primitive. Note The attention that putty after staining can show another shade. To this Avoid, you can replace the putty on the wooden plugs, or to further reorganize these places with straps, as done in this case.

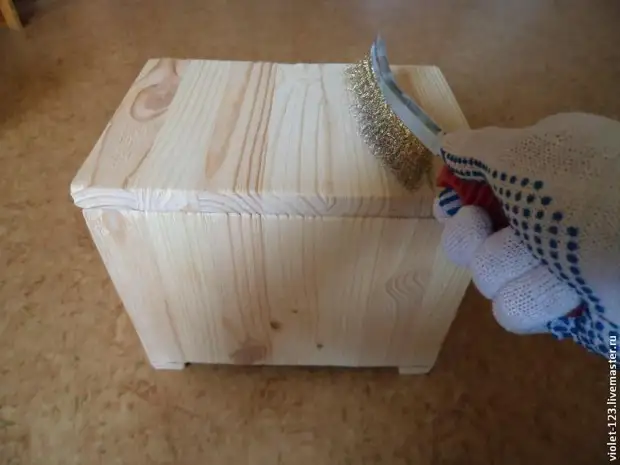
Getting to the stage of manifestation of the structure of the tree . It is necessary to handle the brush on the metal all the external surfaces of the future chest, including the end parts of it. Treatment must be carried out along the fiber of wood, thereby removing the softer tissues of the tree.
The more efforts to the brush and the longer carry out the processing, the better the structure of the wood appears.
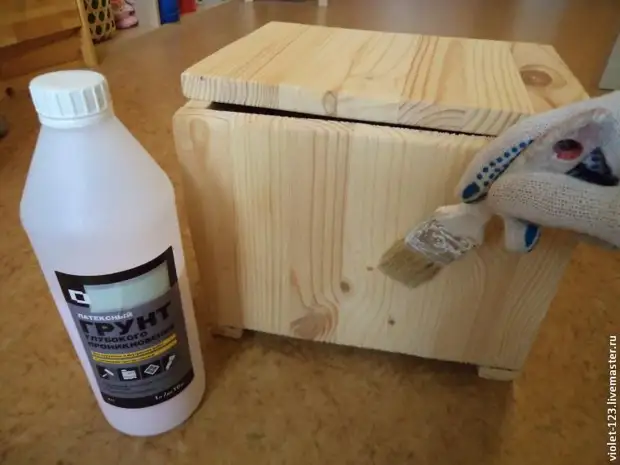
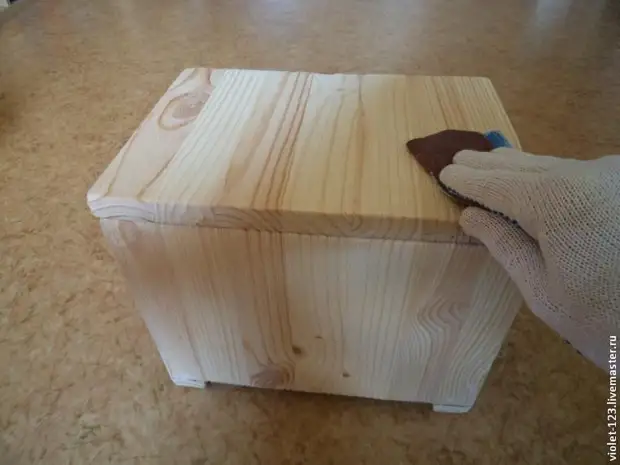
Then you need to process the entire surface of the product with colorless building ground of deep penetration. This requires to raise a pile and improve the clutch of the product surface with the subsequent layers of the paint coating. After drying the soil, you need to remove the rising pile with the sandpaper.
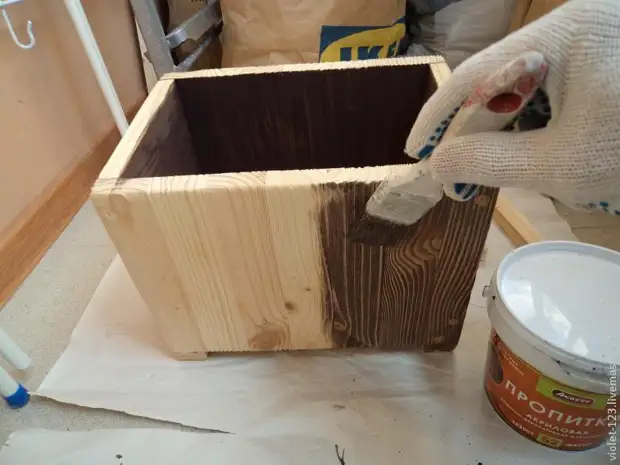
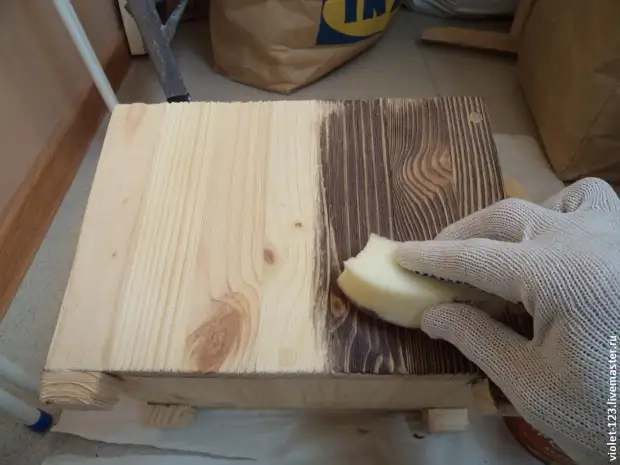
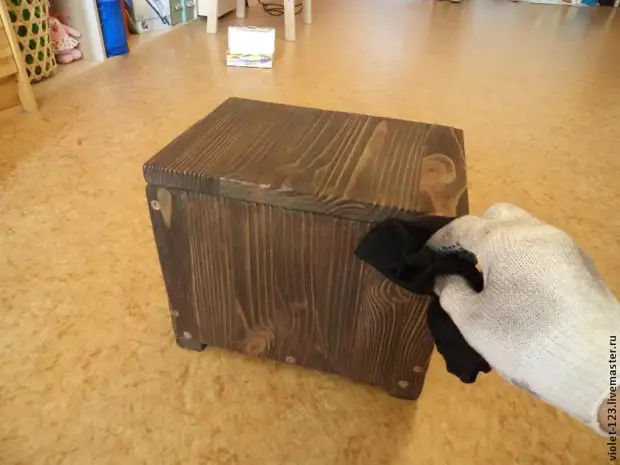
After processing with emery paper, you need to remove dust with a wet cloth. Then you need to process all the product acrylic impregnation for wood (for this chest used impregnation of a shade nut .) The processed product is immediately necessary to wipe the wet cloth to remove the excess impregnation, thereby showing the structure of the tree.
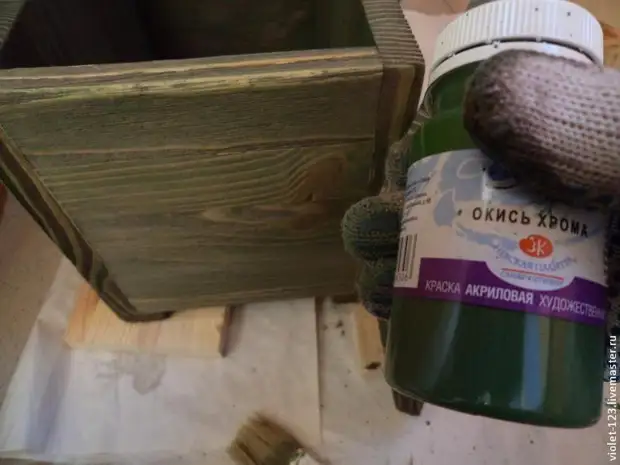
Next, we cover the chest in the ground, which was previously used. After the ground dries, pay attention to the pile. If the pile rose, remove it with sandpaper and wipe the product with a wet cloth, removing the resulting dust.
Then you need to achieve effect green moss On the surface of the product. For this we need acrylic color paint Chromium oxide. The paint needs to be slightly diluted with water and treat it the entire surface of the chest. After that, without waiting for paint drying, wipe the product with a wet cloth, removing her excess.
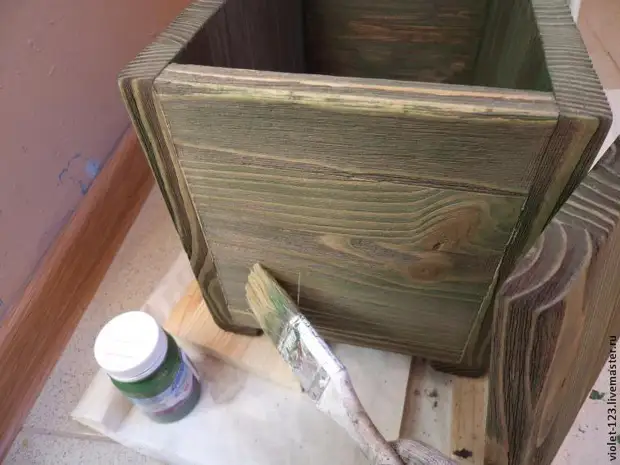
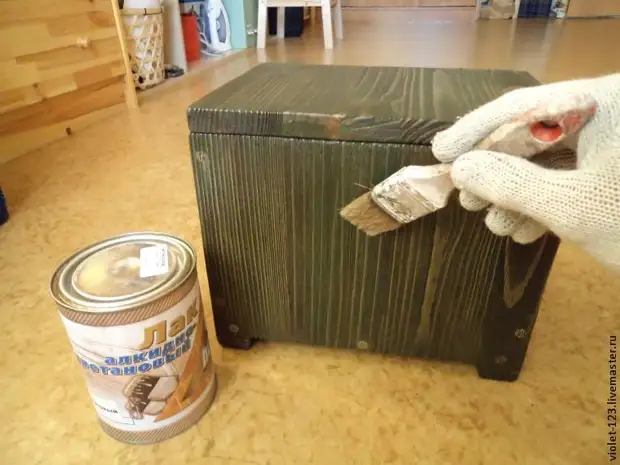
Having achieved the right effect, again cover the product with soil. Follow the pile. Despise. Then cover the chest with a matte parquet varnish into one or more layers at your discretion. We use parquet varnish, because it has high wear resistance. This will save our product.
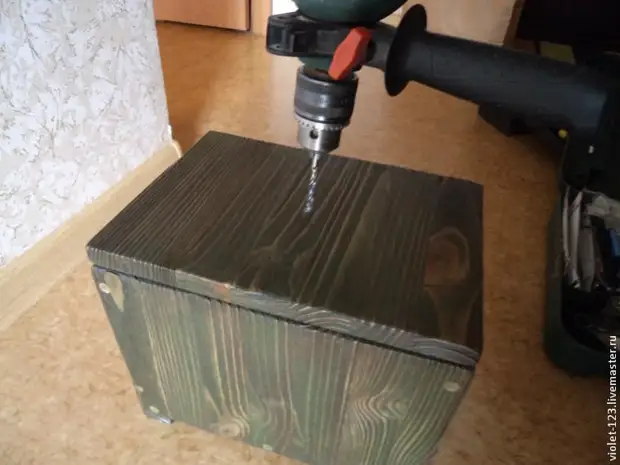
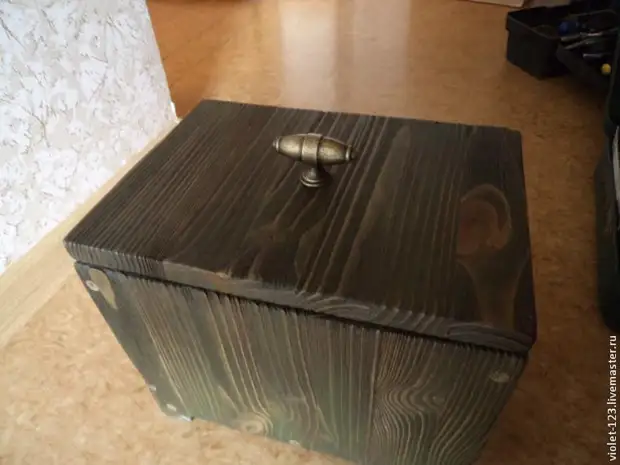
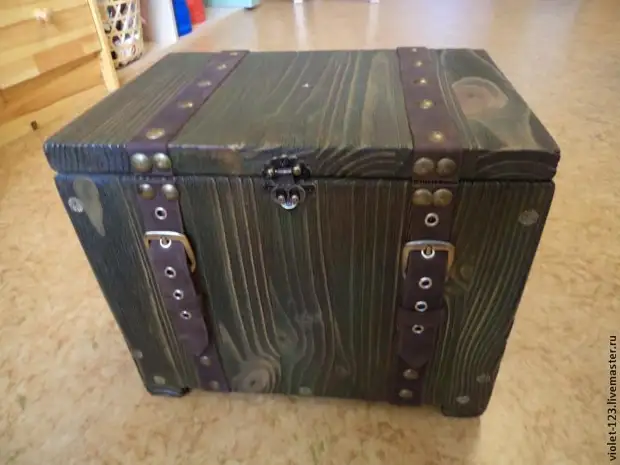
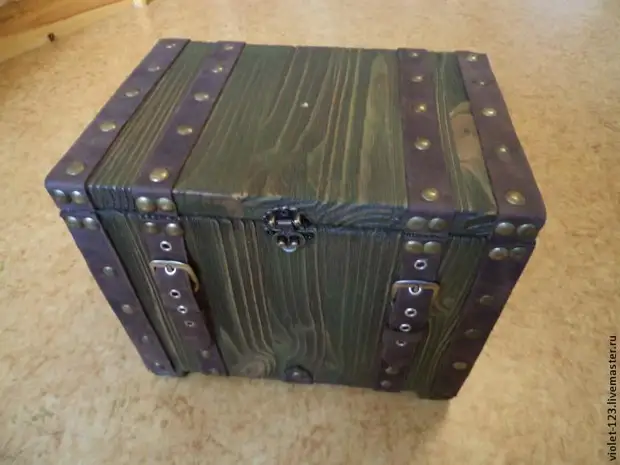
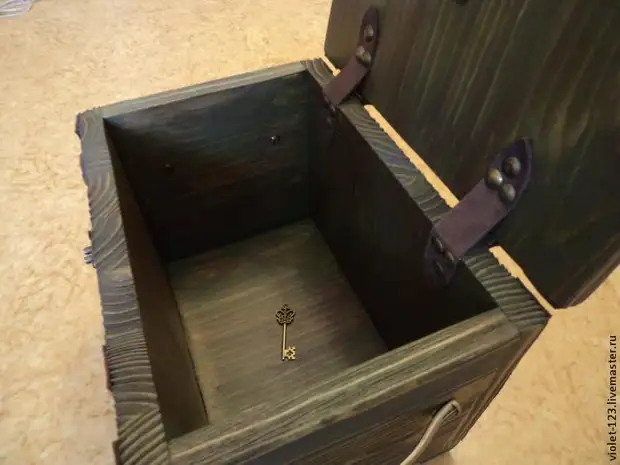
We proceed to install fittings. Drills a hole in the center of the chest cover and set the handle-carrying.
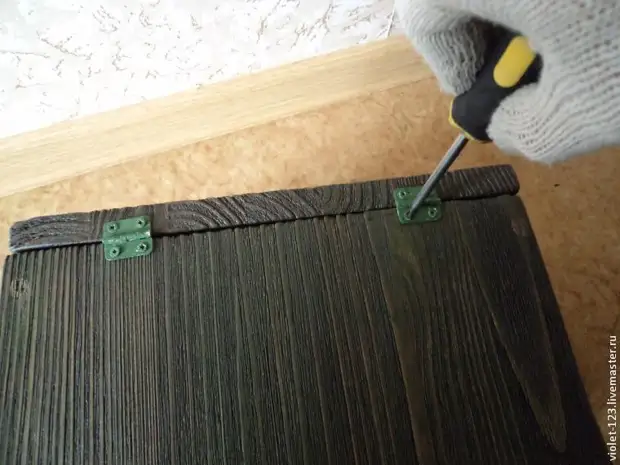
Now we screw the loops, placing them at a distance of 5 cm. From the edges of the product. Loop width 2 cm.
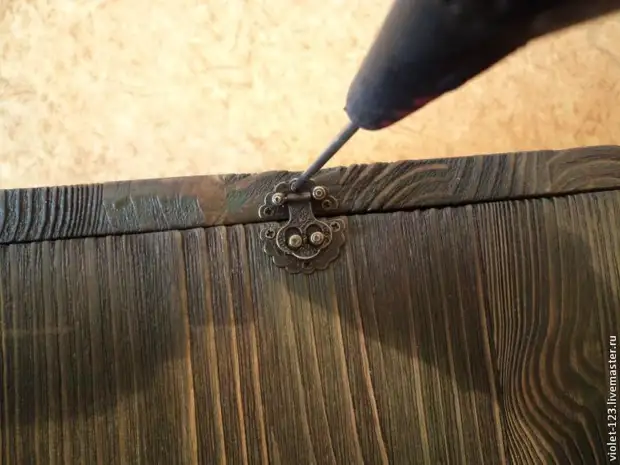
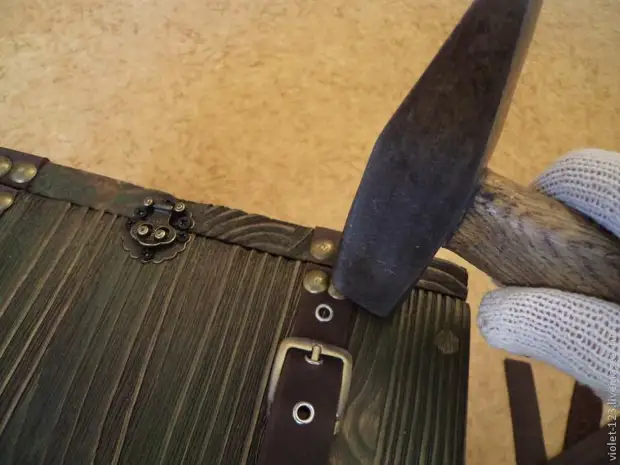
We proceed to the installation of the latch lock. It is located in the center relative to the edges of the chest.
Then we retreat 6 cm. From the top edge of the side wall and drill holes for side handles, given that the handles will be located in the center relative to the edges of the product.
You need to drill carefully, especially at the output of the drill. Do not have a strong pressure on the drill, because At the outlet, the drill can tear the edges of the hole and talk timber.
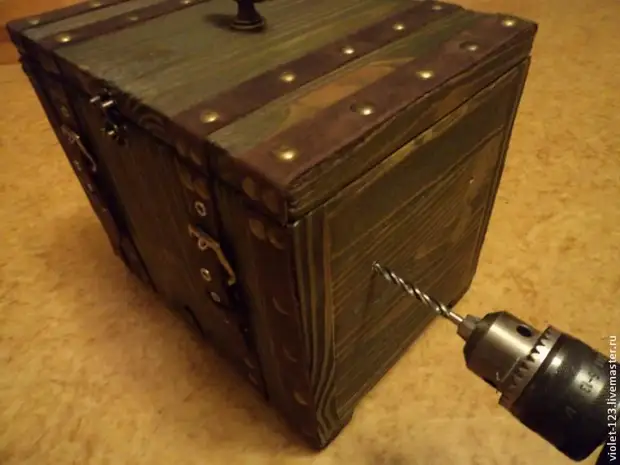
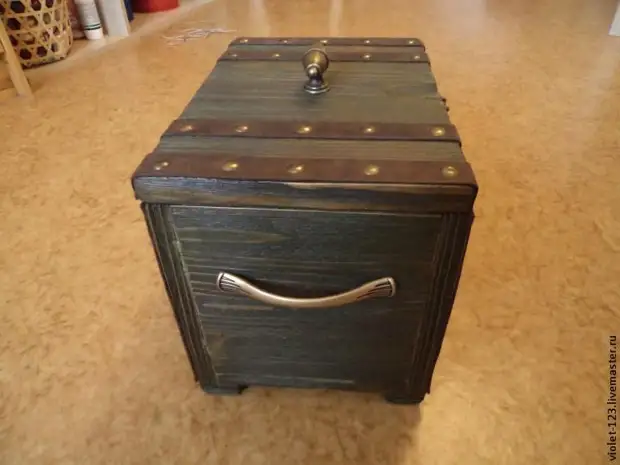
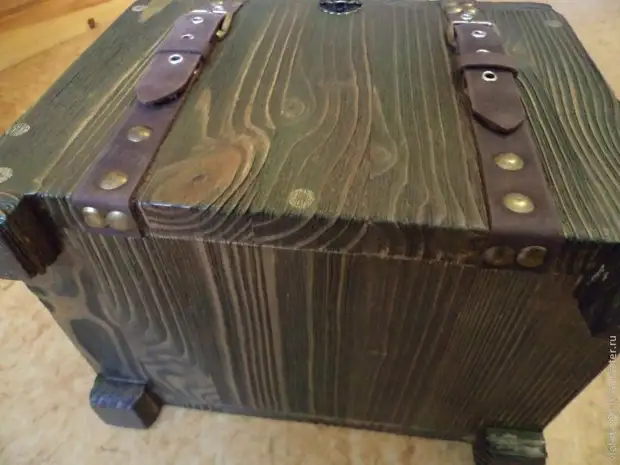
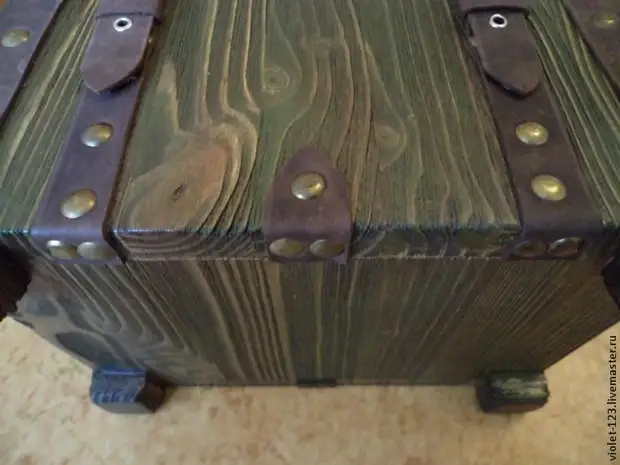
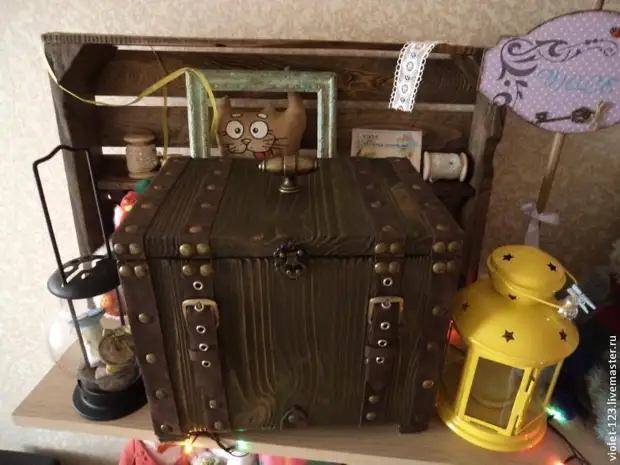
We proceed to the finishing of the product with leather straps. To do this, we need: a skin of 50 * 50 cm., Puverters inner diameter 4mm., Ripper for recordings, a displacement with a diameter of 4 mm., Two plaques of 3 * 3 cm., Decorative, upholstery nails.
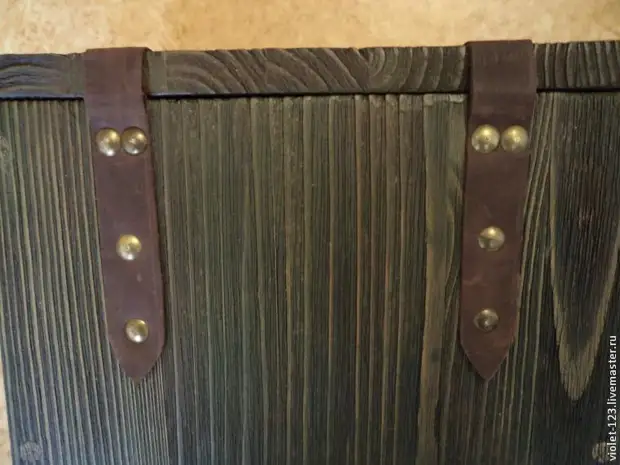
Cut the skin with strips 2 cm wide, which corresponds to the size of our plaques. We make straps length of which corresponds to the height of the front wall of the chest, plus the capture on the bottom equal to the thickness of its wall. Then you feed the resulting straps with the front side of the product at the same distance from the edges of the chest, like our loops. We use decorative nails.
Make everything that is described above will not be much difficulty, having everything you need and examined in detail below the posted photos.
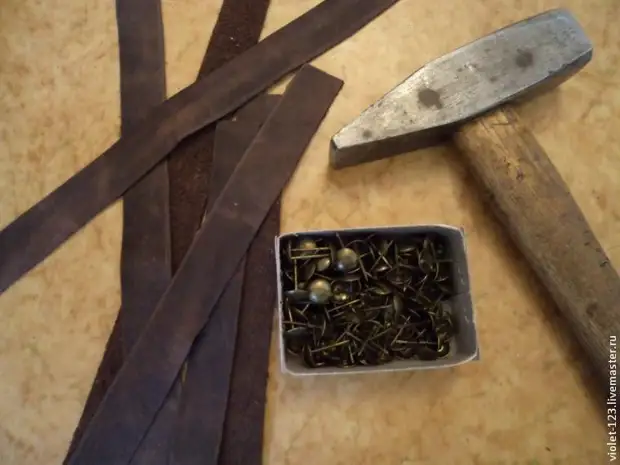

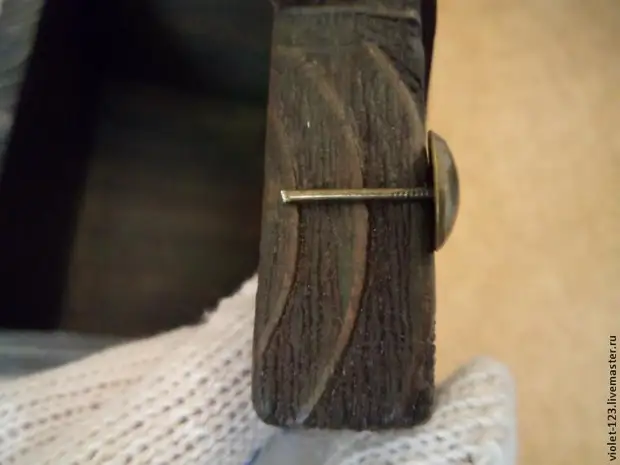
Using upholstery nails, be careful. The length of the rod nail should not exceed the thickness of the chest wall. Otherwise, excessive length will need to be biled with pliers.
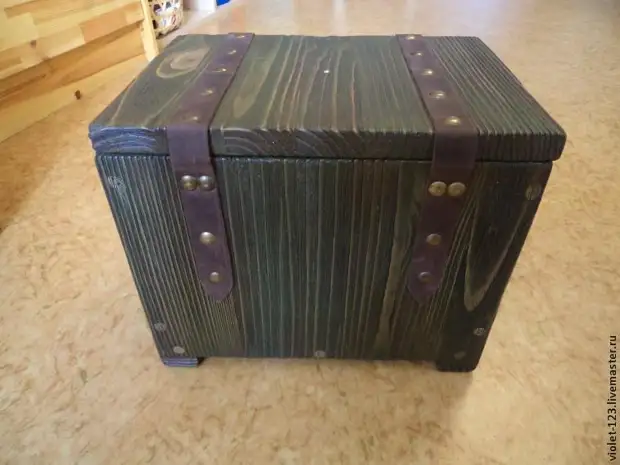
We begin the upholstery of the product covers. Focusing on the straps starting from the front end of the cover, we go along the top and turning onto the back wall, overlapping the loops and go down to 10 cm below. End of the straps cut in the form of a slightly rounded triangle.
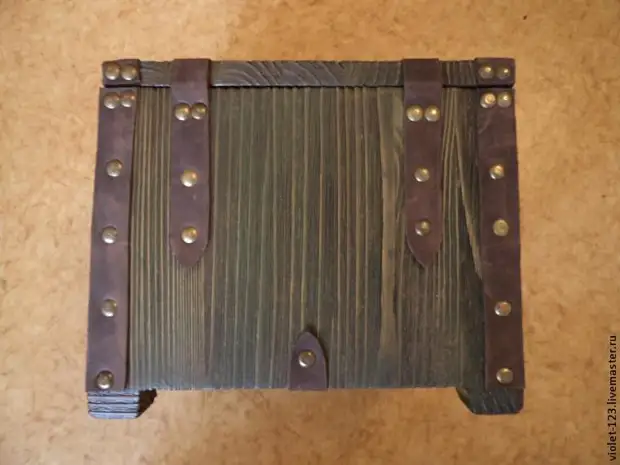
Now we carry out the upholstery along the edges of the chest from the leg to the leg. The exception is the bottom of the product and the legs themselves.
Upholstery of the edges In addition to the decorative function, it helps us to close the screaming hats of self-tapping screws.
Be careful, do not get the upholstery nail in the screw of the self-press!
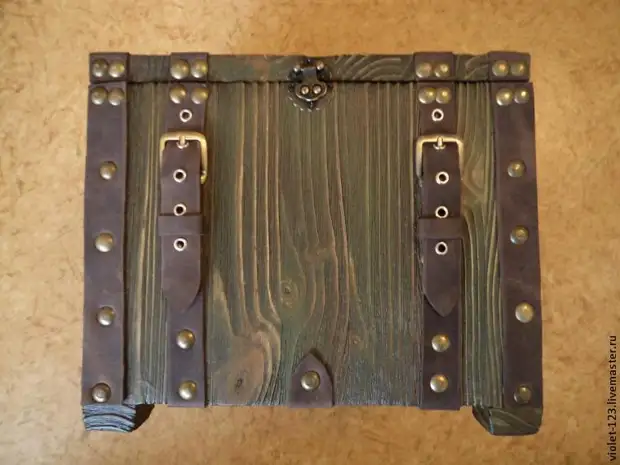
Then you need to decorate the central hats of the Self-timers of the chest. To do this, we also use straps and upholstery nails. And watch again Do not get a nail into a screw!

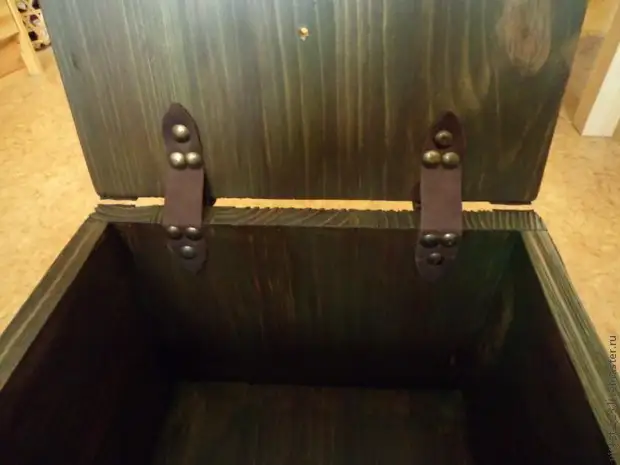
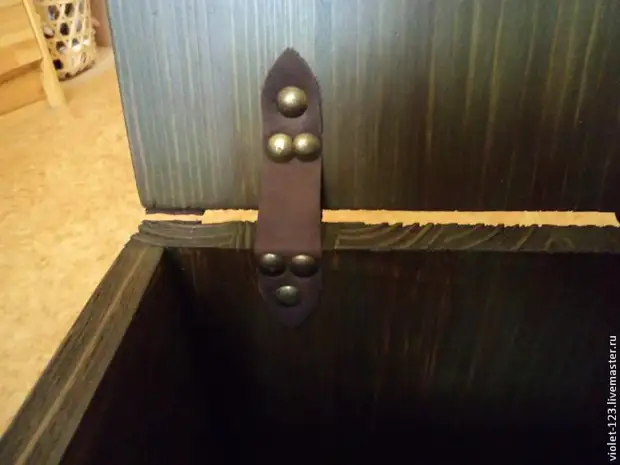
Now we need from the straps to make the cover opening limiters. They will be located exactly opposite the hinges from the inside of the chest. The length of the straps will depend on how far the lid will be folded, and this is at your discretion.
Well, we got the chest from the bottom of the sea. Our work is completed. But you can hugging and supplement it.
Thank you for your attention and creative success.
A source