
Using photos, prints or clippings from magazines, Hand-Made lovers result from unusual, cozy scenery for home, as well as gifts, toys and objects for everyday life.
Now we will spend a small master class on decoupage by photos. Follow the attractive pictures, tassels, glue and objects that you wish to decorate.
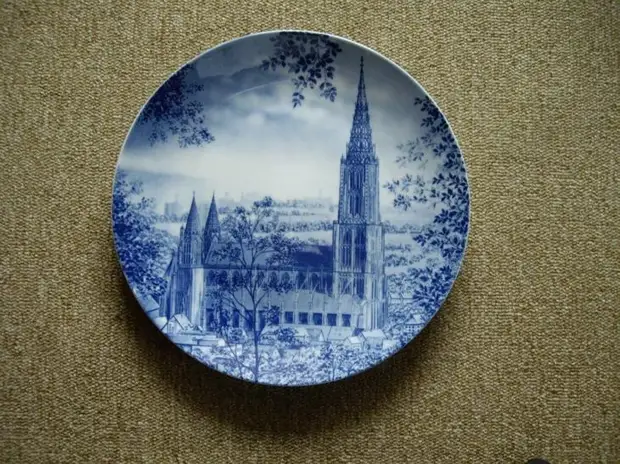
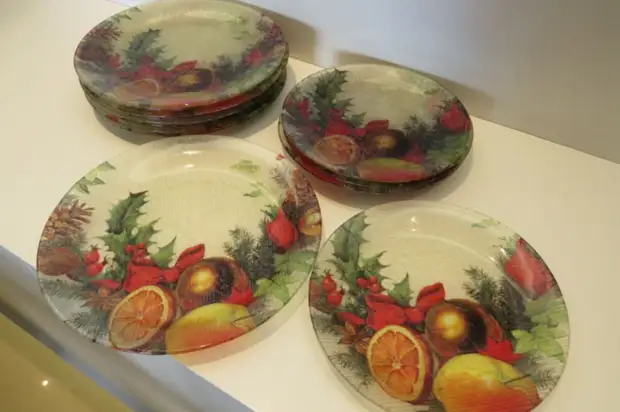
Master class on decoupage plates photos
A plate decorated with a decoupage technique with the help of photos, can serve as a cozy, family souvenir, an excellent decoration of the kitchen or dining room, a home heat element in a servant or a buffet, if you make it from a joint family photo.
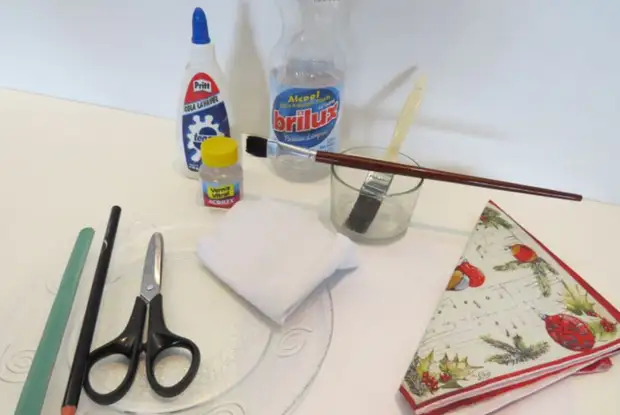
In order to make a decoupage of a plate, you will need:
- transparent plate;
- photos;
- glue and tassels;
- Acrylic varnish.
We will also need scissors, a little cotton wool or gauze, alcohol for processing and other paper cuts, three-layer napkins to decorate the main photos. Before starting work, consider how you would like to place images on a plate, for example, what kind of photo should be in the center, what form and size.
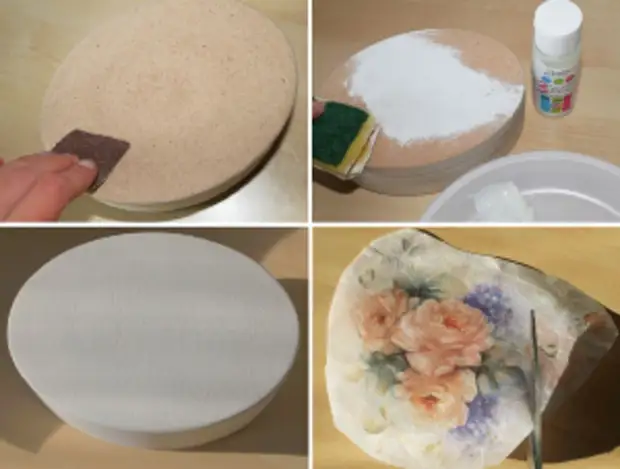
1. Prepare a plate to the scenery. Taking a little wool, wipe the surface well, make sure that your cotton or gauze remains on the plate. The surface of the plate should be perfectly transparent. Start the size of a photo or picture and only then cut.
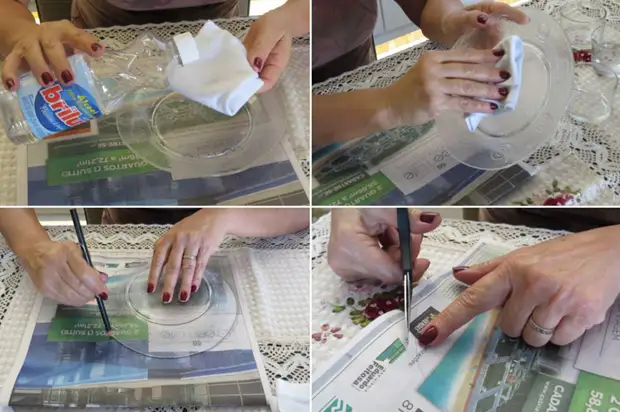
2. Start posting photos you need from those that should be in the foreground. Armed with brush and glue for decoupage, wake photos evenly from all sides. We have to work with a plate from the bottom side, because turn it down, wake the glue to the place on which the photo will be located.
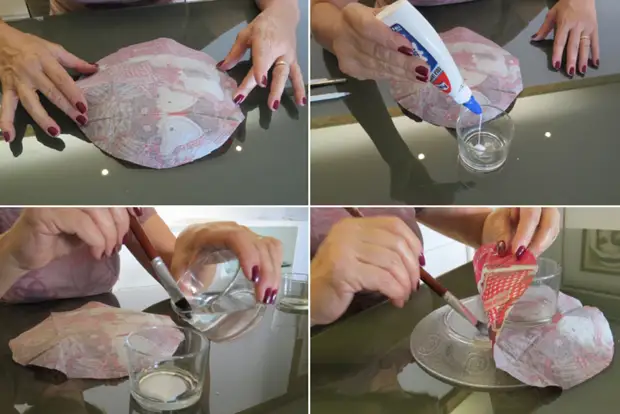
3. Having attached a photo to the front side of the glass plate, wake it with glue again, breaking the bubbles under the paper. In this way, have new items on a plate according to your plan. Be careful, drive out air bubbles from under images. For convenience you can use a sponge.
Try not to leave lumen on a plate, if you are not going to fix all images with acrylic paint or a huge sheet of paper. Decoupage plates should be dense.
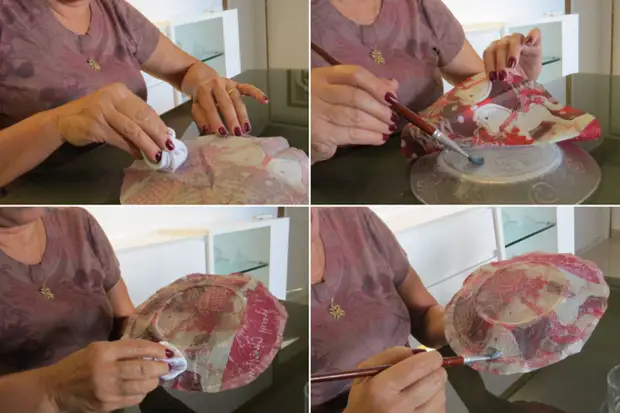
4. Playing all images, wake the whole hover side of the plate with glue, then leave to dry. After the plate is driving, it is necessary to process the edges, removing the protruding pieces of paper. You can make it with scissors or nail file (the latter will accurately remove all irregularities around the edges). Cover a pair of acrylic varnish layers. Finished dish.
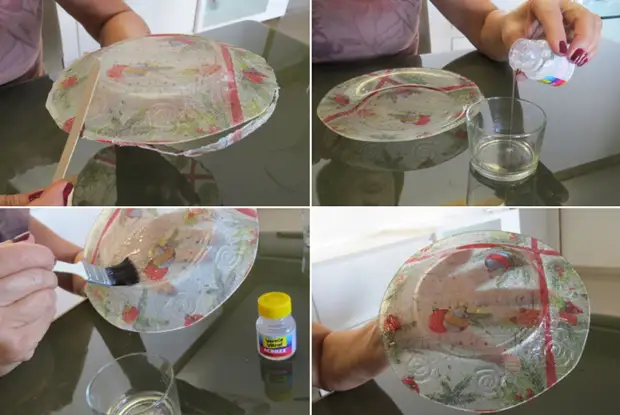
The finished decoration can be placed on the wall, lean or put on a prominent place. You can create a whole series of plates with decoupage from photos of your home - excellent home decoration.
Please note that the plate can not be washed under water, so use alcohol to care.
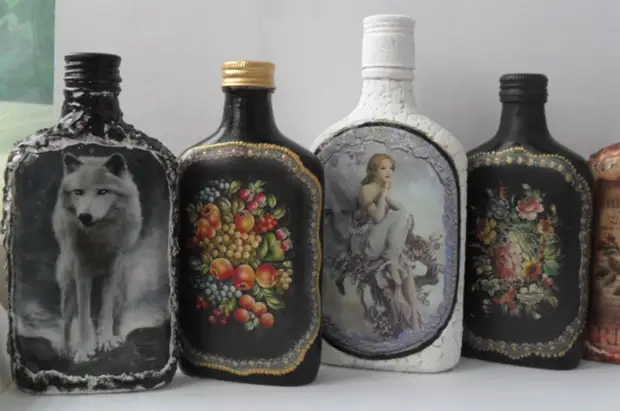
Master class on decoupage on bottles
Decoupage photos on the glass is not so difficult, another master class on decoupage we can offer you on glass bottles. Do decoupage bottles with the help of napkins much easier than the usual photo, but it is quite real.
To make a decoupage on a bottle Prepare the following materials for work:
- Actually, the bottle itself;
- PVA glue;
- Flat brushes;
- sponge;
- acrylic paint and varnish;
- the photo.
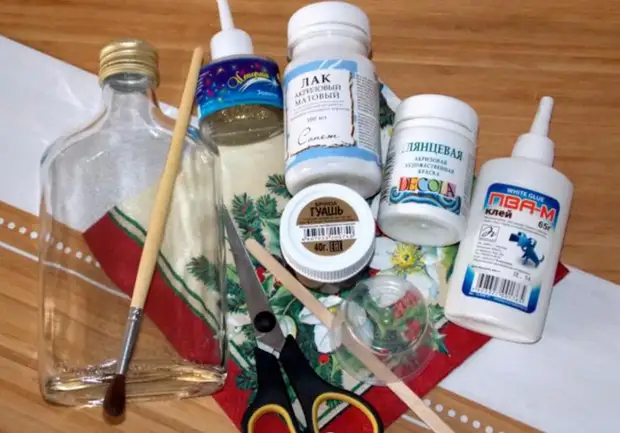
Necessary materials for decoupage
1. Find in your photo album or find it out and print an image from the Internet on the photo paper. The photo will serve as the main element in the decor. Declaring the foundation, it can be done with alcohol. After selecting the color of acrylic paint (it is best to choose that shade that prevails on the selected image so that the photo is like one whole with the color of the base). With the help of a sponge, cover the bottle of selected paint. Let it dry out.
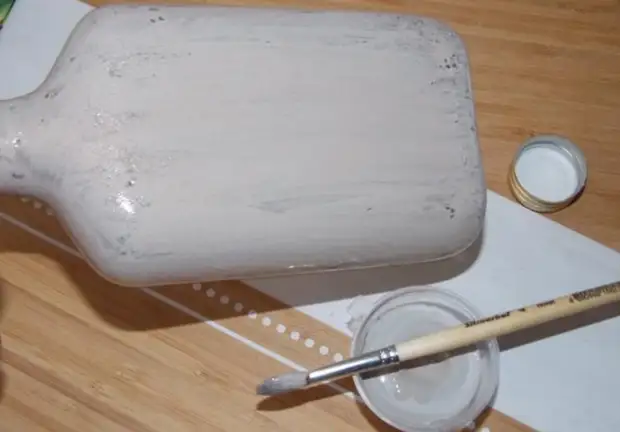
Collect the bottle of paint
2. The next step will be working with a photo. Cut the image and place it in the water for 7-10 minutes so that the paper is a little spacing. Taking photos, carefully remove the bottom paper layer. The picture should become much thinner, now it can easily be placed on the basis. To secure photos on a glass bottle covered with acrylic paint, use glue for decoupage or PVA, diluted with water.
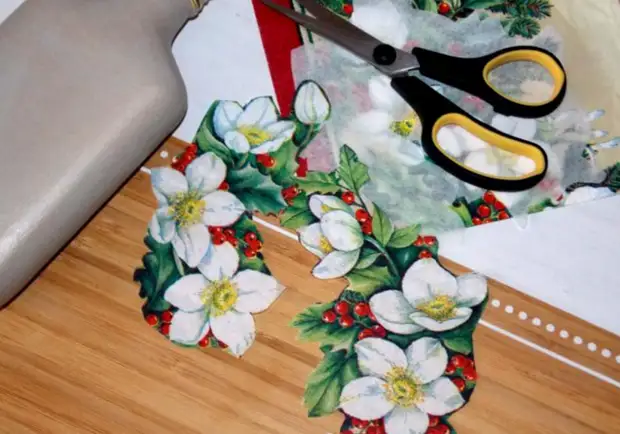
Cut the picture
We glue a picture to the bottle
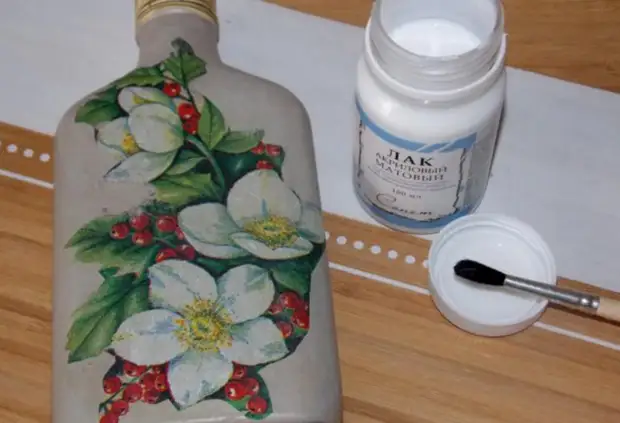
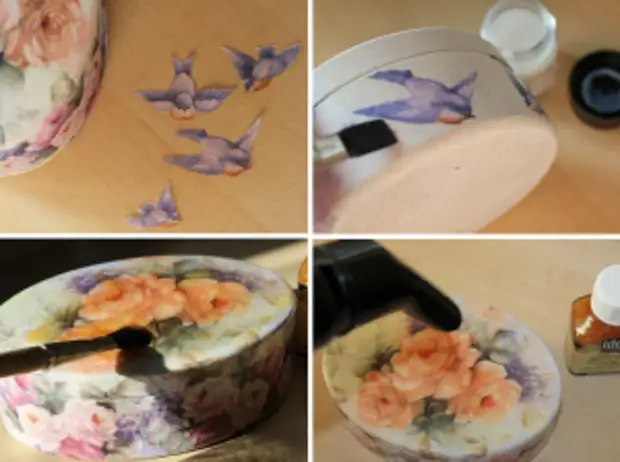
3. That sponge that you applied paint, treat the edges of the image with a drop of paint, combining a photo with the basic color of the bottle. After a complete drying of the product, cover it with a layer of varnish, thanks to him the water bottle will not be terrible.
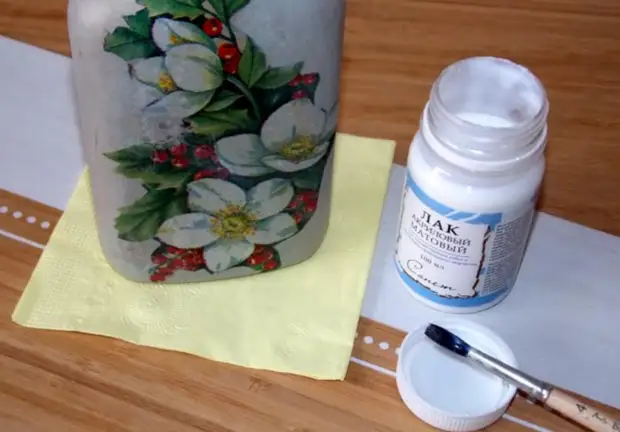
Cover the bottle of varnish
4. You can decorate the product with rhinestones, beads or beads, sequins or tie a ribbon on the neck. In this case, the picture is decorated with sparkles.
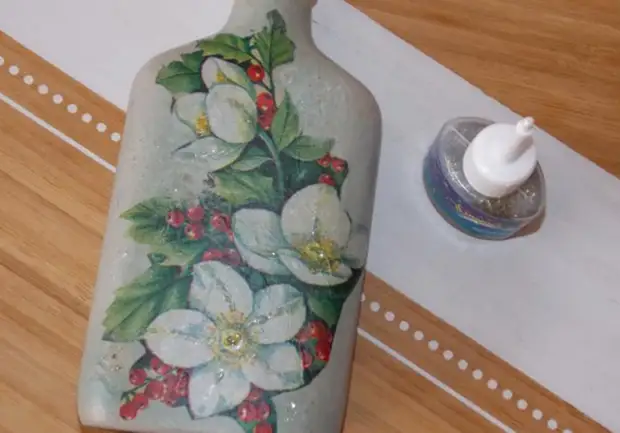
Finishing barcode - decorate a bottle
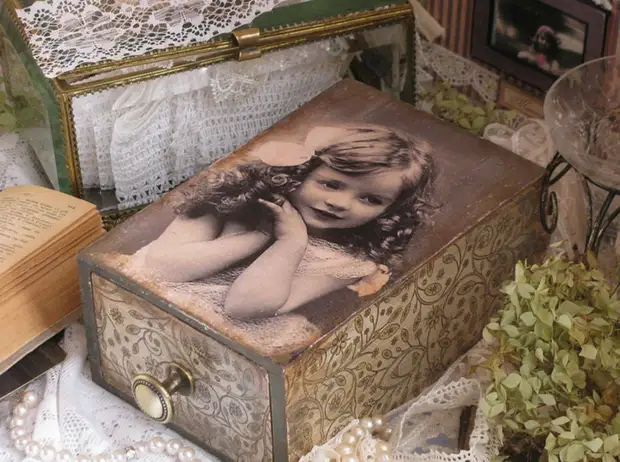
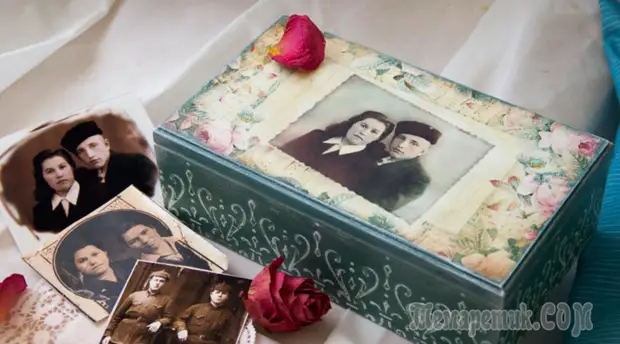
Vintage Casket With Decoupage Technique
If the results of the previous two master classes can serve as an ornament, then this wooden souvenir can come in handy in everyday life. Did you have an old wooden box? Decoupage will breathe new life into it. Now we will tell you how to make a decoupage on a tree.

Let's try to make an attractive, vintage box of old photos, for her you will need:
- Vintage images and old photos;
- some water;
- line and stationery knife;
- glue and tassels;
- Acrylic varnish, acrylic paint and soil.
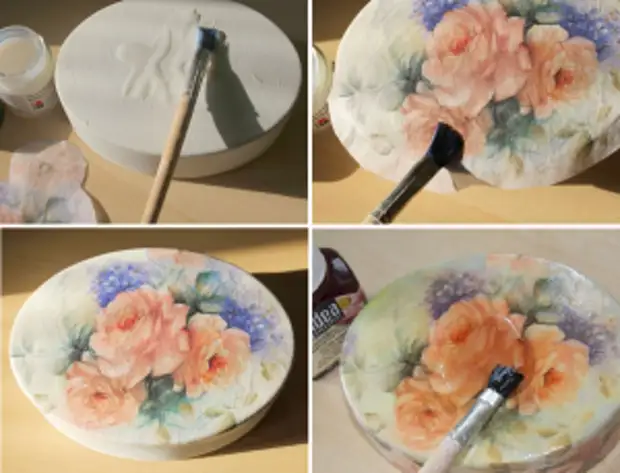
1. Prepare a few photos in advance that you will use. Cut them in size of the casket and soak, the image should be very simply soaked with paper. Casket are stuck, and after paint the acrylic paint pastel tones.
2. Apply a good layer of PVA on the lid and place an image. Blanc the paper base so that there are no air bubbles under it. Leave the box to dry, it is best to put it under the press. The picture can be smoothed by an ordinary cloth. But it is necessary to do it most carefully so as not to erase the image.
We apply glue and glue a picture
3. On the sides of the box, apply images easier, it can be vintage images of colors. Such pictures usually prevail on napkins from the supermarket. You can decorate the box with bows, sparkles or beads.
We glue pictures on the sides and cover the lacquer
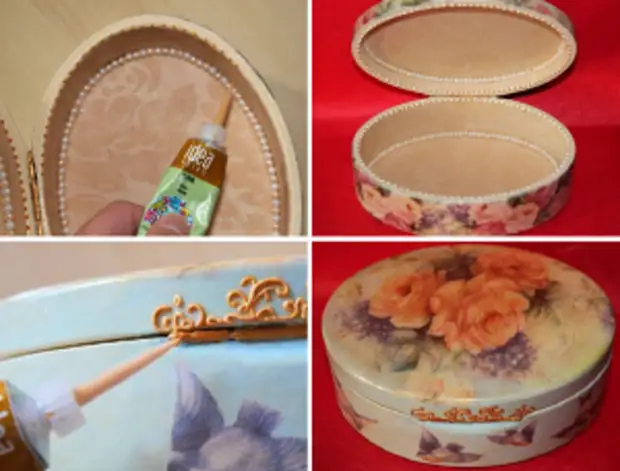
Decorating the casket
The actual decor is also a cracker technique that allows you to create the effect of scuffs and antiquity. As you can see, decoupage technique is very simple, but it is able to give objects an unusual highlight or fully change their appearance.
How to make decoupage boxes (2 video)
