
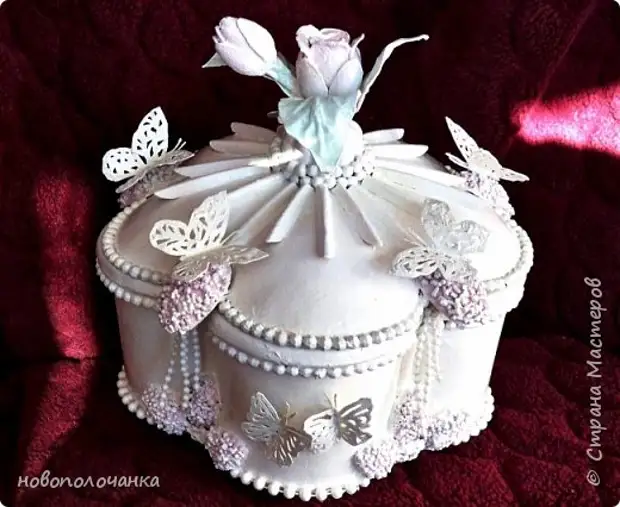
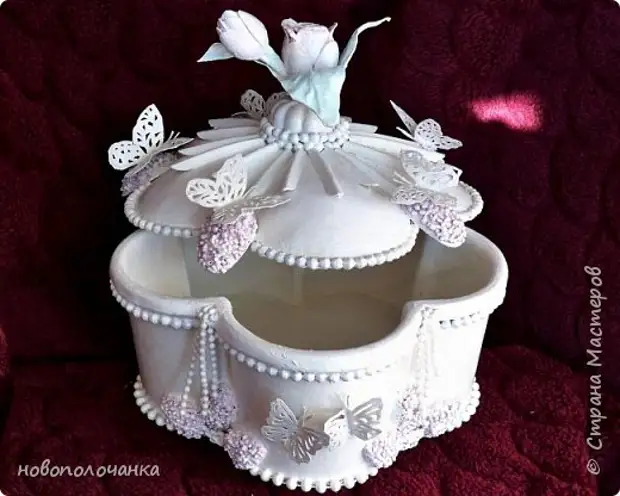
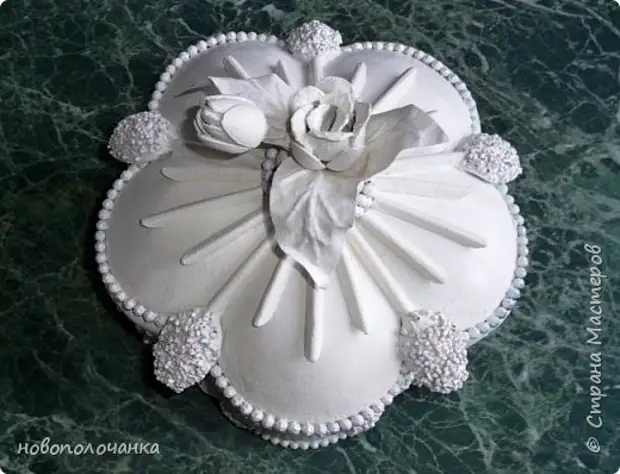
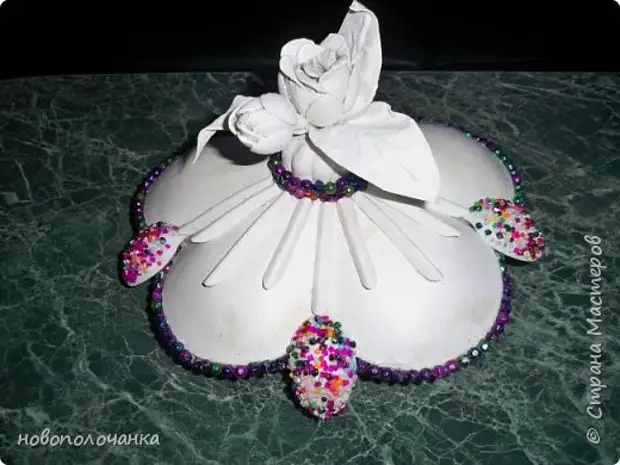
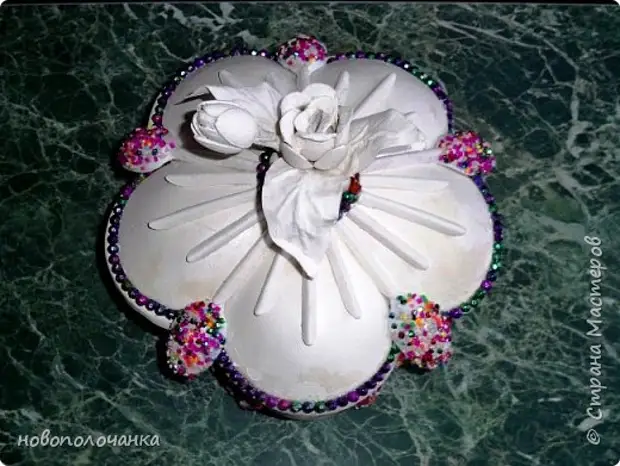
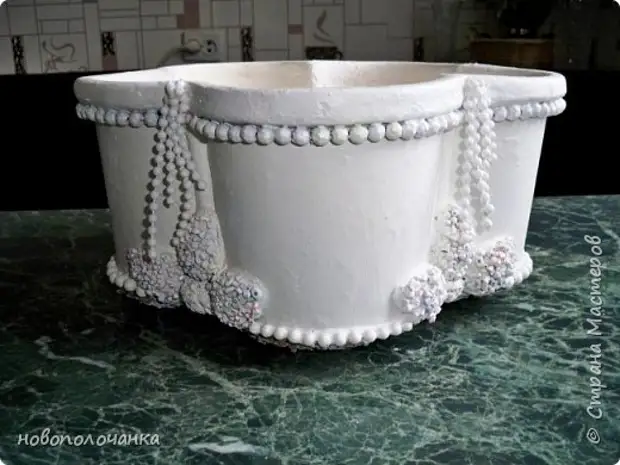
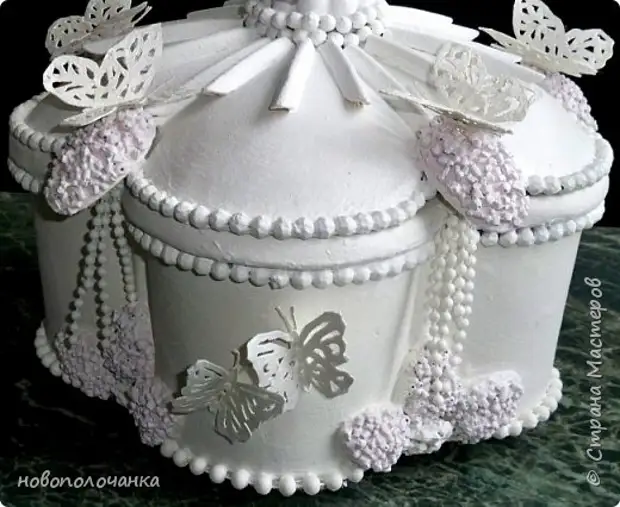
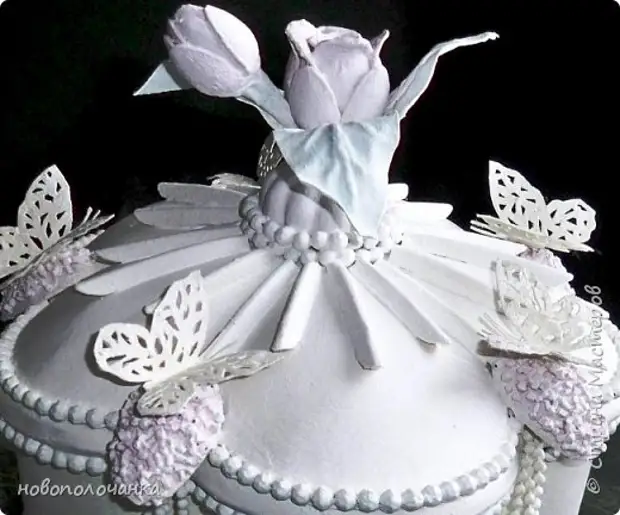
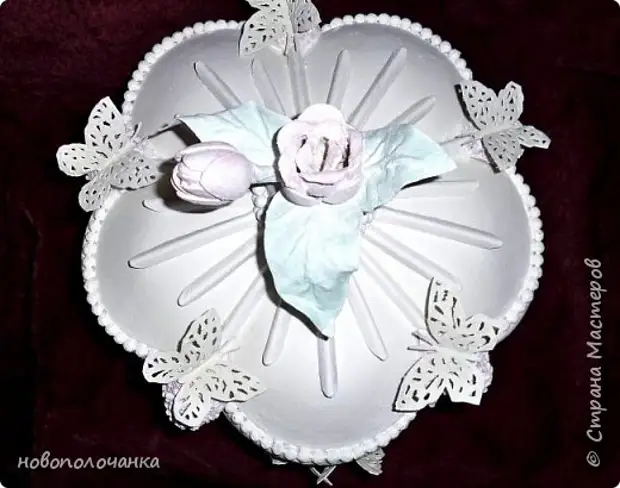
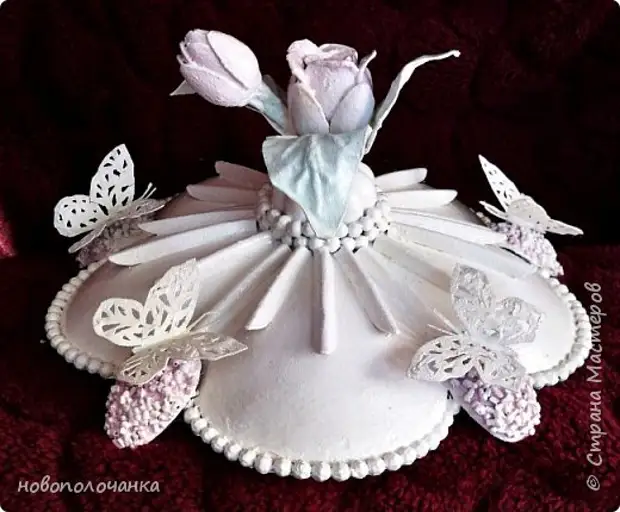
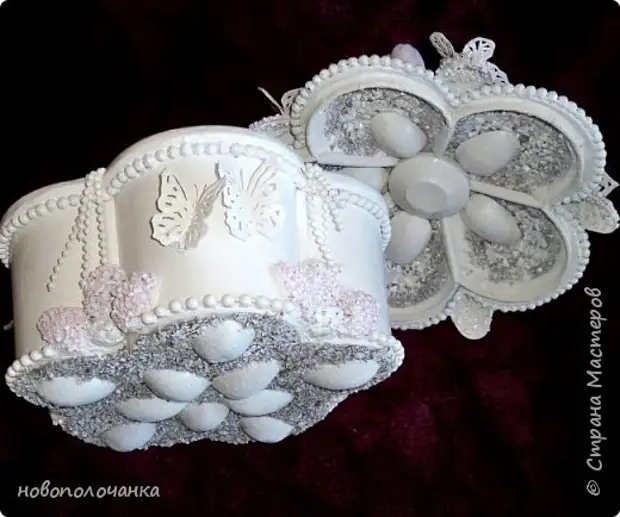
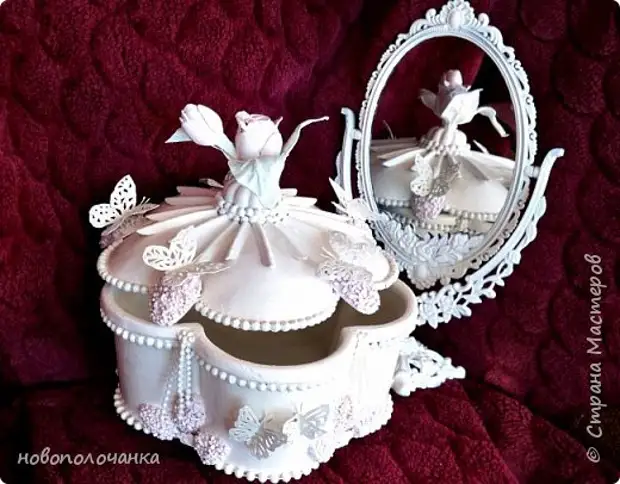
1.This casket I made a daughter for the day of March 8. It was possible to take a finished wooden or cardboard workpiece, make a decoupage from the napkins or a patch pattern through the stencil, lay out pasta (I am a big opponent of use in food decor). But I am a person who is not looking for lung paths and the more difficult, the more interesting what happens. Invent and made it was easy, it was more difficult to pick up a color and tone in which this box will be. What happened to me, you judge.
2.
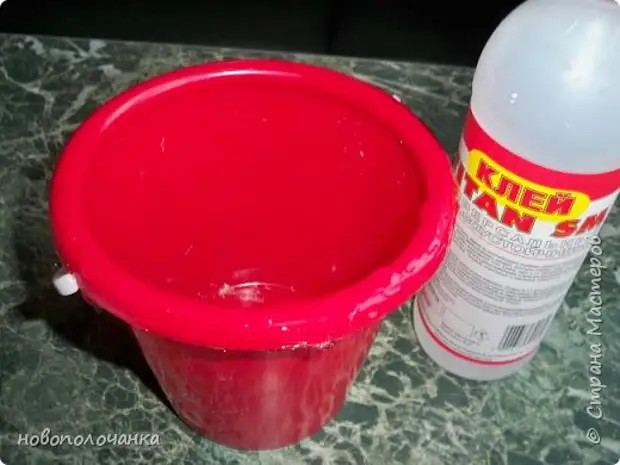
For work, we need:
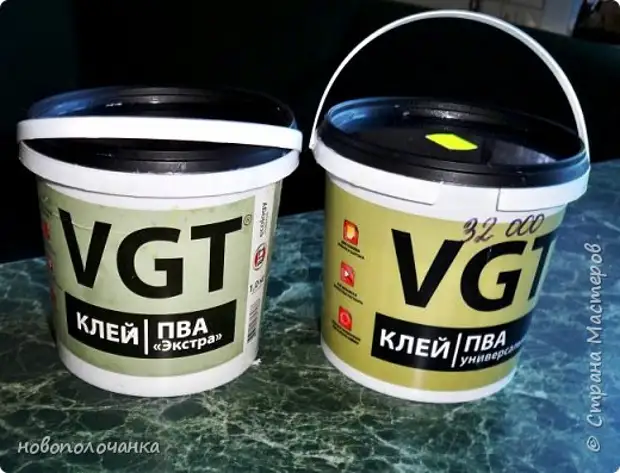
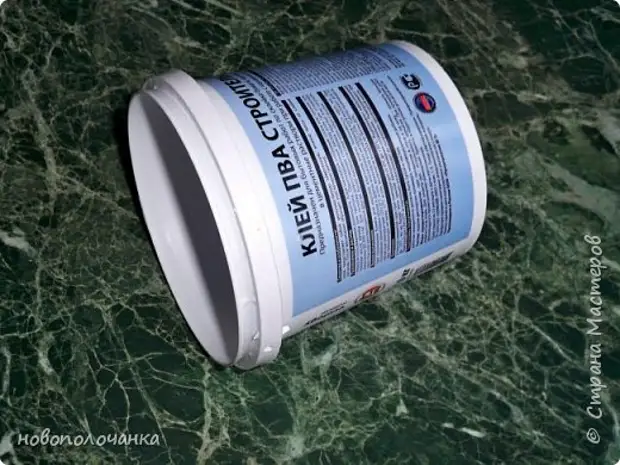
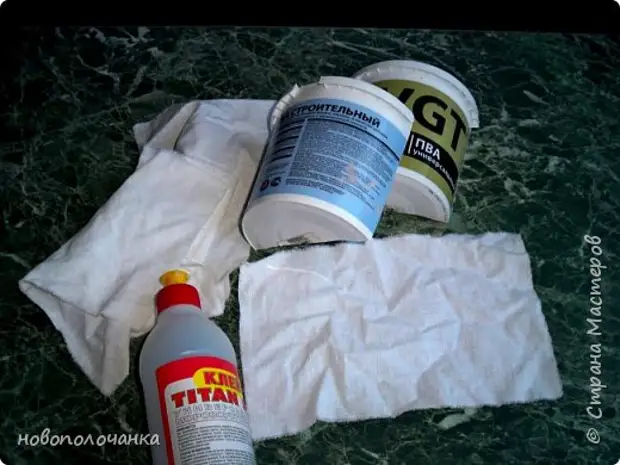
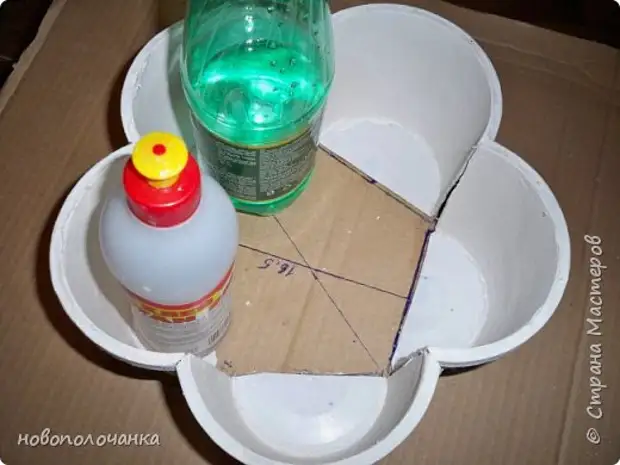
1. Westers with a volume of 1 liter from under the glue of PVA, or mayonnaise.
2 fabric.
3 scissors.
4 ruler and pencil or pen.
5 Titan glue, PVA glue.
6 Cardboard.
7 plastic large spoon or wooden.
8 disposable canteens, teaspoons and spoons for coffee.
9 children's bucket.
10 plastic beads.
11 Enamel-aerosol universal, quick-drying white, matte.
12 varnish - aerosol.
13. Cutting knife for cutting.
14 Spatlewoman Wagon.
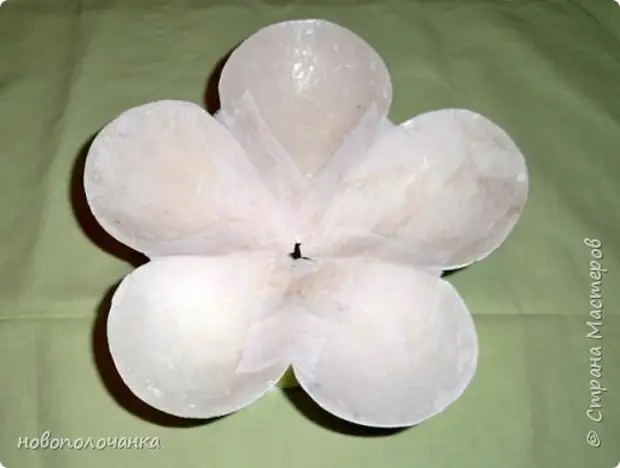
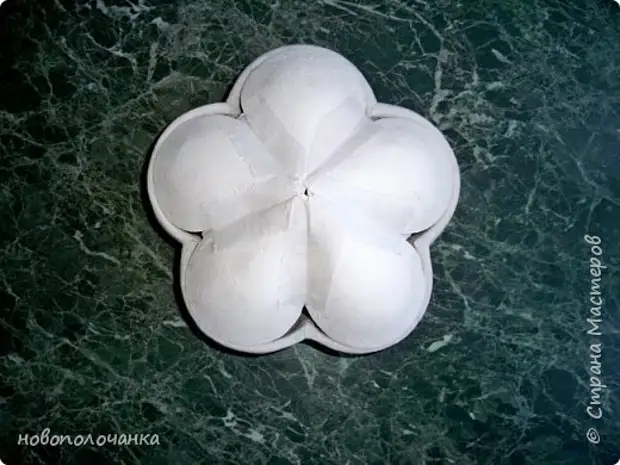
3.
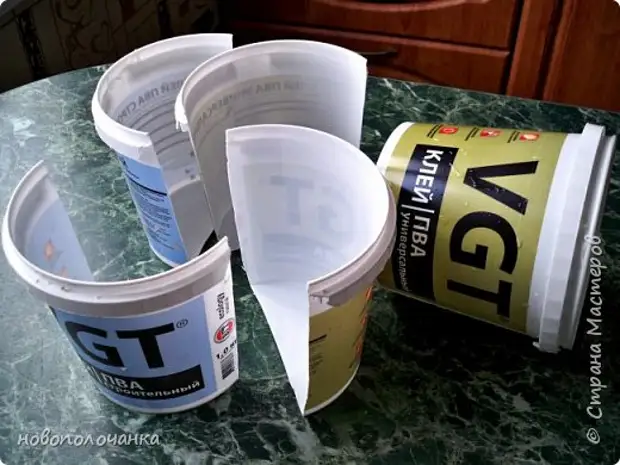
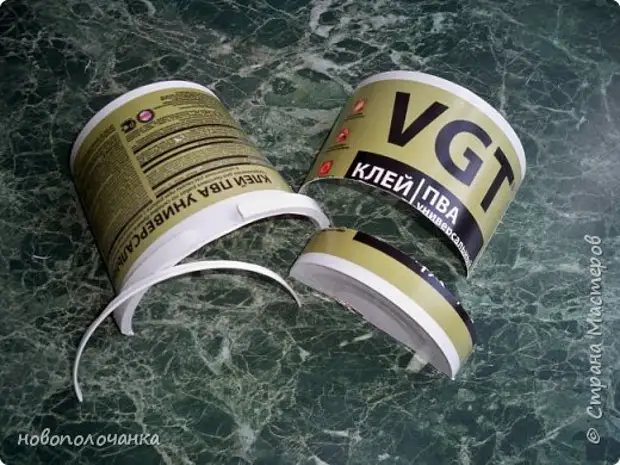
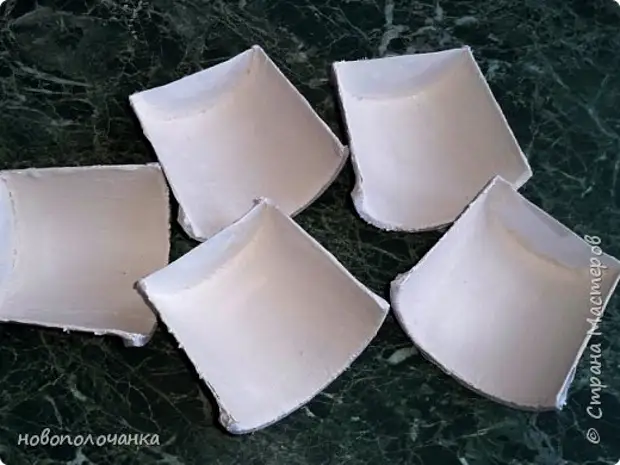
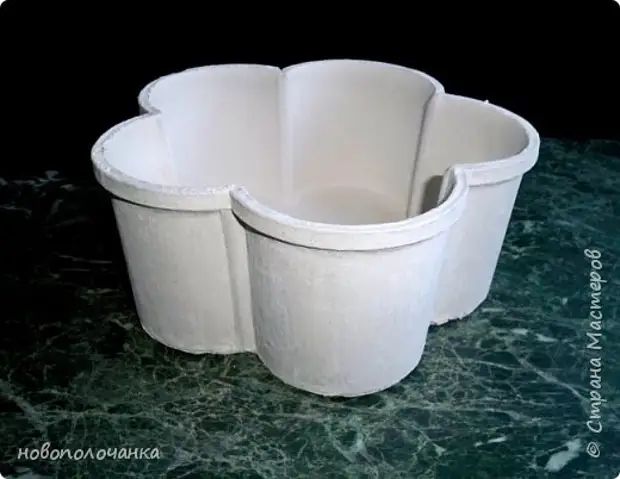
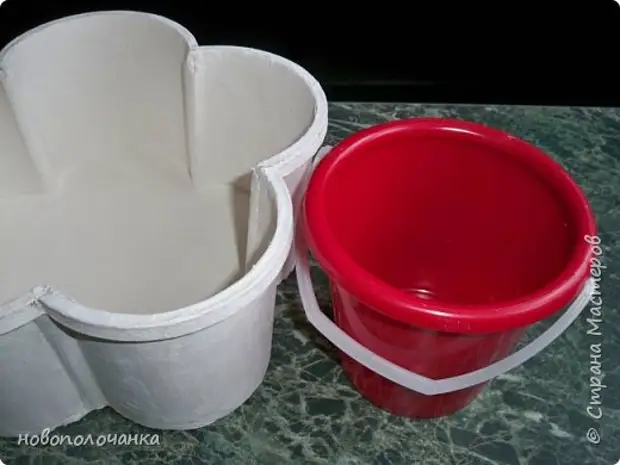
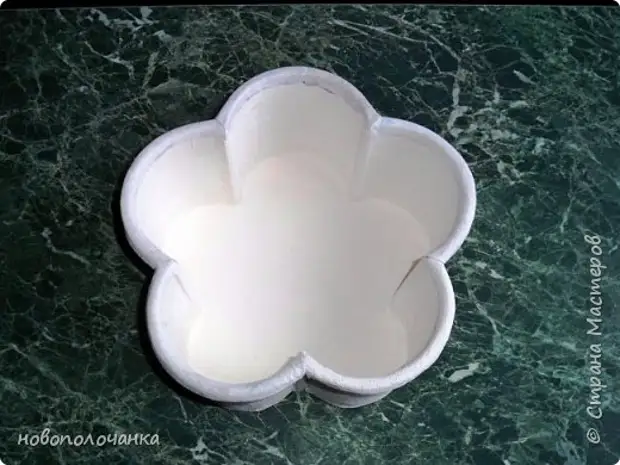
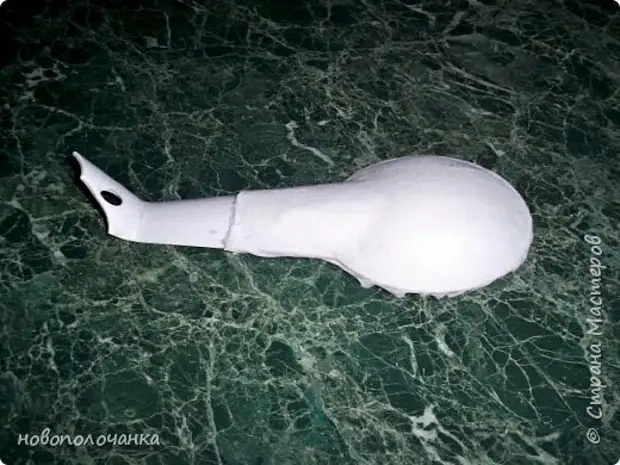
These are plastic buckets from the glue of PVA (I have a lot of gathered, and throw out a sorry), we will create a box of them.
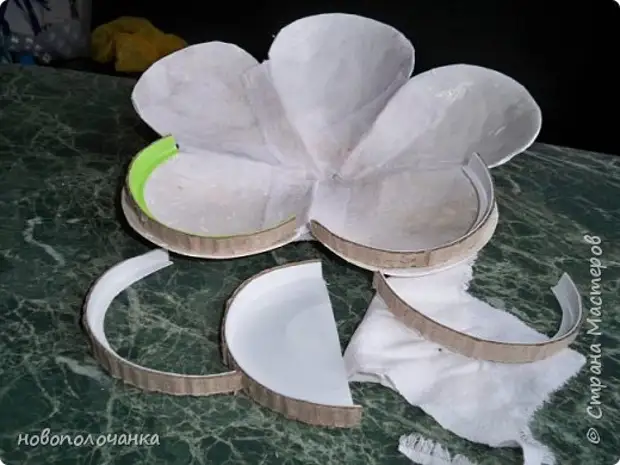
four.
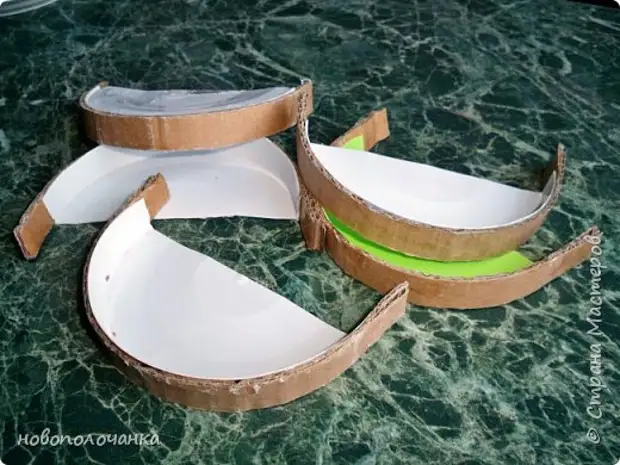
We cut the buckets along into two equal parts. Cut is more convenient and smooth from the hole where the cutter (handle) is inserted and to the hole from the opposite side.
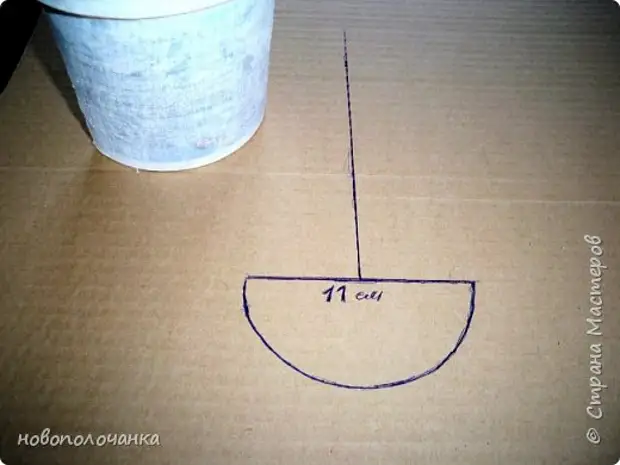
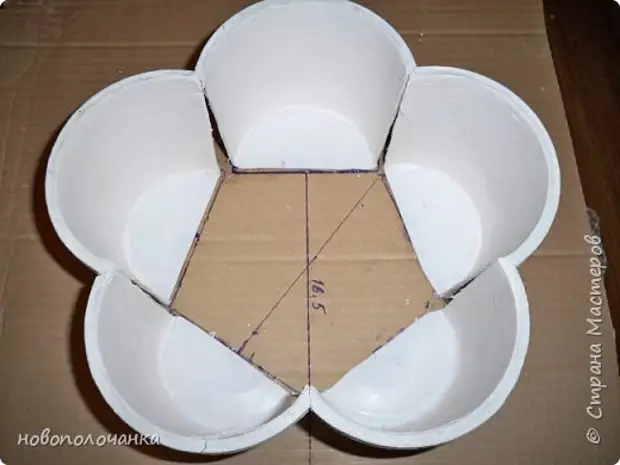
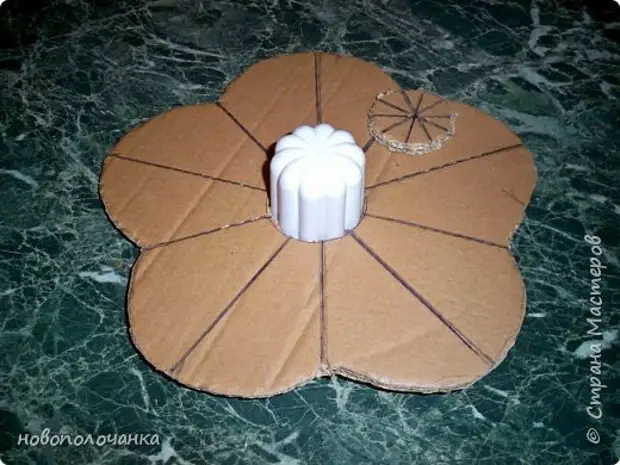
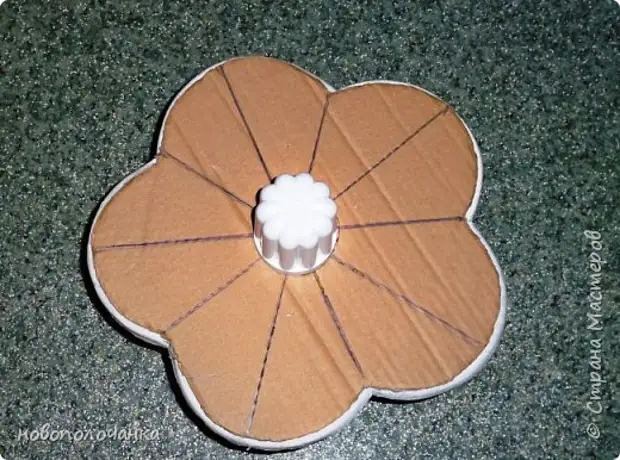
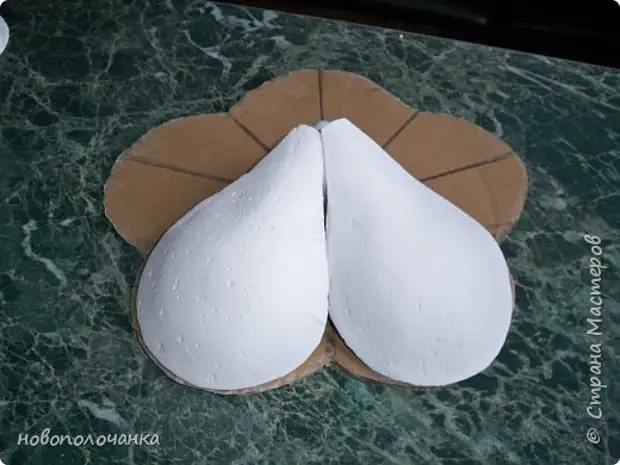
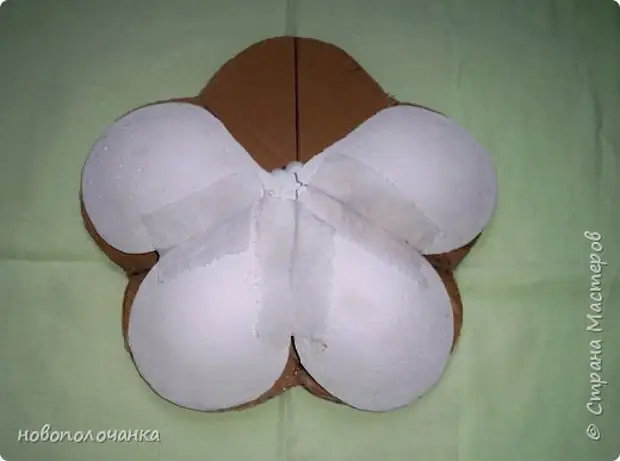
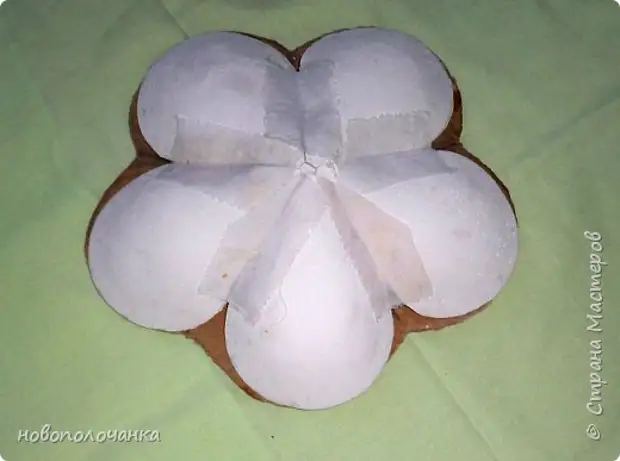
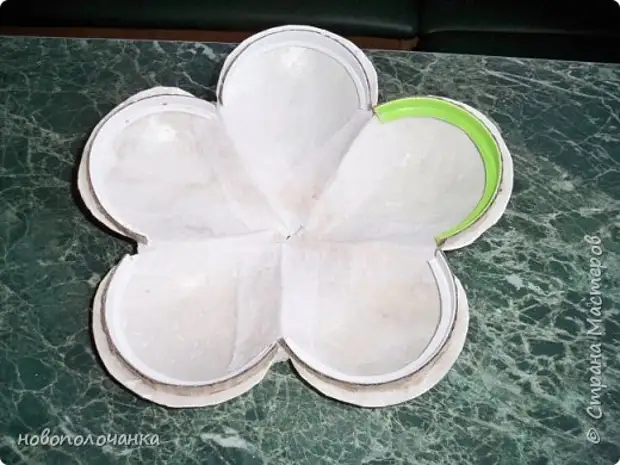
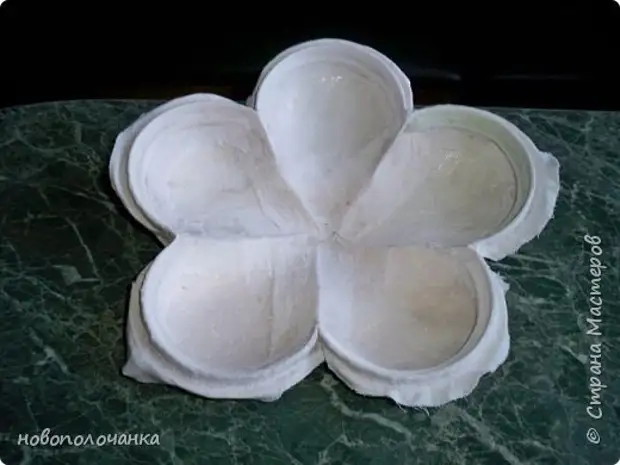
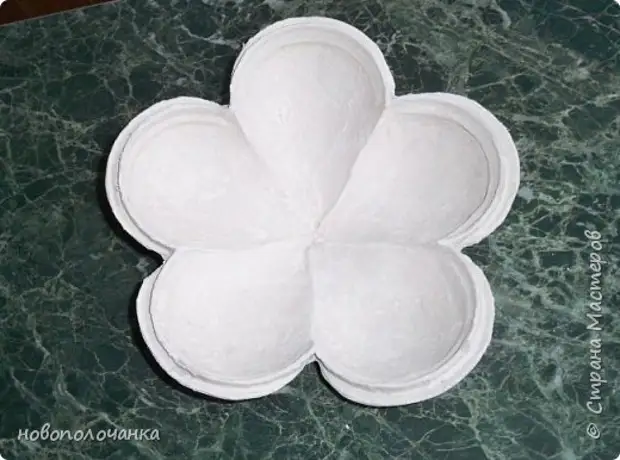
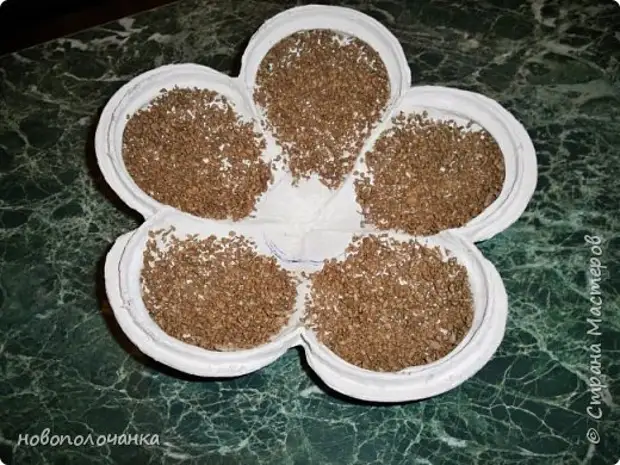
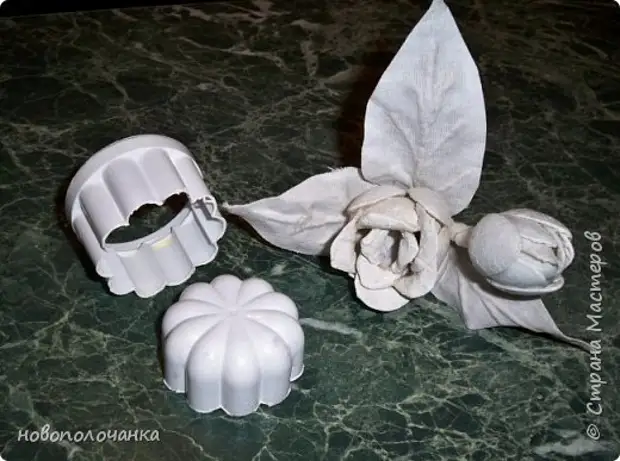
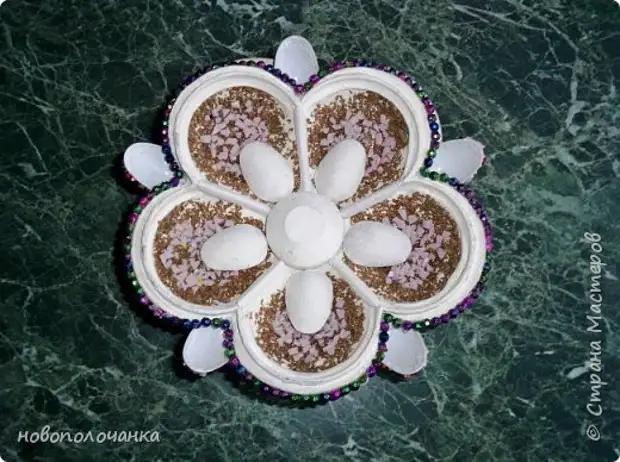
five.
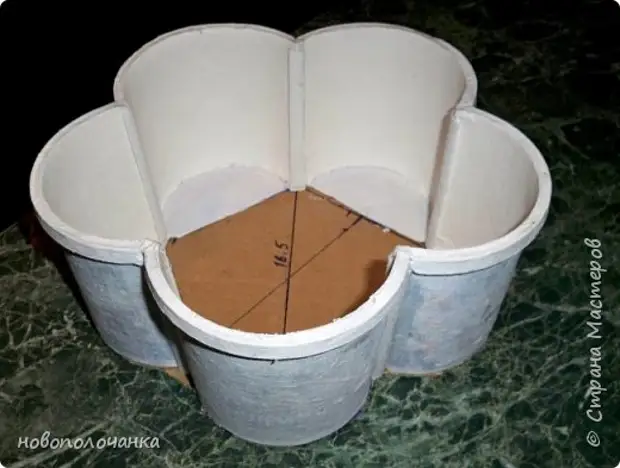
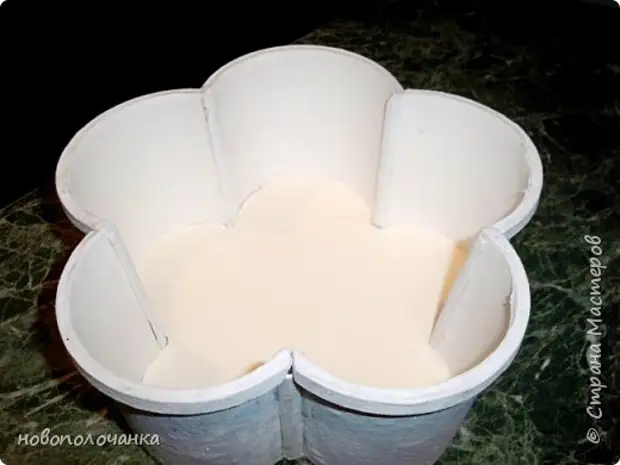
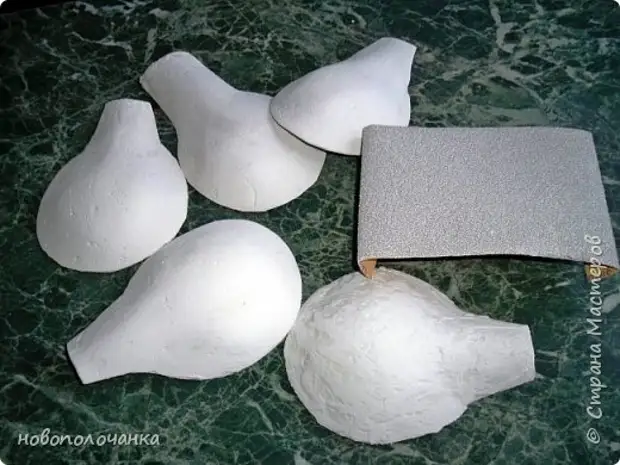
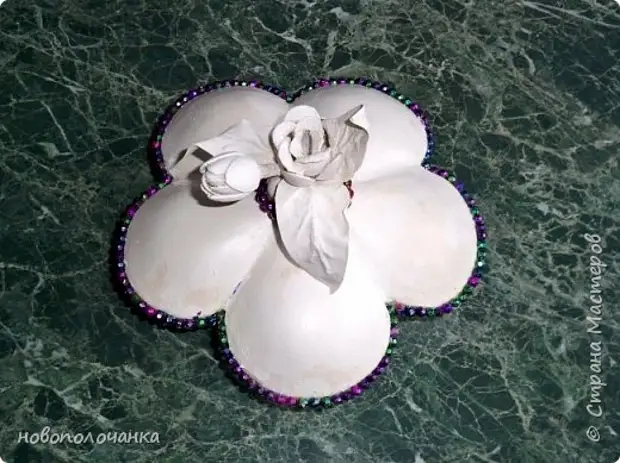
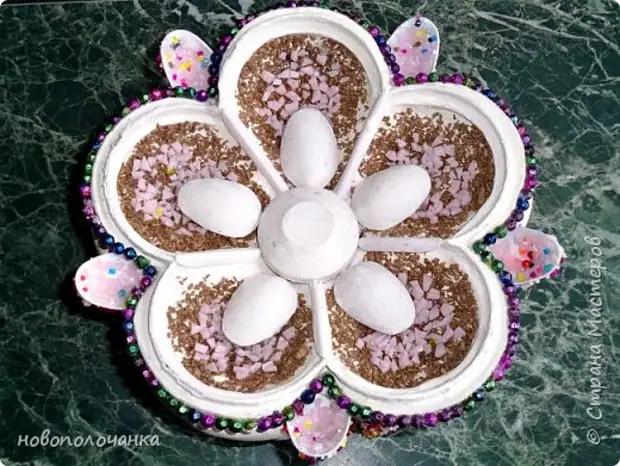
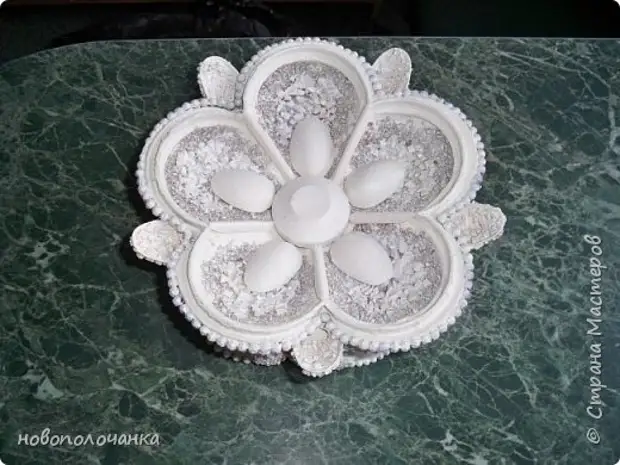
We make a future shape of a five-halled caskets, and you can from four or three, but more beautiful of five.

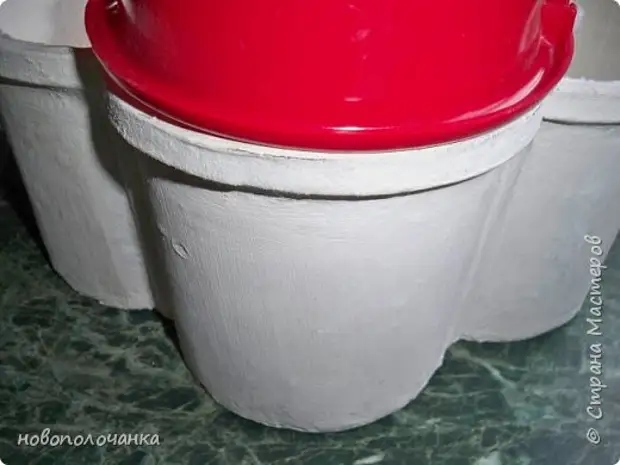
6.
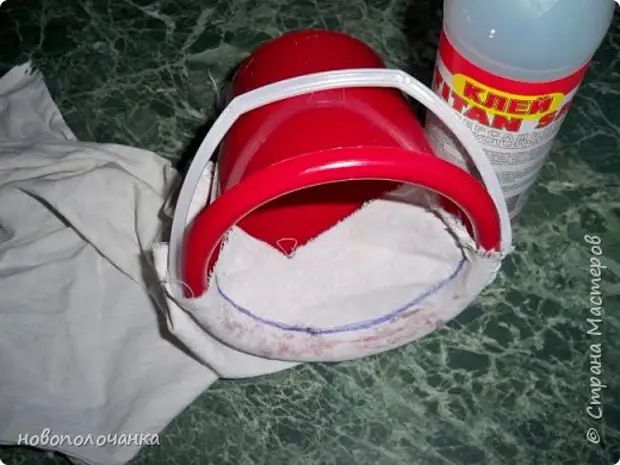
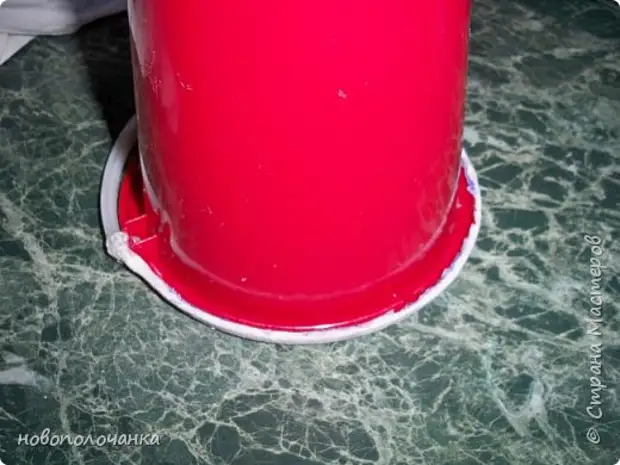
In the top of the vest, we cut a protruding bezel to which the lid dined (the material, from which the buckets are made, soft and fatty, is well cut with scissors).
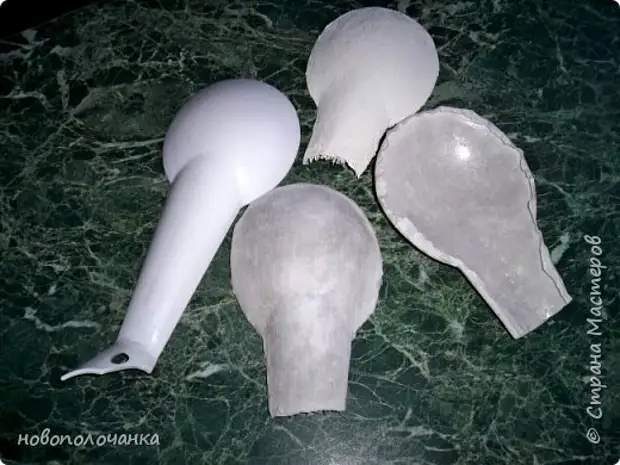
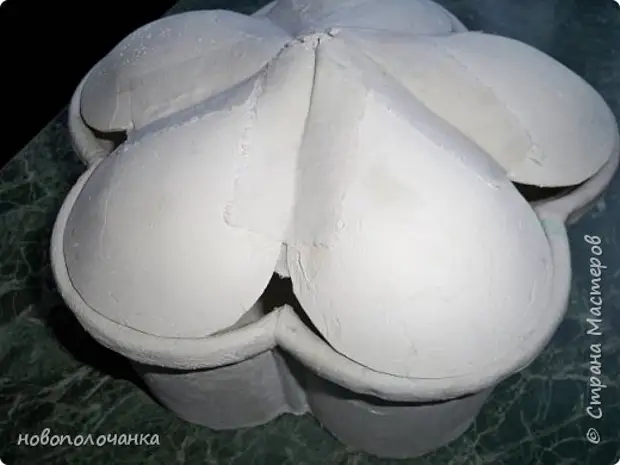
7.
On one half of the blade, we cut the rim, on the other cut off the bottom, it will be useful to us when the casket cover is design.
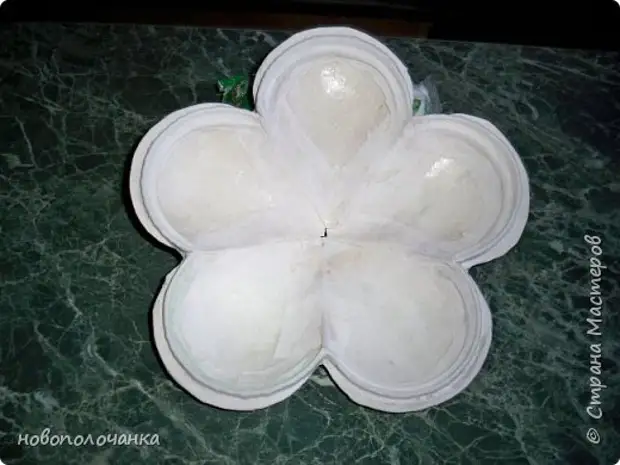
eight.
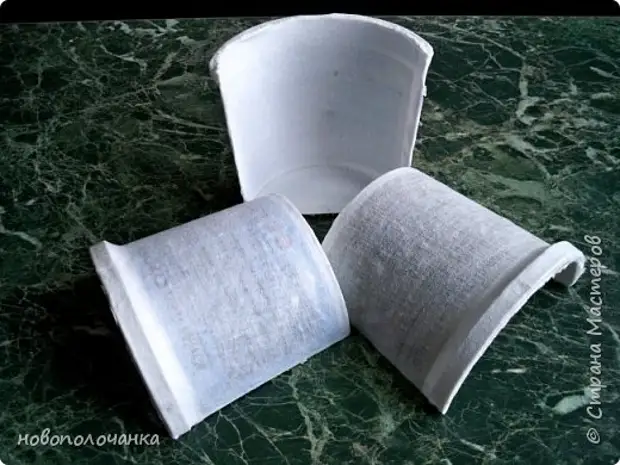
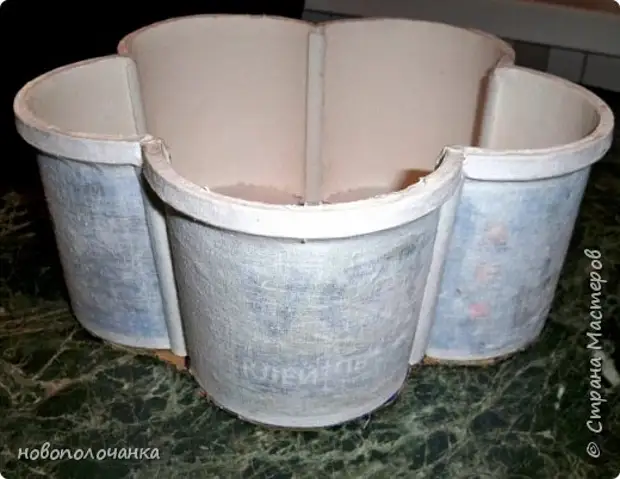
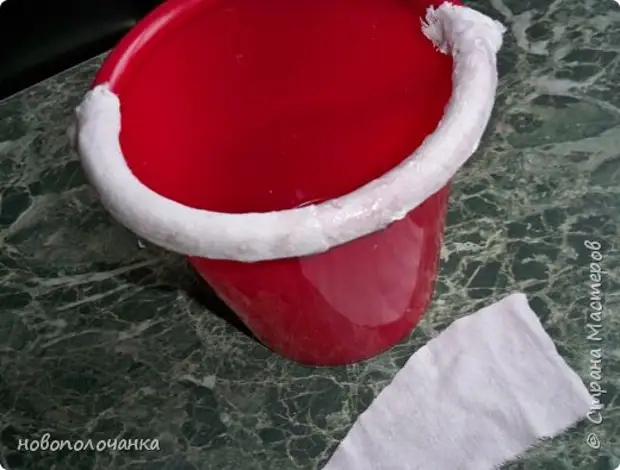
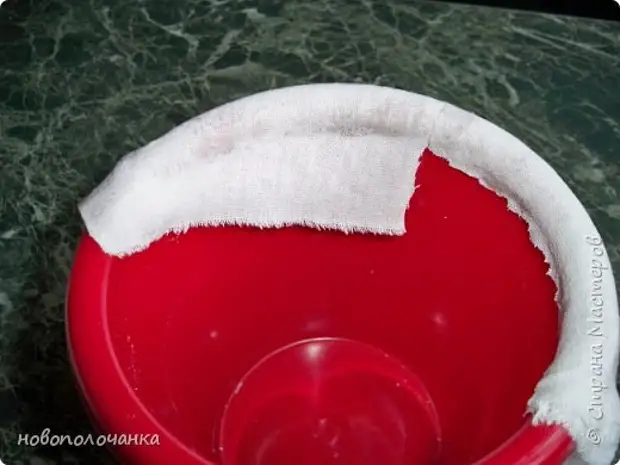
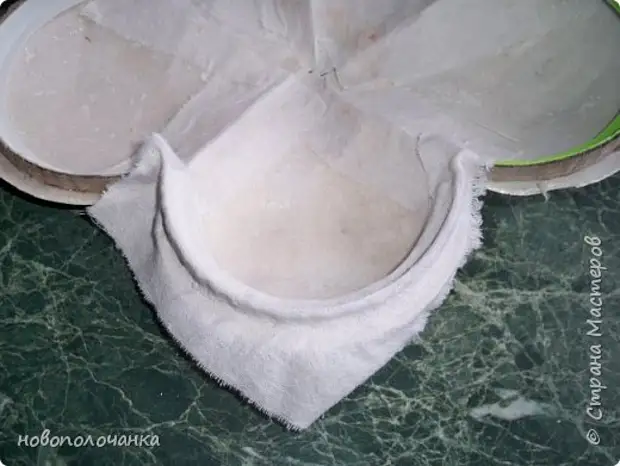
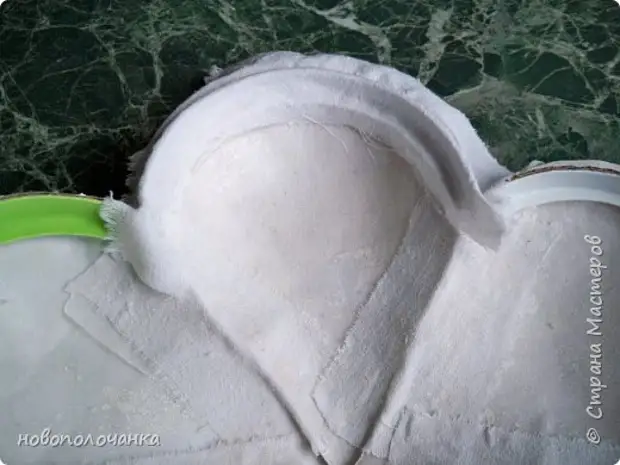
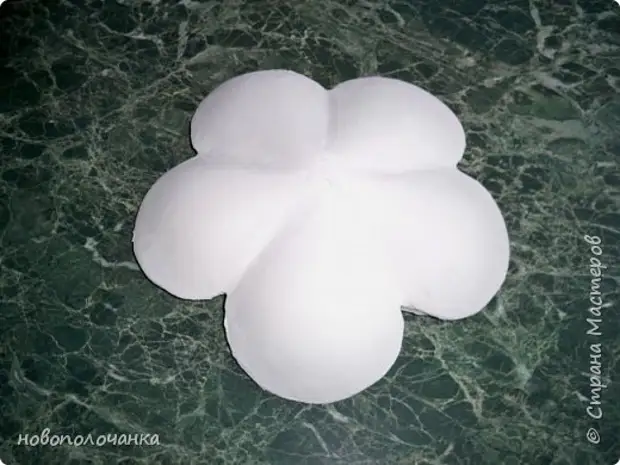
We measure the outer and inner part of the halves and on these sizes cut the tissue. On the other side, we apply glue titanium, evenly distributing glue over the entire surface of the fabric. Correctly take and apply a missing side to the outer part, pulling and sticking.
nine.
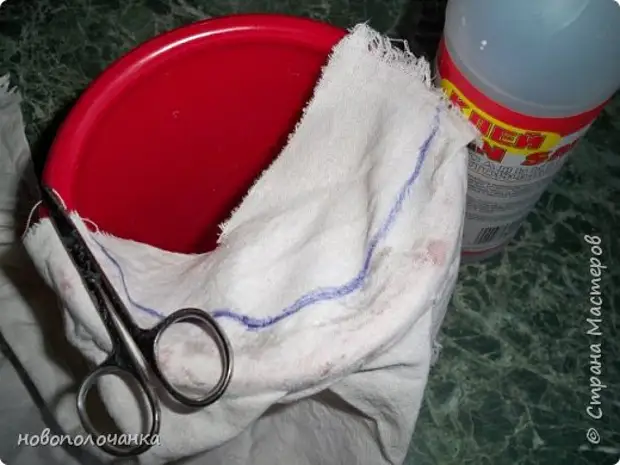
On the outer and the inner part of the halves is already pasted and the fabric is well sucked.
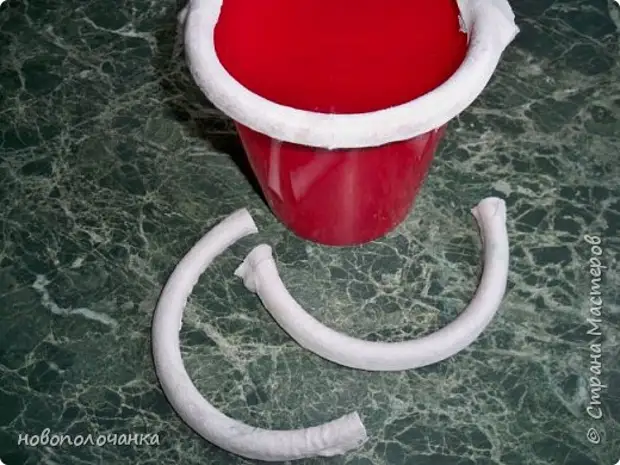
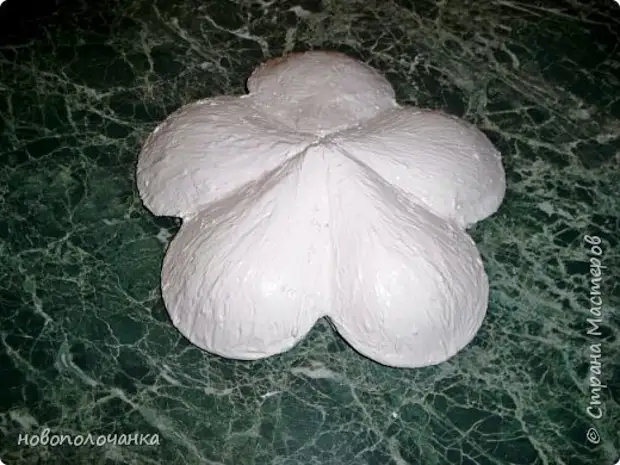
10.
We mix the twin + PVA and the tassel applix a mixture to the surface of the fabric so far only from the inside, drying, whirling sandpaper.
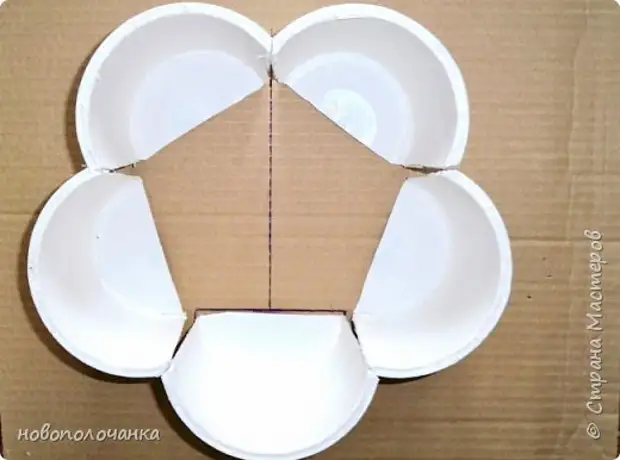
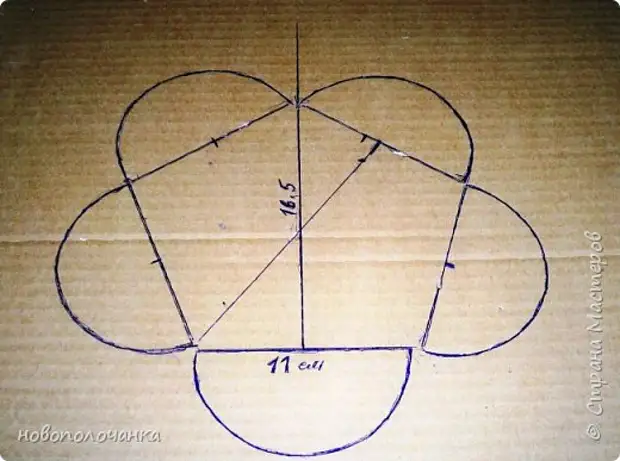
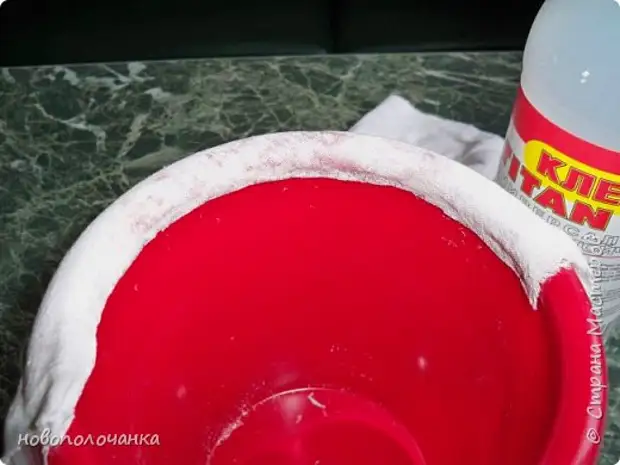
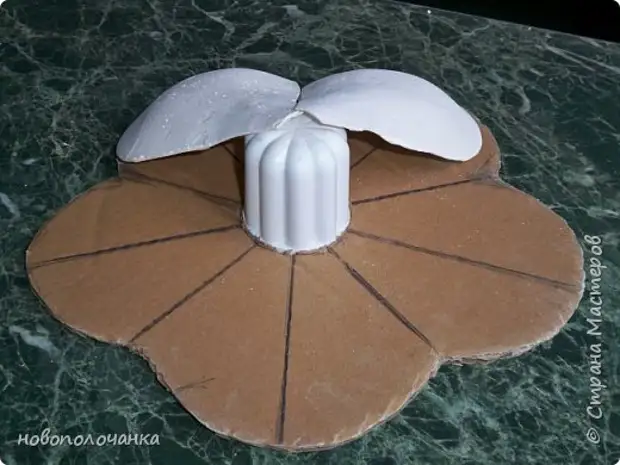
eleven.
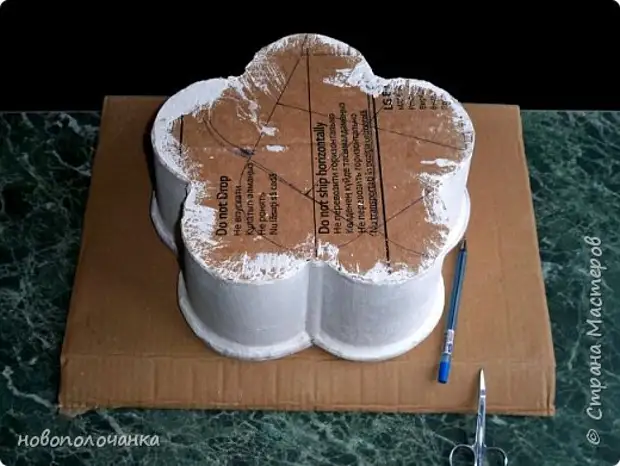
We take a leaf of a tight hafyrocarton, we will be smoothly and beautifully and beautifully make the frame of the caskets from halves. We supply the bottom of the bottom of the midst, we find the middle of the sides, we carry out perpendicular directly from the middle.
12.
We compile and supply a pencil the location of halves on the cardboard.
13.
fourteen.
fifteen.
Printe.
sixteen.
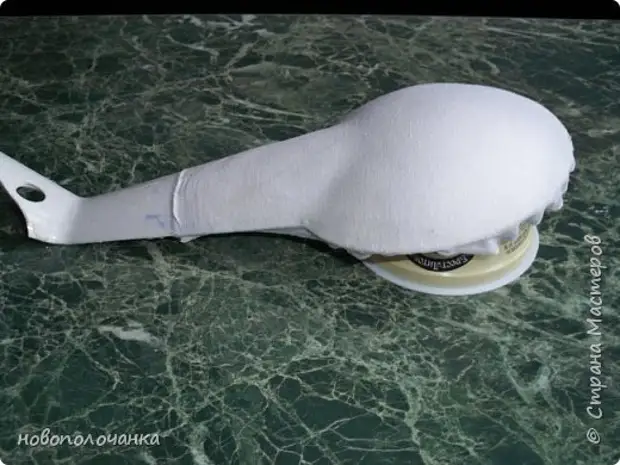
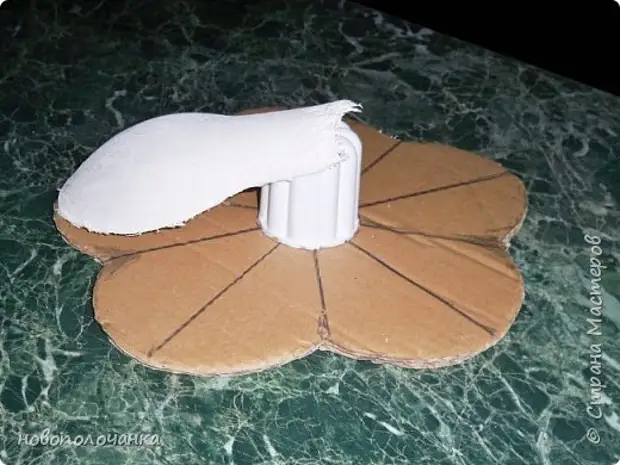
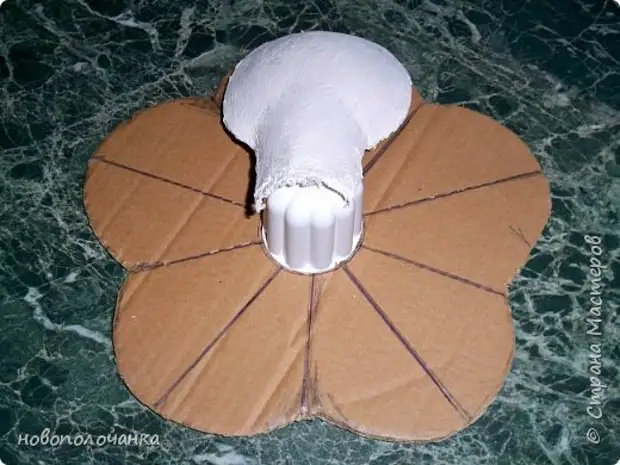
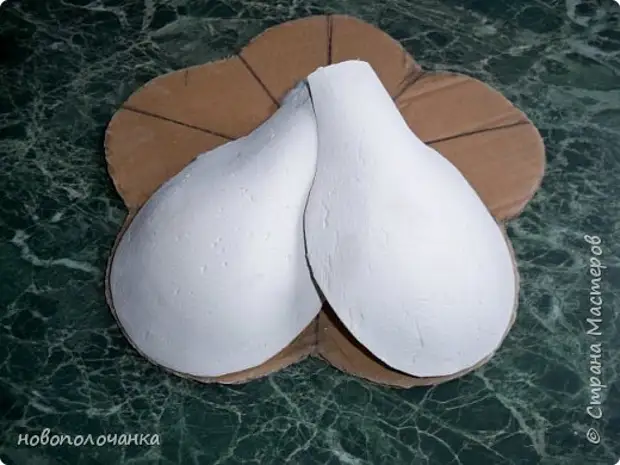
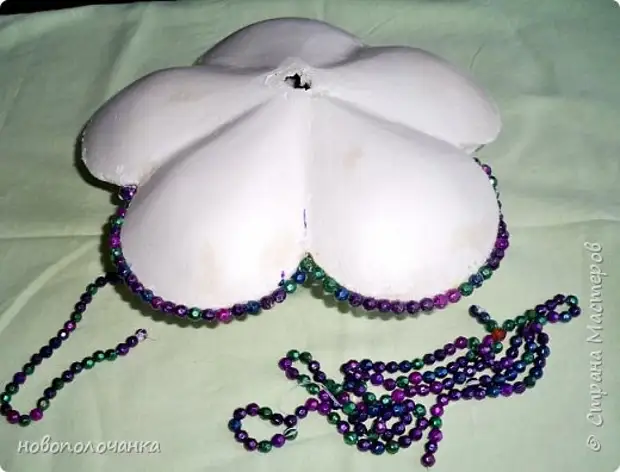
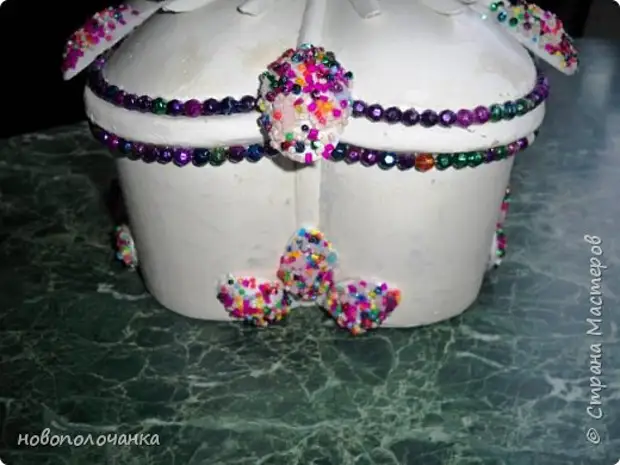
The bottom is glued, we close the slots formed between the halves when they are connected. These are plastic corners of an oval shape (they were thrown out after repair). I did not know where and when they use me, but the hamster instinct quickly worked. Cut 5 segments for outer and 5 for the inside of the casket.
17.
In terms of sliced strips, we tear the cloth, we apply titanium glue, apply on the convex part, bending the edges of the tissue inside.

eighteen.
Printe.
nineteen.
Then glued inside.
twenty.
And you can cut strips and from thin cardboard from the candy box or cut the strips of the twine, glue.

21.
Spit, dry, whirl with sandpaper.
22.
We put the outer part of the walls, dry, whirlpool.
23.
Our future casket has the upper edges of halves angular, we will replace oval.
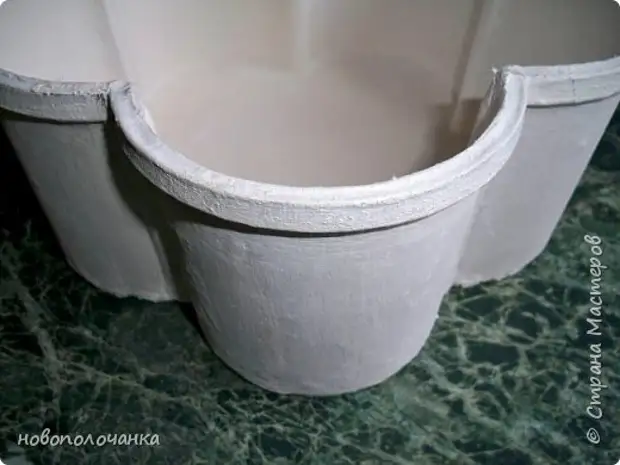
24.
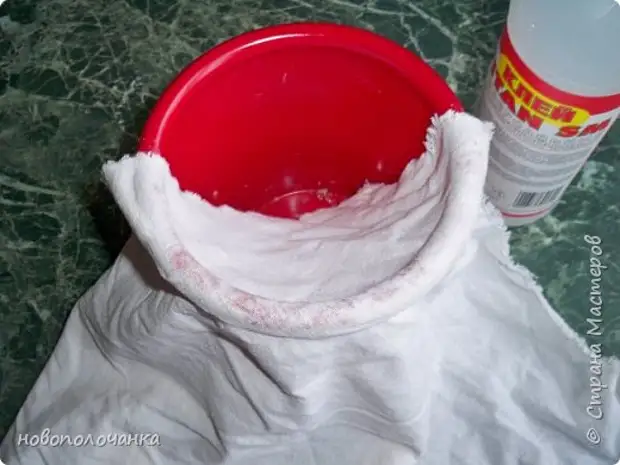
On such as the rim on children's bucket.
25
In size and form are ideal.
26.
Abundantly applied Titan glue on the rim of the buzz.
27.
We take the corner of the fabric and apply a bundle of the bucket, well pressing.
28.
Find a handle from the inside.
29.
We feed the fabric and, in the outlined contour, cut off excess.
thirty.
31.
We turn the bucket and draw a cut line.
32.
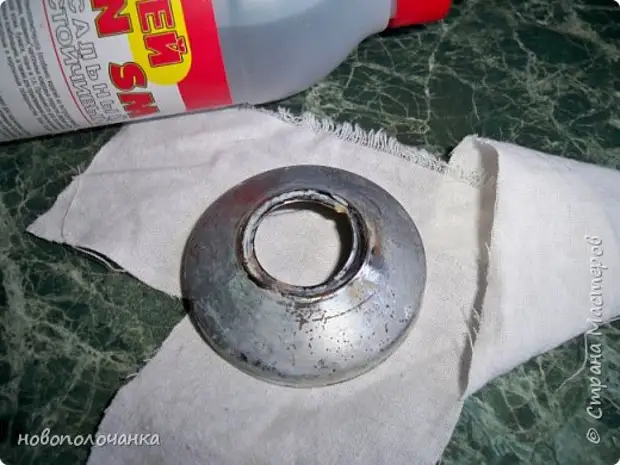
33.
On the glued fabric we are applied with titanium glue and lay a layer of fabric. The second time is glued faster and easier.
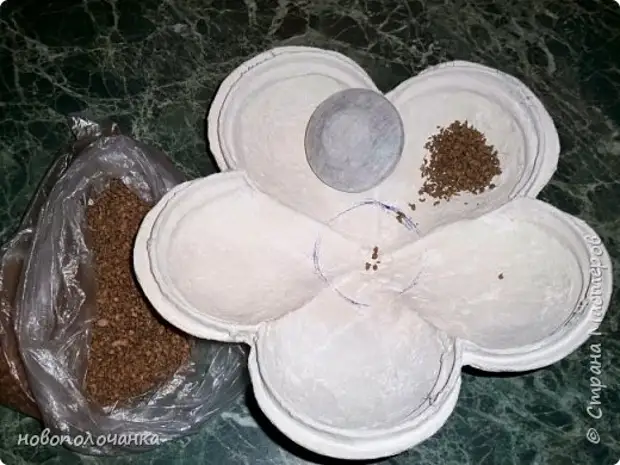
34.
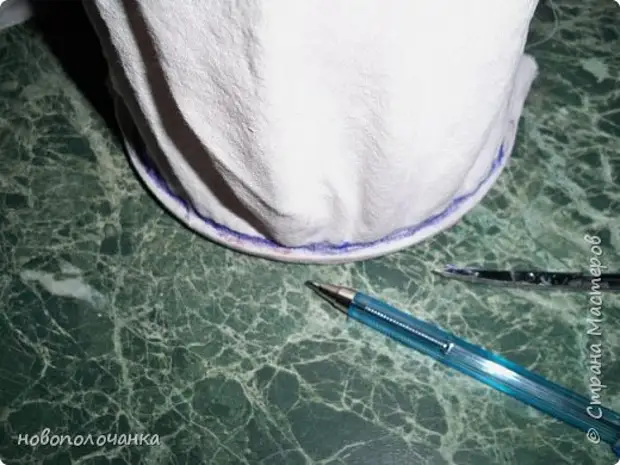
35
After drying, we remove from the messenger. And so, we have five half rims of oval shape for the upper edges of the casket.
36
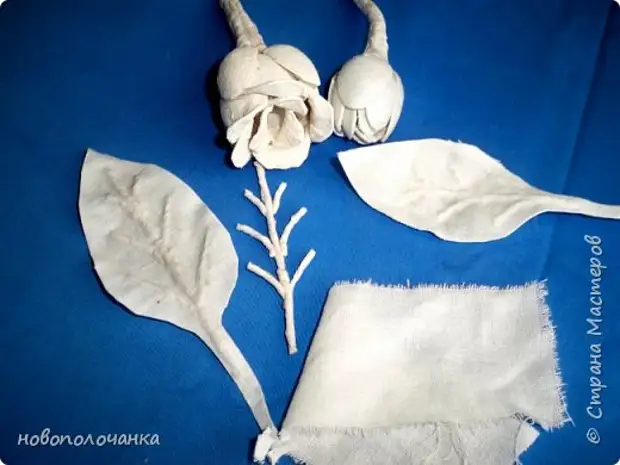
We glue, putty, dry, whirl.
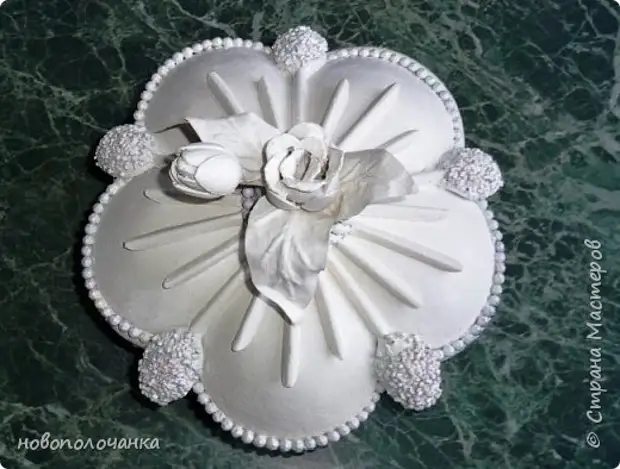
37.
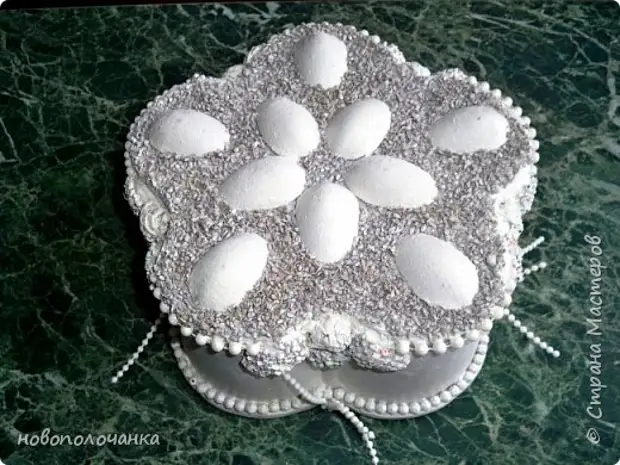
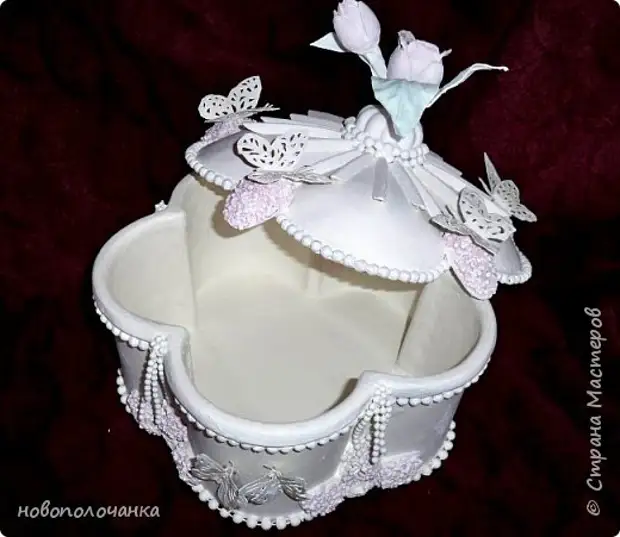
Make this such cover for the box.
38.
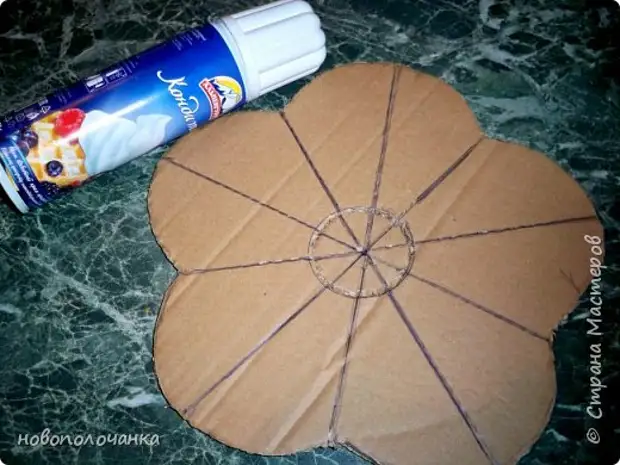
We take a sheet of a thick welder, turn the box of the box, put on the cardboard, outline along the contour, cut out.
39.
On the carved cardboard we find the middle, watched the line (they are needed in the future). We put in the middle of the lid from confectionery cream or any suitable cover, outline and cut the hole.
40.
The size of the circumference of the future cover should be slightly smaller than the top of the casket housing itself. Here you can see how much there should be the difference.
41.
The size of the circumference of the future cover should be slightly smaller than the top of the casket housing itself. Here you can see how much there should be the difference.
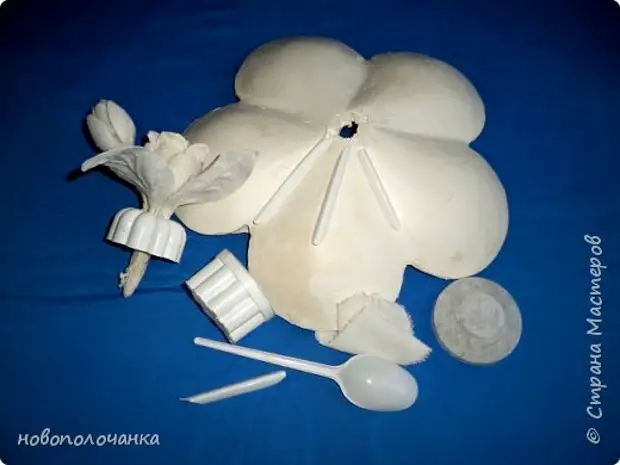
42.
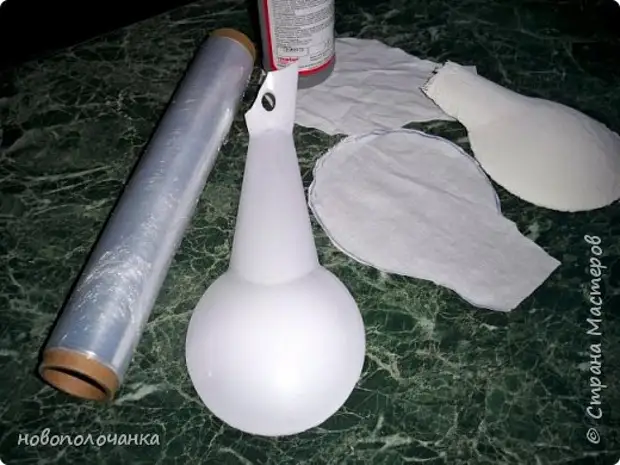
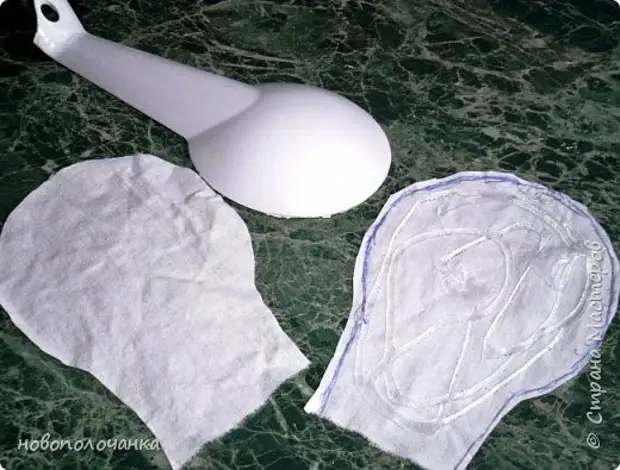
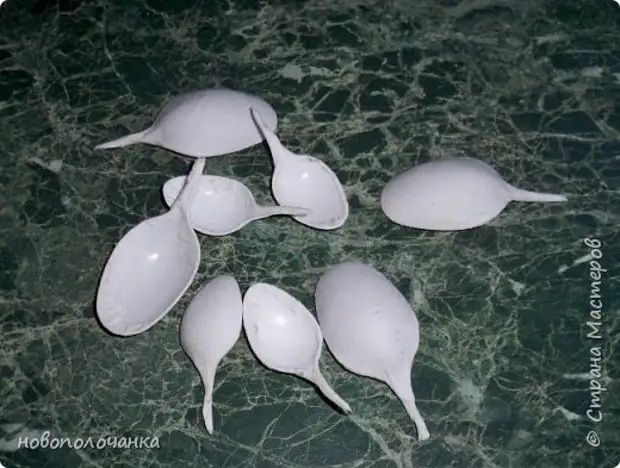
At home there was a broken large plastic spoon, it will be the basis for the papier-mâché of the fabric. Cut from the fabric two forms of spoons. On the tissue form of a spoon, on the one hand, we apply glue titanium, apply the adhesive side to a spoon, stretch, straightening the folds, apply the second melted glue fabric form, west. The food film is shown here, but it is better not to wrench a plastic spoon, it will only interfere.
43.
44.
45.
After drying, we gradually be reducing one edge of the fabric first.
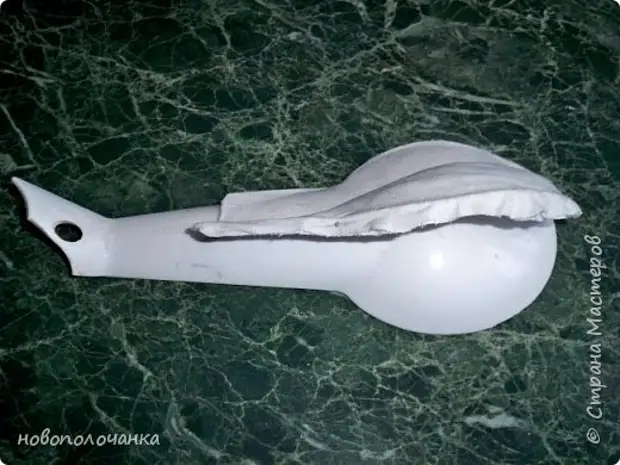
46.
Papier-Masha from the fabric shot from a spoon.
47.
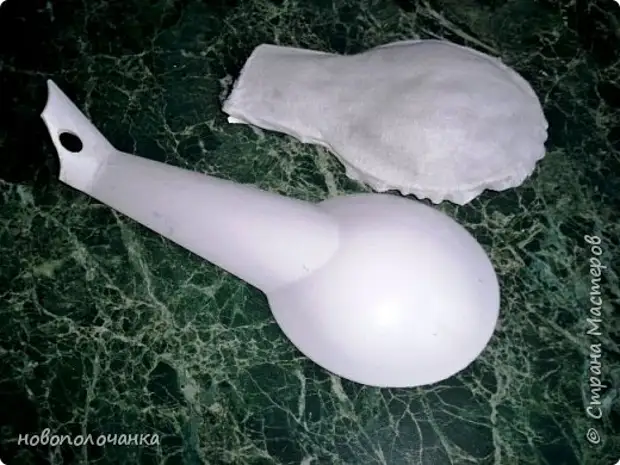
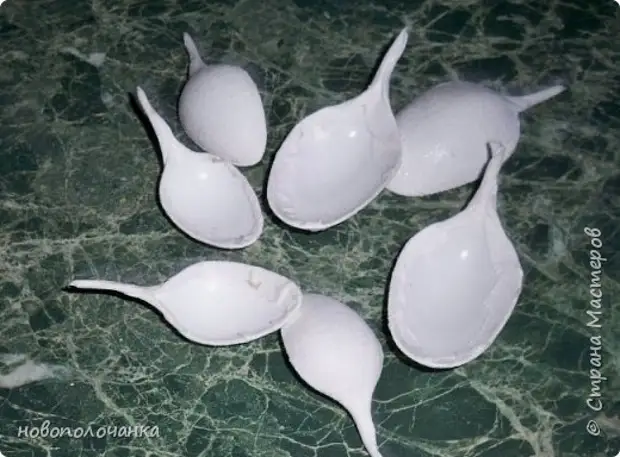
In the inside of the adhesive, there is still no back, we give time for drying.
48.
Furious papier-mashaw dressing on a plastic spoon, crimping the edges inside.
49.
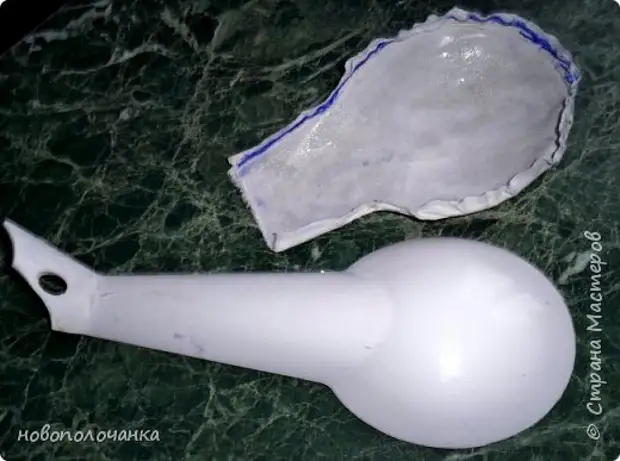
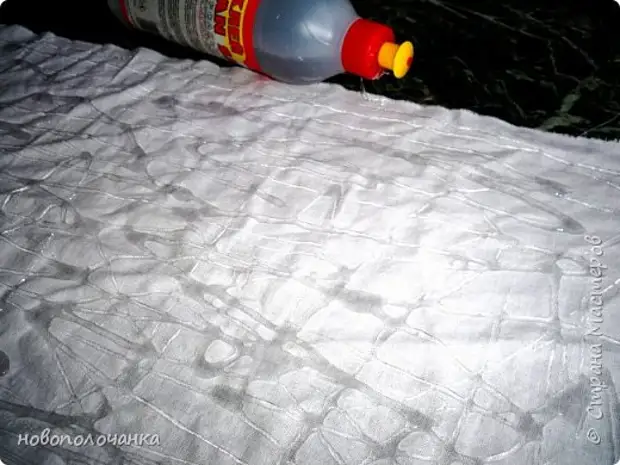
We apply a brush mixture of Plotley + PVA, dry.
fifty.
After drying, skin sandpaper.
51.
52.
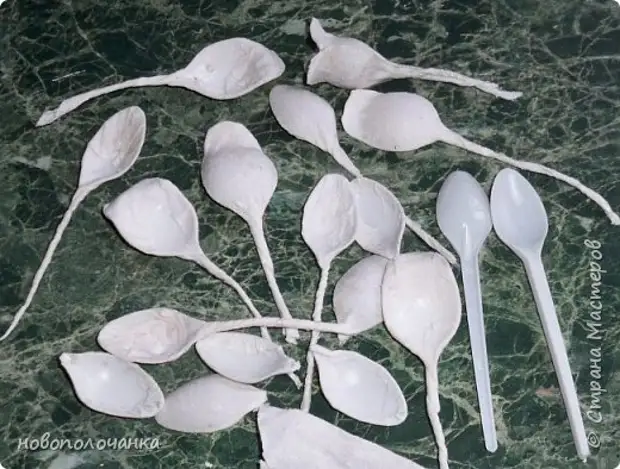
We try.
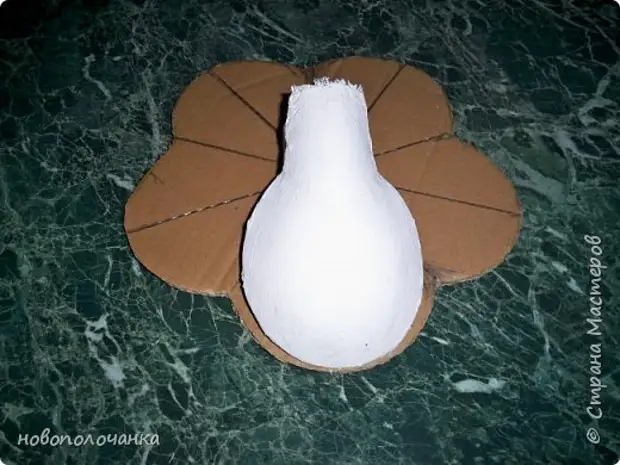
53.
54.
55.
From the resulting spoons begin to make a casket cover.
56.
We try all the spoons and cut off those parts of the spoons that are superimposed on the other.
57.
58.
On the verge of the connection glue, fixing and connecting spoons with a strip of fabric.
59.
60.
So it turns out from the reverse side. We glue the connection places with strips of fabric.
61.
We are trying on 5 spoons, ready-made lid.
62.
63.
On cut from the cans of halves of the bottom glue the cardboard strips.
64.
Cut extra and we will stick to the lid from the inside.
65.
66.
We have a cloth, fixing and strengthening the edges. We wash glue and put the fabric, by crimping well, so that exactly the cloth stuck.
67.
Cut off excess fabric.
68.
69.
So it should turn out.
70.
Spit.
71.
Skurim, covered with dense plow glue, dry.
72.
The reverse side after the shtaplovka, skumpling and impregnation with thick PVA glue.
73.
Such an iron part from the mixer is covered with a cloth.
74.
This is this connecting item, it is between the wall and the mixer body. (I do not know how it is correctly called).
75.
Pour the titanium glue inside and smell the sifted paper crumb on top, (paper eggs are swinging in hot water, crushing, press, westing, on the dried paper crumb, pour thick PVA glue, wipe the crumb and glue between the palms, we put the dry, sift through the palms. colander).
76.
77.
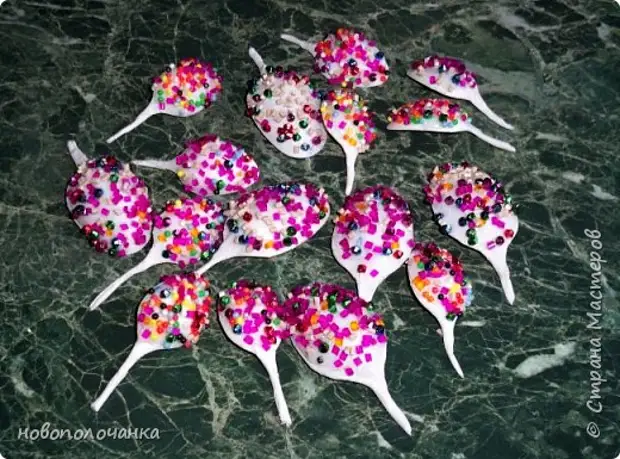
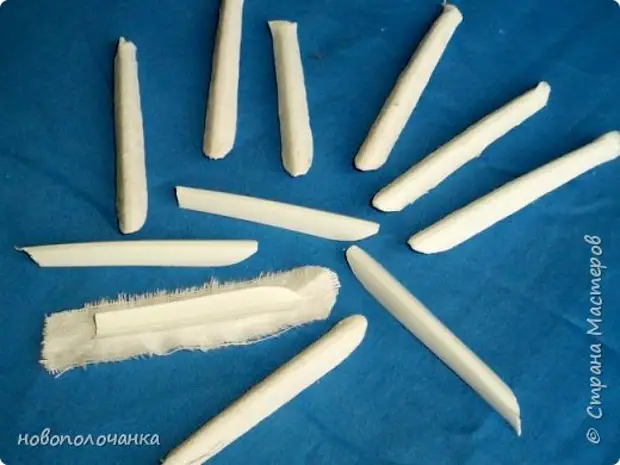
We take plastic disposable canteens, tea, coffee spoons, chop out the handles, get the cloth in the cloth.
78.
We drive the edge of the fabric inside.
79.
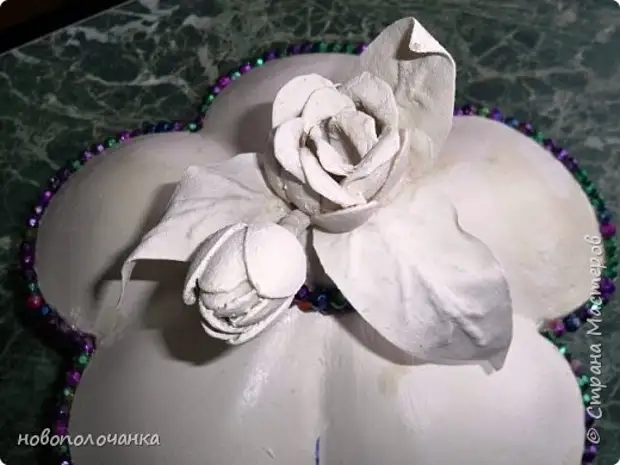
From tea and coffee spoons sailed with a flower and a flower bud. Some spoons of candles are heated before the cloth over the cloth and bent at the top of the "petal".
80.
Flower and bud ready. And do the leaflets like this: from a narrow strip of tissue, tannitis with glue, twist the thin sausage, cut and glue the carcass of the veil veins. Then we apply on the one hand to a piece of fabric (in length equal to the length of the future leaf) glue titanium, put the frame of the veins, cover the tip of the melt glue from above and pressed the palm, draw the gaps between the veins.
81.
82.
83.
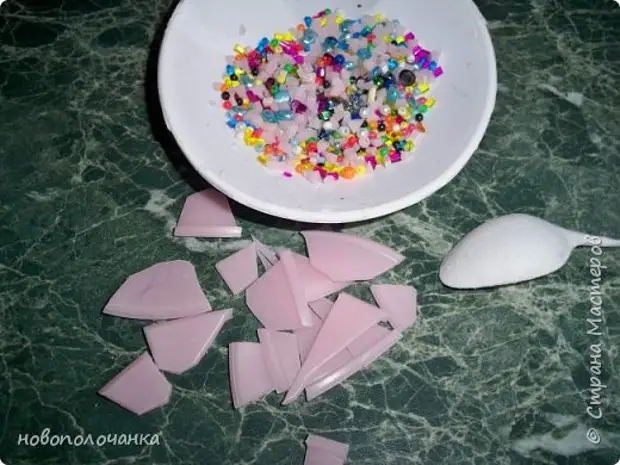
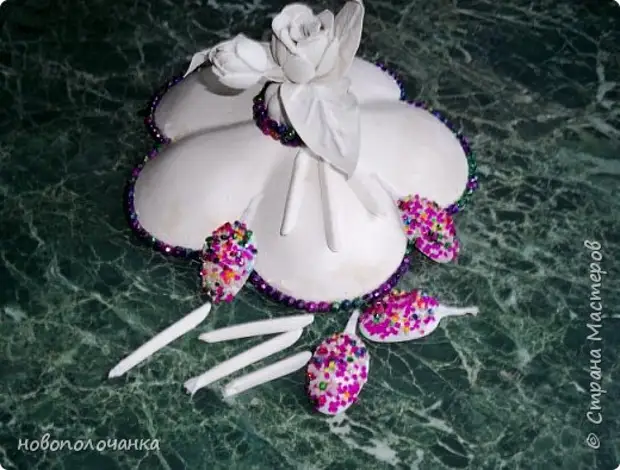
This is the wealth of plastic beads and beads gave me a niece. We ride beads for a double thread, and small beads and beads take on spoons.
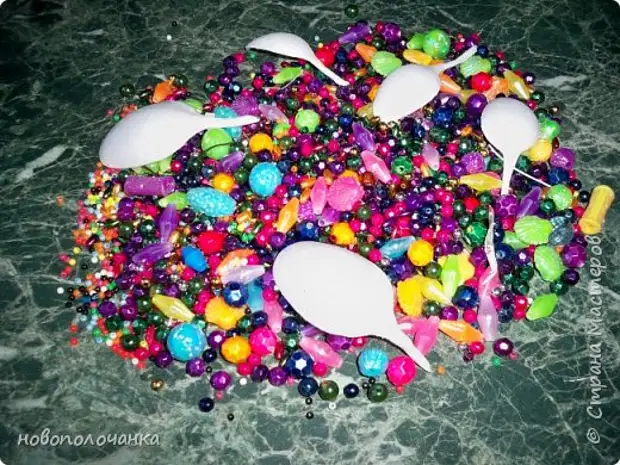
84.
On the edge we glue the thread bus.
85.
We are applied to the beads and small beads with a beads and small beads on top of the fabric and tea spoons.
86.
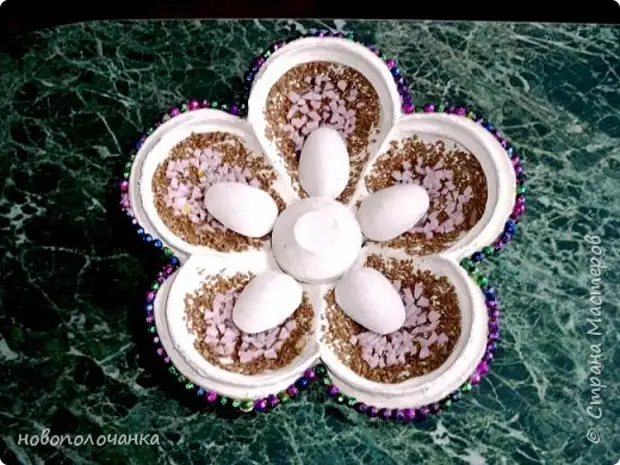
Beads turned out to be a little, we supplement the sliced pieces of soft plastic from the funnel for water (residues from previous works).
87.
This turns out the inside of the lid. Printed five tablespoons.
88.
Top of the lid.
89.
90.
Coffee spoons sticks with cloth.
91.
We glue tablespoons and handles of coffee spoons.
92.
93.
94.
In the lower part, three teaspoons are glued.
95.
96.
97.
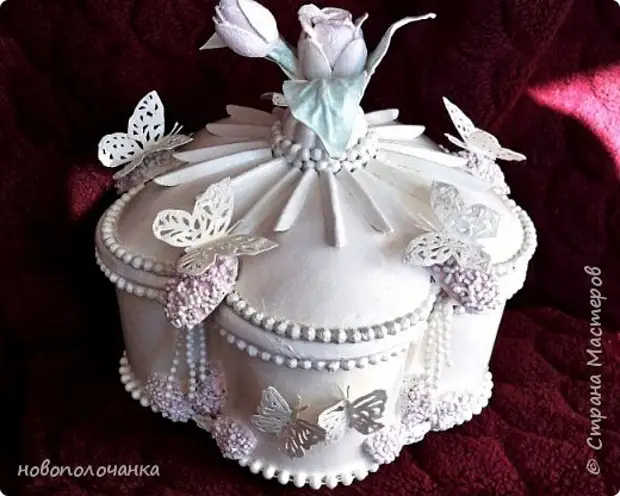
Spray on the cover of white matte paint from the canister.
98.
99.
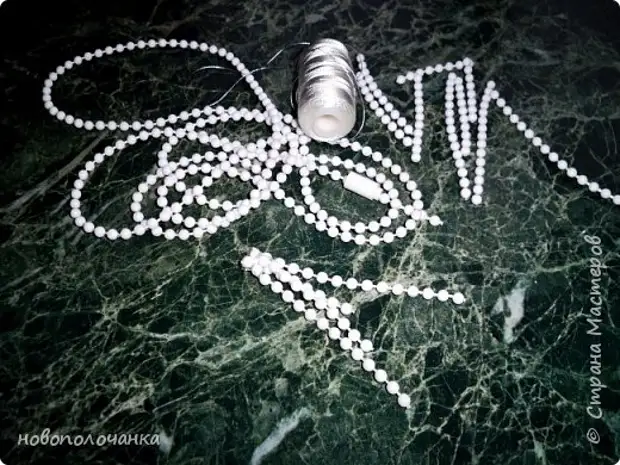
Beads from vertical plastic blinds. (They thrown out, and I cut off beads from them - useful for crafts). Cut different lengths, link in a bundle.
100.
Printe.
101.
Plug Titan glue on the newspaper, squeeze into a lump and fill the inner part of the tablespoons with a cloth with a cloth. It is necessary for the spoon well and tightly glued to the bottom of the box.

102.
The legs of the bottom of the spoons are glued and into the space between the spoons is glued to the glue paper baby. After drying, everything painted with white matte paint from the canister.
103.
We take the cloth, we are applied with titanium glue, distribute a smooth layer over the entire surface, bend in half twice, aligning, so that the surface was smooth, dry. After drying, stroke through the extra fabric hot iron. We have a very dense and elastic tissue surface for cutting.
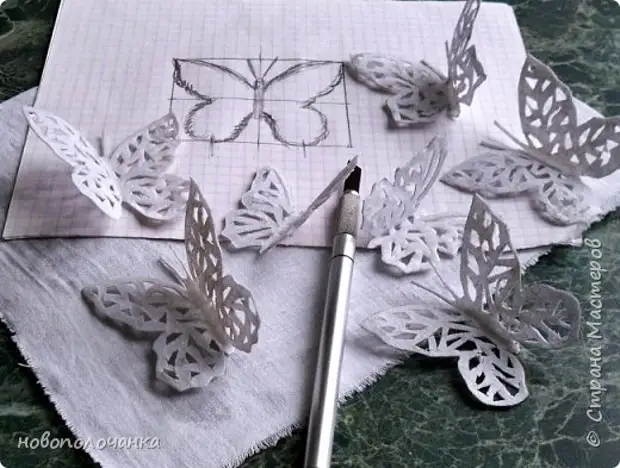
104.
We draw a butterfly, cut out the drawing of the stencil of the butterfly. On the fabric that we have prepared, we cut seven butterflies through the stencil. On the carved butterflies we apply a tastech of Plotley + PVA, dry.
105.
We glue butterflies
106.
107.
108.
109.
110.
111.
112.
Share - (Novopolochka) Tamara Nikolaevna.
A source