
Master class: Aged Metal Foil
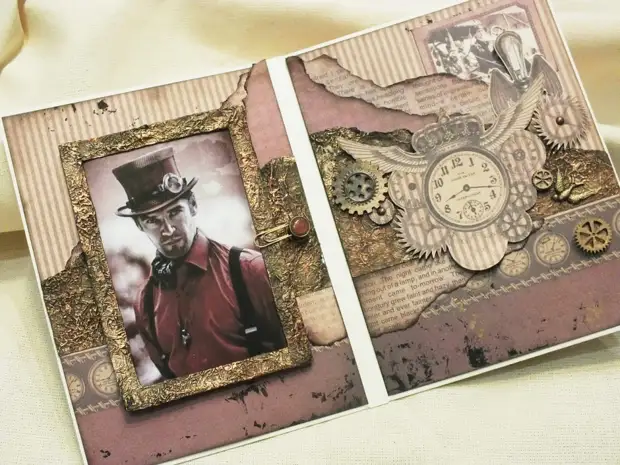
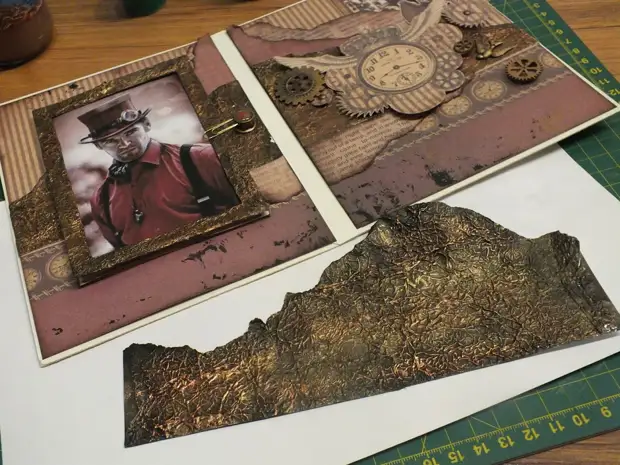
The other day I showed a reversal in the male photo album using foil decorated under metal. In this master class I will tell you how I did it.
So, that's what we will seek - foil in the decoration of pages:
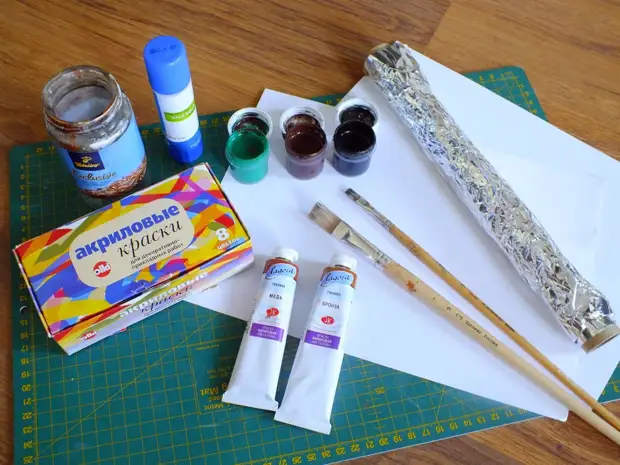
We will need:
1. Acrylic paints, colors: copper (metallic), bronze (metallic), black, brown, green (brown and green are needed to give a shade, but, theoretically, it is possible without them) - in search we go to the artistic store.
2. Hard brushes, can be alone - you can find again in the art store
3. Food Foil - We go to look into the kitchen.
4. Pencil glue, the most common - in any office.
5. A pair of office paper leaves (printer paper) - Tyrim at work, if you work in the office /
6. Water tank (jar) - we find in your bins.
7. Hair dryer to accelerate the drying process (better than a hairdryer for Embosing, but I do not have this - the usual household hair dryer is also great).
8. Scissors - Well, everyone has it.
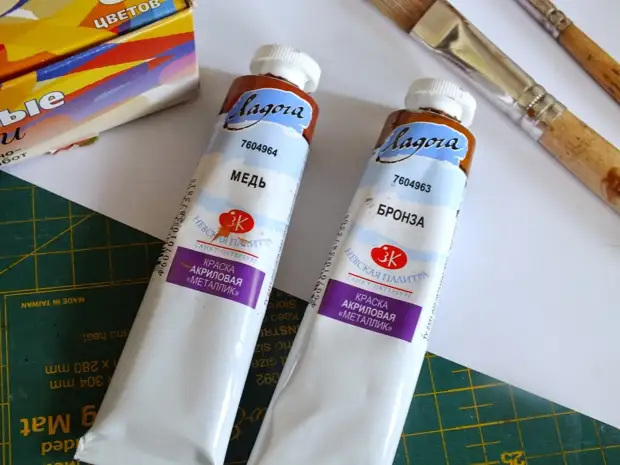
What paints I used:
1. Acrylic paints Metallic Ladoga "Nevskaya Palette", Colors Copper and Bronze2. Acrylic paints, set for decorative and applied works "OLCI", green, brown, black - it would be better to replace it with good artistic acrylic paints, from the same lady.
Let's proceed.
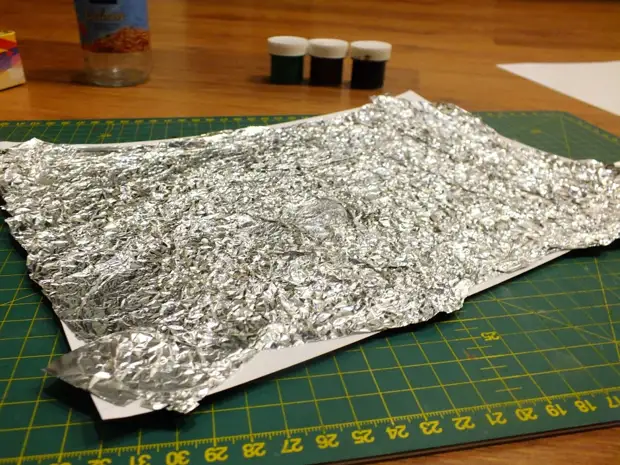
Step 1. Cooking Foil. Cut off a piece of somewhat more landscape sheet with it. Cut off? And now I suffer into a nonestly tight lump. We are folded back, but not smooth.
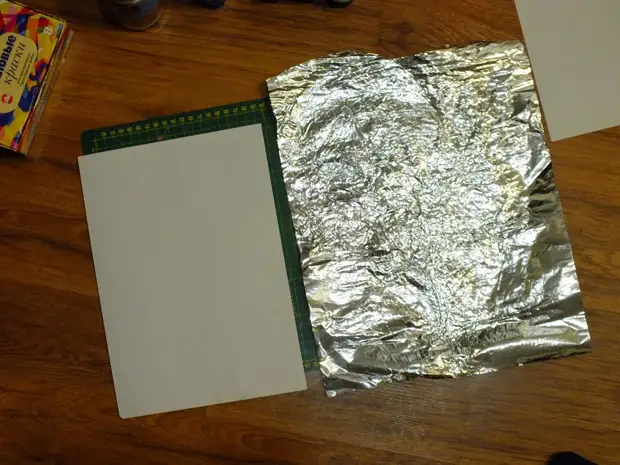
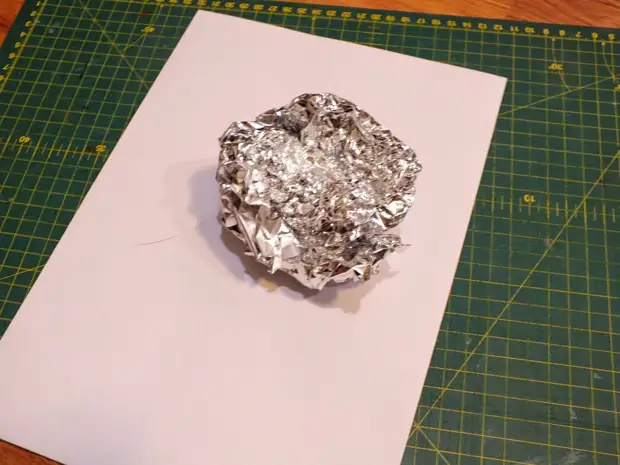
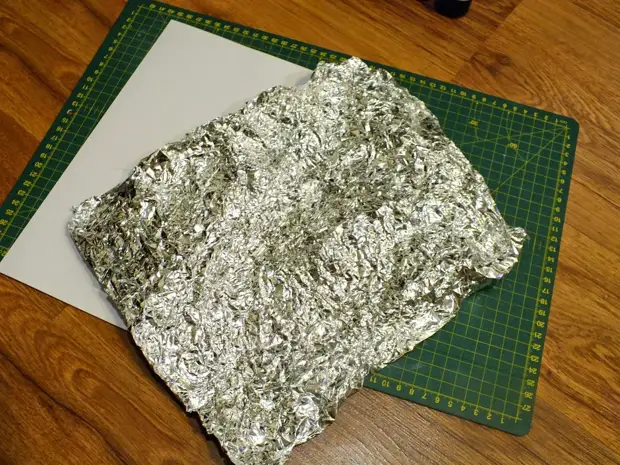
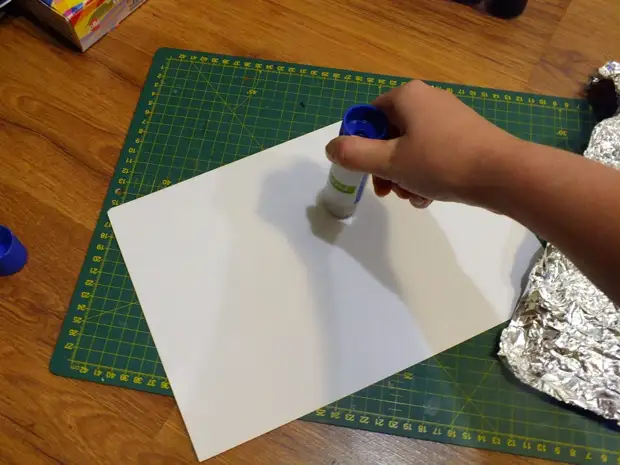
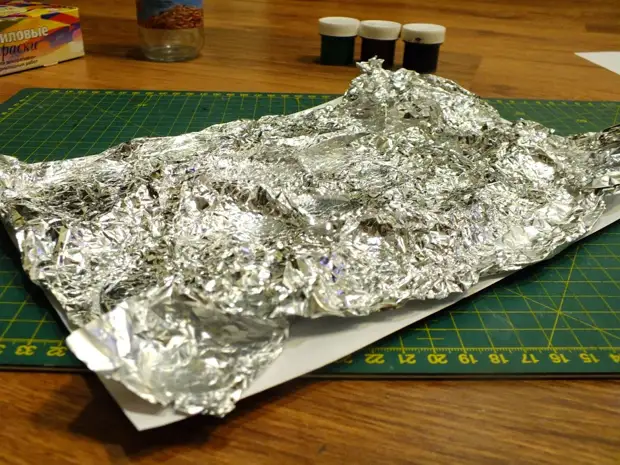
Step 2. Foil glue. We take a sheet A4, and fully scrub it with a pencil with a pencil (possibly PVA). Majes good! Now we apply our foil from above. At the same time, try to fit our larger foil sheet to a smaller sheet of paper, the folds can be obtained here - it should be! This will give the texture to individual sections of our metal sheet. Then hand adjusted all these folds, aligning the sheet.
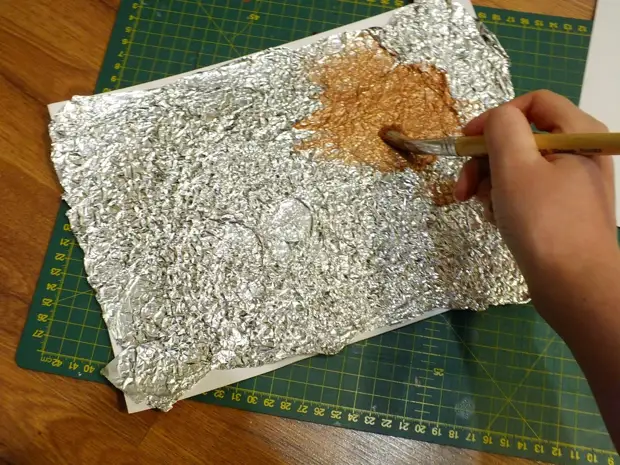
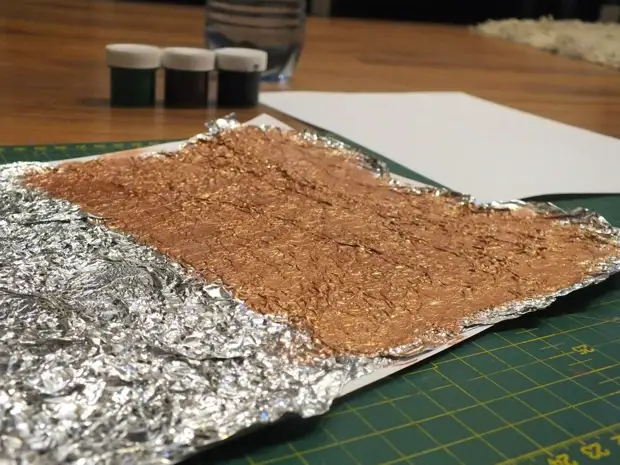
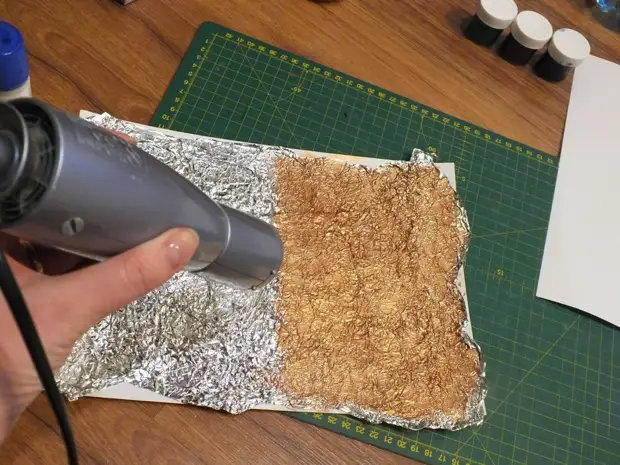
Step 3. Primer. This step, most likely, can be skipped with those who have all the acrylic helmets of good quality (i.e., a dense homogeneous layer is covered with the surface), and not as I have - half of some kind of children, more similar to the gouache ... In my case, if you do not do the primer layer, then the second layer, which we will be stopped, it turns out to be transparent and seen the silver color of the foil - and we do not need it!
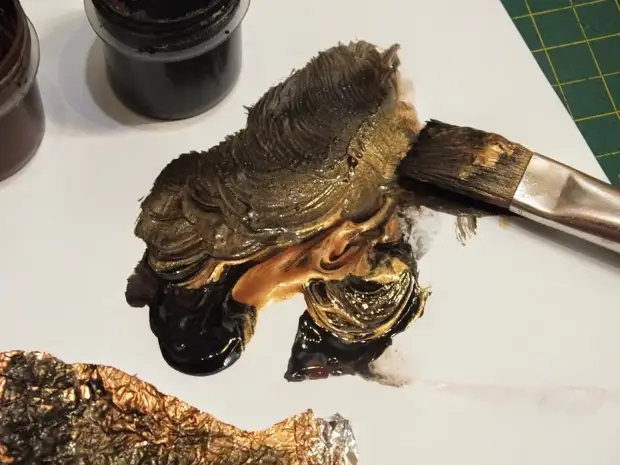
So, out of the tube right on the foil squeeze the bronze paint. With the help of a rigid brush, we paint the surface, carefully "pushing" the brush all folds and sherbinki. I fucked only half of the sheet, at the moment I am enough for me. Choose the size of the brush yourself. For large surfaces, it is better to use a brush wider. And since acrylic paint dries quickly, then the brush we immediately immerse in a jar with water so that it does not get a stake. Scratched? Now we are dry. Or a natural way, we are waiting for the paint dry, or accelerate the process and the drying hairdryer.
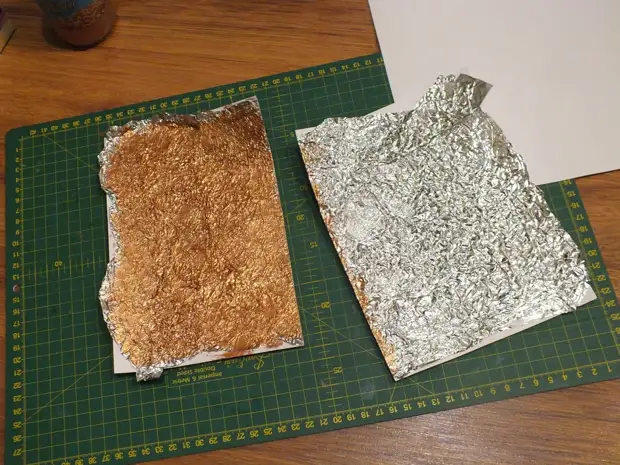
Step 4. We select a form. Here you want you like. You can use the whole sheet, and as I, tear off pieces and create "torn iron". Cut with scissors with a painted part of the sheet. I do not recommend using the stationery knife and its analogues - the foil will be inaccurate and crawled from a paper sheet. Further, we tear it off the piece you need, giving it a form. Talked? Tried where did you want? Suitable? Go ahead :)
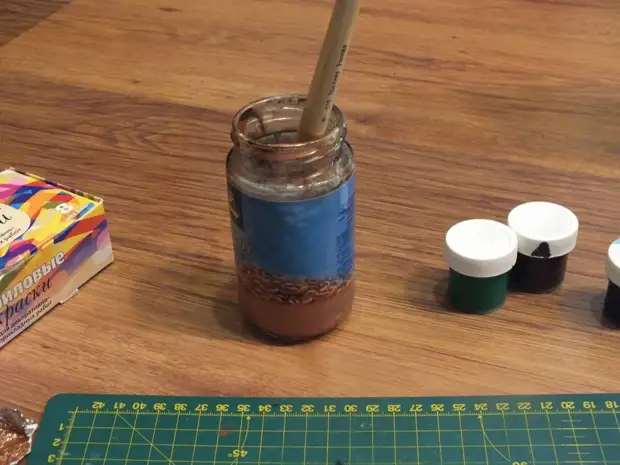
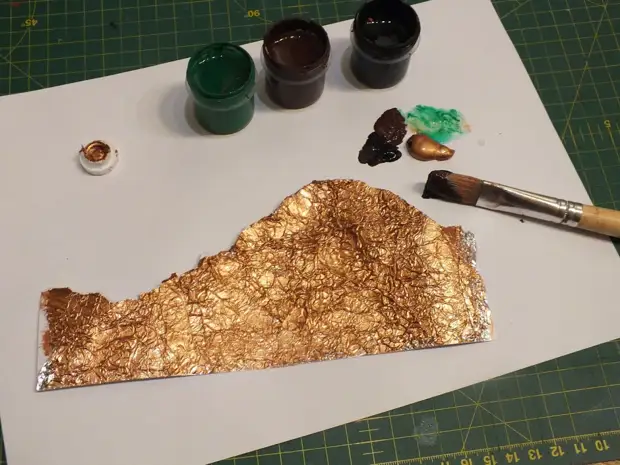
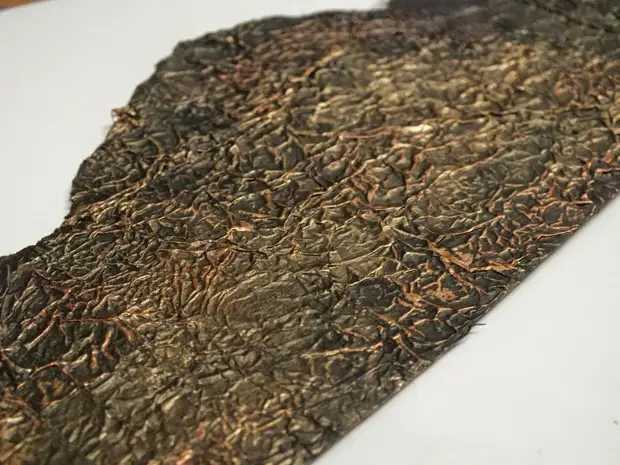
Step 5. Staining. Now we prepare paints: bronze, black, green, brown. We will pack foil and cut the dirty. We lay out the prepared broken piece on a blank sheet of office paper. Take the same hard brush. Previously, we left her in the jar, remember? We pull out, press well. Immediately, we post a little paint of all colors, stirring them with each other. But not all in a bunch! And as if adding one to another. It is difficult to explain, it is better not to look at the photo. We should have a palette with different shades - lighter and darker.
Getting staining. In the center, I lay out brighter shades, with the edges - darker, adding more black pigment. As a result, get a swamp color dirty)) In general, the shade depends on what kind of paints you use and in what proportions. And besides again.
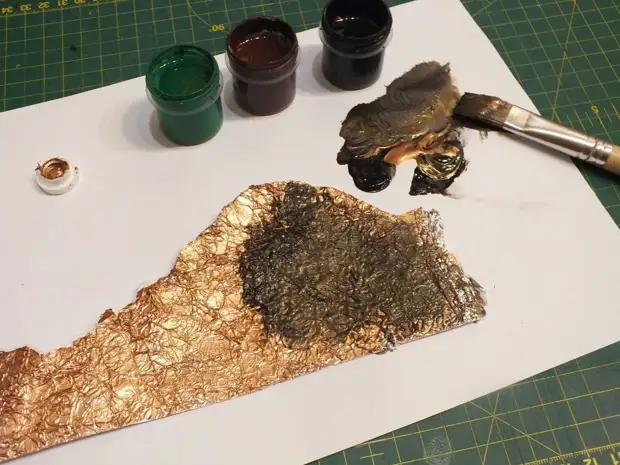
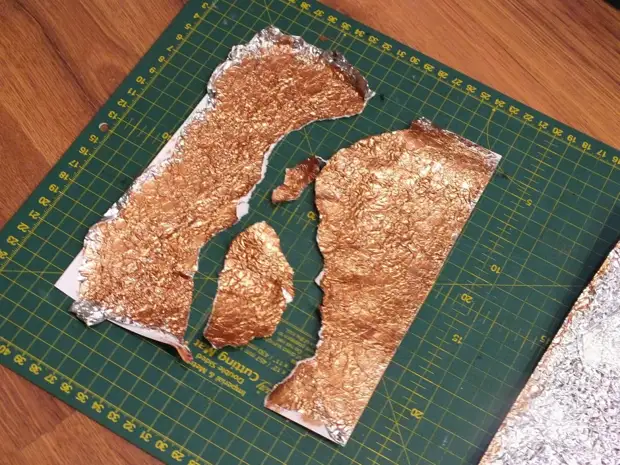
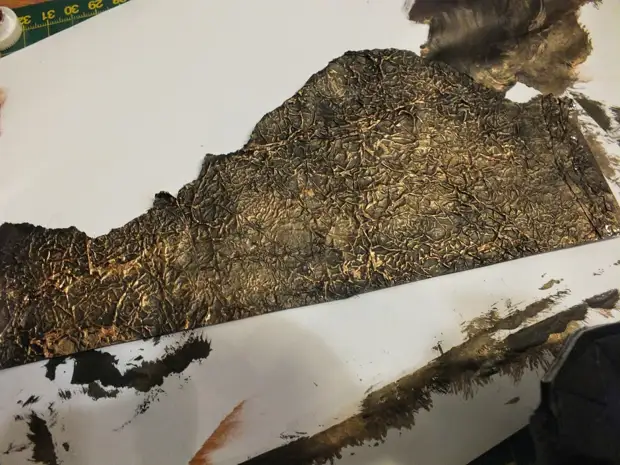
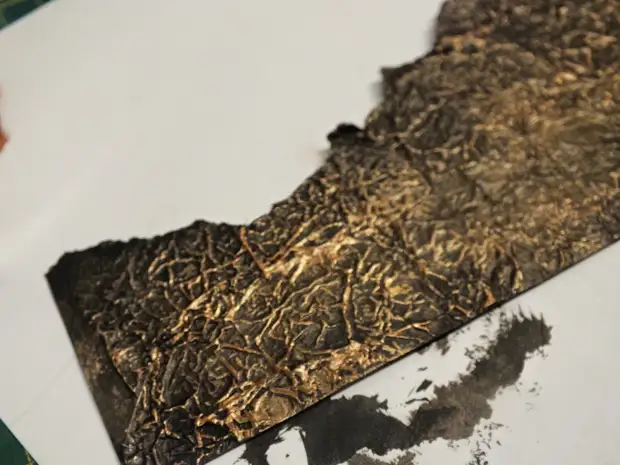
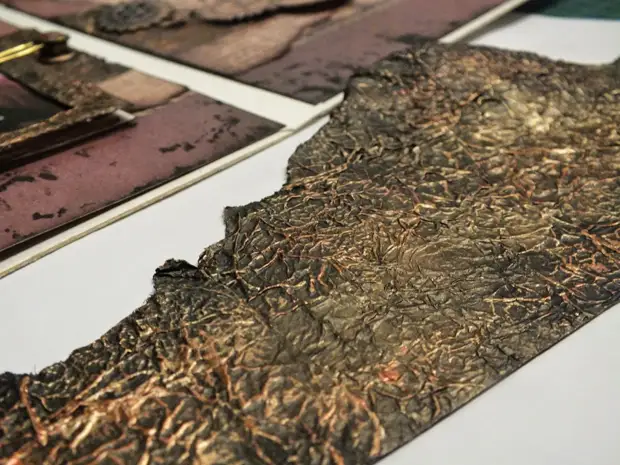
That's what you should succeed at this stage. There is no bright glitter, it looks like an old piece of oxidized metal.
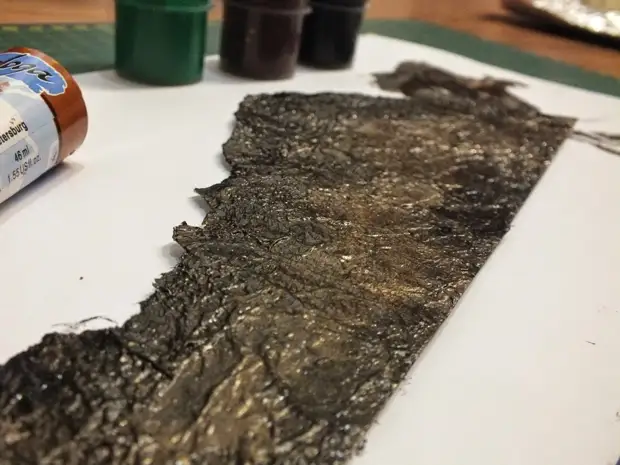
With a different fall of the light, our billet looks differently. Here is an example.
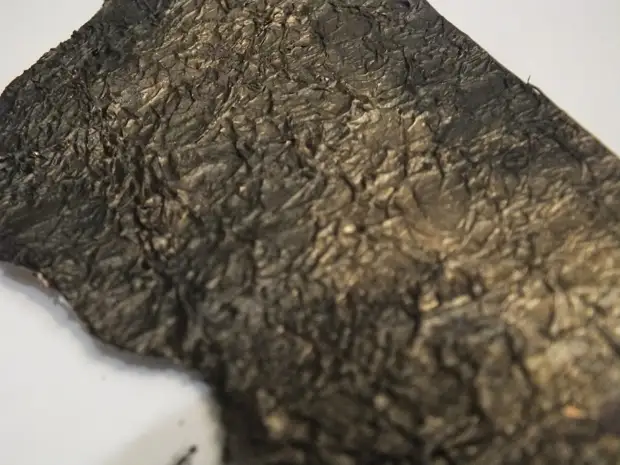
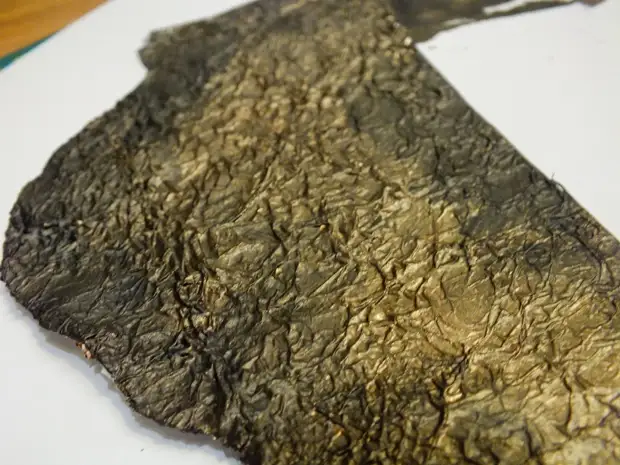
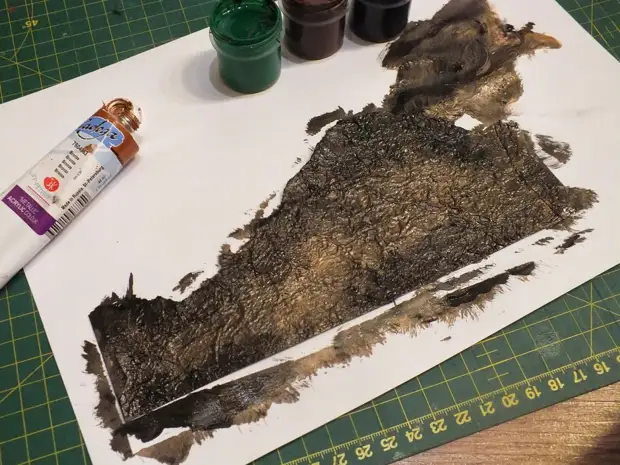
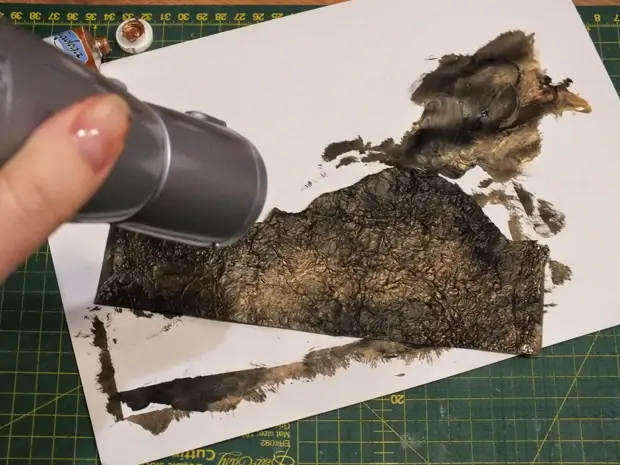
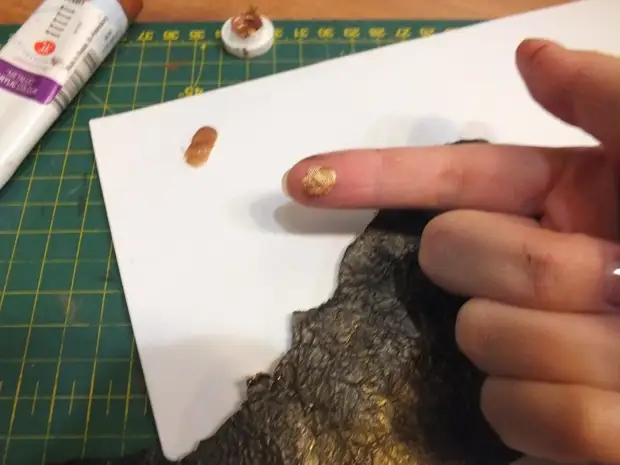
Step 6. Relief. Before this step, try to dry well. Now we cook our fingers)) You can squeeze a small amount of bronze paint on a piece of paper on which we work, and on a slightly type to the pillow. And it is possible to squeeze on a drop on the tube on the droplet. Paints need quite a bit. Gently on the surface spend a finger with paint. In this case, all the convexities are painted, and the inquosity remain dark. And so throughout our workpiece, toning the whole relief. See how our piece of metal is transformed right away?
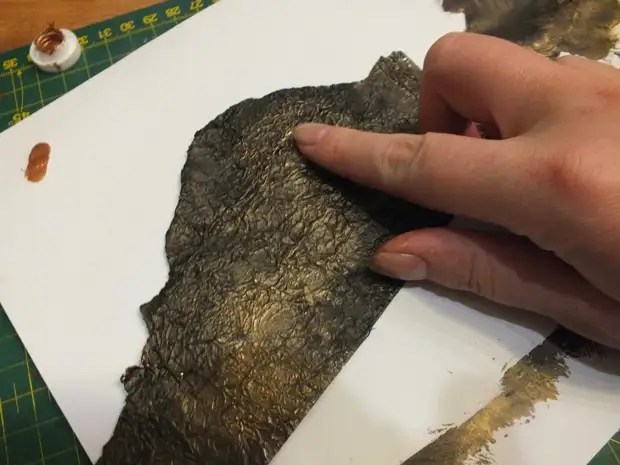
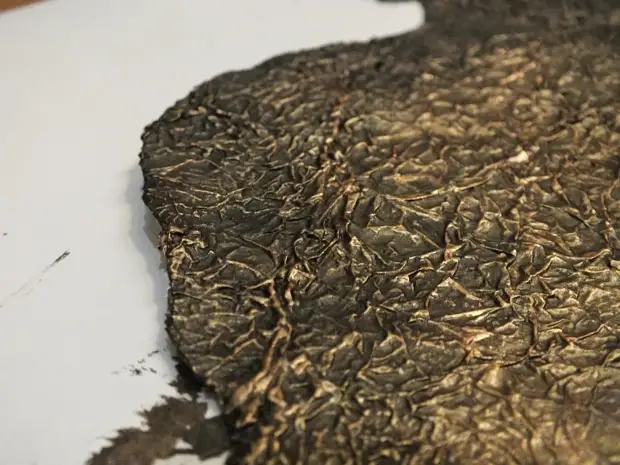
Here you can leave it. But I add copper color from above in the same way (it has a reddish tint), but not everywhere, but only in places.
Step 7. We admire! Everything is ready, now you can use our metal in your work!
All about everything goes no more than 20-30 minutes. Well, provided that the dry hairdryer /
A source