

Today I want to present to your attention a master class dedicated to the manufacture of a device, which, in my opinion, makes a more convenient embroidery process with beads. It will take no more than 20 minutes to make it, and we will use used, penny things:
- disposable plastic tablespoons,
- The substrate in which the food is packaged in stores.
And let's make a thin sequel, which we need in work.
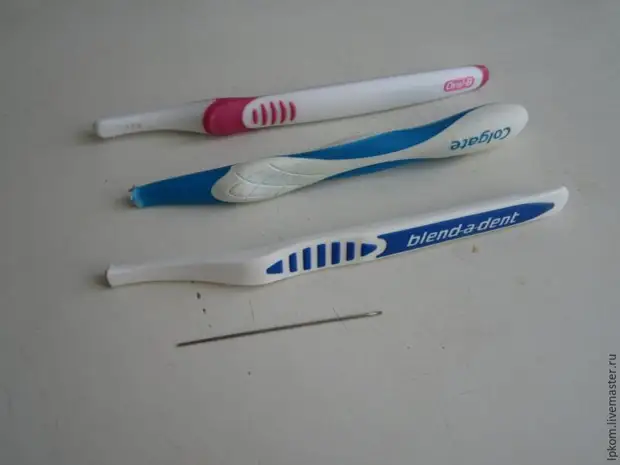
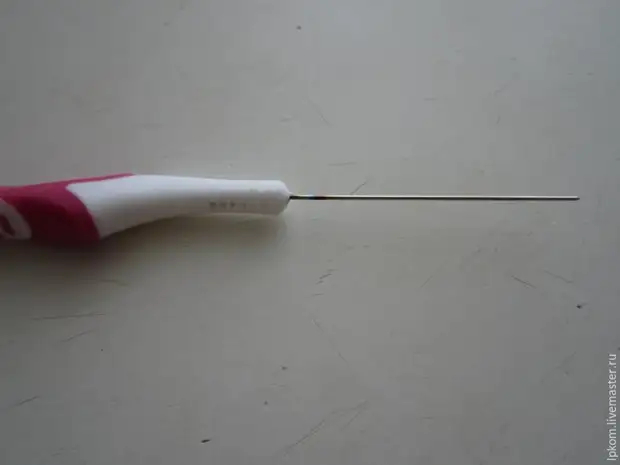
We will use a toothbrush that served your time, which 3 months cleaned your teeth. It is not advised to use dentists longer. We will need a very good handle of a comfortable form, which has an emphasis and non-rolling from the table. Sculpt its top with a bristle. We do not need it.
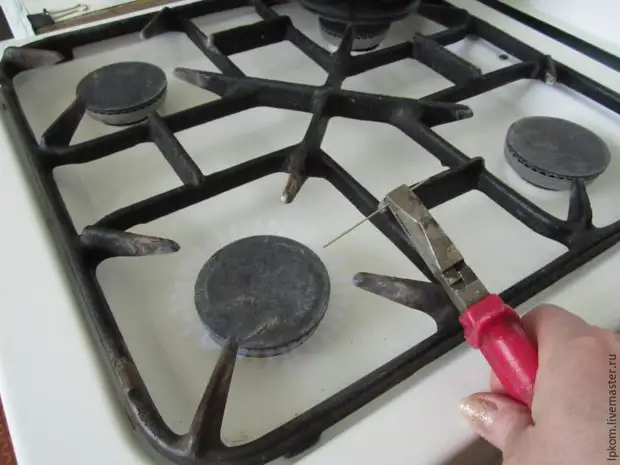
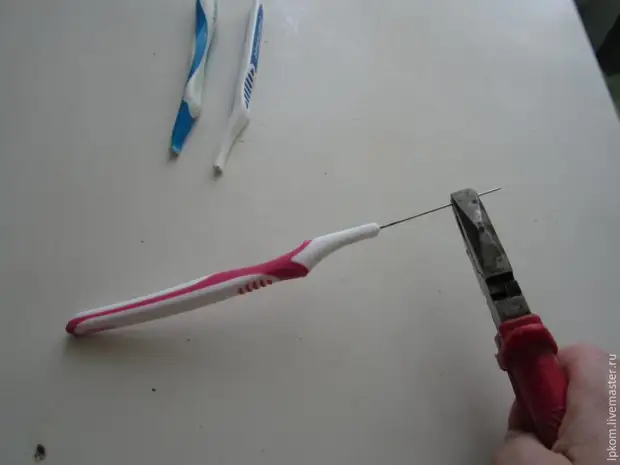
On the burning burner, closing the pliers a sewing needle, warm up the tip of the needle and press it into our handle.
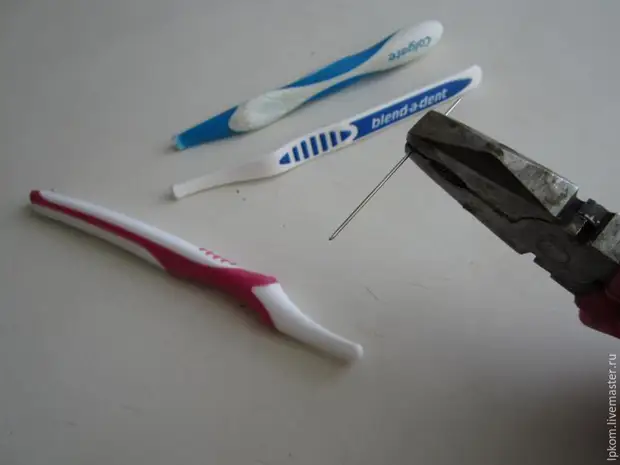
By the way, if you use a machine needle, you will get a tool of a shoemaker for manual seams.
The knob from the toothbrush melts in the place of the puncture and will reliably keep the needle!
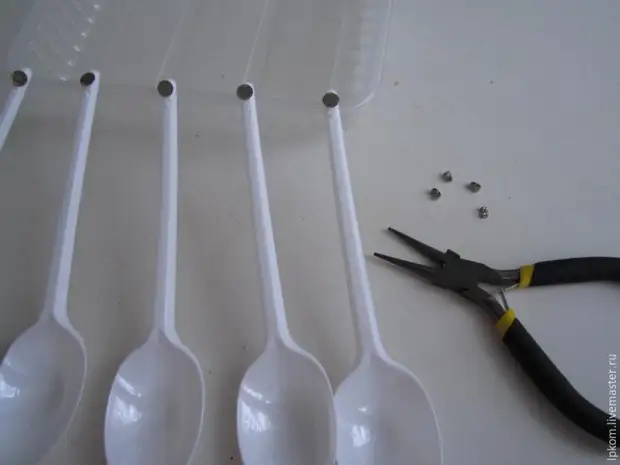
We place on one side of the substrate point of the oiled seer. I have a distance between them 3.5 cm.
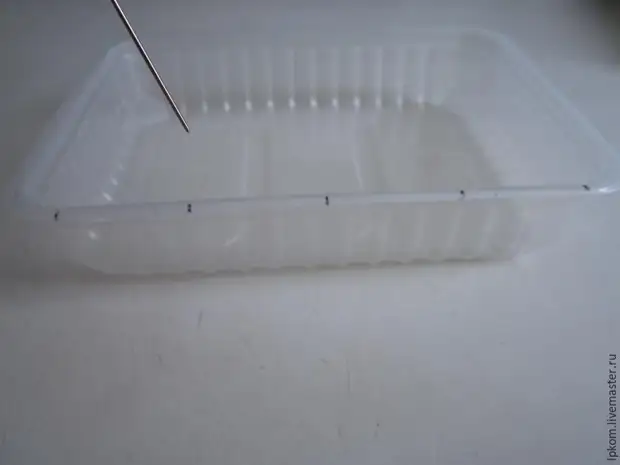
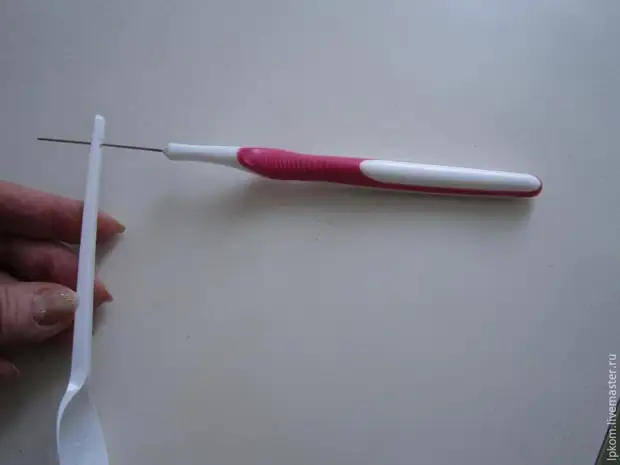
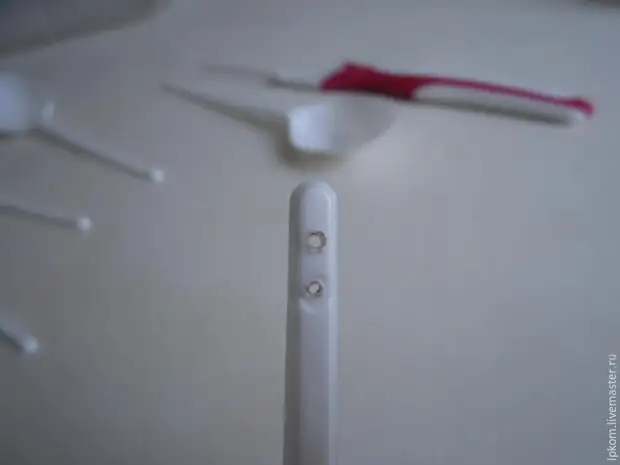
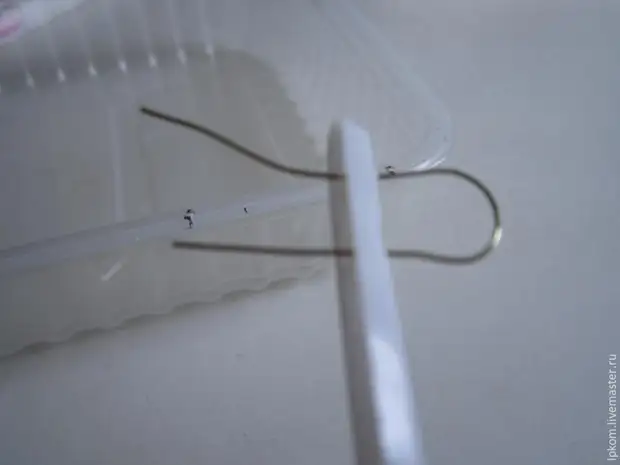
Heat on the heat of our own hand-made thinted sequel and pierce the holes in the sidewall of the substrate and plastic spoons.
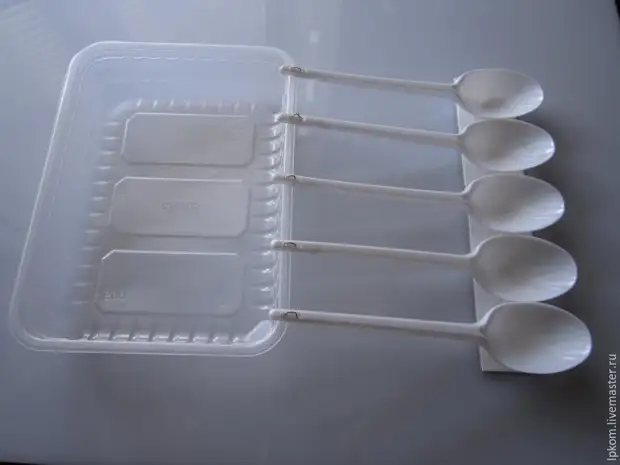
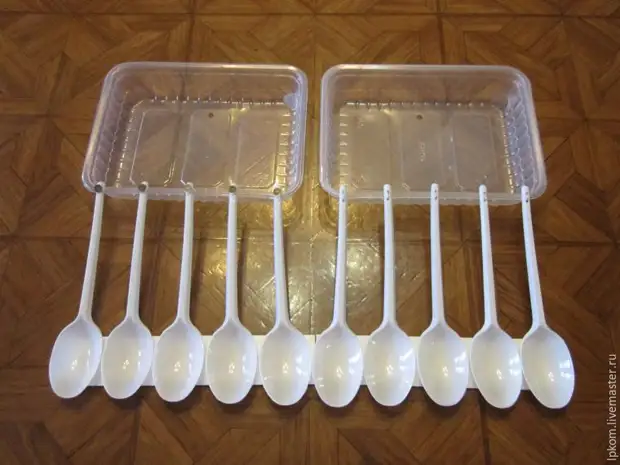
Cut the small pieces of wire and connect with them spoons and the sidewall of the substrate.
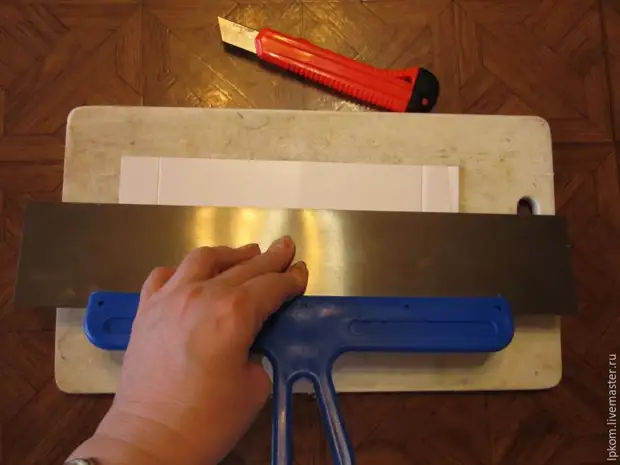
Withdraw the cardboard strip of approximately 3.5 cm in size by 20 cm.
I use a spatula with a plate made of stainless steel and a plastic handle for accurate cutting. In contrast to the metal line, he very accurately holds a line, which stands, not moving.
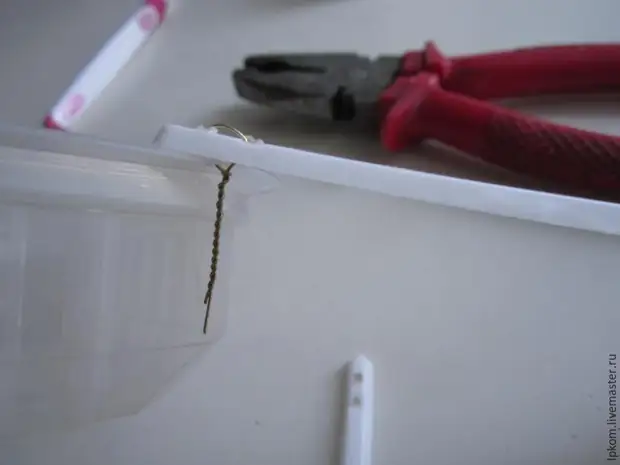
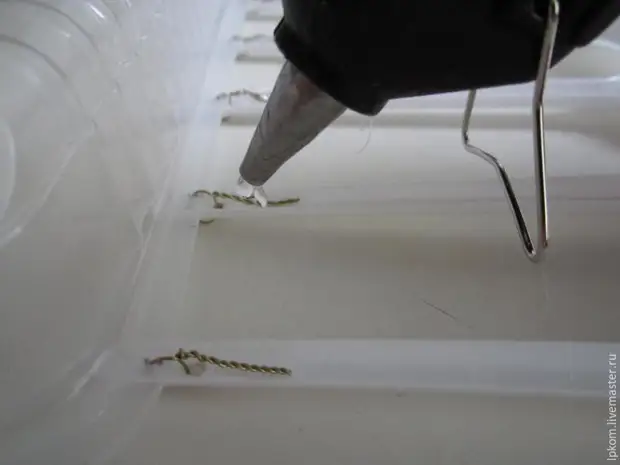
Heat the adhesive gun and pour glue twisted wire tips in spoons.

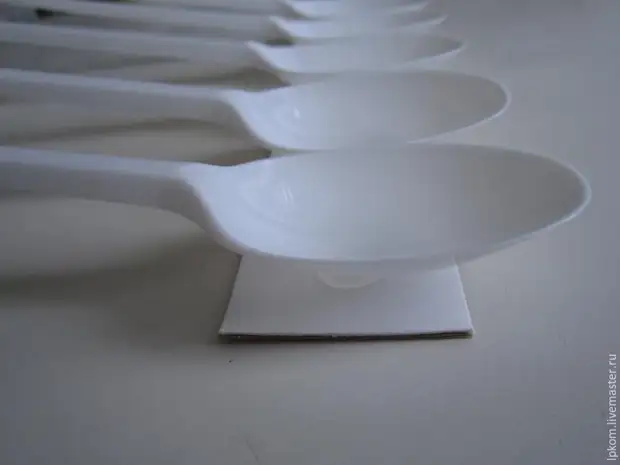
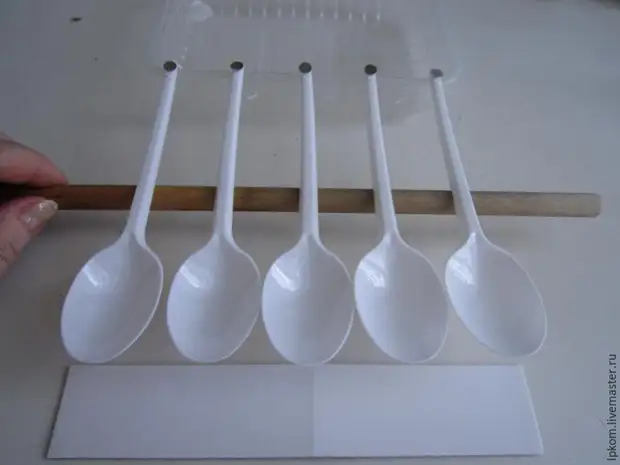
We make the glue path on the sliced strip of cardboard and, supporting the spoons with a stick, aim and precisely lower the spoon on the glue path.

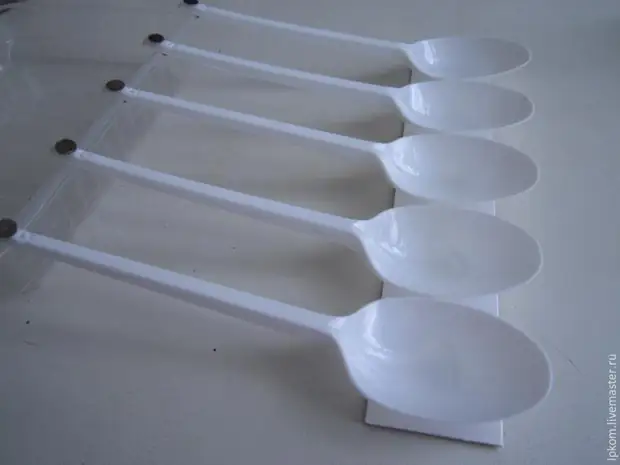
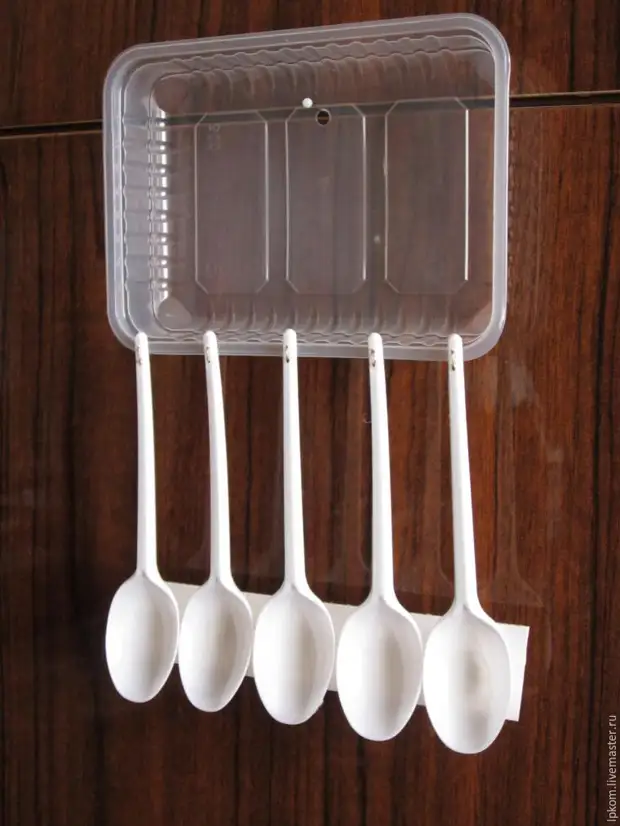
Our fixture is ready! If you make a hole on the bottom of the substrate, it can be kept in a suspended state, on the carnation.
Pour in spoon the desired bead colors and start embroider!
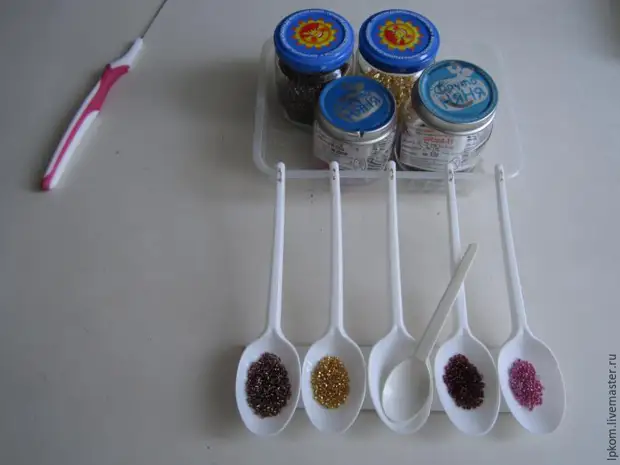
Try in work this is a simple, compact, convenient and comfortable device, when you embroider with beads of different colors and I hope you enjoy it. Just like me.

Share - Love Comissarov.
A source