
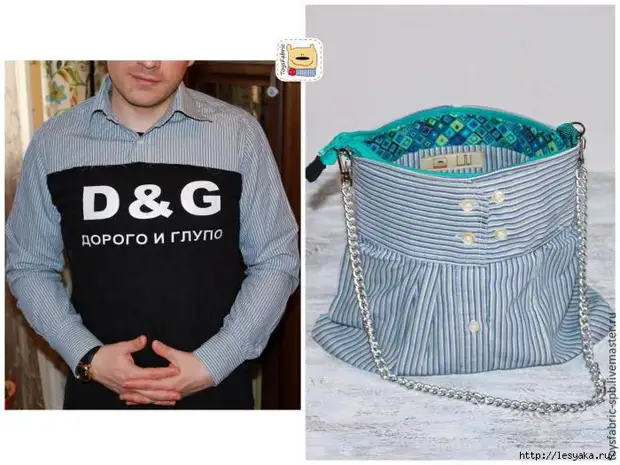
It turns out that you can sew a bag from anything, even from sleeves of an unnecessary shirt or sweatshirts.
Required materials and consumption will depend on the size of the shirt and bags that you want to sew.
In my case, the size shirt M and the finished bag 23x25cm.
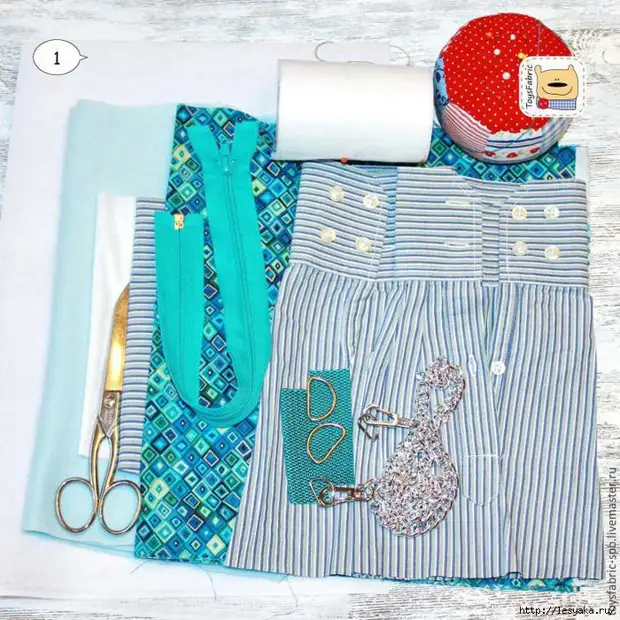
To work, we will need:
Materials:
- shirt sleeves (facial and auto side must be identical);
- material for lining;
- Fliselin;
- Hard Dublerin;
- web glue;
- fleece;
- lightning;
- pieces of belt tape;
- two semirings;
- handle for bags (clutch);
Instruments:
- Two hands having a sewing skill;
- Scissors / Knife for Patchwork;
- Sewing machine / needle.
Master class on the alteration of shirt in the bag:
We start with cutting sleeves.
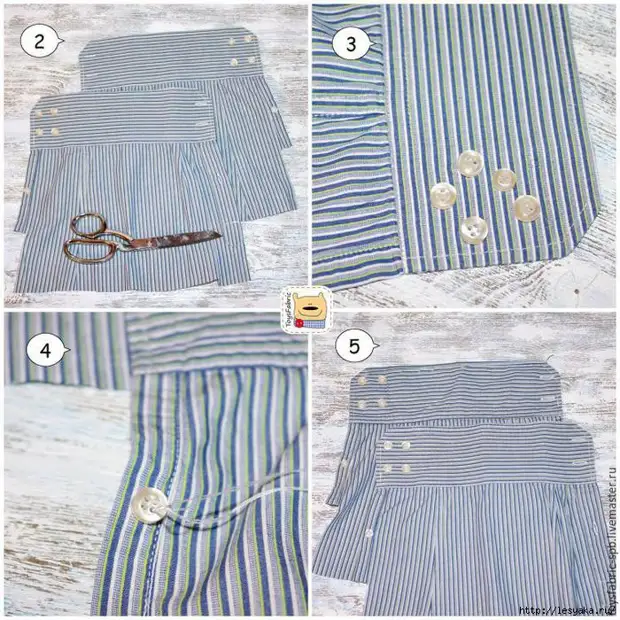
2. Cutting should be made so that you have 2 parts, as much as possible rectangle.
3. From one of the details it is necessary to repeal all existing buttons.
4. And sew them in the same places from the wrong side.
5. As a result of all manipulations, we should get 2 right sleeves.
Assembling the front of the bag (step 1)

6. Waste the sleeves with each other, so that it turns out a one-piece canvas.
7. We make a small nozzle under the clasp and sweep it inside.
8. We flash along factory seams to get a whole cloth.
Assembling the front of the bag (step 2)

9. We proceed the same manipulations with the second party.
10. Soak on the wrong one and align the lower cut (I slightly rounded the corners).
11. We flash bottom.
12. Put the resulting Detail of the bag to the side.
We measure the dimensions of the front of the bag
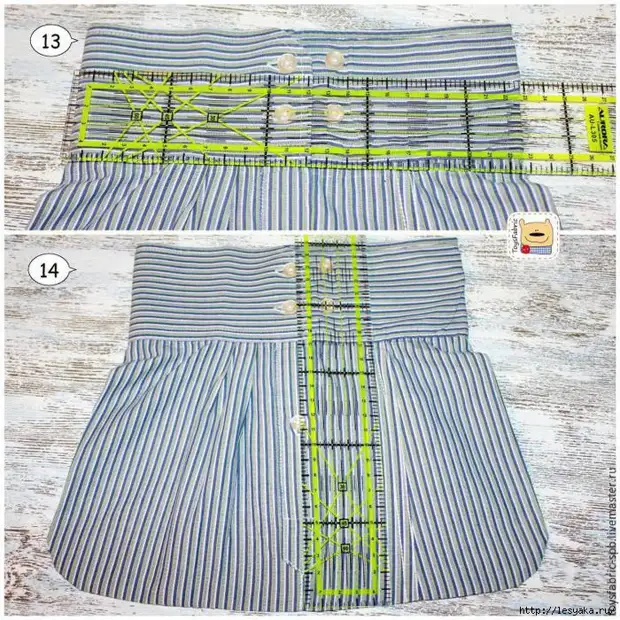
13. 14. In the most narrow places.
Strip the details of lining and pockets
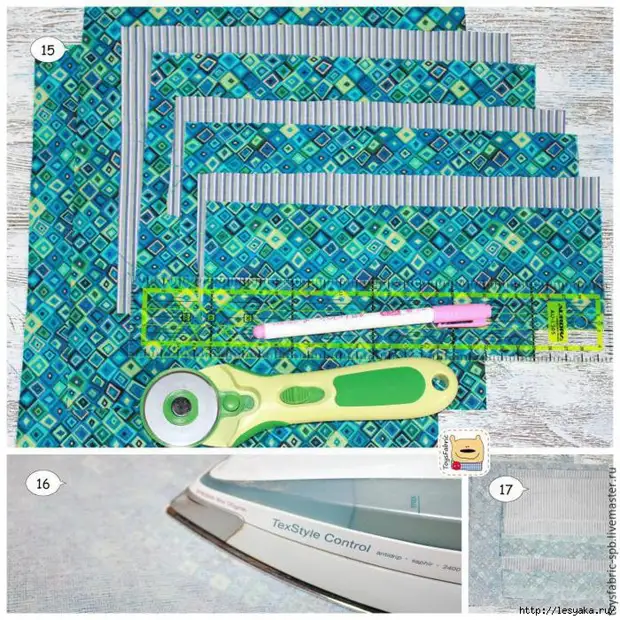
15. Dimensions of parts:
- 25x27cm x 2 parts (diamonds);
- 17x27cm x 2 details (rhombus + shirt);
- 8x27cm x 4 parts (diamonds + shirt);
16. We sample the main details (25x27cm) hard dublerin (I have Korean tissue dublerin 135 g / m);
17. Details of the pockets are sampled by phlizelin (I use 42 g / m).
Production of pocket
Similarly, the pocket in the bag-lobster (I will not repeat in detail here) stitch your pocket details in order to obtain 3 rectangles as a result: wide and two narrow.
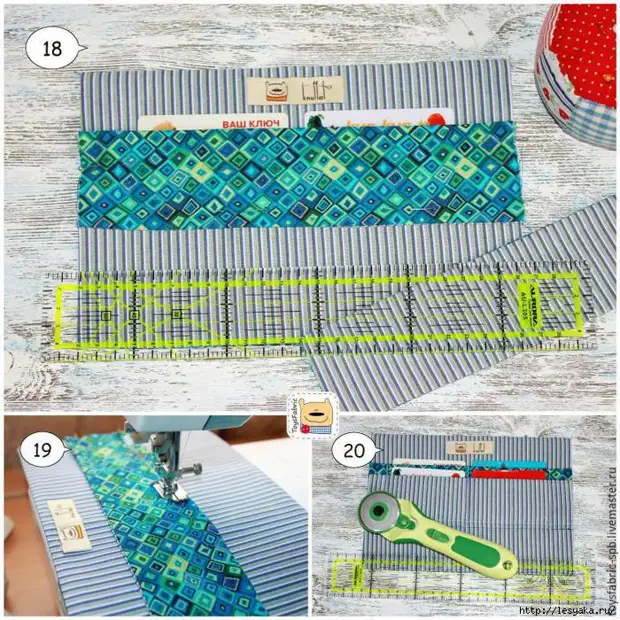
18. On a wide part of the pocket, we apply a narrow part, trying on the depth with the help of cards.
19. We laugh at the bottom border of a narrow detail.
20. We repeat this procedure for the second narrow part and except for the seam at the bottom border, we make vertical seams in terms of cards. As a result, there should be 4 compartments for cards.
Sew zipper to lining
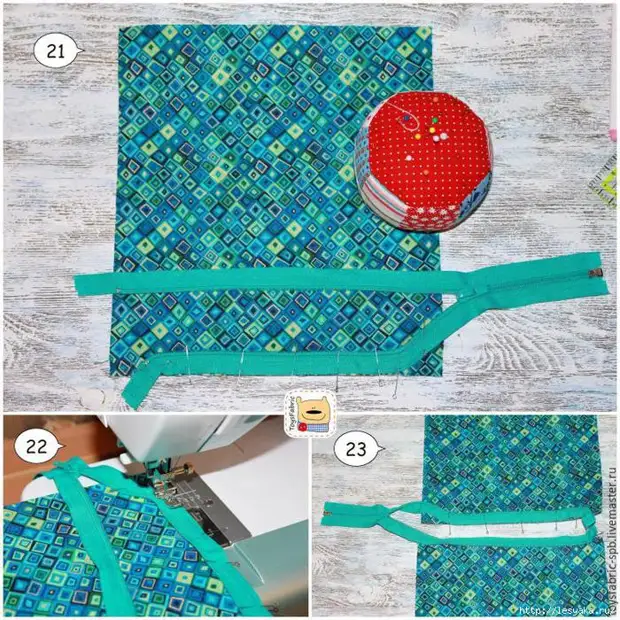
21. We assign one part of the zipper to the front of the lining.
22. It is convenient to use a special foot for sewing lightning.
23. Make the same for the second part of the lining.
Seer pocket
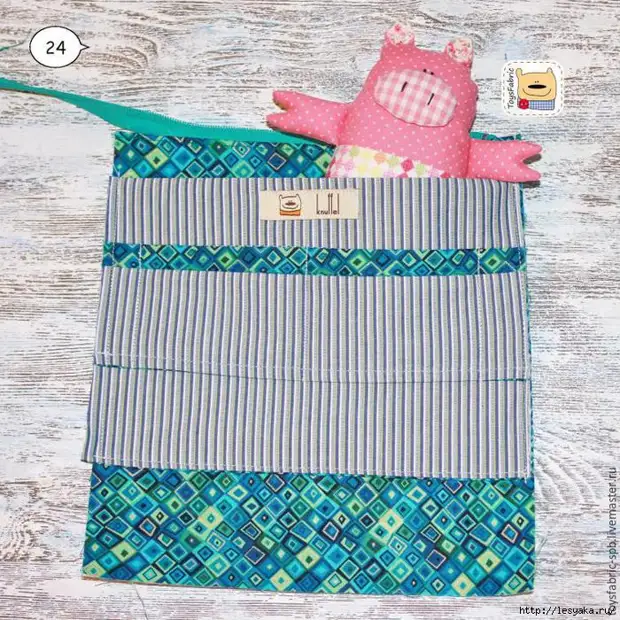
24. Send around the perimeter pocket to one of the parts of the lining.
Preparation for Bag Assembly

25. Once again, we compare the main part and the inner details of the bag, if necessary - align to the desired size.
26. Put the fleece to the lining details on both sides. If you want to get a volumetric bag, then at this stage you can flash corners to form the bottom. If it is clutch, then you can leave so.
27. Send a semiring on the belt tape to the top of the bag (on the sides).
Build a bag
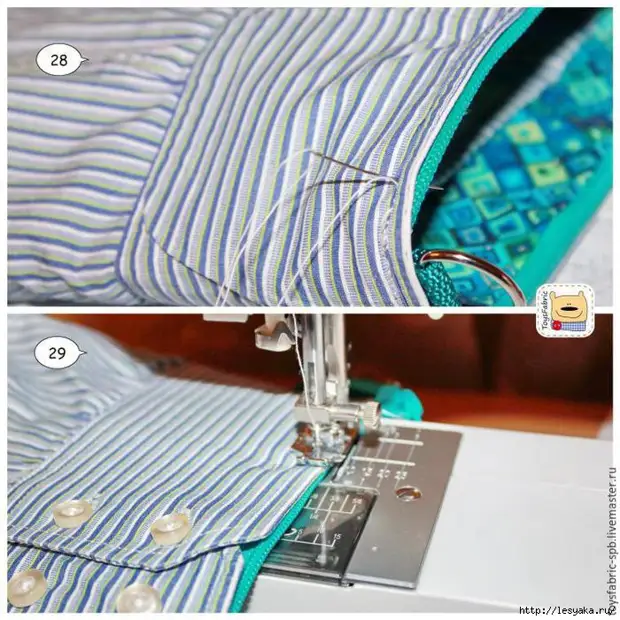
28. Insert the lining inside, align the details so that the lightning goes to the sleeve with the cuff and flash. If it is difficult to make a circular seam on the machine, then you can manually perform it or make the draft seam first.
29. If the top color and the lining color are very different, it is better to use two colors of thread when performing this seam. I have an upper thread - white, bottom - turquoise (in the color of zipper and lining).
Latest touches - lightning treatment
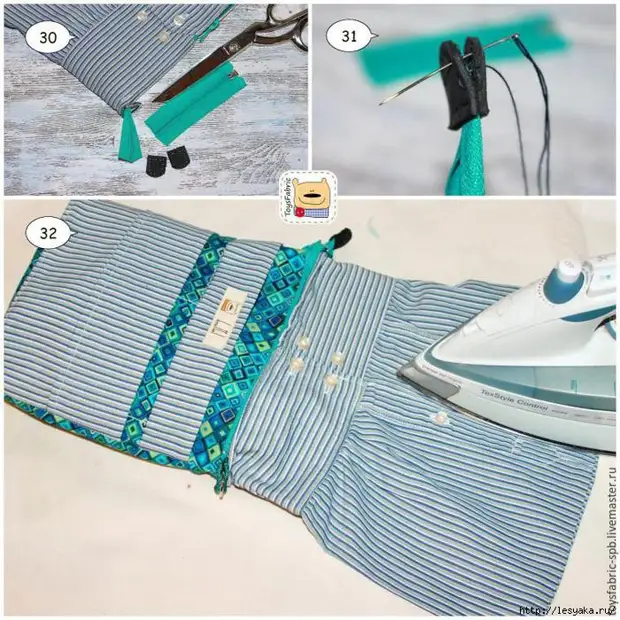
30. Cutting zipper to the desired length
31. We draw up the tip of the zipper. If you do not have a ready-made confusion, you can make it from the fabric in the color of the bag. I usually use ready-made leather or metal limitations for lightning.
32. In order to be more convenient to iron the finished lining can be turned out.
Ready!
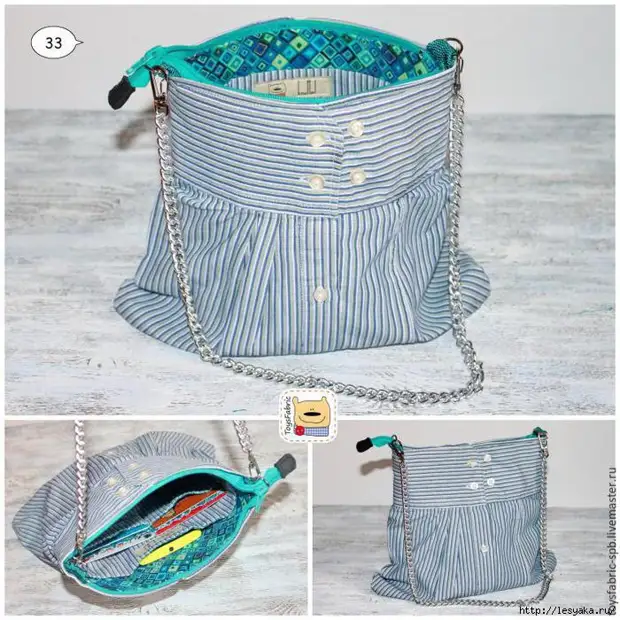
33. If it is a clutch, you can use the hand strap, I chose an option with a long chain handle. Since the knob is removable - you can combine with any handles and any length depending on the needs and mood.
Photos cannot fully convey the entire external lightness and airiness of the resulting bag / clutch, although inside it is perfectly holding the shape and due to the presence of pockets turned out quite functional. I will wait now summer so that it will be rapidly trying to try it in business. Initially, I thought that it would be such a summer walking option for a light sundress in the heat, and in the end it turned out a rather stylish thing that would only be with me (and everyone who decides to repeat my experience).
Author: Elizabeth Krasnokutskaya.
A source