
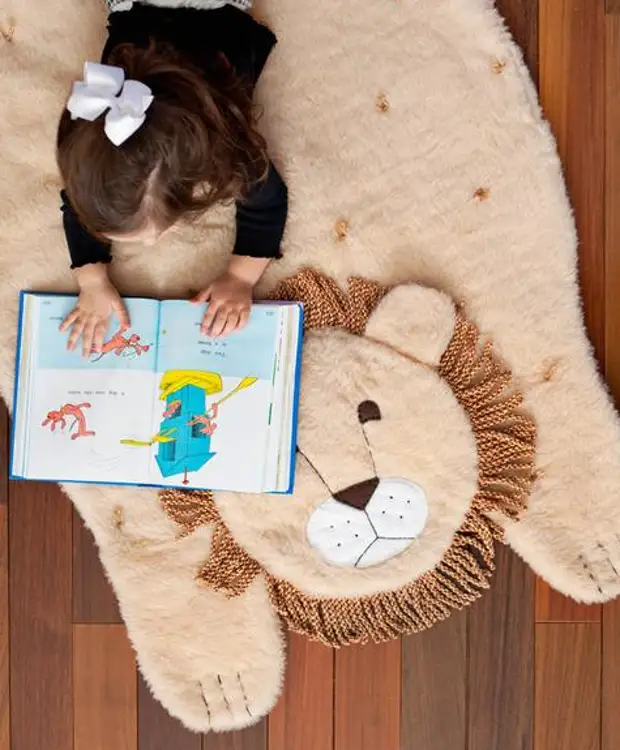
In the children's room, there must be a soft coating or, at least, a rug, on which the child can play, not traumating his knees about a solid floor. In addition, sitting on the rug more pleasant and warmer than on a laminate or linoleum. In this article we will tell how to make the original rug in children with their own hands. Soft rug can be made in the form of any animal, it all depends on the preferences of your baby. In our case, the rug will be in the form of a lion.
Materials for the manufacture of the original children's rug:
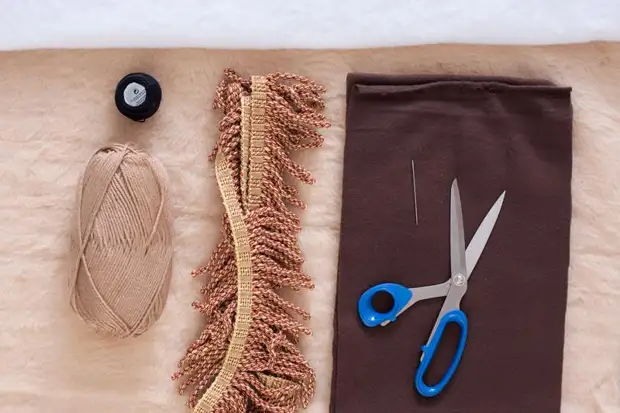
- 1.5 meters of yellow-brown artificial fur
- 1 meter bchromy
- Quick battling (thickness, select at your discretion)
- Thick black threads
- White threads
- Small pieces of white and brown felt
- Yellow-brown yarn
Tools for the manufacture of original children's rug:
- Skal needle
- scissors
- marker
- Pins
- sewing machine
Making a children's rug with her own hands
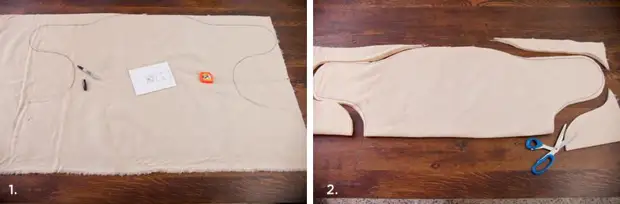
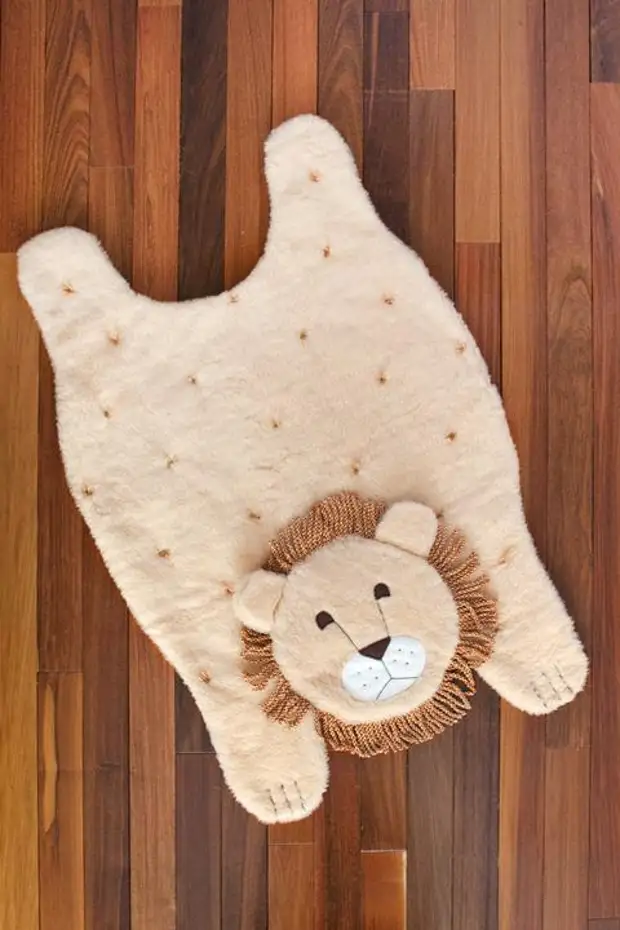
Step 1 . Spread the artificial fur on the floor pile down and mark the form of the future rug.
Step 2. . Fold the fur twice along the longitudinal axis and cut the placed part. So your rug will be perfectly symmetrical.
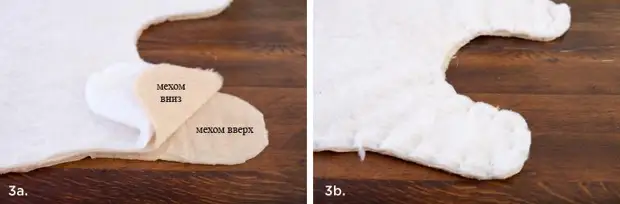
Step 3. . Take advantage of the first cut blank to apply markup on the second segment of artificial fur and sealed batting.
Fold out the cut blanks, as shown in the photo, and secure them with a pin. Make sure that the two bottom blanks come into contact with the sides with a pile.
Street around the perimeter, retreating from the edge around a centimeter. As you progress, remove the pins. Leave an unprofid segment about 15 cm long so that the product can be turned out. Then this area can be sewn manually or on a sewing machine.
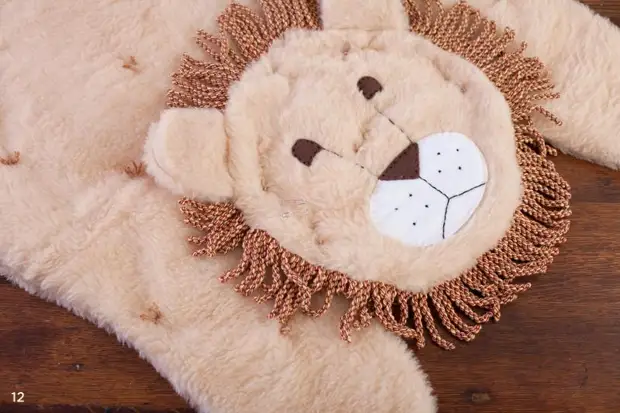
Step 4. . Now you need to make a head. To mark the markup into two pieces of artificial fur and easy batting, take advantage of something round as a template. In our case, a plate with a diameter of about 35 cm was used. Size should be chosen, focusing on the gabarites of the rug. Cut the blanks for the ears of the lion. Each ear is also made of two pieces of artificial fur and a piece of wattin.
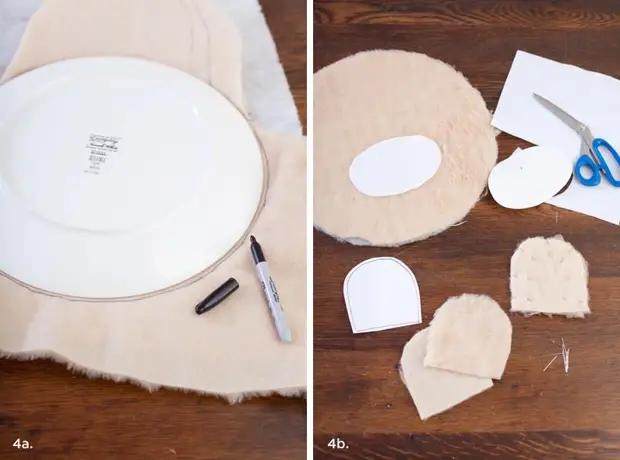
Felt cut out mouth, nose and eyes.
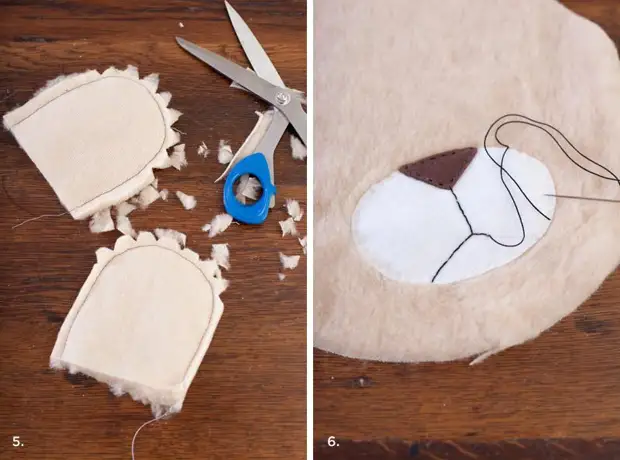
Step 5. . Throws the ears around the perimeter, after pre-laying the workpiece, as shown earlier. On the edges, make wedge-shaped cuts so that the fabric is not going to collapse when turning.
Step 6. . Sew the details from the felt to the front side of one of the circles cut earlier.
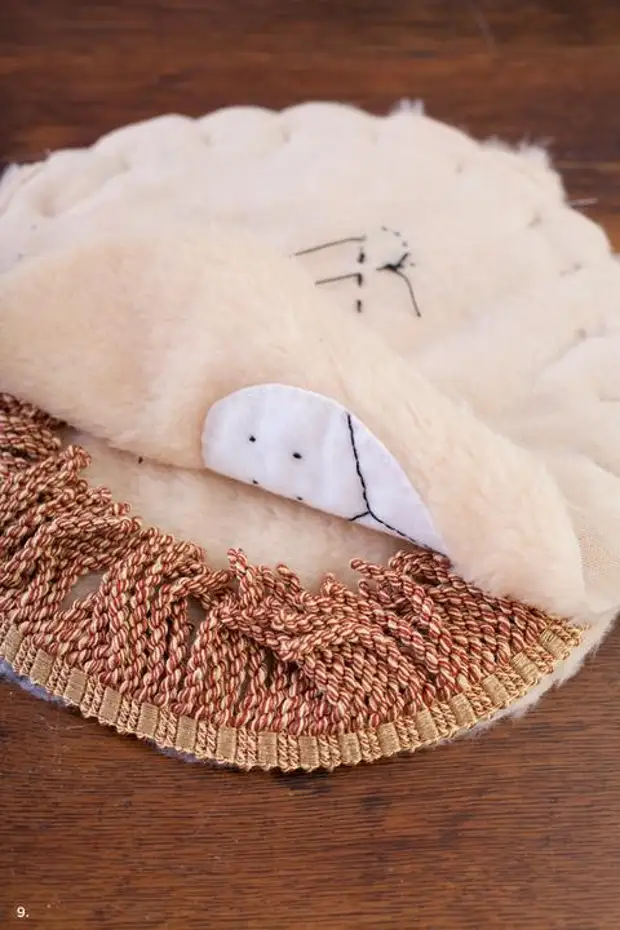
Step 7. . Watch a watine lining to the back of the rear mug. The seam should take about 5 mm from the edge.
Step 8. . To a circle, which will be the back of the lion, take the fringe. To the front circle will take ears.

Step 9. . Fold two circles with the front sides inside. The fringe and ears should be inside. Fix the blanks with pins and push around the perimeter, retreating from the edge around a centimeter. Leave the space a length of 10-15 cm so that the head can be turned out. Remove the product and squeeze the remaining part.
Note : If you use too durable fur and thick batting, with the processing of parts on the sewing machine there may be problems. Pay attention to this when choosing materials. In extreme cases, the details can be sewn manually.
Step 10. . You have already turned the skin of the lion face outside and sewn space. Now layers need to be fixed with each other. In checkers, scroll the layers of pins.
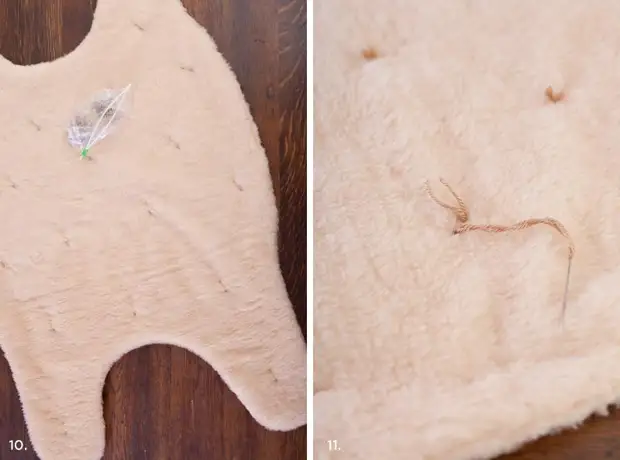
Step 11. . In some places, make a few pass-through stitches of yellow-brown yarn. At this stage it is more convenient to use the duct needle.
Step 12. . Lock the head on the spot with the pin, and then the trick of the yarn with the corkscale needle.
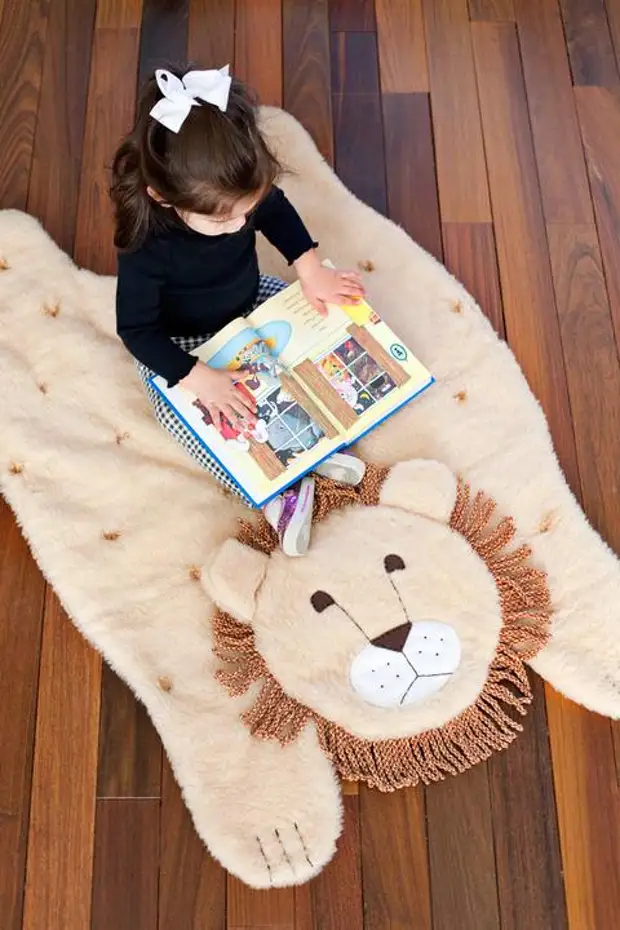
Cute, soft and warm rug for children's room ready.
A source