
All children love to build huts from chairs, sheets and other priest materials. True, then you have to arrange furniture in places, and the sheets, bedspreads and pillows re-fold in the closet or retain on the bed. If you want a child to have their own game corner, whose structure would not have to make a mess, wish the game tent in the form of Wigwam.
In this article we will tell you how to sew the Vigvam for children with their own hands.
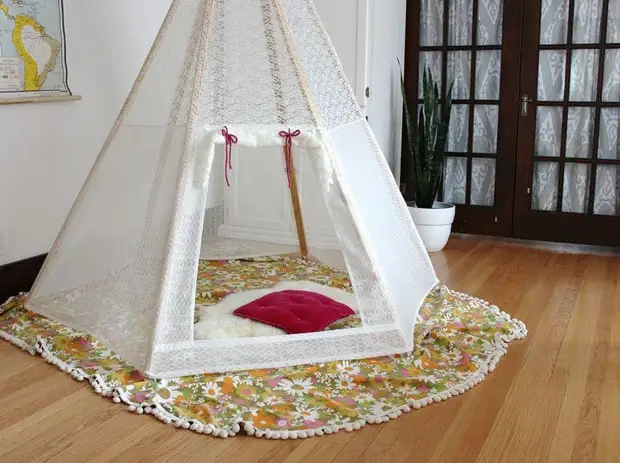
Wigwam for children do it yourself
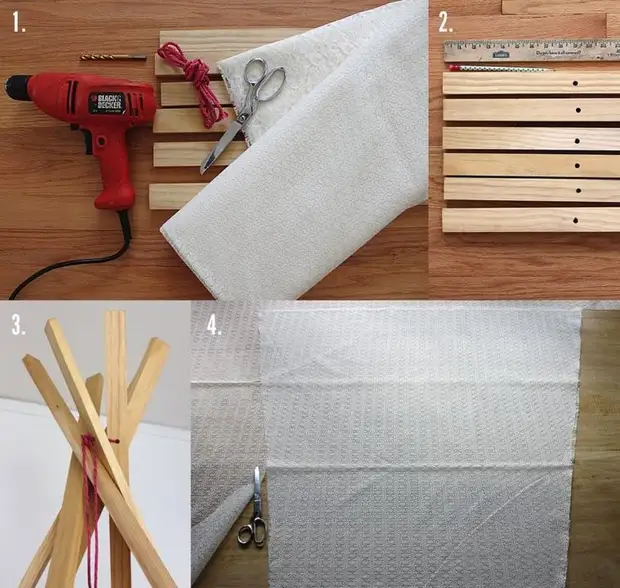
Step 1. Prepare materials and tools for Wigwam sewing:
- 4 meters of tulle with a small pattern (for drapeting the bottom of Wigwam)
- 3 meters of tulle with a large pattern (to dramatize the top of Wigwam)
- Six 12 × 50 mm specks, 2.5 meters long (it is desirable to choose something stronger than pines)
- Drill with a drill
- 2-3 meters rope thick about 10 mm
- 1 meter of rubber band
- 2 meters tape or thick yarn
- scissors
- Rule
- pencil
- sewing machine
- Thicks
- Iron and ironing board
- Stationery buttons
Step 2. From one edge of each of the rails, measure about 20 cm, apply marking. Drill through holes.
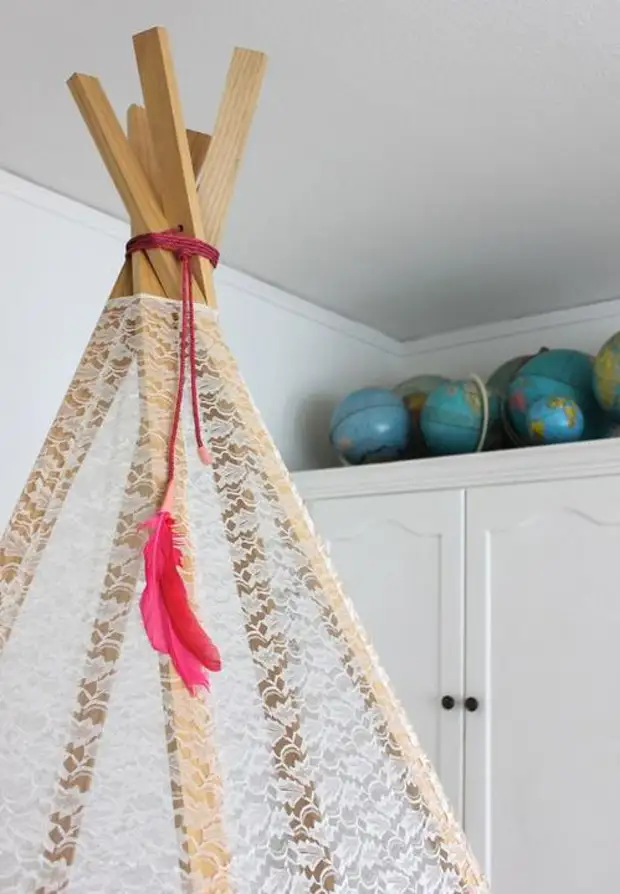
Step 3. Stretch the rope through the holes in all six rails, tie the knot, not too tightening it. Put the frame, adjust the position of all racks so that they are in a circle. If you need, tighten or loosen the node. Free ends of the rope can wrap around the racks several times.
Step 4. Spread the tulle cloth with a large pattern in front of them. Measure the segment of a width of about 60 cm is the width of the base of the triangular billet. Make a small incision at the markup. On the opposite side of the canvas, measure the distance equal to half the end of the triangle. From this point to each side, set aside 4 cm. Connect the upper and lower points so that you have a triangle with a trimmed vertex. Cut the cloth over the markup lines.
In the same way, make 5 more wedges. As a template, you can use the first billet.
For the manufacture of the lower seats, use tulle with a small pattern.
Prepare a segment of such a tulle width 105 cm. From the center of the bottom edge, deposit up 95 cm. From this point in both directions, set aside for 30 cm. Connect the lower points with the top so that a trapezium from the top of the vertex is 60 cm. Cut the blank over the markup lines .
Using the first workpiece as a template, cut out four more trapeats.
Step 5. Fold together the upper and lower blanks, fix them with a pin. Stretch the workpiece on the sewing machine. Seam later can be closed with a ribbon.
Do the same with the rest of four pairs of blanks. As a result, you will remain one unused upper triangle.
Step 6. Fold large triangles with long sides together. Cold them with pins and push the seams.
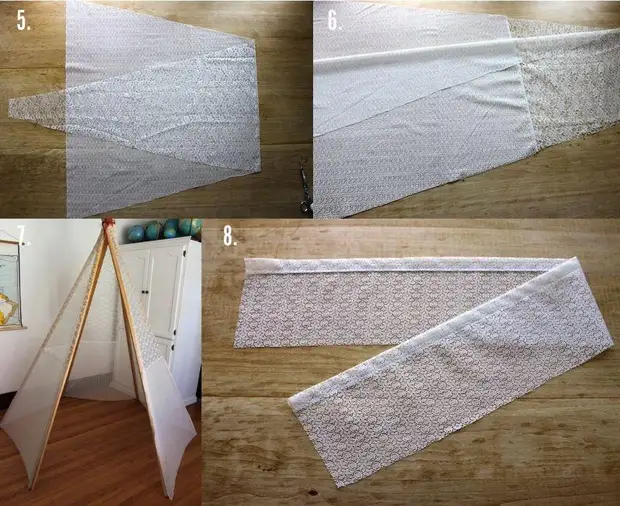
Step 7. The resulting awning of five wedges are put on the wooden frame, make sure that the racks go under the places of docking panels. Secure the awning by stationery buttons.
Step 8. Cut the segment of the tulle with a small pattern of 105 cm wide and a height of 16 mm. This strip will become a Vigvama boot. One of the long sides are approximately on the centimeter, join the fold of the iron and step up. Fix the threshold so that the bend is from above. Fix the remaining top triangle on the frame. Previously the bottom edge of the workpiece is preferably a bit to turn and strain.
Step 9-10. Cut from Tulle with a small pattern. Cut two strips of 15 × 85 cm. Each of the strips are subjected to one long edge, join and push. Fix the strips on the sides of the opening so that their edges are under the upper triangle and the booster.
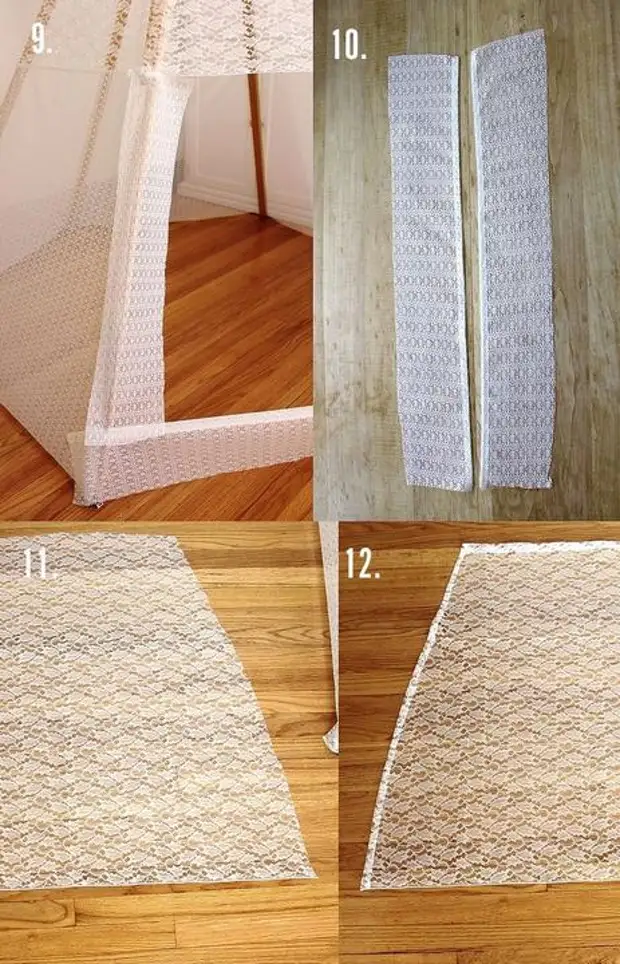
Step 11. Make the Wigwam door. To do this, cut the trapezium from the tulle with a small pattern with a base of 80 cm, 88 cm high and a vertex width of 48 cm.
Step 12. Each of the sides of the trapezion is subjected to a centimeter and strive.
Step 13. Remove the resulting front panel and the rest of the awning.
Step 14. To the top of the doorway, the trapezoidal door. Make it up for several centimeters overlap the Vigwam's thresholds.
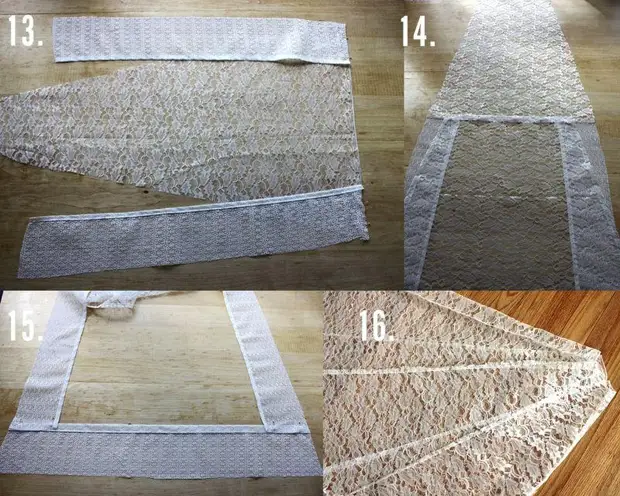
Step 15. Stop all the front panel seams so that the side strips, the door, the boots and the upper triangle were securely fixed.
Step 16. Connect the front panel Wigwam with the rest of the awning, stepped up along the long sides.
Step 17. Turn the lower and upper edges of all panels, including the thresholds.
Step 18. Take six segments of rubber bands about 15 cm. Slice from them rings and fix on the lower edges of the side seams of wedges. These gum will allow you to save the awning on the frame.

Step 19. Prepare four cuts of tape or thick yarn about 45 cm each.
Step 20. Sew them above the door, two outside, and two inside Wigwam. Using these ribbons, the door can be fixed in the open state.
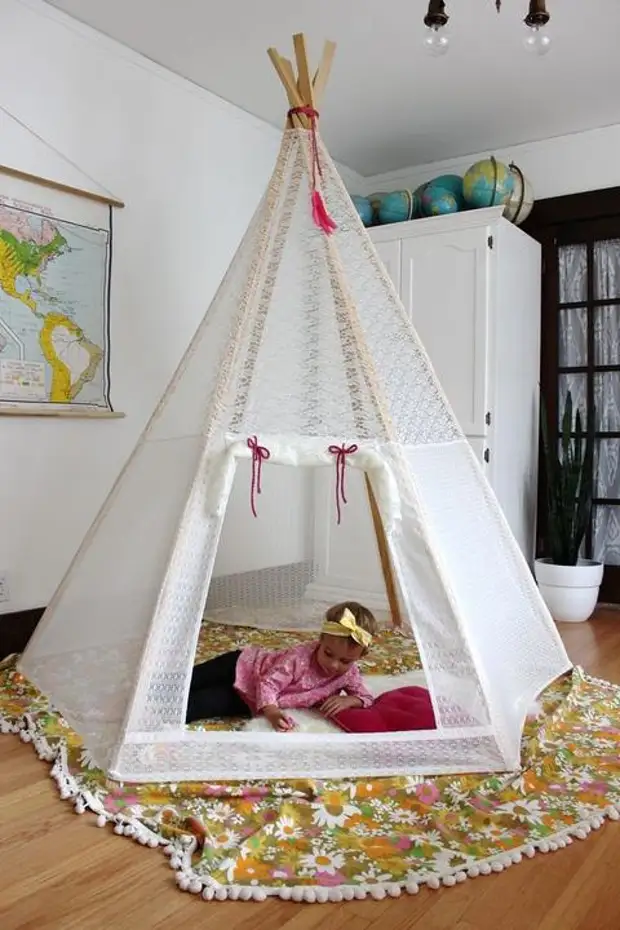
Wigwam for children ready. It is easy to fold and declines, in folded form does not occupy a lot of space, it can be stored outside the door. If the child is stepping awning, you can remove it to wash it.
We hope your baby will be delighted to such a gaming house.
Istchonik