
Armed with the desire and tool, we will make a wardrobe in the hallway with your own hands. Carefully choose everything you need in the process of creating this difficult wood product. Remember the simple and correct rule: "Seven times will die, once a couple of times", think about it for a couple of seconds before each application of the cutting tool, it is useful, I'm talking to my own experience.
Required materials and tools:
roulette;
pencil;
paper;
Square with direct angle
line;
electric drill;
Electriculover (preferably, but not necessarily);
awl;
a hammer;
Drill for waders f = 8mm;
Drill for confirmates (if not at all, it can be replaced by the drill f = 7mm);
confirmable key;
Screwdrivers straight and curly;
iron.
Determine the place for the cabinet
Hallway - the first thing we see in the apartment. Usually there is little place in the hallway, a lot of rubble, so: we take a roulette, paper and pencil. We measure the dimensions and determine the dimensions of the future cabinet in the hallway.
Sketch of the cabinet
Invent what the wardrobe will be. For our example, consider a wardrobe for an entrance hall with shelves and a hanger for clothes with dimensional sizes 1200mm wide, a depth of 600 mm and a height of 2200mm. Facade material Laminated chipboard 18mm thick, sheet size on sale 2800x2070mm. Material of the back wall - Laminated Fiberboard 3mm thickness of 2500x2070mm or 2750x1700mm.
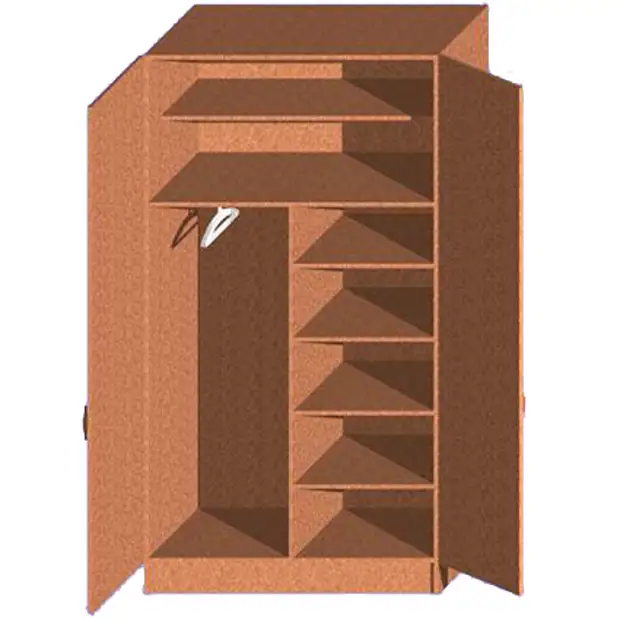
Drawings of the cabinet
Making a sketch and drawing. Of course, more "advanced" for drawing can take advantage of the programs for the production and simulation of furniture: FURNITURE FURNITURE, PRO100, BCAD Furniture, DS 3D, VisiCon, Astra or ArchiCAD, AutoCAD. But the drawing can be done on paper, better millimeter paper. We make a drawing of our cabinet:
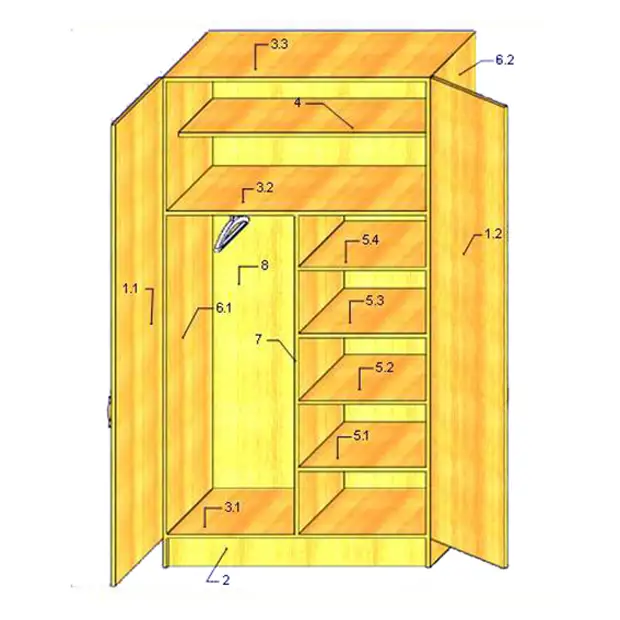

And we have the following details: 1.1 and 1.2. - Doors - 2pcs. 2 - rigidity edge - 1 pc. 3.1, 3.2, 3.3 - horizontal walls 3 pcs. 4 - Shelf - 1pc. 5.1, 5.2, 5.3, 5.4 - Shelves - 4 pcs. 6.1 and 6.2 - side walls - 2pcs. 7 - the inner central wall - 1pc. 8 - rear wall 1 pc.
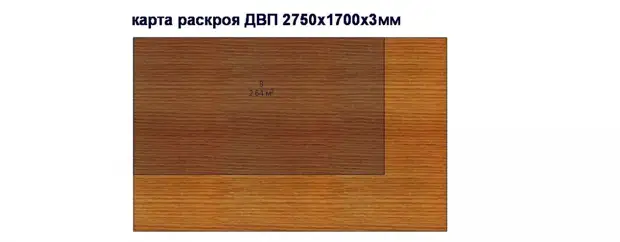
Card cutting
We make a card cutting out on paper your details on a sheet of chipboard. Red mark the parties where the facial side and the furniture edge will be. Cutting details are made on a format-cutting machine. If you decide to do yourself, especially for the first time, risk making a closet curve. When drawing up, the cutting card should be taken into account that the thickness of the cut 2 mm. As you can see in the figure, we will need 2 sheets of chipboard and 1 sheet Fiberboard then with a ready-made card cutting and detailing we go to the company that sells materials for the manufacture of furniture and makes cutting. Until we place the order on the cutting details for our cabinet to the hallway, we go for the accessory.

Furnitura
For our cabinet, you will need: Furniture edge - Idle holder - 2 pcs and screws to them 3.5x16 6pcs, rod for outerwear long 570mm long, hinge door in a set 6 pcs, magnets 4 pcs and self-tapping screws3,5x16 - 8pcs, half-holder 20pcs, Handles included 2 pcs, conformats - 22pcs, screws for mounting the back wall 3.5x20 - 40 pcs, if you wish to install - Supports 4 pcs and screws to them 3.5x30 8pcs.
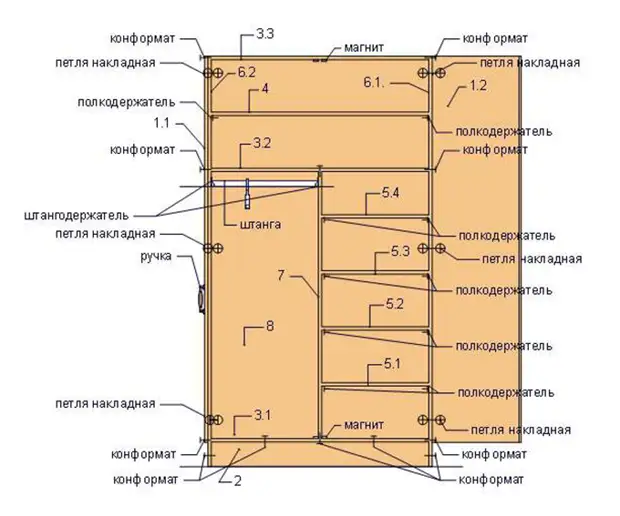
Hole markup
In accordance with our scheme, placing the holes.
We glue the edge. Use the recommendations of the manufacturer of the edge that you have chosen. Most often on the edge there is already a layer of glue. Glue edge with iron. On the trial piece, select the temperature and heating the edge, press with a piece of felt or a dense cloth to the end of our parts. Then the edge neatly cut and slightly grind the shallow emery paper. The edge edge can be soldered with a heated iron.
The assembly remains quite a bit - we collect the items and install the closet. Everything! We have a beautiful wardrobe in the hallway.

A source