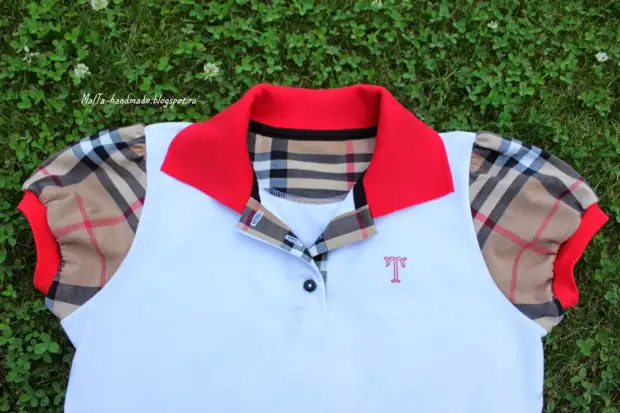
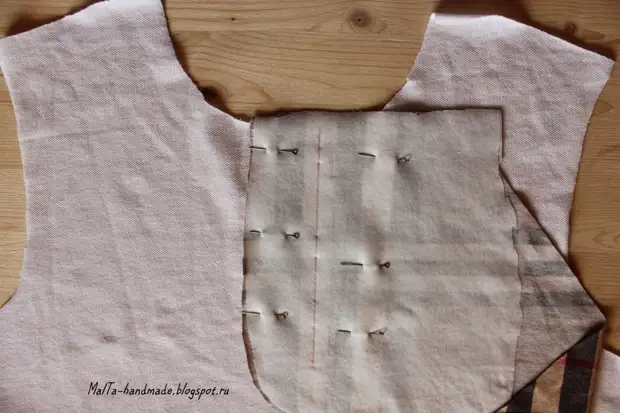
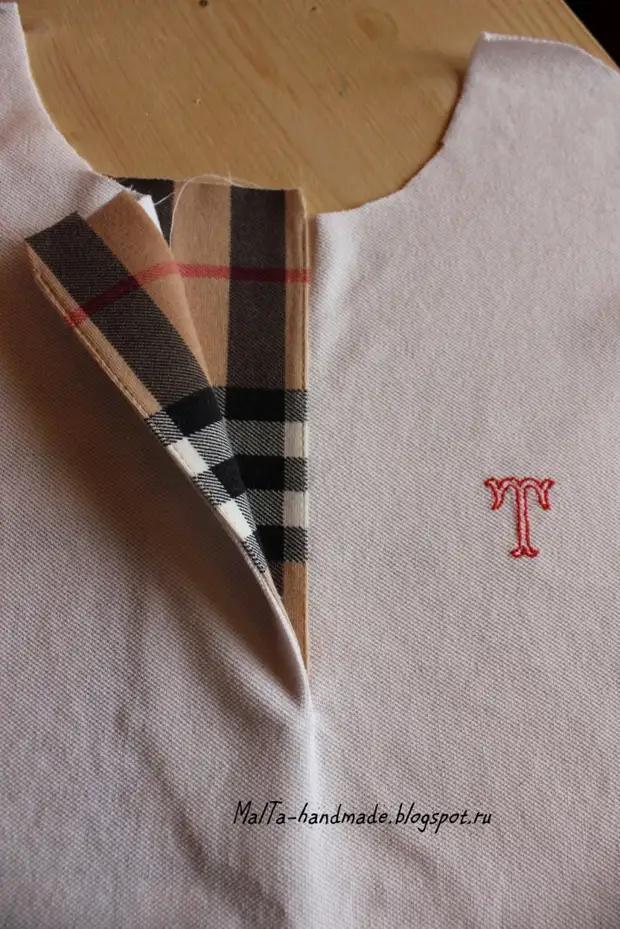
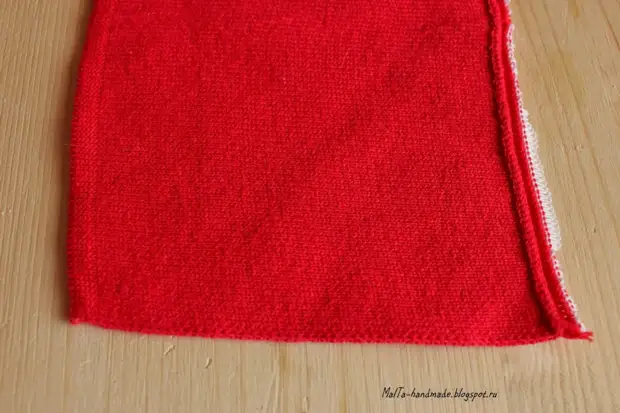
We sew a female t-shirt with a clasp polo. The main fabric is peak here, 100% cotton. To cover, we take a piece of a liqueur-duplicated fliesline with a liqueury (you can take the same peak - in tone or contrast), we plan on it a self-describing marker of the cut line on it, we rush face to face to the shelf. The width of the plank took for convenience 3 cm, it means that the incision will take place in parallel with the middle of the transfer, 1.5 cm from the center. (If there is a desire to make a 4 cm wide strip, this is a cut, respectively, 2 cm from the middle of the pass). Attention! A cut for a male T-shirt must be performed on the other side - to the right of the middle of the pass, when the thing is wearing, and if you look at the unfolded T-shirt, then to the left of the center. Fabric for wrap in this case to pin down, shifting it in the opposite direction, but so that it is over the center of the product a narrower part of the wrapper.
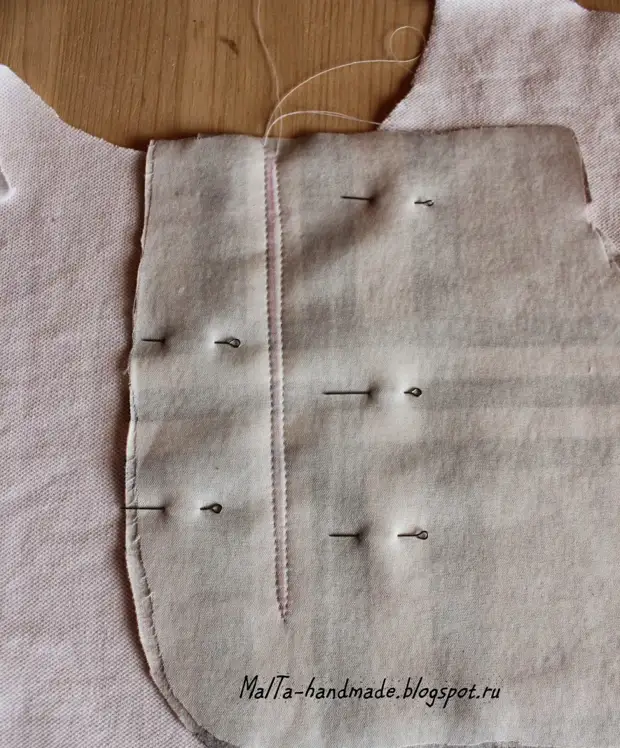
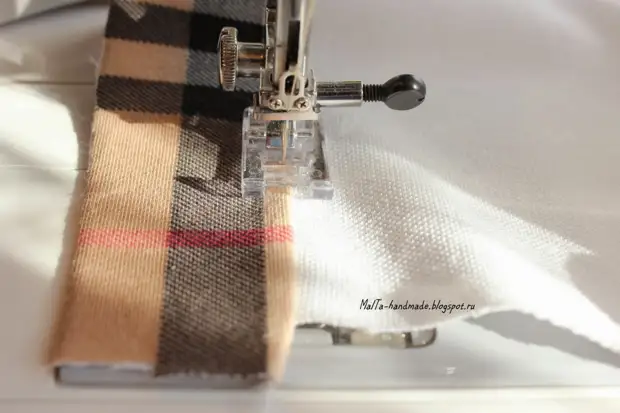
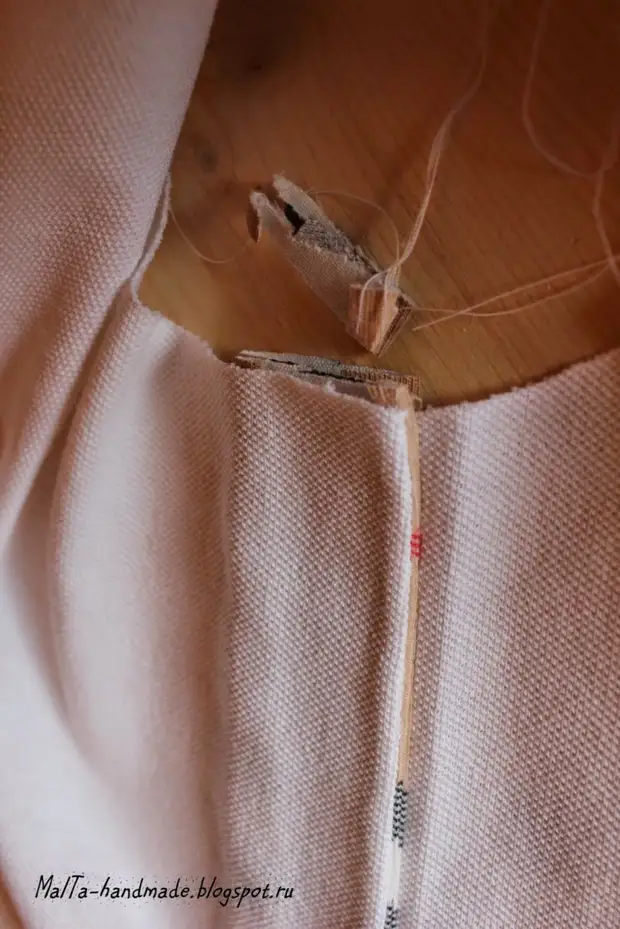
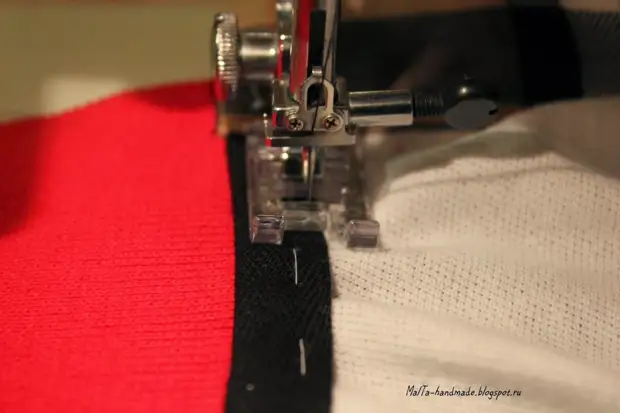
We pave a line along the planted line, retreating approximately 2 mm, while deploying work when the sewing machine is lowered by the needle, strister in the opposite direction.In this photo, the middle of the shelves is marked with pins and it is clear where the incision will be a female t-shirt.
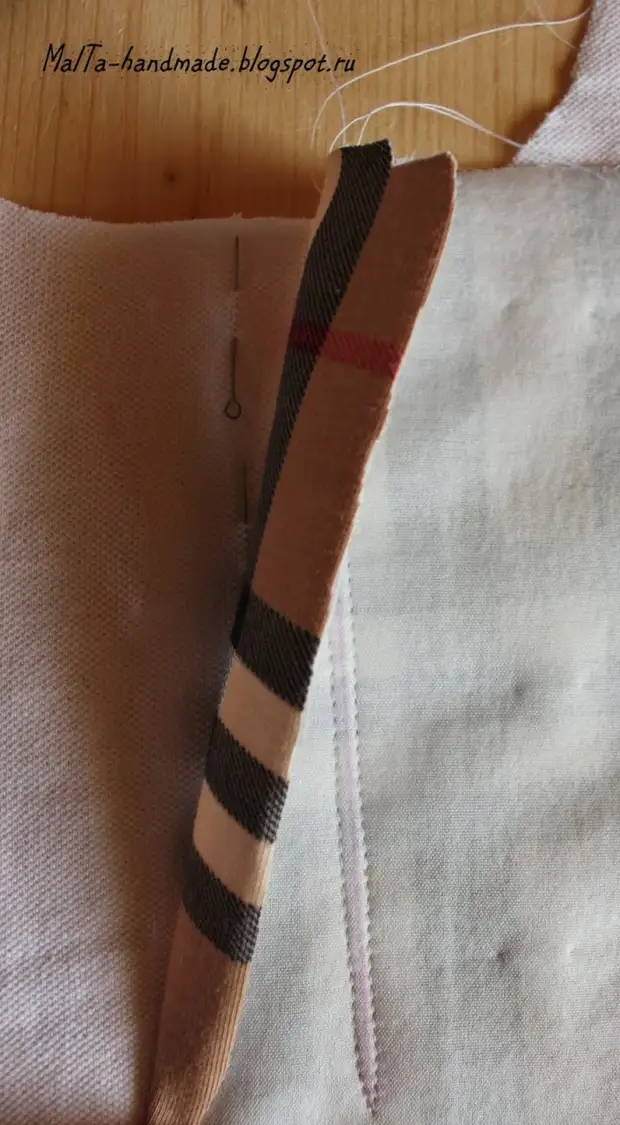
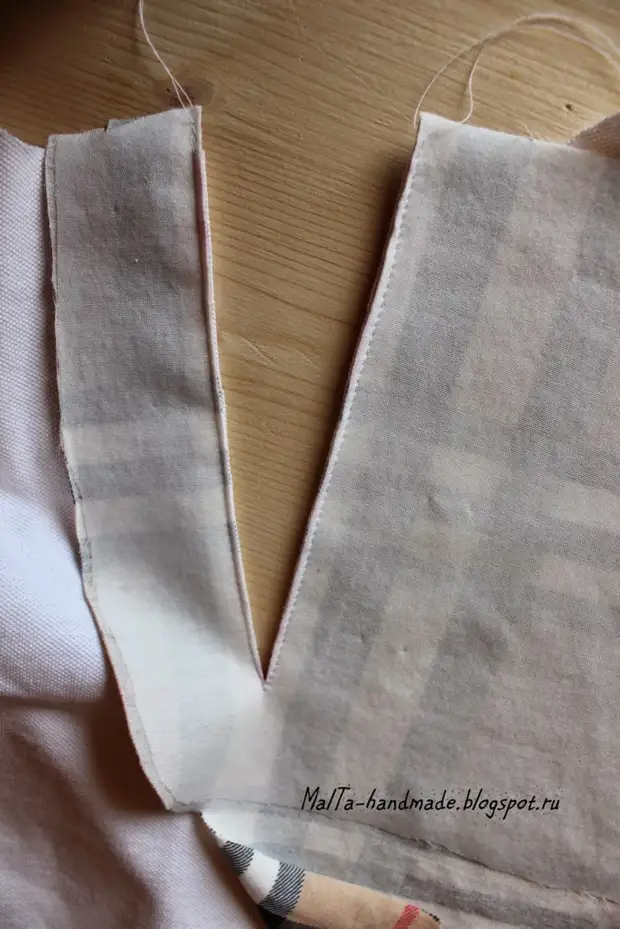
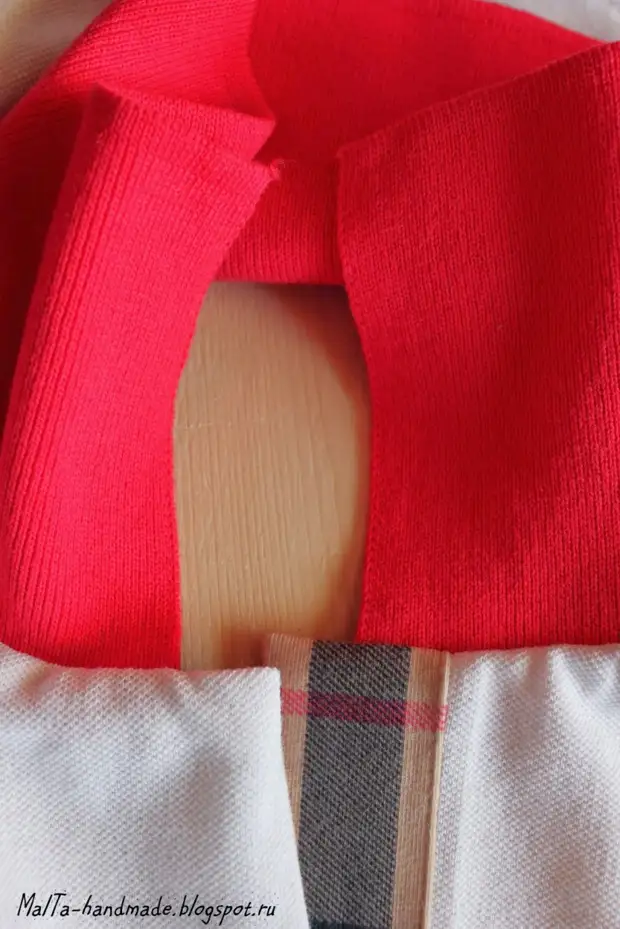
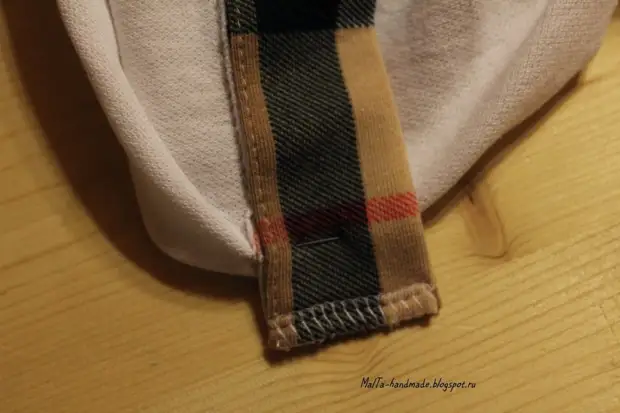
Gently make a cut between the lines, it is important not to cut the line.Introduce the allowance for a slap on both sides.We are tightening the garment in 1 mm from the suture of the apparable - on both sides. Sometimes I do it with one line, turning down at the bottom of the slap, sometimes I pace two lines.It turns out so.
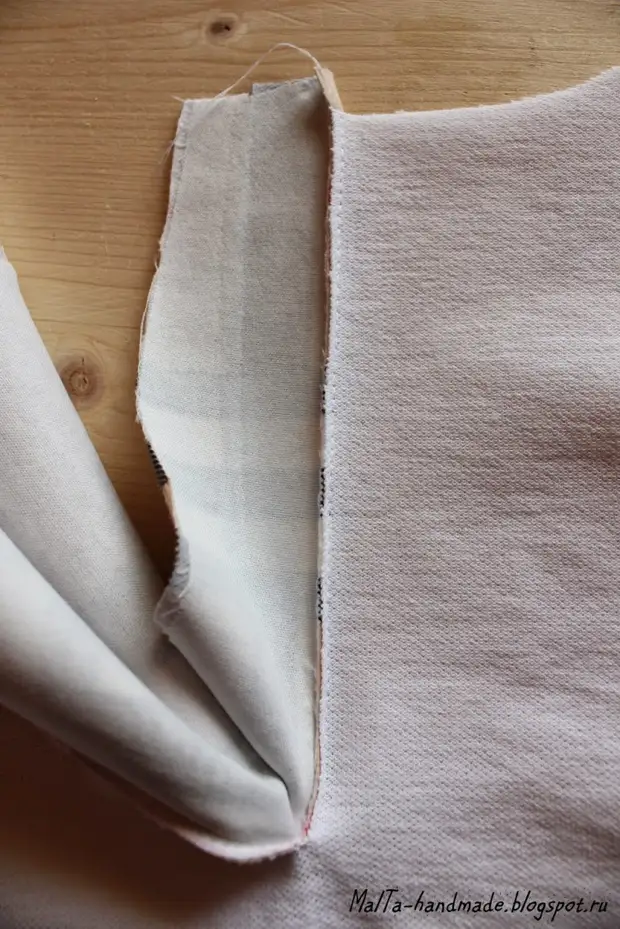
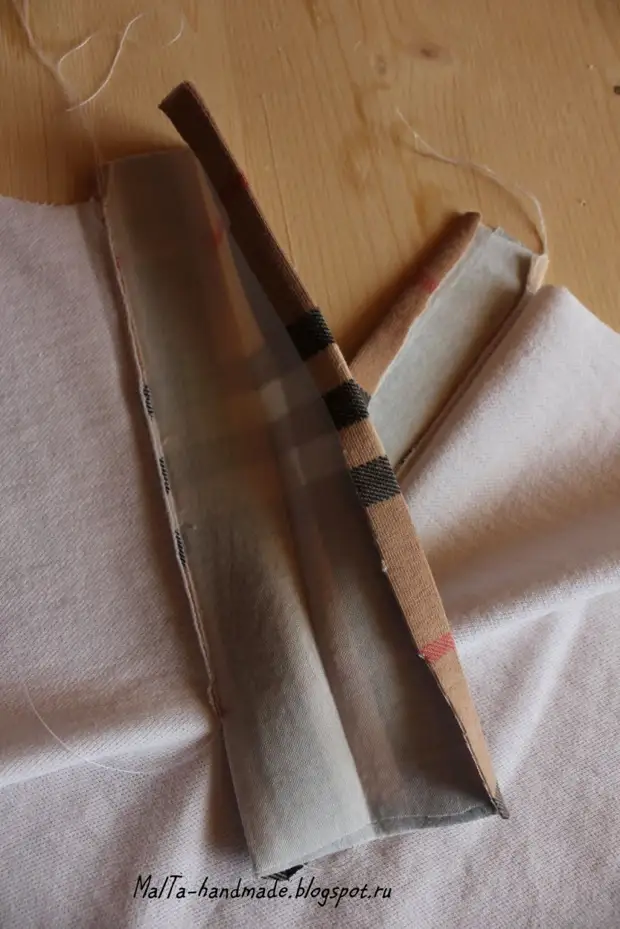
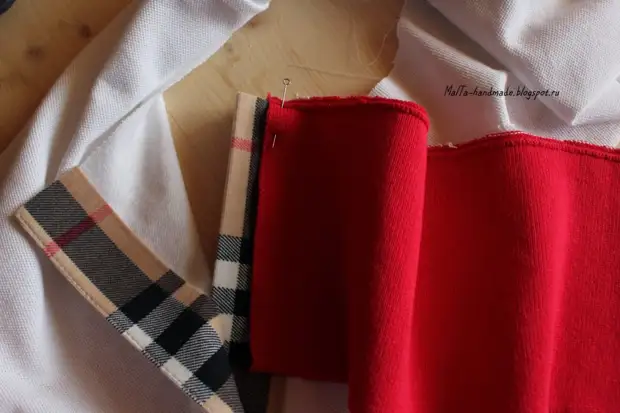
We are revealed by the upper part of the wrap, so that the fabric is inside.We start the garment, forming the upper and lower part of the plank and the allowance, cut off the unnecessary fabric. Here is the nuance - at the upper part of the wrapper it is started with a battery of 3.1-3.2 cm from the seam, and the lower part of the hooking starts first at a distance of 3 cm, and the second fold is 3.1-3.2 cm. Due to This, with a disclosed collar, there will be no seams of feeding the bottom of the hopper. And visible from the face of the plank, on which buttons are sewn, will be 3 cm wide.We deploy a machine line at 1 mm from the fold, it will just be visible when the collar is uncurved. Sometimes I have previously worked with an overwheel point, but in fact, without overlock at this stage, all clashes feel great.We carry out the shoulder seams, in the back, they must be pre-duplicated by the adhesive strip, starting the allowance for the shelf. In the photo, the backrest is still pre-installed decorative insert, this step can be skipped.
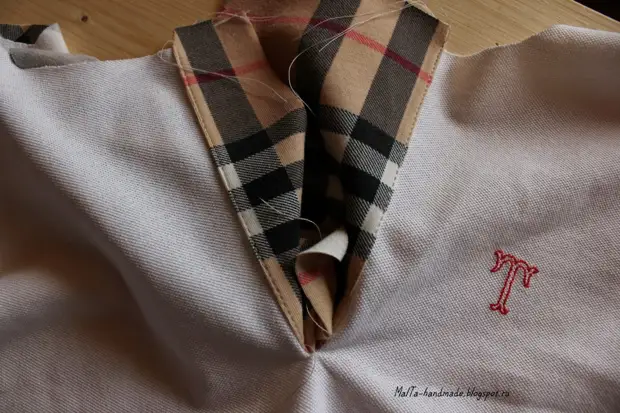
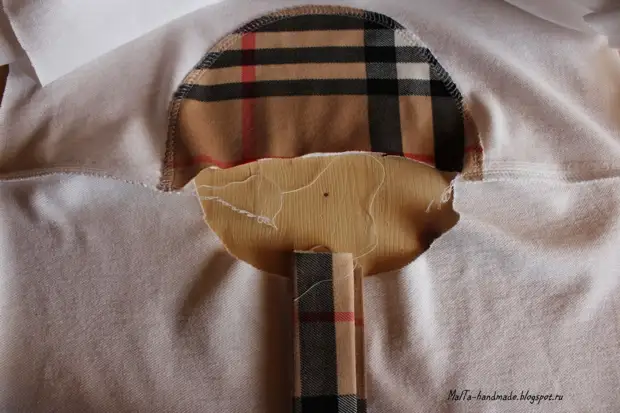
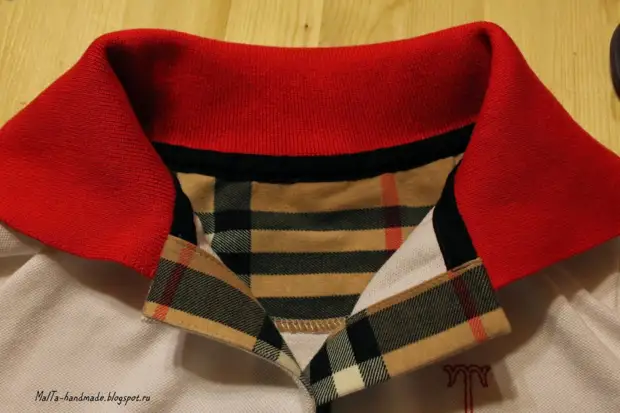
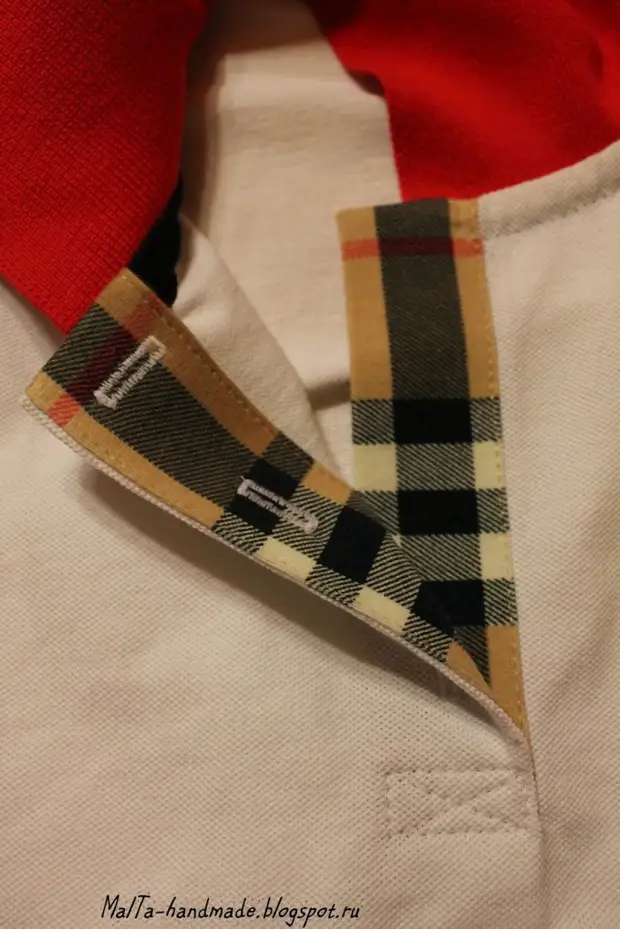
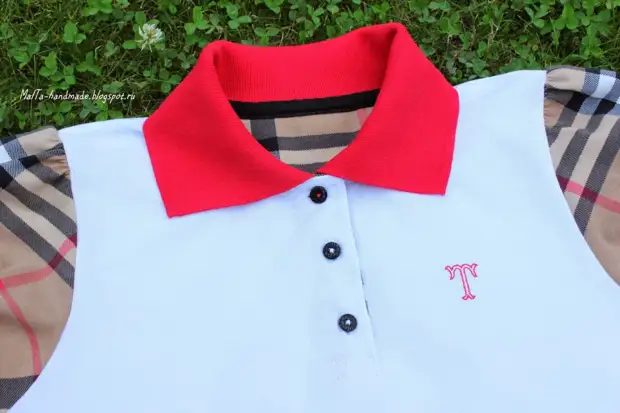
Now we take the collar and determine its inner part, which will felt in the door - in the photo it is right, there seems to be split pigs. It often happens that the new collar and at the top there are white auxiliary threads together with one color, they simply need to be carefully pulled out. We measure our gate and the length of the collar, if necessary, adjust the iron with a ferry length of the collar.Having equalized the hint of the neck, cut off the excess fabric of the wrapper (initially I make such a science exclusively from the convenience, because if you apply the top edge to the slop with a cut in the neck, then when forming the slats may not have enough wrap height, because the neckline is bent up).Prett the collar face to face with a product, placing the collar edge smoothly in the middle of the planks. We combine the middle of the collar with the middle line of the back.Overtakes turn and temper over the collar.
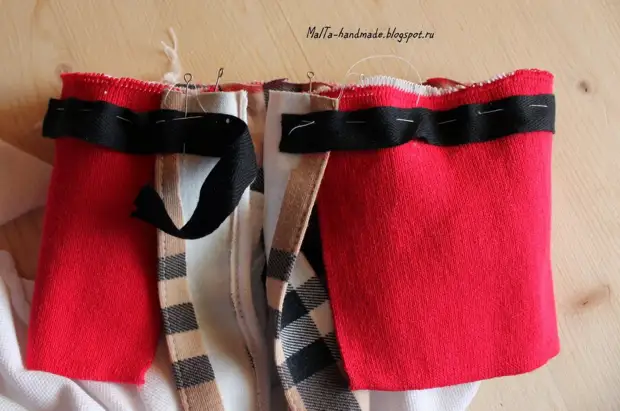
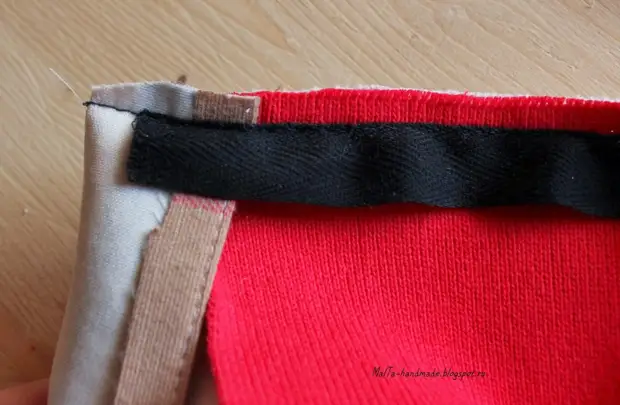
On top of the collar ruling and pick up a cigarette ribbon. We will scribble on a mouse tape in 1 mm from its upper edge, therefore, to form a battery, we displaced the tape at 0.7 cm from the edge of the collar and the neck. We pave the machine line along the whole neck from the collar.Turn the wrapper and check whether the collar is correctly located, its edges must be smoothly in the center of the shelter.The edges of the collar must also be 1.5 cm from the corners of the clashes.With an inside, cut the allowance, near the corners of the diagonal.
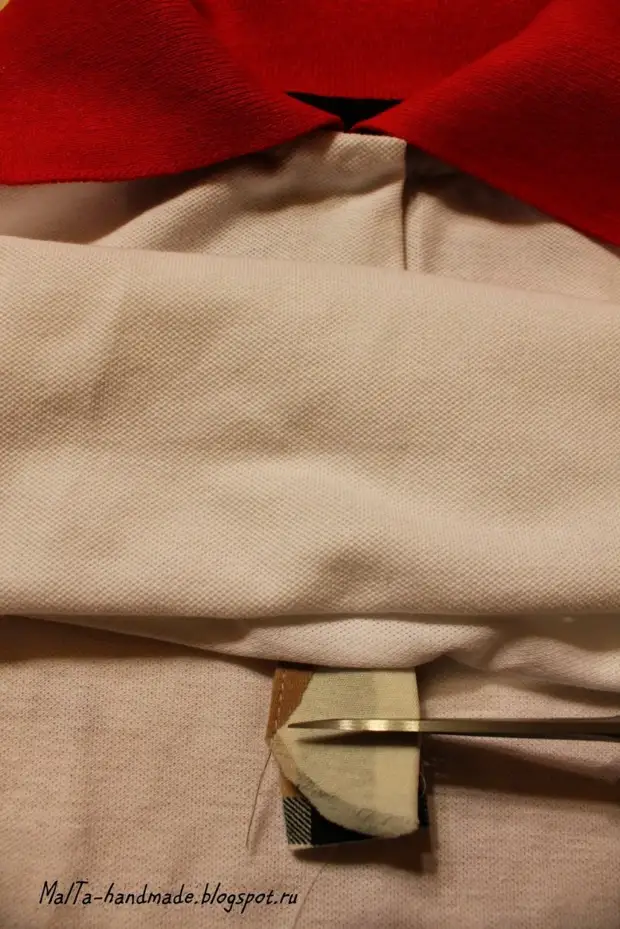
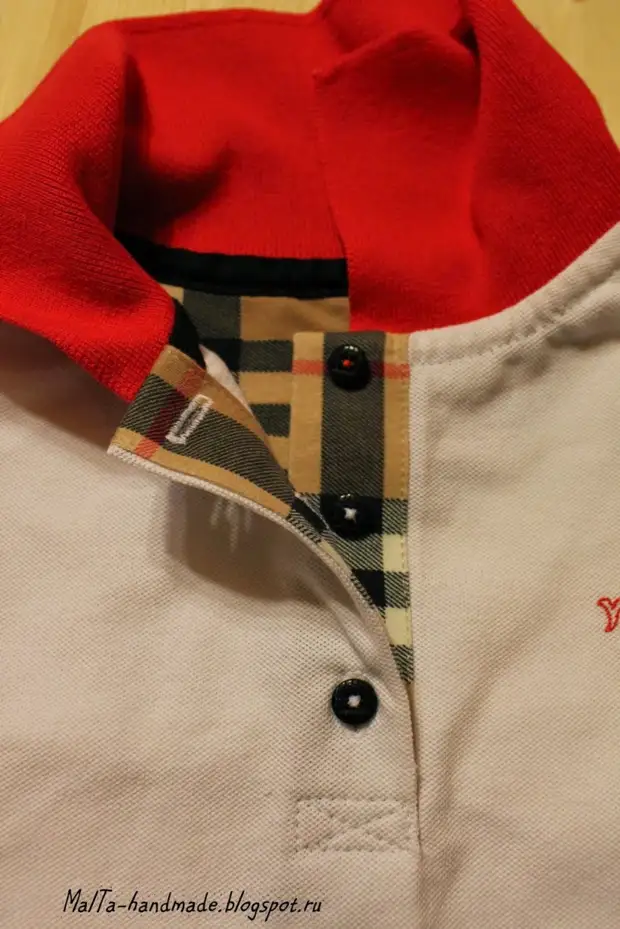
Soak again, the wrappers are revealed by a kipper and the neck.Take the melting tape.We admonish a silent tape of 1 mm from the bottom edge, starting from one plank to another.Tie a nodules and hide them.
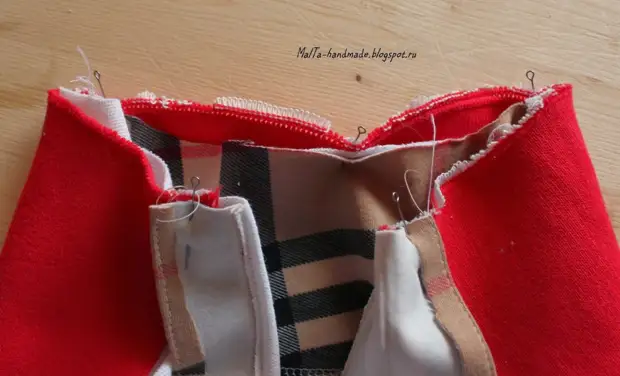
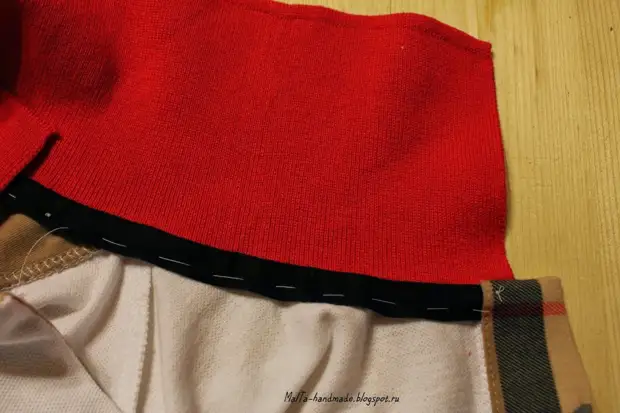
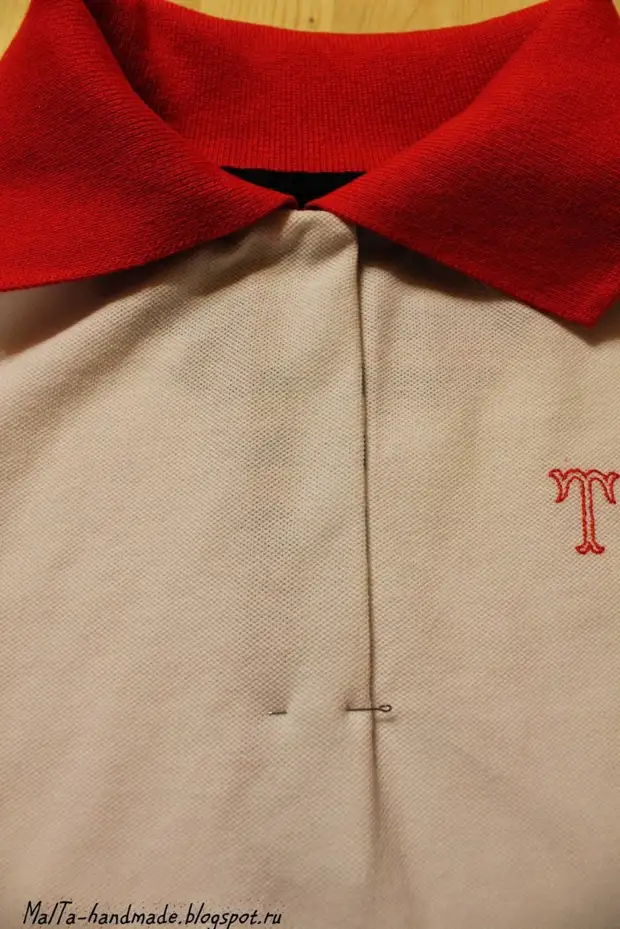
We apply one part of the wrapper to another, equalizing them, challenge the pin at the bottom of the cut.Cut off the excess fabric.We proceed with a cut overlock, hide threads. (For example, I will note that more often perform this operation before processing the neck, so as not to suffer the lower part of the cut, but it is possible after the neck, you just need to gently handle this node.We perform the leaving above the lower part of the cut - as a rectangle. On the top of the clashes, we perform the loop, the top horizontally, the remaining vertically, 1.5 cm from the cut.
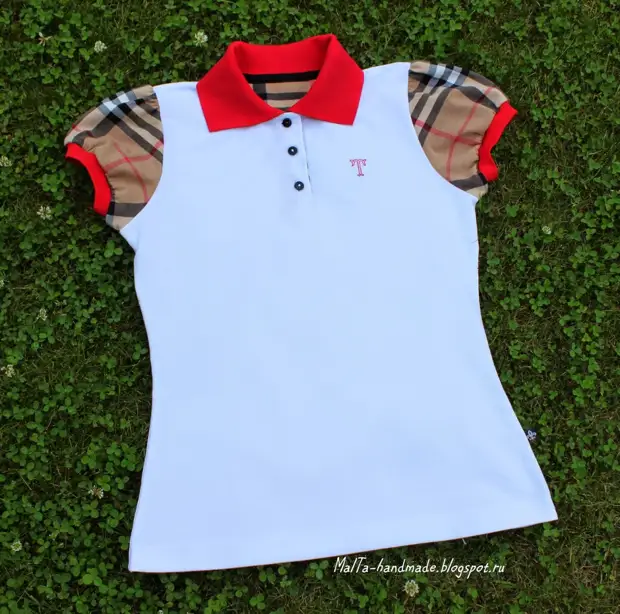
Send buttons in the middle of the bottom plank, 1.5 cm from the cut.Further, as usual - we sew the sleeves, perform the side seams and the bending of the product, wet-thermal processing.T-shirt with collar polo ready.