
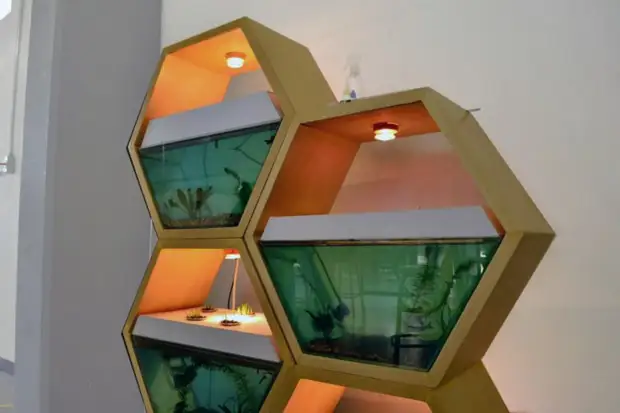
Fishing for fish will serve algae, which in addition to this is isolated oxygen. Waste liveliness of fish pump raises to top, nitrogen-nitrogen plants and nutrients. Plants, in turn, will filter water and enrich it with oxygen.
For a visual demonstration of the aquaponic process was made Naughty Hands Multi-tier aquarium in the form of bee honeycombs.
Step 1: Materials
- Plywood sheet 3 mm thick;
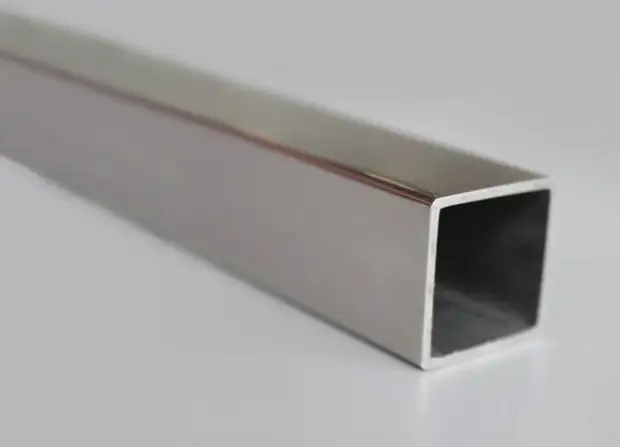
- 12 square-section pipes 25x25mm 35 cm long;
- 6 squares of the square section 25x25mm with a length of 29 cm;
- Contact glue;
- 6 mm glass;
- 2 meters of a two-core cable;
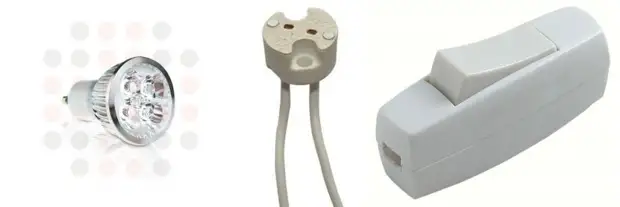
- Cartridge for the lamp;
- LED lamp;
- Clear nail polish;
- Putty;
- Switch;
- Electrical plug;
- Water pump with power supply;
- Filter;
- Polyfoam (base for hydroponics);
- Fish, algae and various small details for decorating aquarium.
Step 2: Move honeycombs
I propose to develop under the tree (from wooden trimming), which will be a template in the manufacture of composite elements of the future aquarium block of 35 cm of profile pipes. Wooden parts will be connected with glue. After making a form, placed metal pipes in it. Then cut the corners to connect them into a single design.
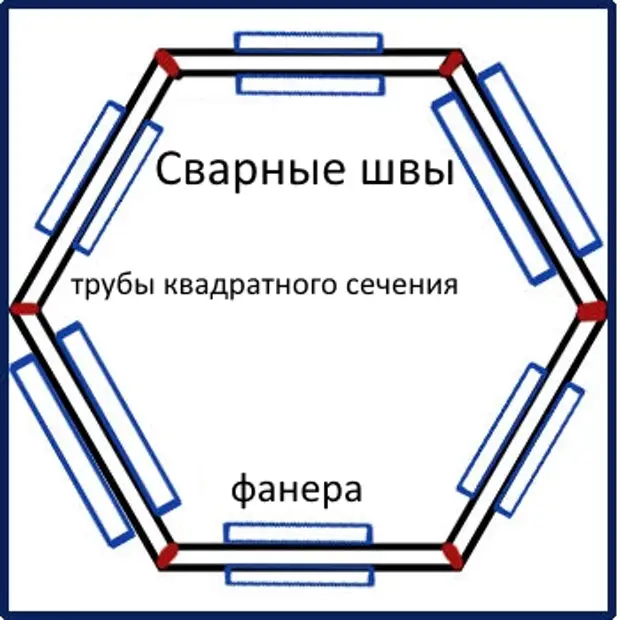
After all the elements are combined, proceed to welding at the specified points. Welded seams clean the grinding machine or a file.
Honeycombs are ready. We place them on a flat surface and weldings of 29 cm pipe to each corner. (You can use round tubes).
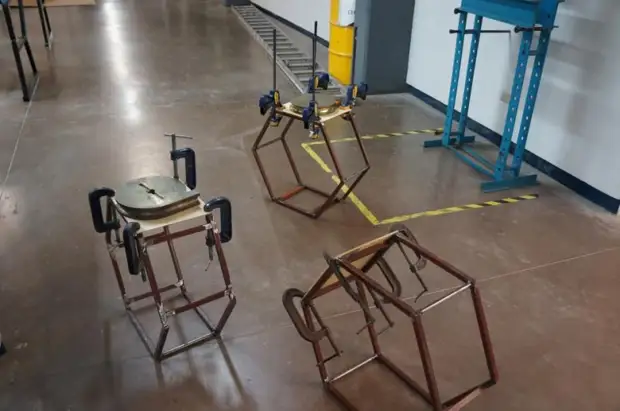
Note : This form is great for hold of a large weight (more than 300 kg per hexagon).
Step 3: Cleaning
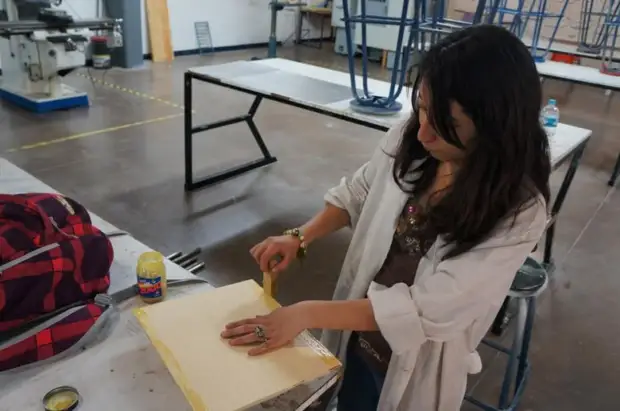
Cut from plywood 6 rectangles with dimensions of 35x29cm. Apply contact glue to the metal skeleton and parts of plywood, which will be connected to the metal. Give adhesion to dry for 5 minutes and immediately after that place the rectangles on the frame. With the help of clamps, fix the phaneer to the complete drying of the glue.
Contact glue dries quickly, but to get the best results, leave it for two hours.
Make a hole under the lamp at the top of the cell.
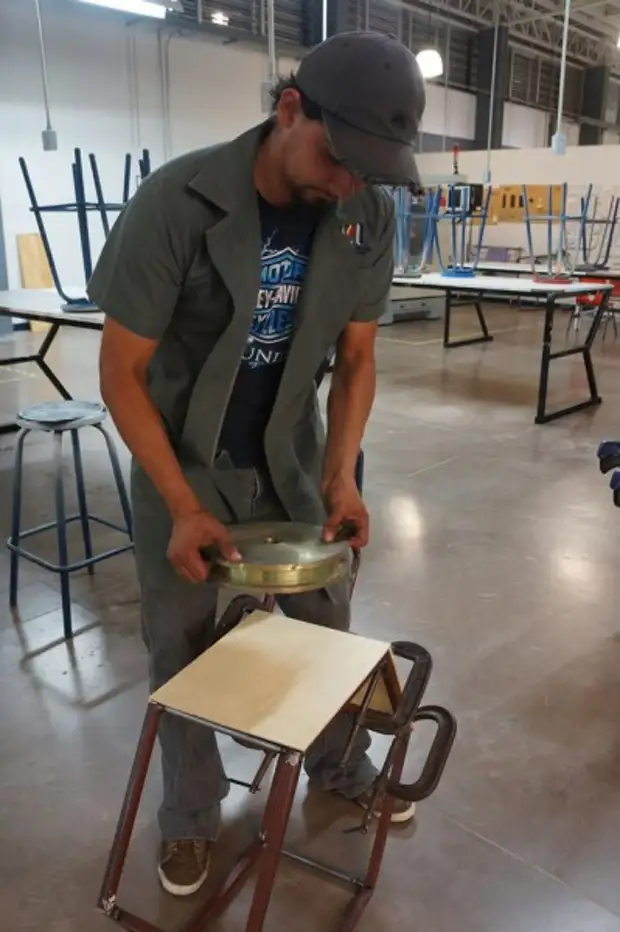
Step 4: We carry out lighting
We will install the cartridge, after which we will insulate all the connections.
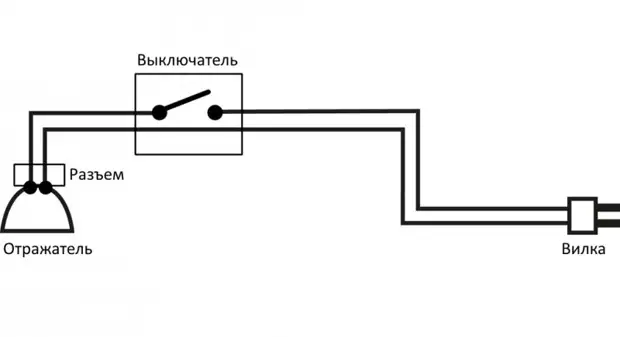
Connect the switch and fork, as shown in the diagram.
Upon completion of the work, we will put a putty, cast the surface and cover it with varnish.
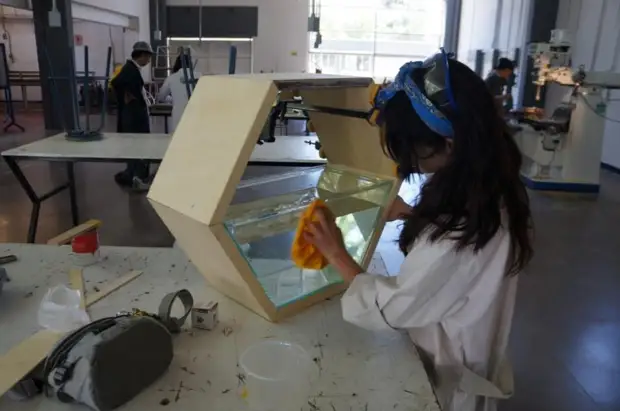
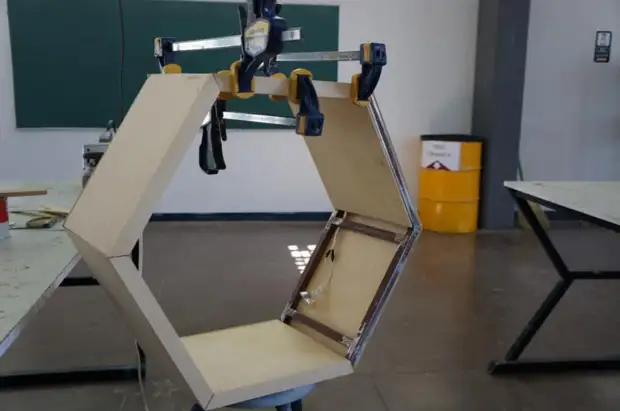
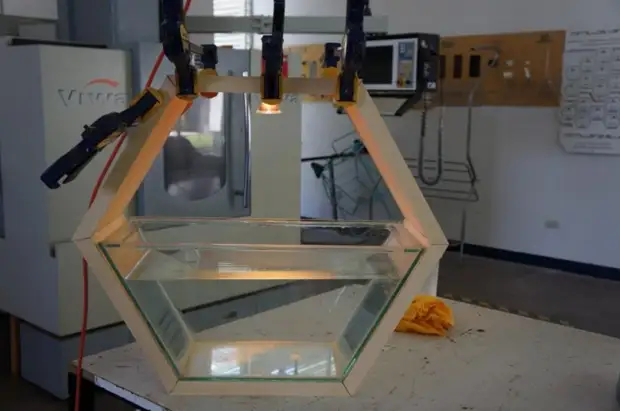
Step 5: Aquariums
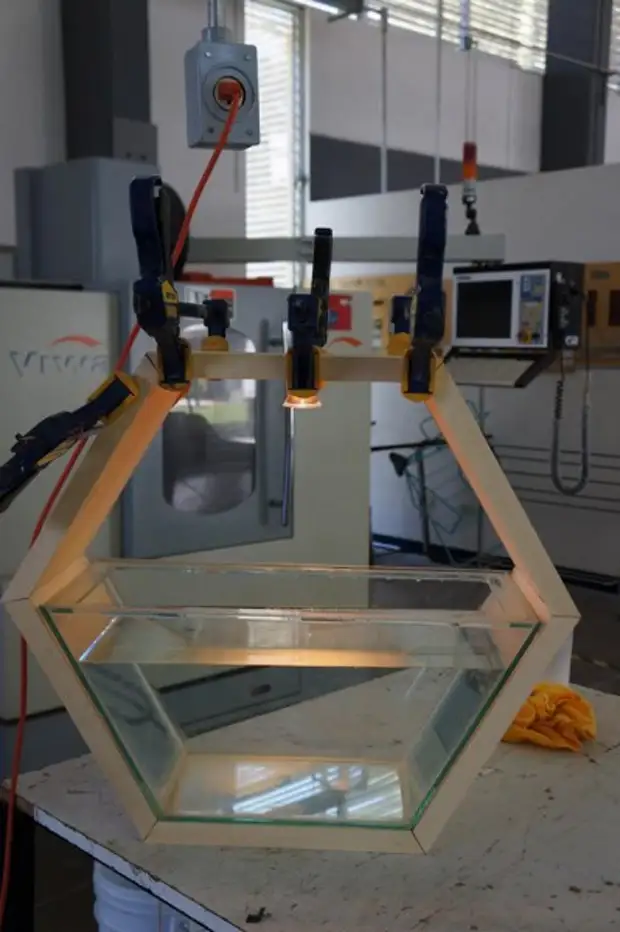
We measure the internal dimensions of the frame and cut out the walls of the wall for aquarium. Gley glass. Next, cut out the basis for the support of plants from the foam.
Fill the aquarium with water and leave for a day to check the tightness of the compounds.
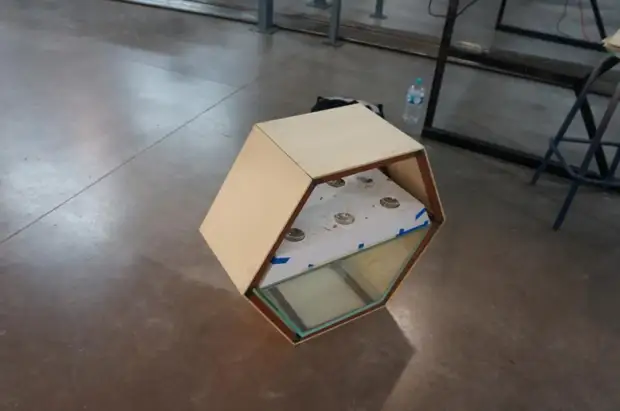
Foam base (if you look in profile) repeats the shape of a trapezium with a height of 6 cm. Inside it is a hollow. Instead of polyfoam, you can take any material that does not allow leaks (glass, acrylic or PVC).
We will make two holes for hoses (in the ends), and a few more holes for plastic cups in which we will plant algae.
Function of the end holes - to bring water to plants and overflow the filtered water back.
Step 6: Packaging, Assembly and Operation
When all the details are ready to come time to collect them together.
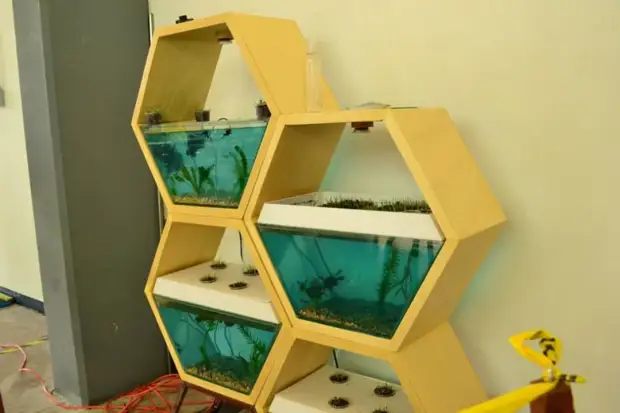
Decorate aquarium by stones and algae. We will establish an aerator to enrich water oxygen. After that, holly water and launch fish.
A source