
The author of MK is Olga Volkova.
Mosaic is an effective "masking" for many everyday items. It turns the object of mass production into something unique and original.
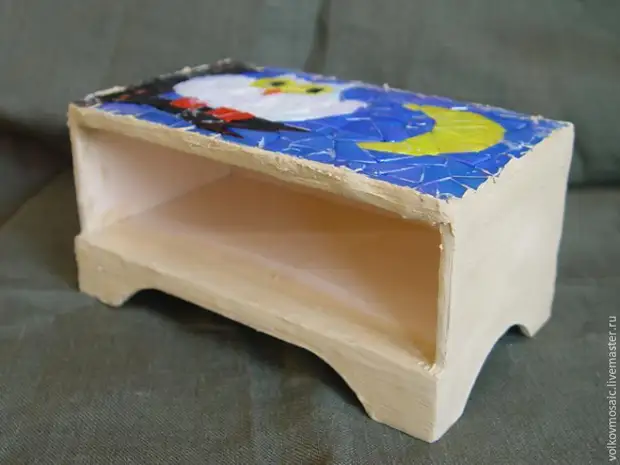
I present to your attention a master class on decorating a mini-chest in a mosaic technique with decoupage elements. A pretty small dresser for baubles will look perfectly on the dressing table. You can store in it decorations, letters and other your treasures.


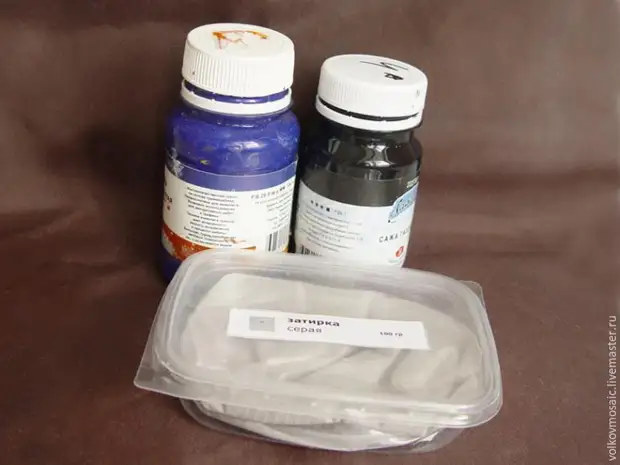
You will need:
1. Blank box.
2. Glass mosaic mosaic 2 x 2 cm.
3. Glue PVA, glue moment.
4. Tongs for rolling mosaic.
5. Grout.
6. Putty.
7. Transparent Scotch.
8. Rubber spatula.
9. Emery paper number 1.
10. Tassel.
11. Acrylic paints, acrylic varnish.

Mosaic for the box:
- Yellow tile - 7 pcs;
- Blue tile - 26 pcs;
- White tile - 15 pcs;
- Dark brown - 13 pcs;
- Black tile - 1 pc;
- Red - 2 pcs;
- Orange - 1 pc.
1. It is necessary to decide what to lay out on the top of the chest and prepare a sketch.
You can draw inspiration from different sources, including nature, the world of animals and plants. An image of animals and birds is invariably enjoy popular and always attract attention.
For this project, I chose an image of owls - a symbol of nightdiction, the personification of the aggregate of earthly and celestial knowledge, she sees everything from the inside.
All nations were with great respect with great respect, as its main power - in the ability to transfer wisdom from ancestors to descendants, to see hidden, hidden in darkness.
In modern interpretation of owl - symbol:
• scholarships;
• limitless horizons;
• fair mental luggage.
Animal and birds can be depicted symbolically, it may be an allegorical, humorous, realistic or naturalistic image. You can designate only their contours on a single-color or two-color background, depicting silhouettes or achieve a two-dimensional or three-dimensional image. For example:


Draw a sketch of owls sitting on a tree branch. The dimensions of the picture are very important. I got rid of the details that will not be visible at a distance. The size of the sketch must correspond to the size of the top of the chest.

2. I glue the moment sketch on paper.

Then, on the glue, glue a transparent tape sticky side up. Also, you can use bilateral tape. Then the glue will not need.
This method is called the reverse mosaic set. The mosaic tile with the invalid side is glued on the temporary surface - a sketch with a sticky basis.
Then, the resulting mosaic canvas turns over to the other side and glued on the top of the chest.
Sketch I made a mirror in the other side, then that the finished composition was in the one way, in which she was originally intended.

Mosaic tile is glued to a temporary mount (scotch) with an inlet.

3. Layout pieces of mosaic tile of different shapes the temporal base, according to the figure.
This method of laying the mosaic makes it possible to achieve an end with a smooth surface. It is suitable for decorating surfaces requiring increased evenness. For example, for floors, a table cover or chairs seat. This method is suitable for the top of our product.
The fact is that the mosaic on the reverse side has a corrugated surface. This is done for better clutch with the surface. When we glue the whole tile, there are no problems - the tile falls smoothly. But it is worth you to beat it into parts, as when gluing pieces with a direct set, the tile begins to "walk". One edge piece to go above, the other below. Therefore, it is difficult to achieve a smooth surface.
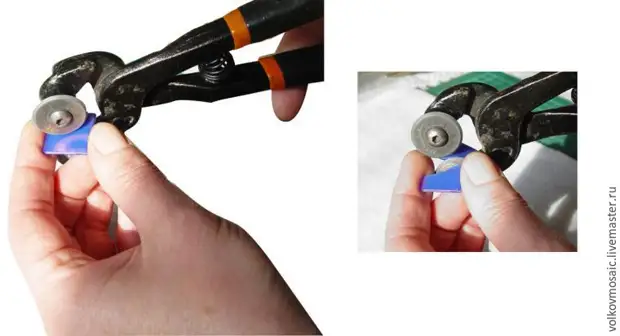
No less important sizes of mosaic cubes. When the mosaic sinks with special forceps, try to make pieces of this size so that they are not too large and did not break the drawing.
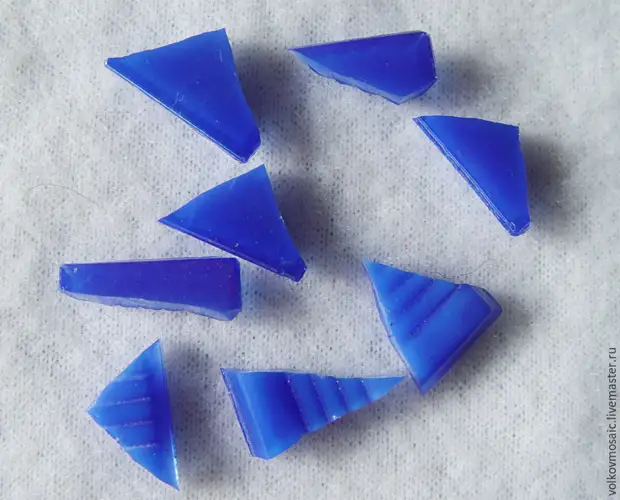
The pieces should not be too small so that the mosaic does not look slightly. Very small cubes weaken the effect of the mosaic and make it nondescript.
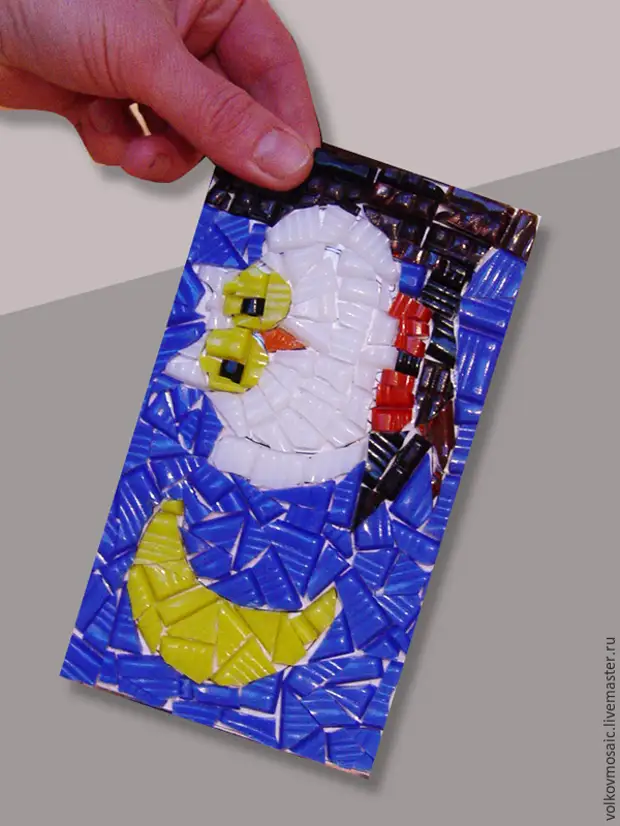
So, our sketch with the owl is fully laid with pieces of mosaic tiles.
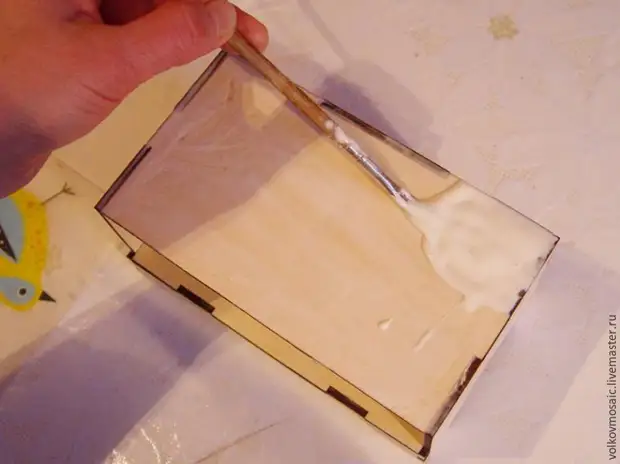
4. Cooking the surface of the chest. Initially, the subtle layer of PVA (construction) is born. Let dry 30 minutes. Then, with a magnifying layer of glue.
For the gluing of most types of tiles on the fiberboard or other wooden surface, the glue PVA is best suited for wood. This glue remains white until it dry. It is very convenient, because during work you can see how much glue based on. And hanging, it becomes transparent.
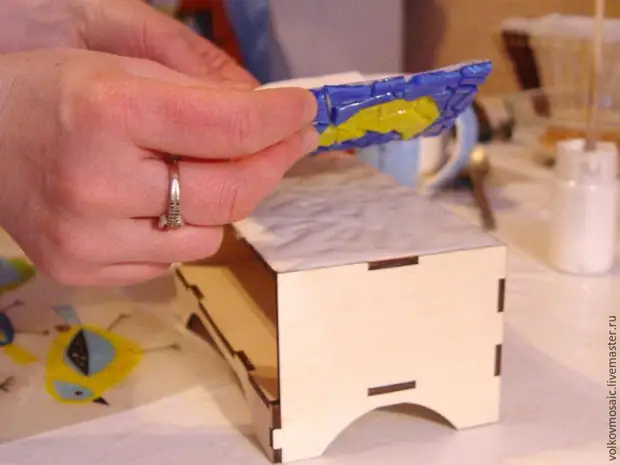
Lower the mosaic panel with tiles down, the surface of the chest on the missing glue.
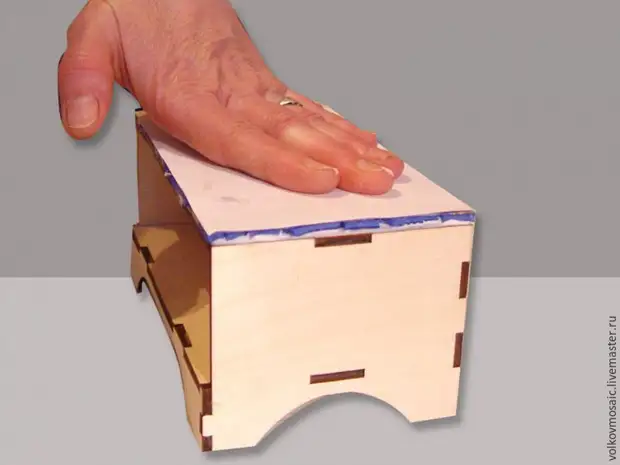
Slightly add a sketch with a mosaic tile to the surface of the product. Leave to dry it for 12-15 hours.
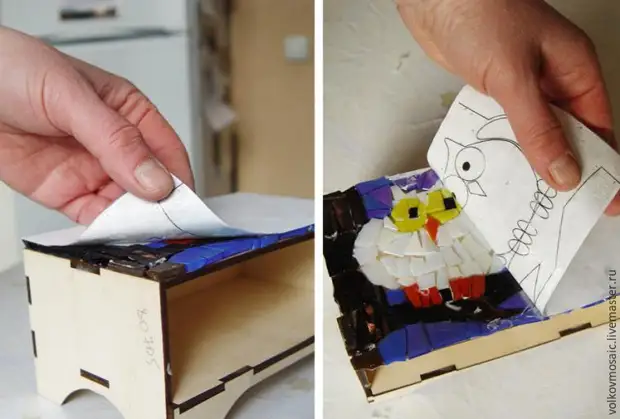
5. When the glue dries, it will be possible to remove the paper with scotch. They are no longer needed.
The mosaic is glued to the top of the chest and lies exactly. It's time to lure the grouting of the seams between the pieces of the tile and sharpen the putty side of the chest.
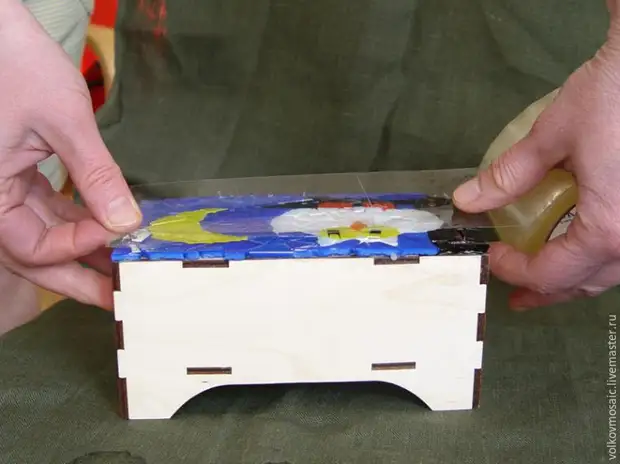
6. Let's start with putty. We close the surface of the box with painting or ordinary scotch.
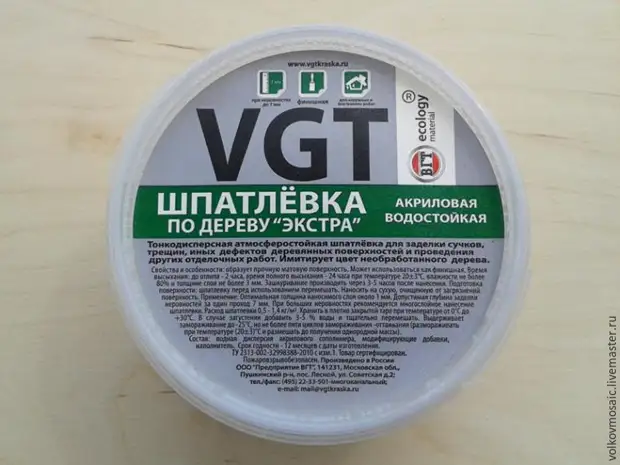
On the construction market you can buy a putty on the tree. She is well used to close the sides of the casket.
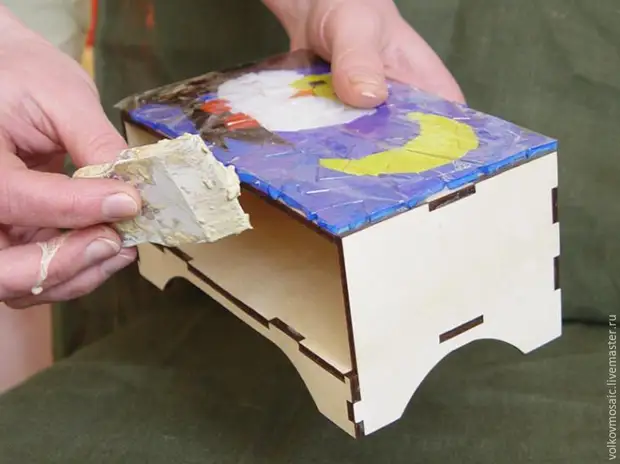
I recommend to apply it with a spatula in two receptions. First one thin layer. After drying (5 hours in a dry room), pollute the shapached surface of the sandpaper No. 1. At the same time, try to achieve a flat surface as much as possible. As a rule, it is difficult to achieve the first time, therefore it is necessary to apply the second layer of putty, reporting it in the recess and reducing the slides.
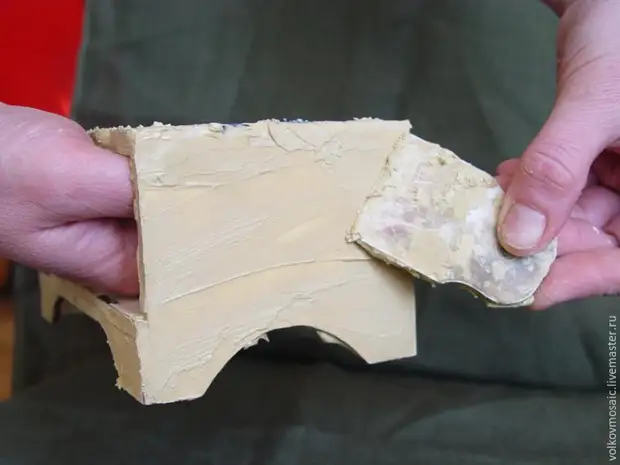
Try to put a putty on the surface of the product as much as possible. Then the less will have to work sandpaper.
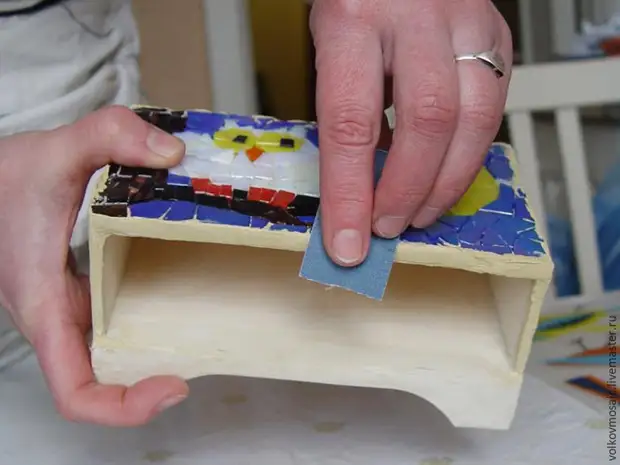
After the putty dry will dry out the second time, redeploy the irregularities of the sandpaper.
In this photo, the whole chest is polished. But the front top sidewall had to sharpen again to get rid of too large depressions and bulges. After the material is dry, it was once again paved by sandpaper.
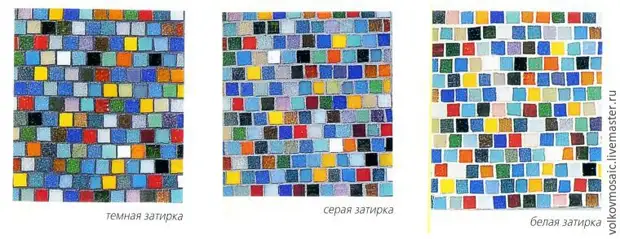
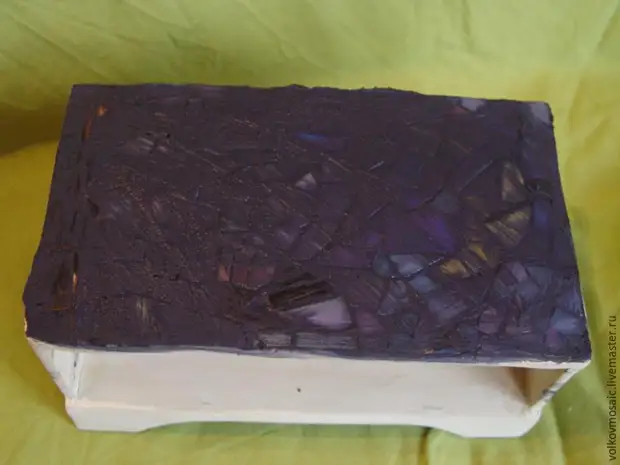
7. We are preparing grouting for seams. Since the main color of work is blue, then I decided to add a blue and black acrylic paint into a light gray grout.
In the mosaic, the design of the gaps between the cubes is an equally important element than the cubes themselves. The final result is more dependent on the color of the grout: the white grout will make the whole mosaic lighter, dark grout will make the mosaic darker, deeper and can create a contrast.
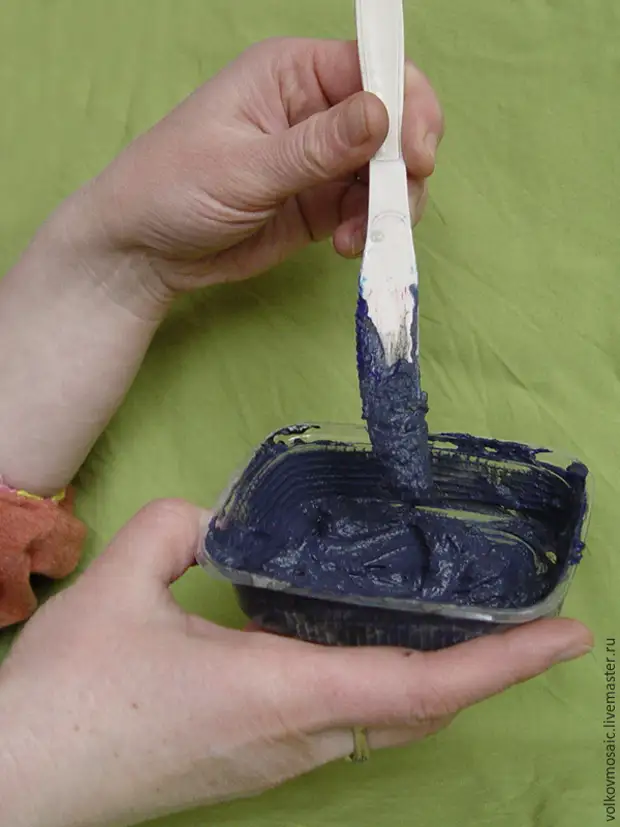
In powder (3 tablespoons) add water 2 tablespoons, then, paint. Mix all the ingredients. Mass should turn out thick and not drip off the sticks.
With the help of a rubber spatula, we apply the resulting mass on the surface of the product and rub it into the seams.
It is worth saying that at first it makes sense to sharpen the sides at the chest, and then, losing the seams between the tile. If you do on the contrary, the bright small crumb, which flies when we grind the dried putty, will fall on the dark seams between the tile and paint them into the bright tone. Remove it later, and get a dark blue tone to get the seams and the color will be impossible.
In this form, we leave the product to be dried for an hour.

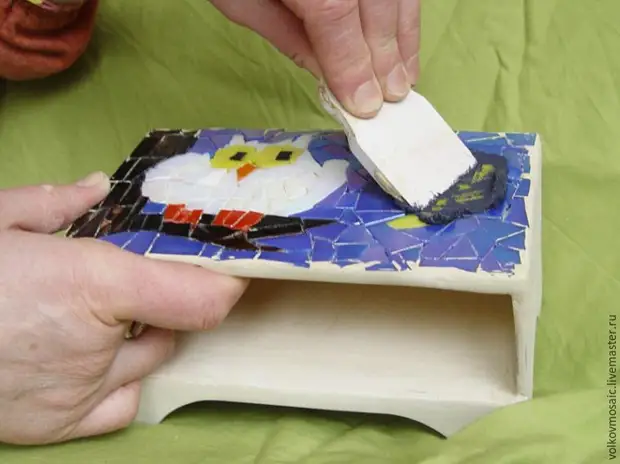
8. Then, a wet napkin begin to remove an excess grout from the casket surface. Immediately do not try to remove it all. The seams will remain more raw, and the grout will be swore over the surface. After 5 hours of drying, it will be possible to finally wash the mosaic surface from unnecessary grout.
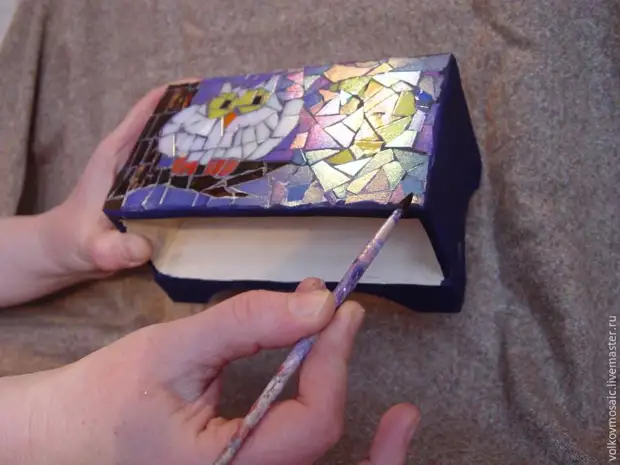
9. Final stage: decoration of the remainder of the casket. I decided to paint the box itself with blue acrylic paint. Then, on top of the paint covered with acrylic varnish.
And the front part of the drawer I wanted to decorate in the technique of decoupage.
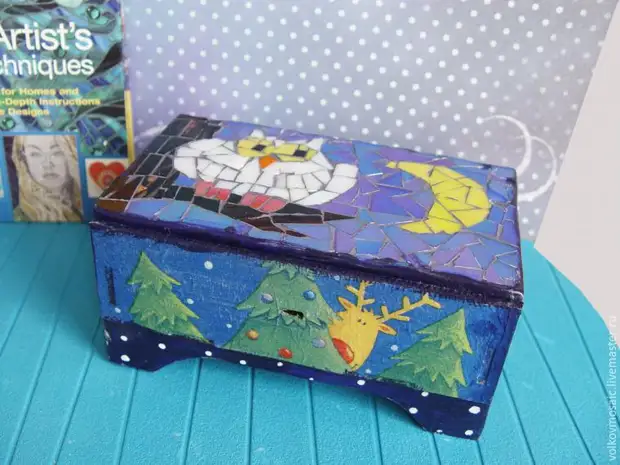
And here, our mini-dresser is ready. It remains to find him a suitable place in the interior of the apartment.
It is worth deciding whether this product will stand out on a general background or merge with it. Whether you want everyone to immediately pay attention to your mosaic, because it easily overshadows what surrounds it.
A source