
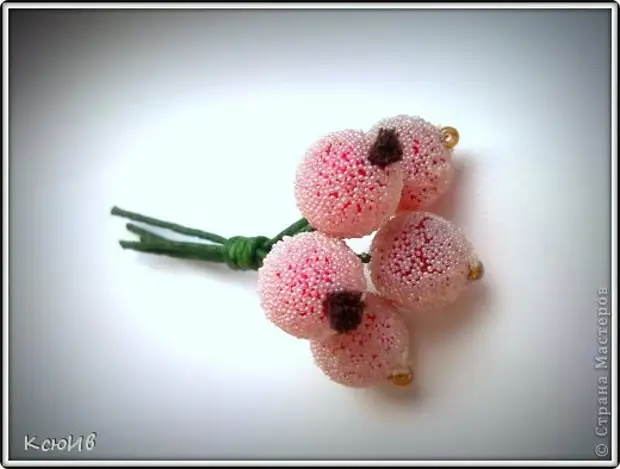
Twig with berries for decoration.
2.
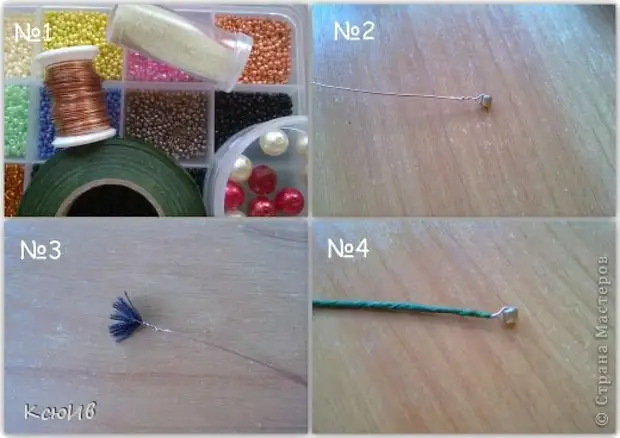
No. 1 For our berries, we will need: a microbistant, wire,
Beads (color can be any), Flor Tape (or corrugated paper), PVA.
No. 2 on the wire tip weeping beads (№3 or thread), fix.
No. 4 Wires are wrapped with flora ribbon.
3.
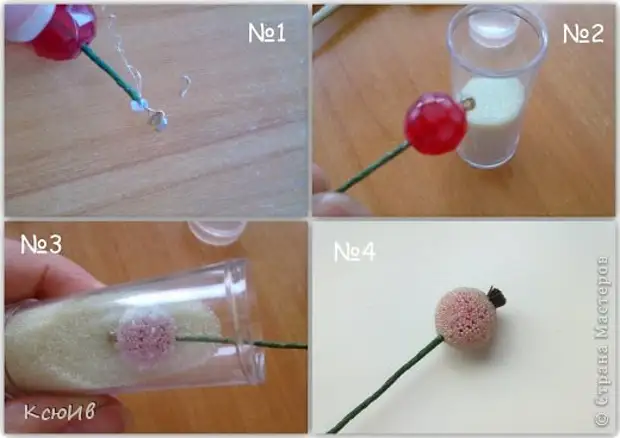
No. 1 Now we need to consolidate a big bead, I used a gun for this.
No. 2 Now the bead need to deceive the PVA, use for this brush.
No. 3 After you immediately scroll through our bead in a bottle with a microbistant.
№ 4 That's ready!
Stychkin
3.
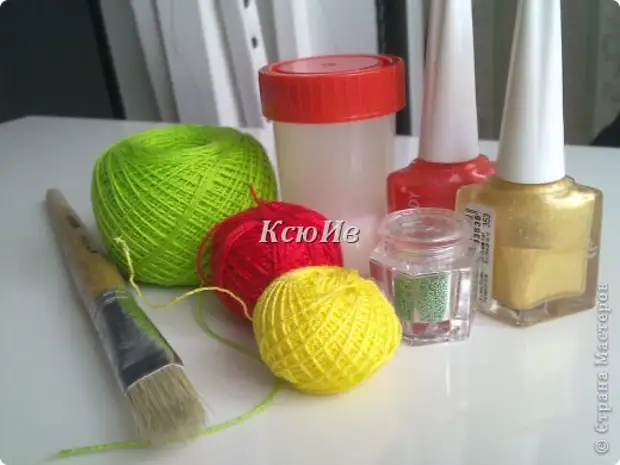
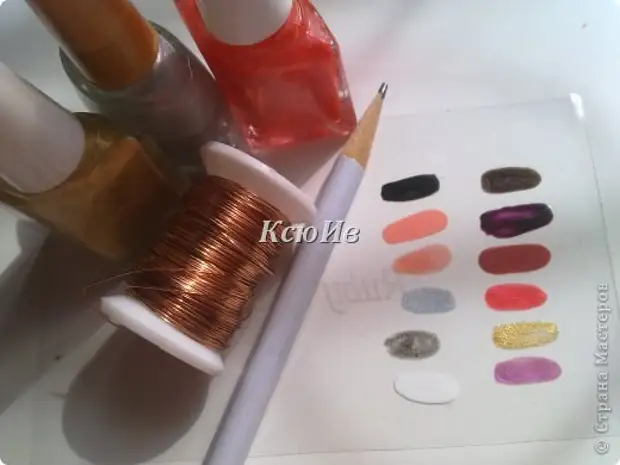
What we need. Iris threads, nail polish, brush,
PVA diluted with water (if it is thick, the threads are not impregnated with glue)
and small beads for decoration (you can buy the one for scrap
Or in any store where there are nail decorations).
four.
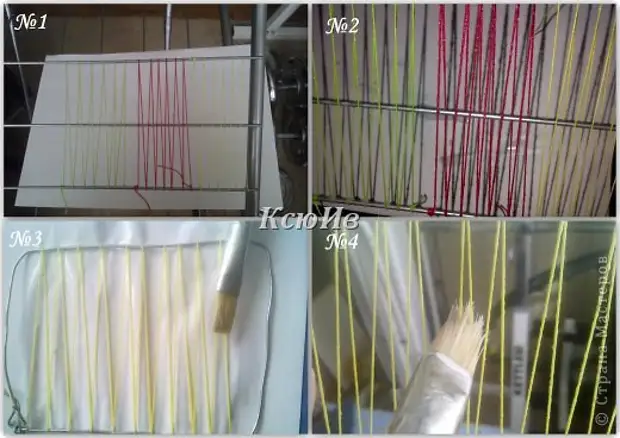
№1 Threads I pulled on what was at hand ;-) Dryer for linen, missed a good PVA
№2 And now we are waiting for dry
№3 You can and this option, bend the wire, pull the threads, put on paper and overs. And then hang somewhere dry.
№4 Do not forget after remove the paper from the sheet, walk again with a brush without glue. And the excess glue will be removed and evenly falls the rest.
five.
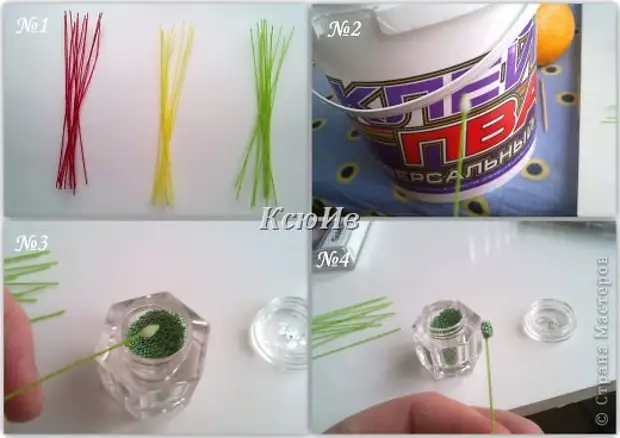
№1 Here are our wands.
# 2 Now consider several options. The first, omitting the tip in PVA glue, it turns out a droplet (sorry for the quality, I did not want my tel. Focus well)
№3 And immediately carefully do the droplet in the bead from all sides.
№4 from and ready, now we put in any container for drying.
6.
No. 1 with the second option will have to tinker. Macaus tip in varnish.
№2 Whatever the lacquer does not flow along the entire length of the thread, I blocked a few seconds for a few seconds. So have to do several times. In my case, it turned out five foolings. Between each layer did not wait for a long time (lacquer pretty quickly), while she was macalas the last thread, the first is enough enough. But with the other end of the thread, there were already all the "procedures" only the next day.
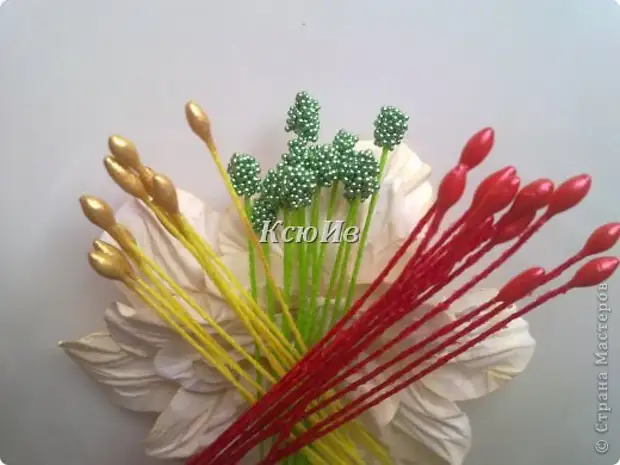
№3 Well, in fact, our stamens.
№4 And this is a variant of their use.

7.
MK Flowers for decoration.
eight.
All we need it
Wire, pencil and nail polish.
I first used the whole varnish on the film that I had
And selected the favorite.
nine.
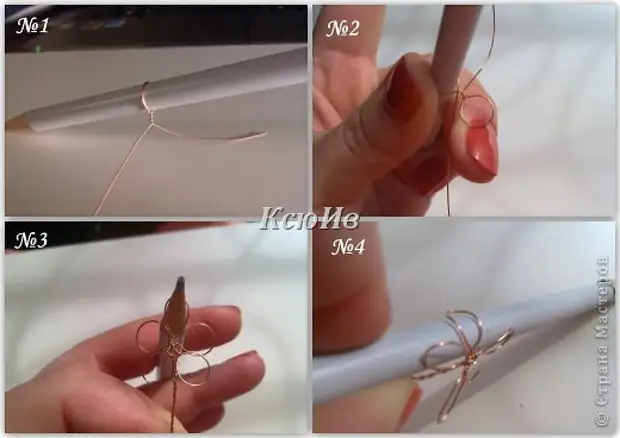
№1 The size of the petals will depend on the thickness of the pencil. Watch the wire around the rod and make the first petal.
# 2 take out the pencil and do the following. And so so many petals as you want.
No. 3 Petals can be left round, and you can pull a little.
№4 Now much spinning putting on the rod.
10.
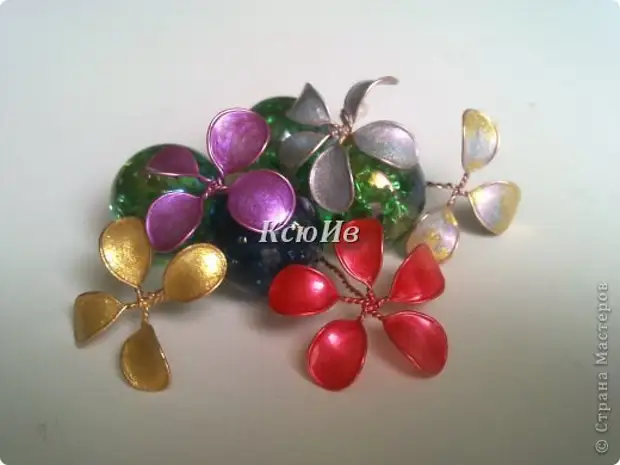
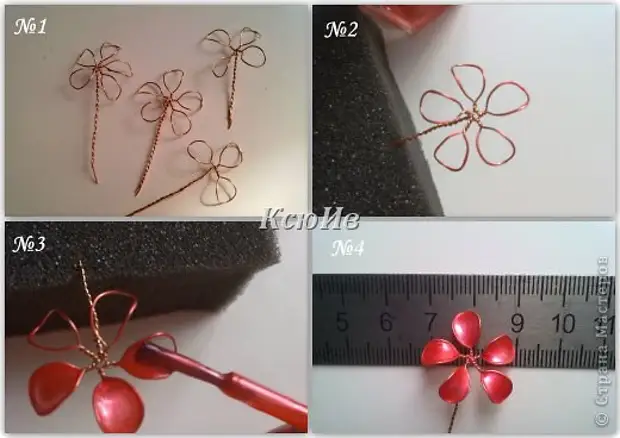
№1 Here are ready our billets.
№2 I am for a better clutch, along the contour went lacquer.
№3 Now the most interesting, fill the varnish emptiness. The more varnish on the tassel, the more saturated color will be. But do not worry if the first time it does not work and will greatly enlighten. After drying, you can safely apply another layer.
№4 Well, that's all ready.
eleven.
Experiments with color.

12.
MK in the stamens Var №2
I want to offer you another option of MK of the stamens from my childhood. Once I was engaged in flowers from the fabric and at the time, we did the stamens of the mankey painted by gouache.
13.
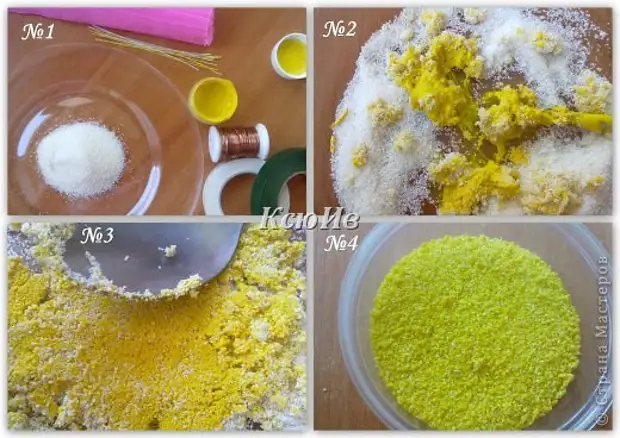
№1 For this, we need a manka, gouache, wire or prepared threads for stamens, flora tape or corrugated paper (I used it at that time).
# 2 To start, we will paint the gun itself. To do this, simply add a gouache with a small portion to a sack.
№3 and carefully larger a spoon. I am after not long rubbing a spoon, I did everything with my hands, I just triturated with my fingers (for me it is more convenient)
№4 Well, here is our mixture and ready.
fourteen.
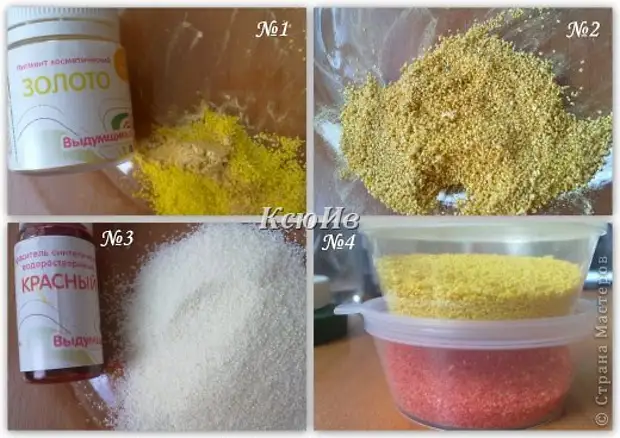
№1 Since I sometimes do and soap, I have such a pigment, I added it for shine.
№2 As a result, I got a golden pollen.
No. 3 can of course paint food or synthetic dyes.
№4 Here I was also not kept and added to the Red Sean and the Golden Pigment.
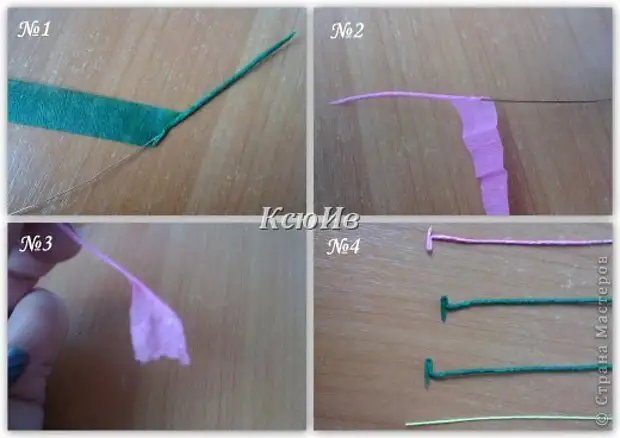
№1 Now the wire will be wrapped by Flor Ribbon or ...
№2 CORFR paper. One nuance, as Flor's tape sticky, it is very easy to rest on the wire, but the corrugated do not forget to laugh at the beginning
№3 And of course at the end too.
№4 Now that the wire will need whenever you need stamens for such colors as lily. In other cases, you can simply use threads for the stamens (as it is done can be viewed in MK №1).
sixteen.
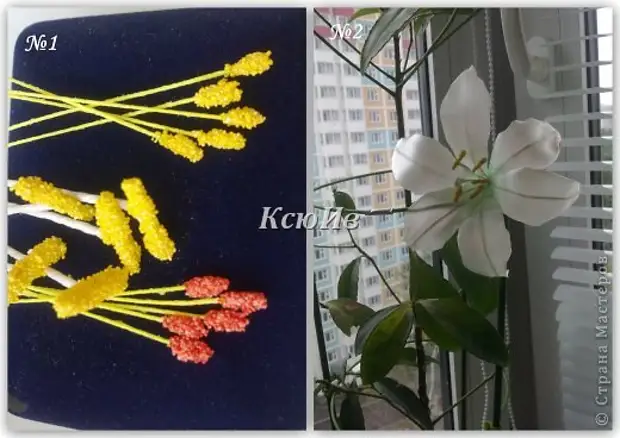
№1 Now we do as in the first MK in the stamens, just do the tip in the PVA and after our semi. Let me dry and everything is ready.
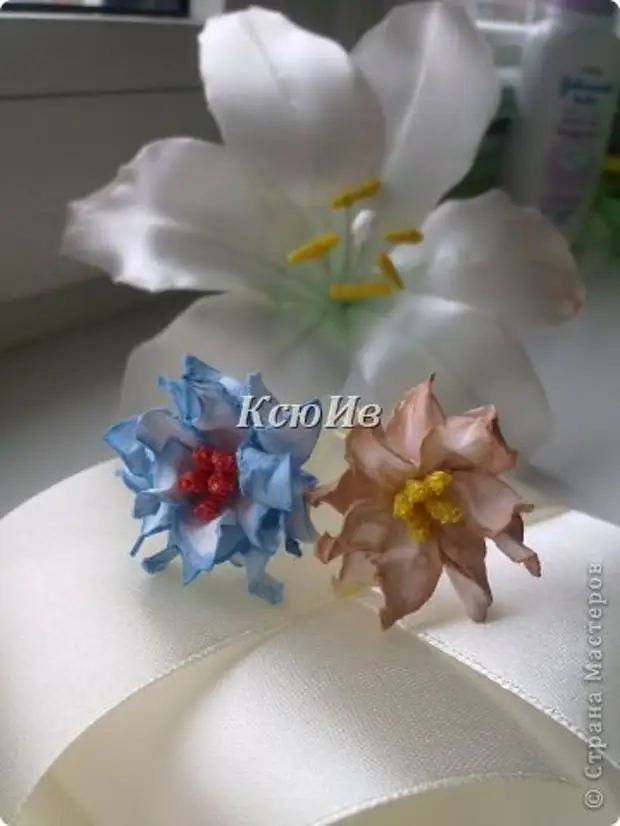
# 2 decided here in the morning to do something like lily. So strictly do not judge, it's so simple I made it for example in bulk stamens
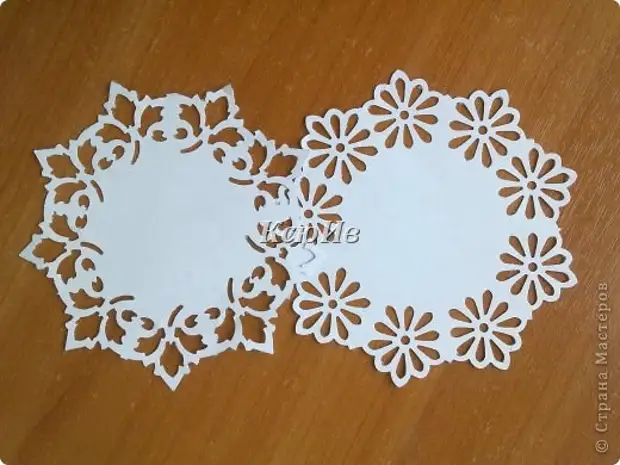
MK Openwork Sliptes
These napkins and any diameter can be done by himself
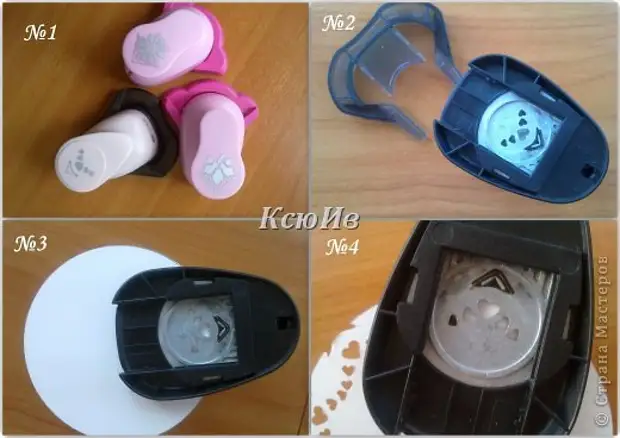
eighteen.
№1 For this, we will need angular holes
№2 As far as I know, the bottom part is removed from any angular hole panel (angular limiter).
# 3 Next of the paper cut out the circle of any diameter and proceed. For convenience, the hole in the hole is kept upside down. This is in order for when piercing the following drawing,
We could see where the previous one ends.
№4 Now it remains to carefully combine the drawings and do so in a circle. For example, I photographed the hole from the heart of the previous picture.
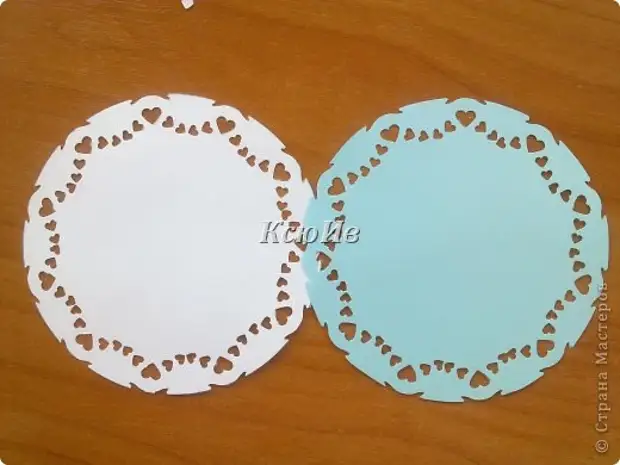
nineteen.
Here are ready our napkins.
Of course, more interesting angular hole punch,
Moreover, the napkin itself will be.
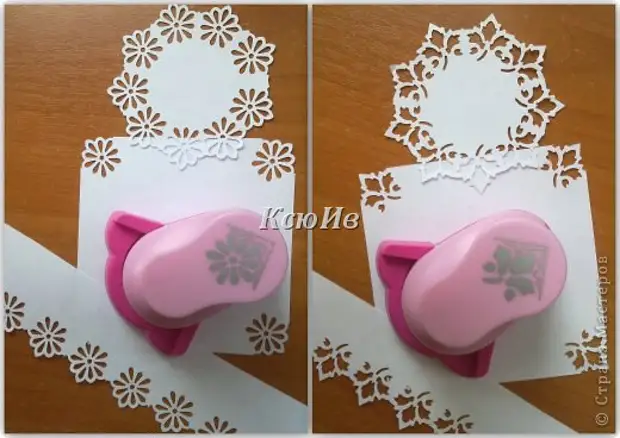
twenty.
You can also try to make the corner and strip. The principle is the same, to remove the limiter and combining drawing to do at a distance that you like more.
You can on the one hand and from two, as if you like.
21.
This time I propose two ideas at once ...
22.
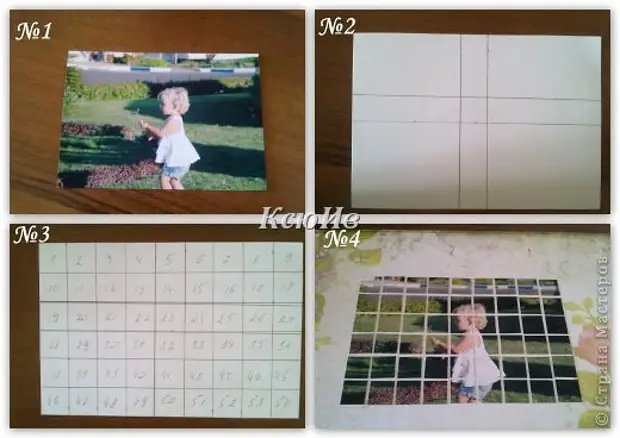
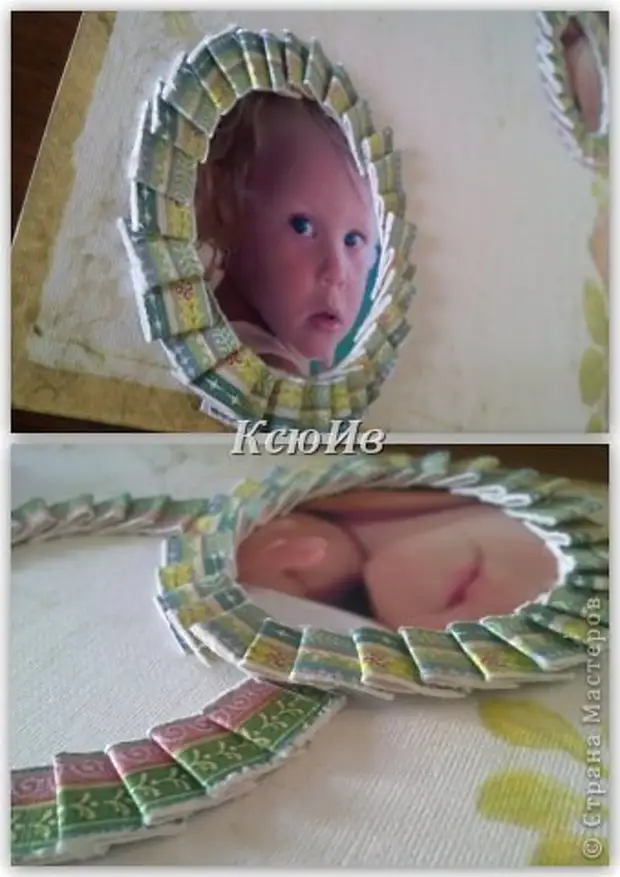
№1 This idea is that it is not necessarily on the page, the whole photo is needed. Why don't we cut her on small pieces ...
After selecting the photo, if one face is on it, it will be better not to cut it. To do this, measure from the front side, how many cm from the top of the photo, to the head and also from the side of the photo, to the face.
№2 Now we put the point from the inside and decide how much cm will be our square. I have a photo of 10x15 cm, and the squares themselves are 1.5x1.5 cm. (Do not forget when put points from the wrong one that the photo turns over and the left side becomes the right, and the right left.)
№3 Now we start noting the following squares from the first. I had a few mm on the edge of my edge, I cut them immediately. Now correct that it would not confuse the sequence ...
№4 and cut. Can of course leave and so, just decide on the width between squares
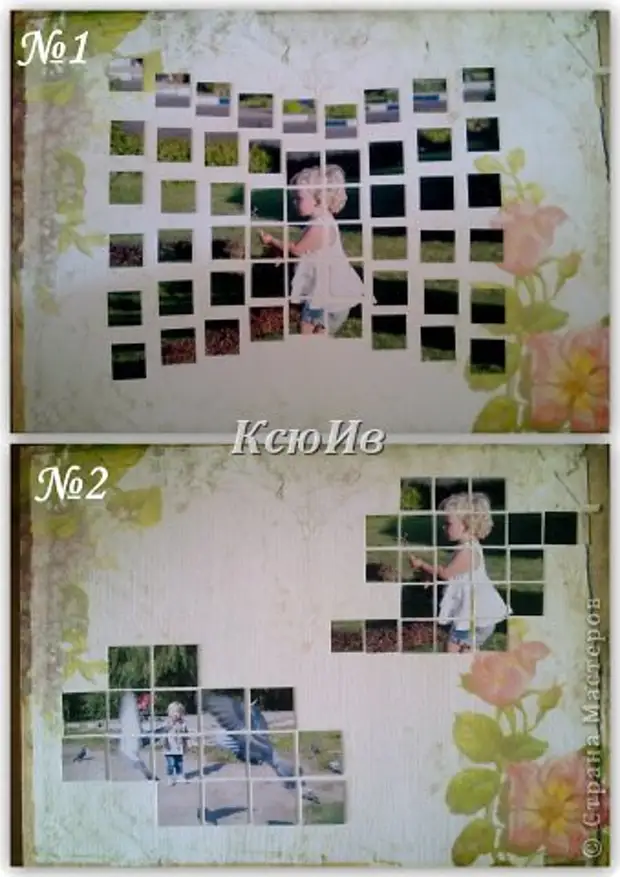
№1 And you can connect fantasy and arrange more interesting.
№2 or part of the squares even just remove.
24.
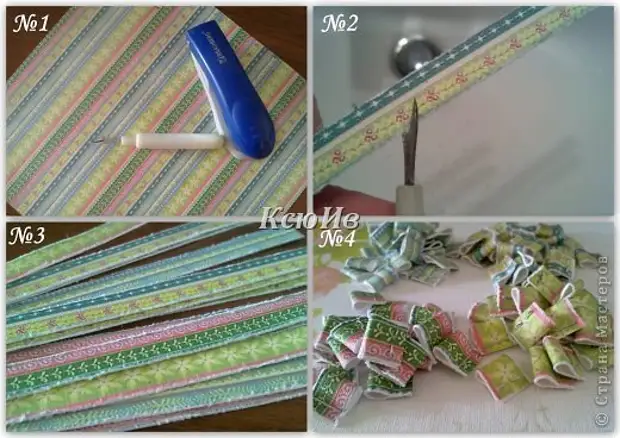
№1 Now for the next decoration ... For this, we need a sheet of paper with any pattern (it does not have to be a strip, I just had exactly such a thing at that time), the stapler and tool for processing the edge of the paper (there is a special for creating torn The edges, I use the usual plower for threads).
# 2 Now cut the paper on the strip, I have a strip width to a little more than 1 cm. After processing the edges, you can then then reject them with some color or leave white.
№3 Here is our strip and ready. Now every mode is still, I cut 2.5 cm
№4 After each small strip we fold in half and fix the stapler.
25
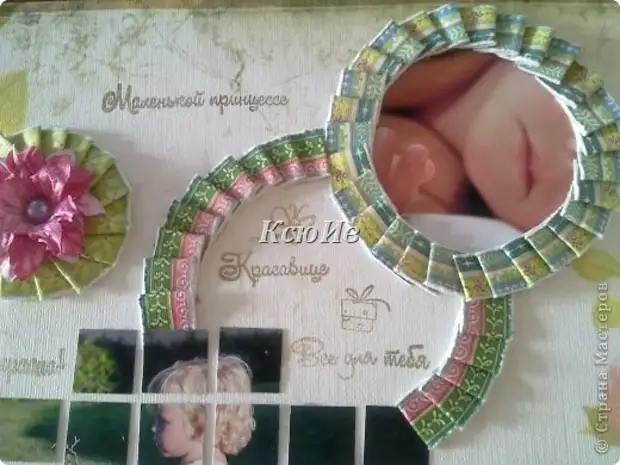
And now again we turn on the fantasy and decide how we will apply them. You can make a photo in a circle, in a square, oval ... You can make it simple a blank circle, and in it or inscription or decoration, but you can just leave like that.
26.
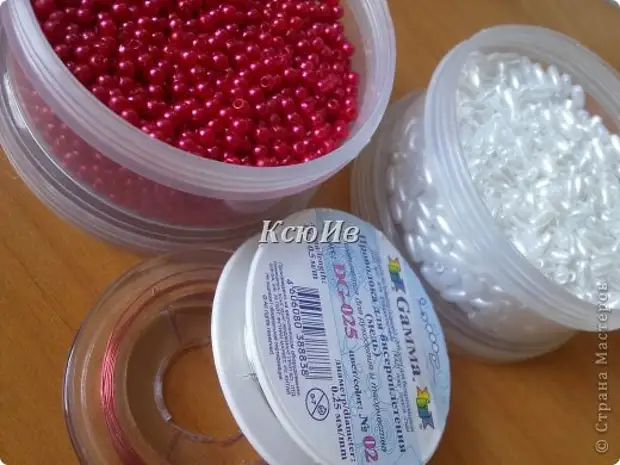
This time I want to offer to make a twig to decorate covers, postcards, albums, and much more.
Probably many have seen such sprigs in stores, but I decided that you can make them and yourself.

27.
For this, we will need only beads (I have beads with a diameter of 3 mm and "rice"), wire. I really wanted to show you a twig with beads in the form of droplets, but at all nearby shops, I never found them. Of course, it turns out more beautiful, but I think that with the beads, too, nothing ;-)))
28.
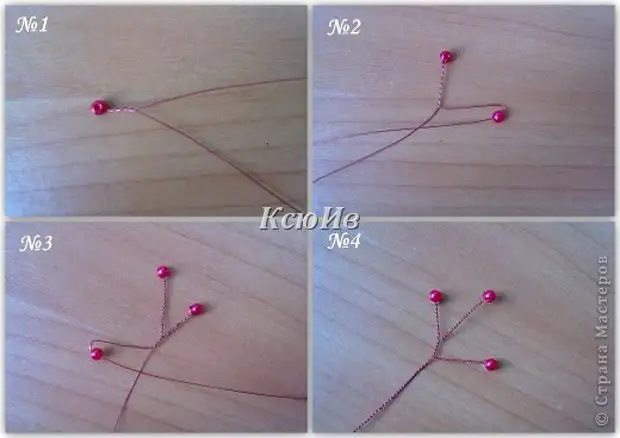
№1 So force. Cut off the wire you need long, it depends on how much the beads will be on the branch and what you want the length of the twig itself (I have 21 cm) you wear the first bead and begin to twist the wire, I started twisting the first bead from the middle of the wire, but this is not necessarily.
№2 Scroll down the distance you want. Next, we wear the following and scroll again.
No. 3 After the second beads, I scrolled a little wire and only after dressed the following.
№4 This is our first twig ready.
29.
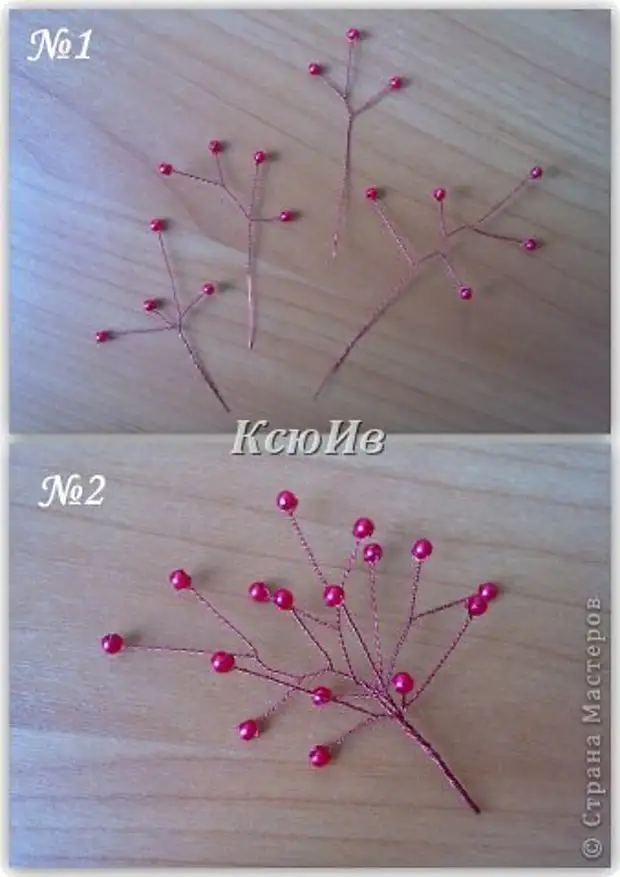
№1 We make twigs how much we want and how we want ;-)))
№2 and collect everything together in one. The bottom can be wrapped in a ribbon or flora corrugated. Since I had no tape of this color, I just covered the nail polish.
A source