
Sooner or later, but in front of a man who serves edging, always arises the question of how to complete it beautifully and gently, how to properly connect the ends of the oblique bay.
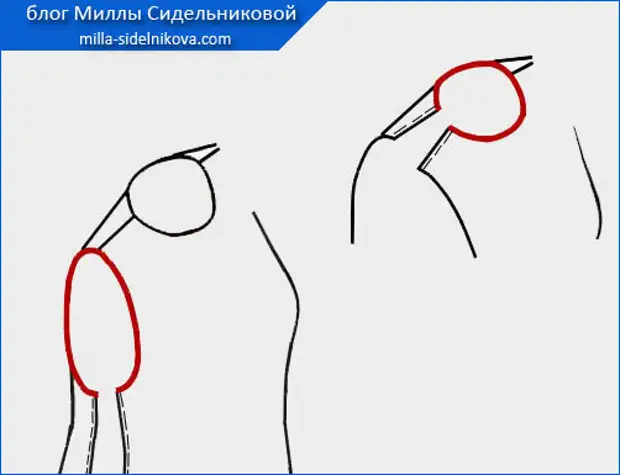
Any connection of the ends of the oblique dispatch on the review is not exhibited. And the specifics of the fulfillment of the compounds with whom we will meet today, dictates us to have them somewhere away from curious views. For example, at the armor, under the mouse, on the neck, in the middle line of the back, etc.
Attention!

Well, let's start!
1st way.
If both ends of the beaks are located on a slice, which is one solid circle or a one-piece perimeter of any other shape, then the ends of the faces can be hidden in the seams.
At the same time, it is necessary to ensure that the ends of the edging, their width, coincide in the seam exactly.
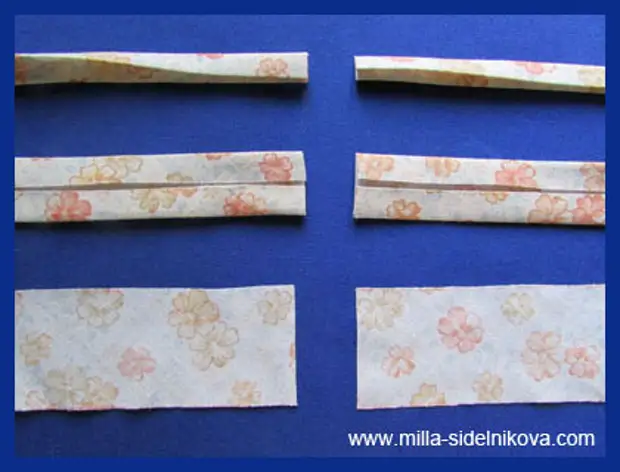
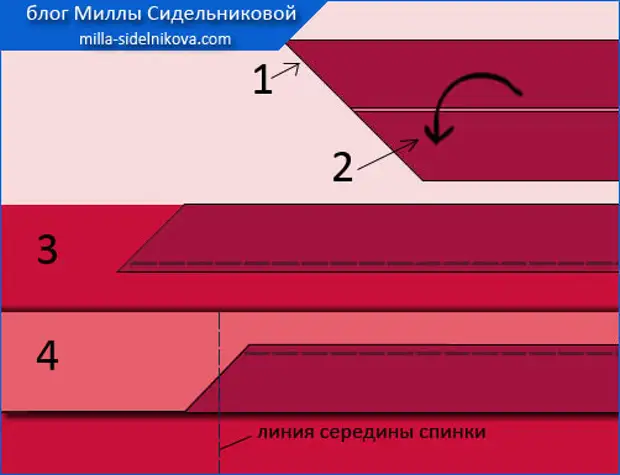
Thus, it is possible to connect in seams of edging, made by places of different forms of additions:
- Baika one-layer, ready, "freshly crown";
- Baika one-layer, ready, with one-fold-bent, allowance for longitudinal sides;
- Baika one-layer, ready, with absorbing allowed in one fold on the longitudinal sides and folded to each other on the median collapse.
2nd way.
For all these types of buildings, you can apply the second way to connect ends.
You can simply measure the exact length of 1) external or 2) inner sections of circles or perimeters of different shapes that will be processed by oblique baking
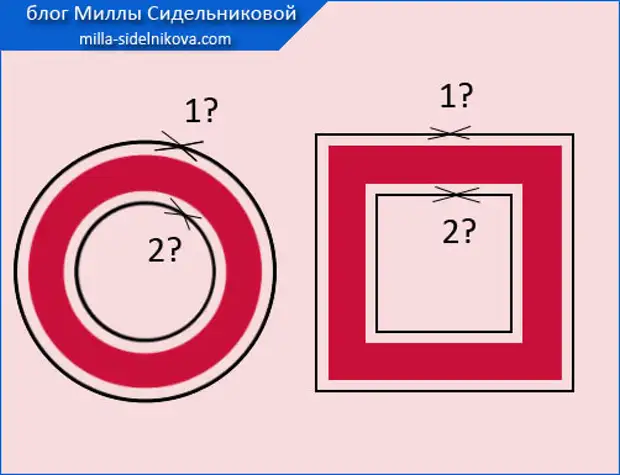
And leaving the allowances at the ends of the faces of 6mm on the seam, to combine its ends with the usual racial seam.
And then you can already take edging from the cut, attaching places made in different additions, each in your way.
The connection of the ends of the beaks, we have somewhere in a small place.
But such a connection is somewhat rude and it will be bad to fit around the cut.
It, and above the rest of the edging surface, will be distilled.
Therefore, it will be better if you connect the ends of the faucets a little different way.
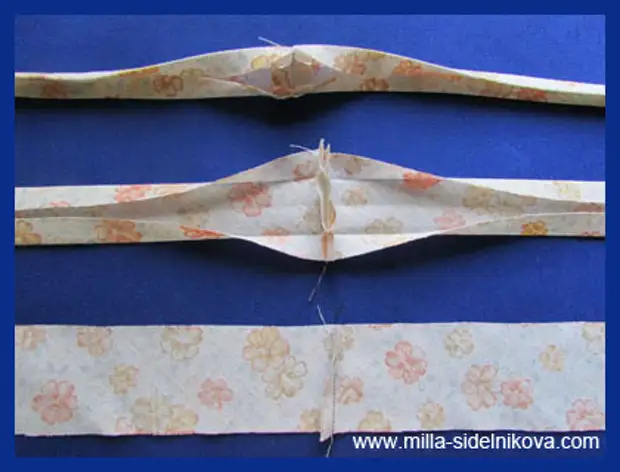
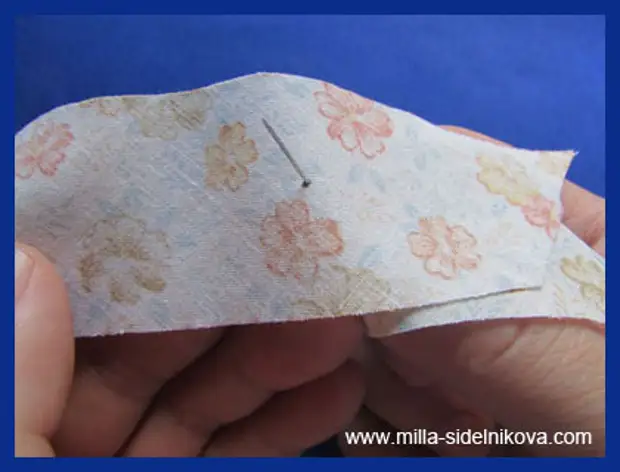
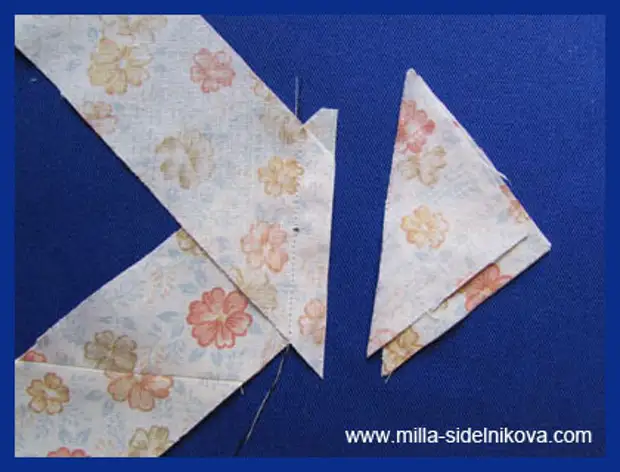
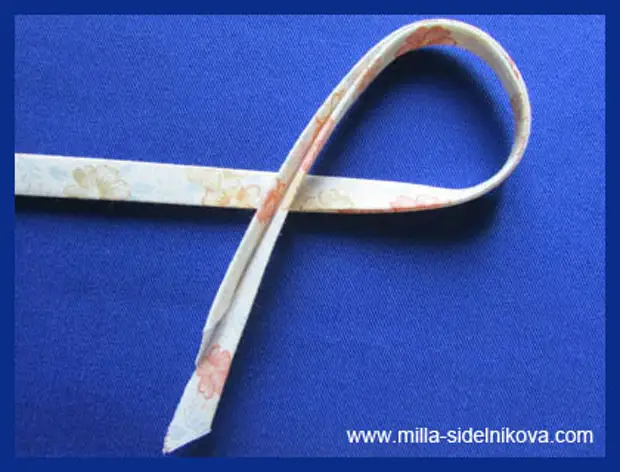
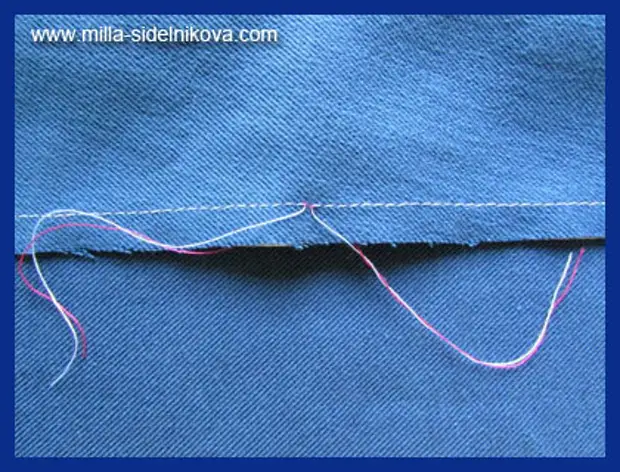
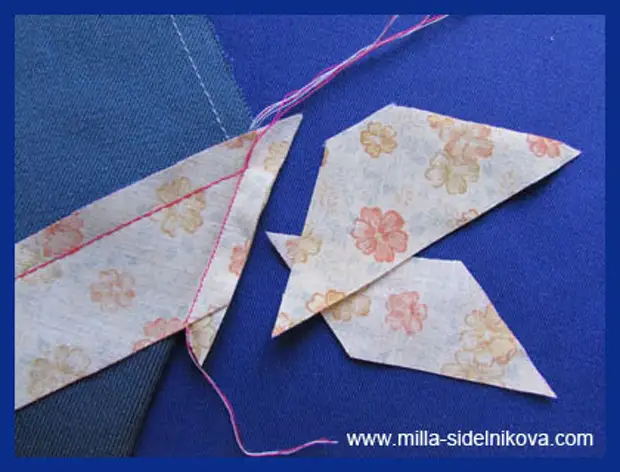
Deciding with the desired long faucet, points on Beech refer to the ends of this segment.
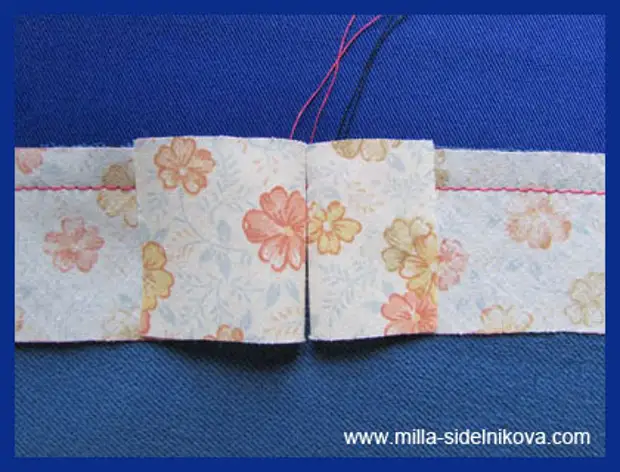
And then, "we ride" on the pin first one end of the beaks,

And then the second, turning them, face to each other.
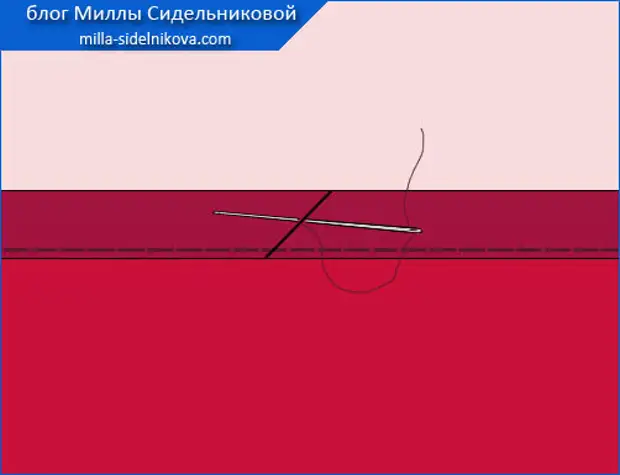
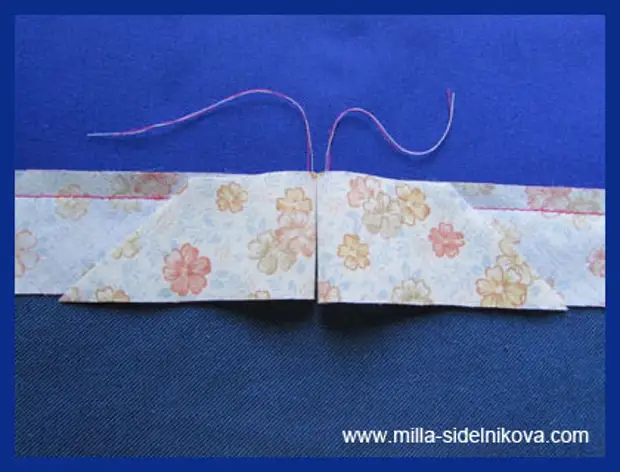
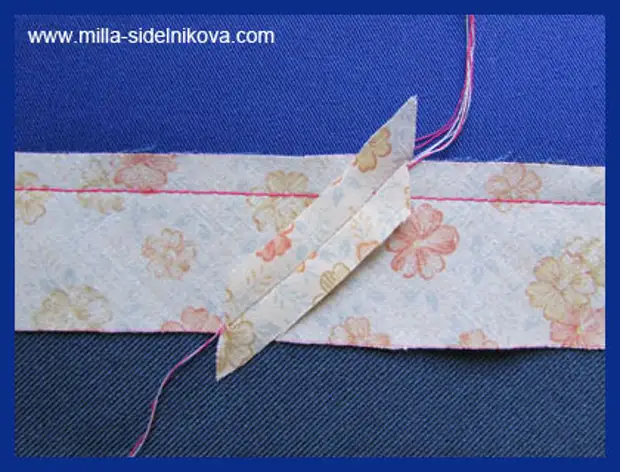
Now we turn the ends of the faces, around the pin so that they become perpendicular to each other.
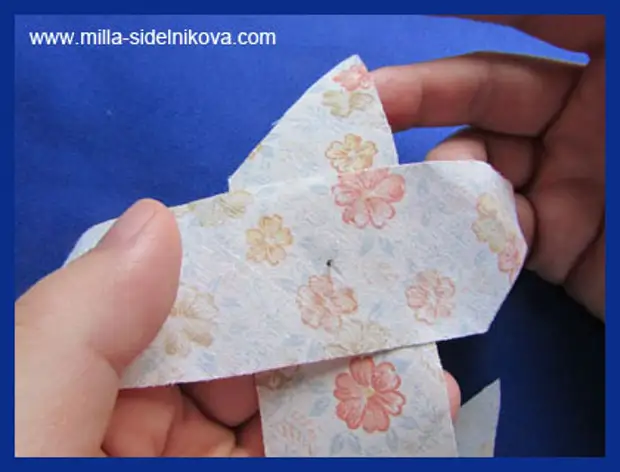
And fix the pin, this is their location.
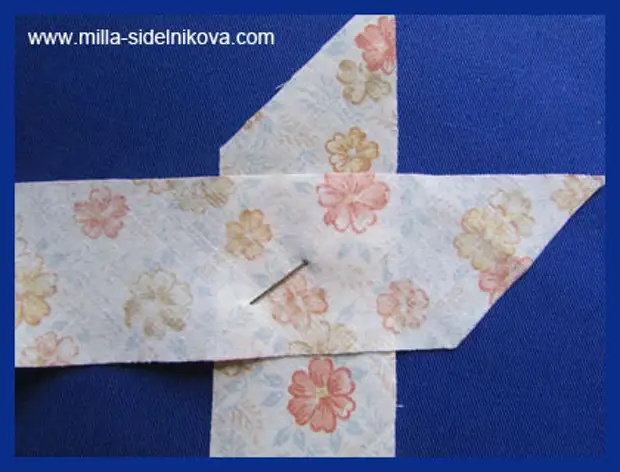
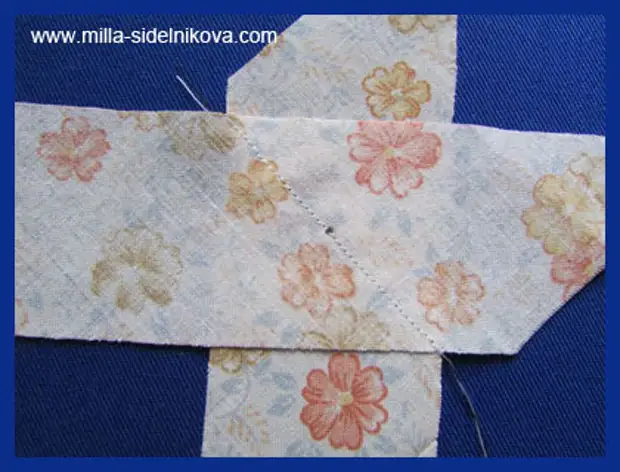
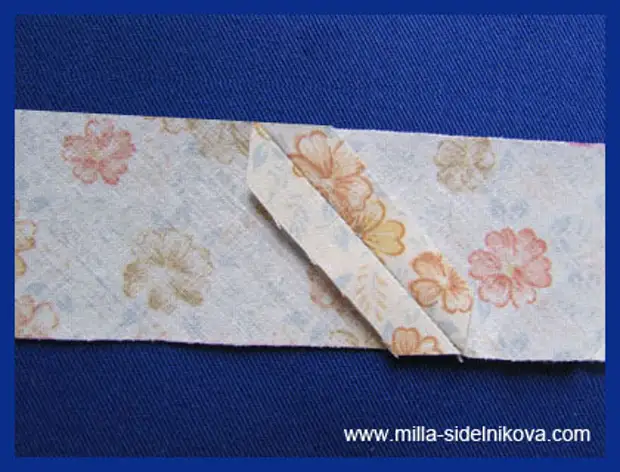
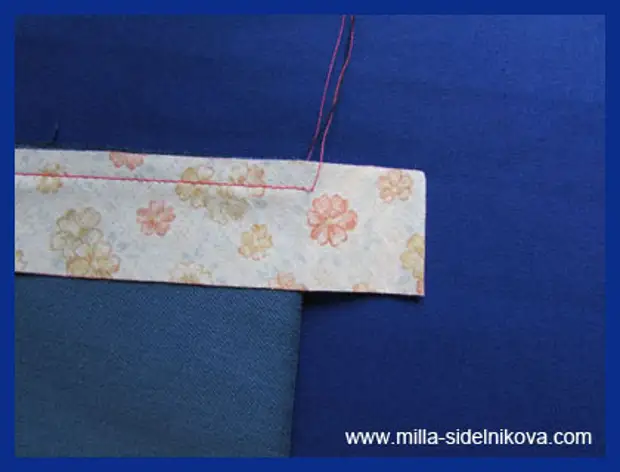
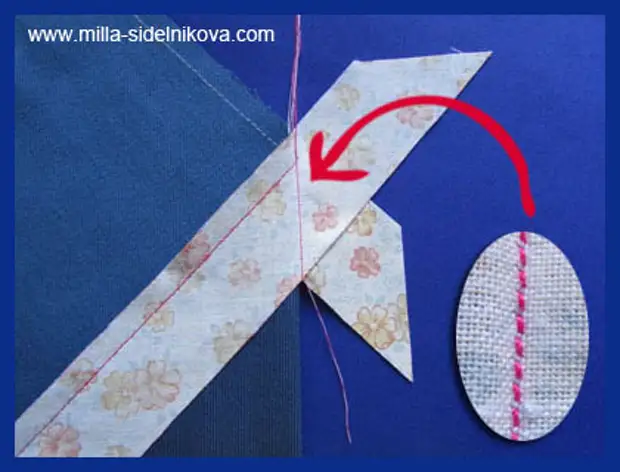
Further, on the equity thread, we deposit a batch line, connecting the ends of the beaks.
Such a line can be performed by conventional stitches, but then the lines are needed at the ends. And if the scaffolds do reluctance, then you need to set the length of the stitch 1-1,5mm.
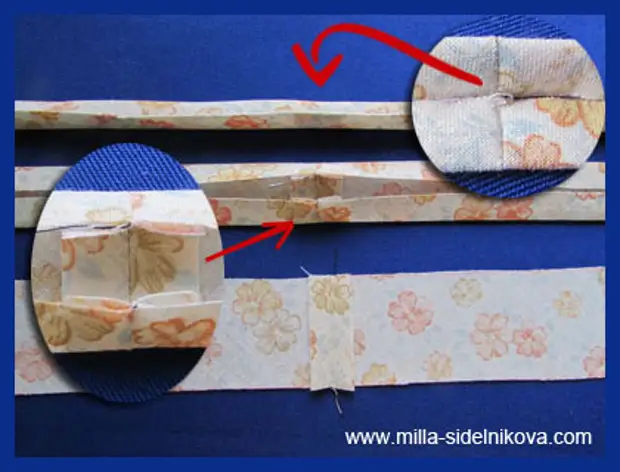
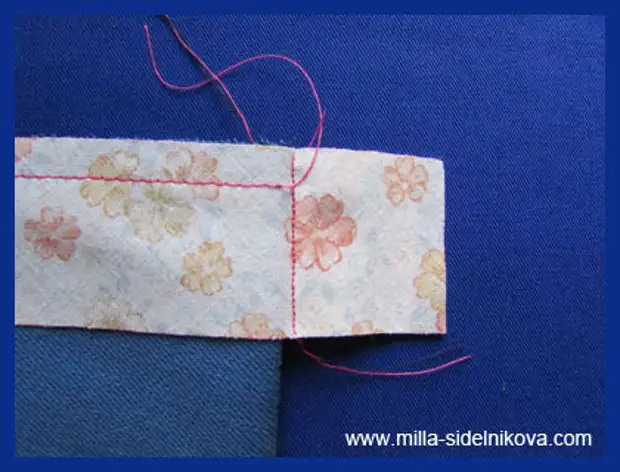
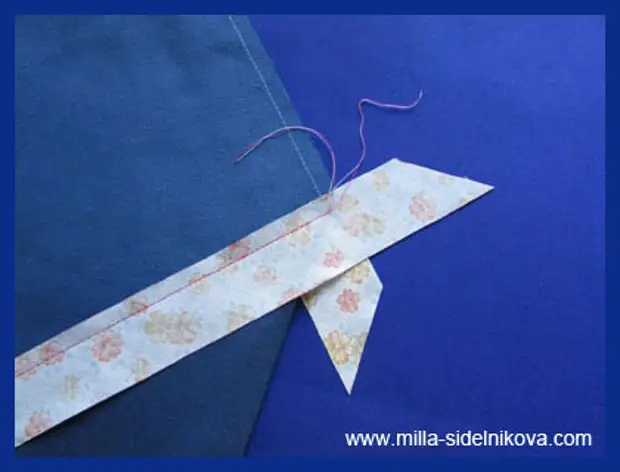
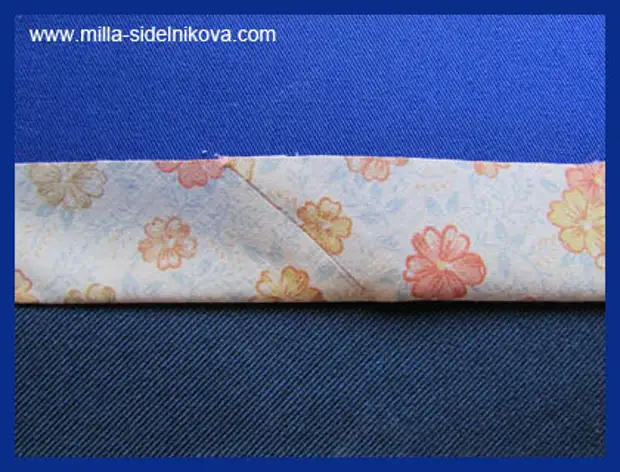
Cut the superfluous, leaving the battery of 6 mm wide.
SPU lap irrigant, unnecessary, protruding parts cut.
Similarly, you can connect the ends of the beek folded three different ways of addition.
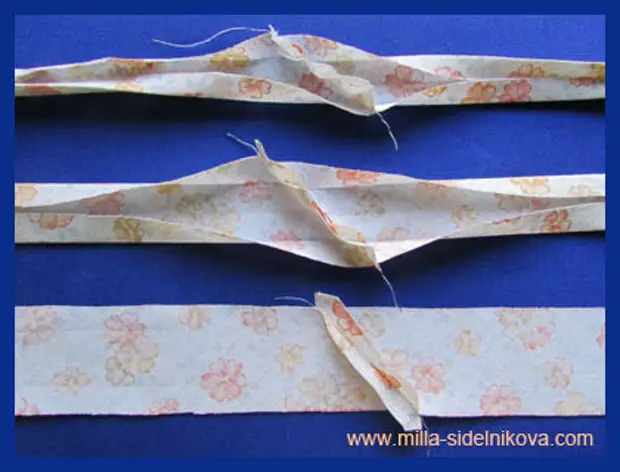
And then already, by them, you can make the cutting of the cut, attaching each, to it, in its way.
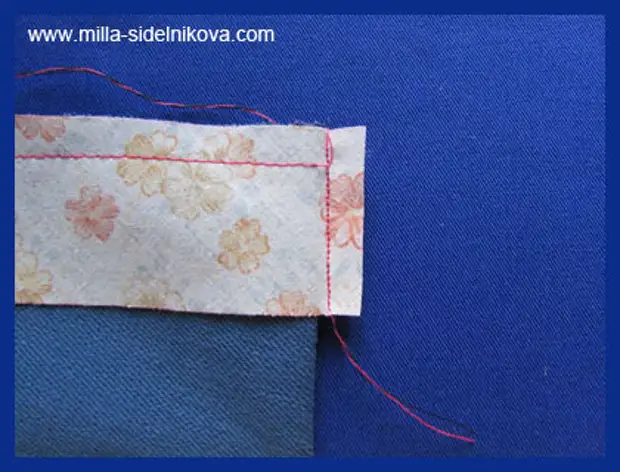
Such a connection is made over the rest of the edging surface, significantly less than the previous and thickening in the place of the seam is not as noticeable.
Very often oblique baker, sections are processed, or closed in whole circle or closed into integer, sections of other geometric shapes.
How to connect the ends of the faces in this case?
There are several ways to gently connect the ends, edging of the cut, oblique baker.
How to combine the ends of a single-layer, ready, with allowance for one fold on the longitudinal sides and folded to each other on the middle split?
1st way.
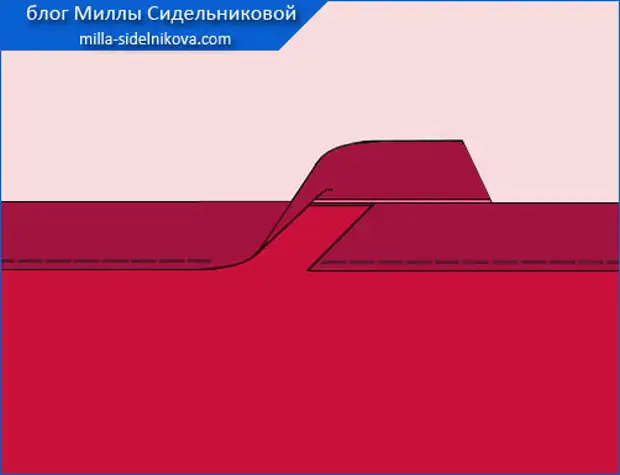
Performing edging in such a type of addition of bey, at the final stage, the end of the Beach
It's just begins inwards and attached to a slice line to the edge along with the main part of the faucet.
This method of connecting the ends of the single-layer fairych, with the allowances set in one fold on the longitudinal sides and the plastics folded to each other in the middle split, well deserves to apply it.
But it seems to me that he can say so, "oak". The line does not always "fall" where you need. The sides of the sides of the side of Beaks are very bad in the seam. Yes, and the wrong side, the line does not always "capture", the side of the beaks.
Therefore, I propose to use another, slightly more complex way. But the connection of the ends of the bay will look much elegant.
2nd way.
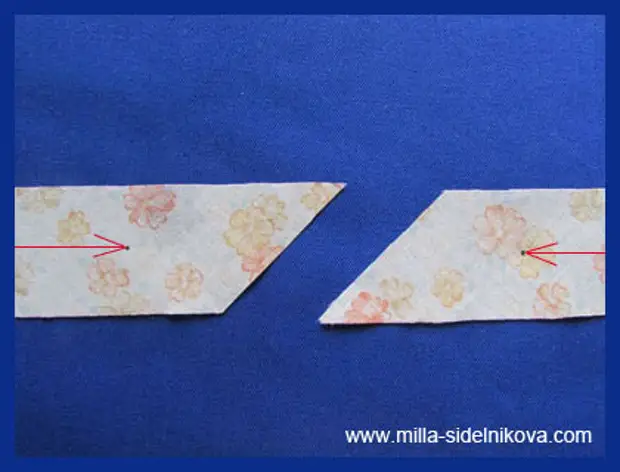
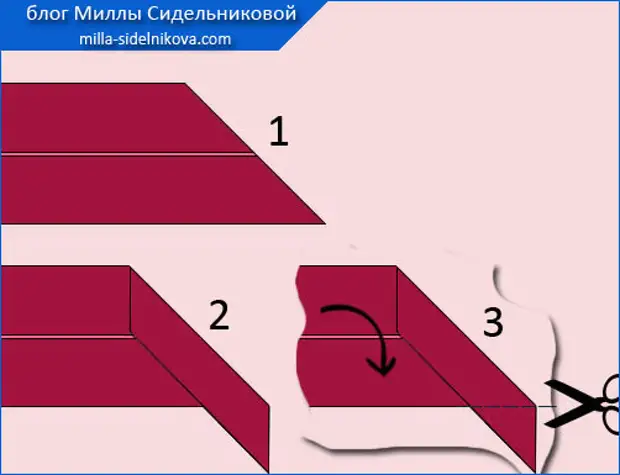
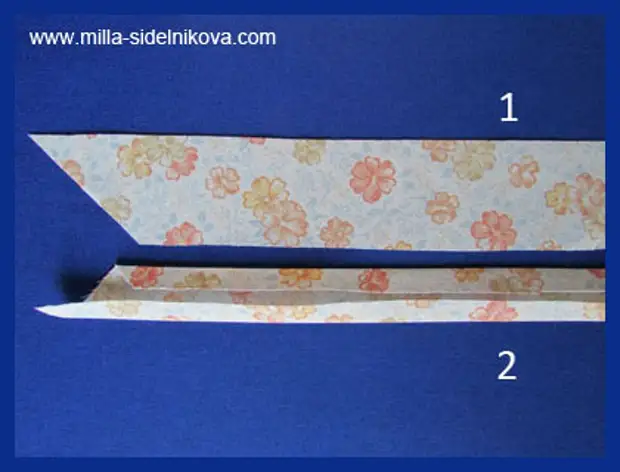
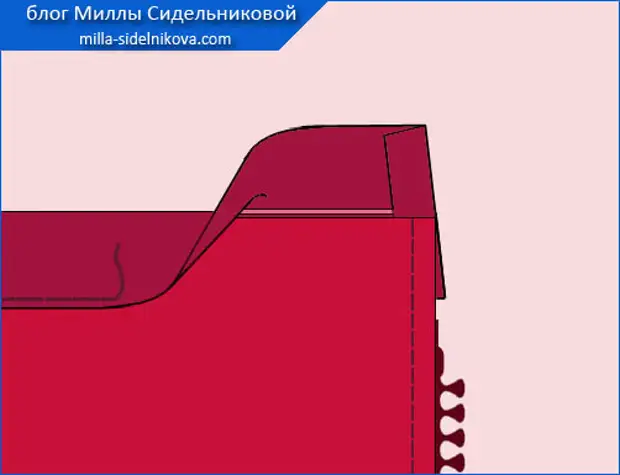
If the end of the beaks, before that, it was not cut off on the equity thread, at an angle of 45 °, 1) means it is necessary to do this.
2) We fold the place in half and begin to take the edging of the cut, moving along the front side of the product, from left to right, along the circle.
3) the form of one (cut at an angle and the damaged) of the end of the beef, from the front side;
4) with invalid.
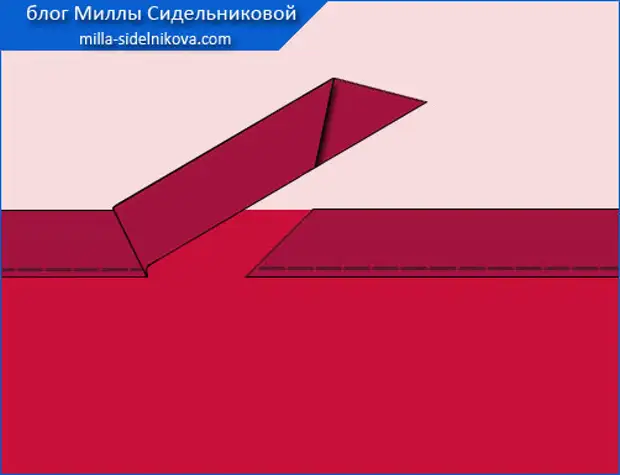
After turning the edging of almost the entire cut and already approaching the other end of the bay to its beginning, we leave this end of the beaks, so long so that it covers the beginning of centimeters by 4-5.
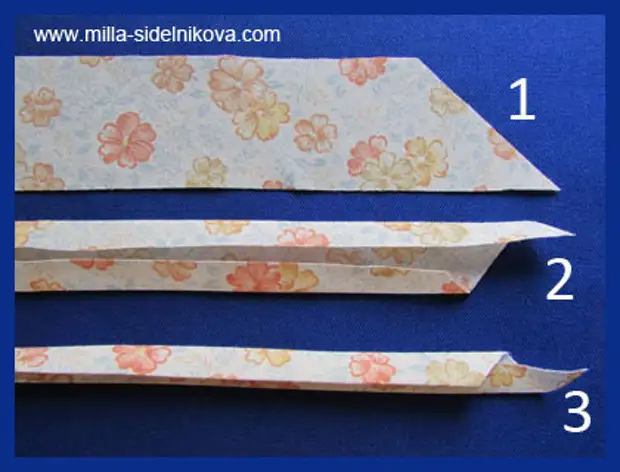
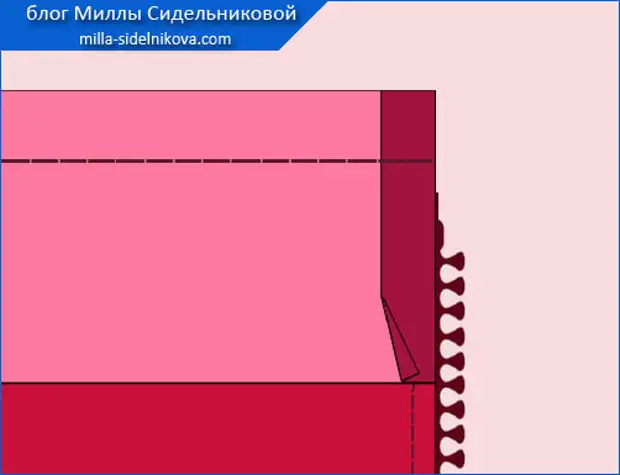
Now, if this horses of the beaks were not cut on the equity thread, 1) cut it at an angle of 45⁰.
2) Then we convey the slice in at least 1 cm.
3) Baiki tip, leaving "beyond" carefully cut off,
And there are places in half, we apply one end, a fitted beaks, on the other and end to perform the line.
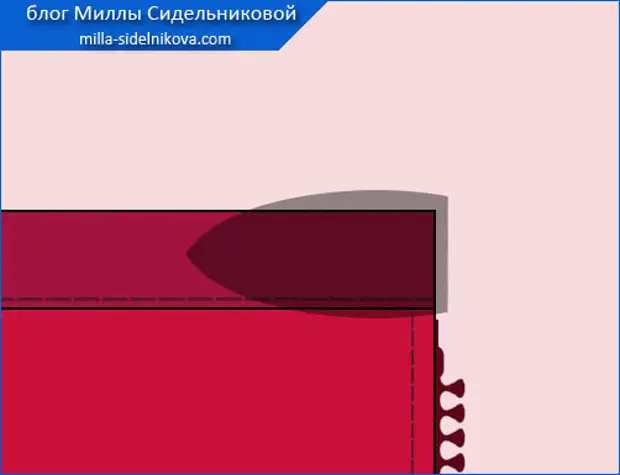
Now, all this, you need to troughting well and
Sew "breakdown" by a constant manual stitching stitches or, simply speaking, secret stitches.
The connection of the ends of the oblique bey, made in this method, will not be visible from the wrong side.
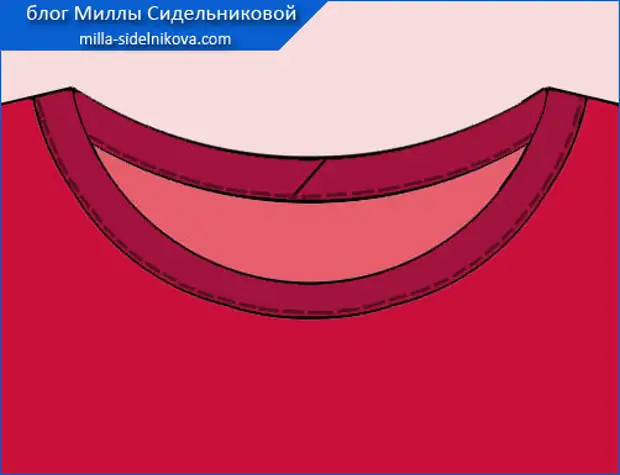
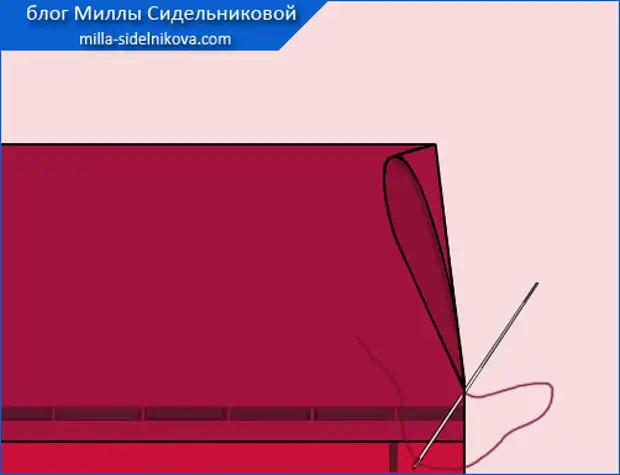
And from the front side it will look like this.
All these "exercises" with the ends of the beaks are needed in order for their compound as little as possible above the surface of the finished product, and an additional thickness of the material layers has not been created.
And now we will consider the options for connecting the ends of the bay, on the same closed in a solid circumference of the cut or one-piece sections of other geometric shapes.

Only we will work with places that are folded differently.
How to combine ends 1) single-layer, ready-made beaks 2) one-layer, ready-made beaks, with one fold-mounted, allowance for longitudinal sides?
Since the connection of the bay ends is fulfilled, for these two types of additions of one beaks, on such a form of cuts, almost the same, it means that we consider only one option.
So, before us, Beak is one-layer, ready. And one-piece cut.
1st way.
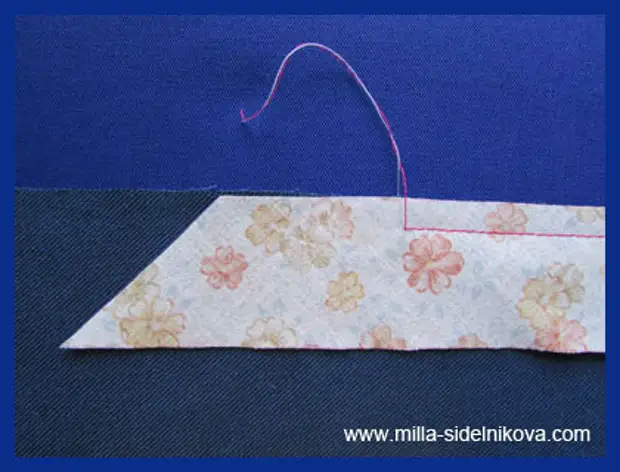
Attach oblique beyk to the slice line. Switch width is a future edging width. The end of the lines deposit justice to the beginning, leaving the allowances on the seam.
After that, the edged detail, at the point of the beginning and end of the line, bending and fold it with the front side inward, along the line coming from this point.
At right angles to the first line, along the fold line, we perform the second.
Stitches of this line must be no more than 1-1.5 mm long. And if it is ordinary, 2,53 mm stitches long, then at the ends of the line you need to fix the lines.
Cut the allowance to a width of 6 mm.
We run them.
And now the connected ends of the beaks can be opened further by finishing the cut in their way.
This option also has a place to be.
But, as they say, the best enemy is good. And if there is a way to make the connection of the ends of the bay better, then why not use it.
2nd way.
We begin to take edging, leaving the allowance of the beaks of centimeter 3, 4.
Attaching the bay to the whole slice, on a whole circle, we deposit the end of the stitching of it to its beginning, leaving one more, the same as the previous one, in the seam.
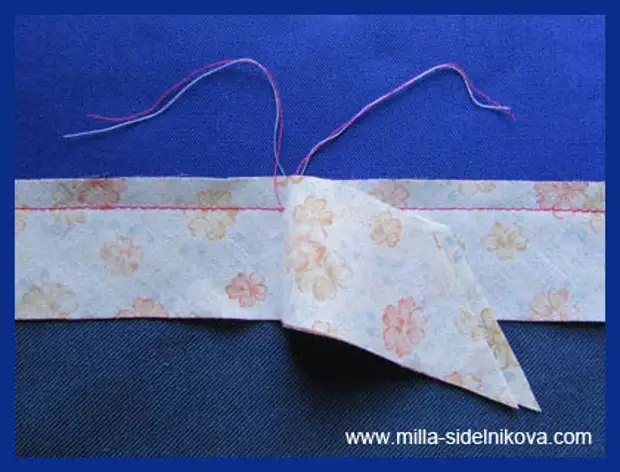
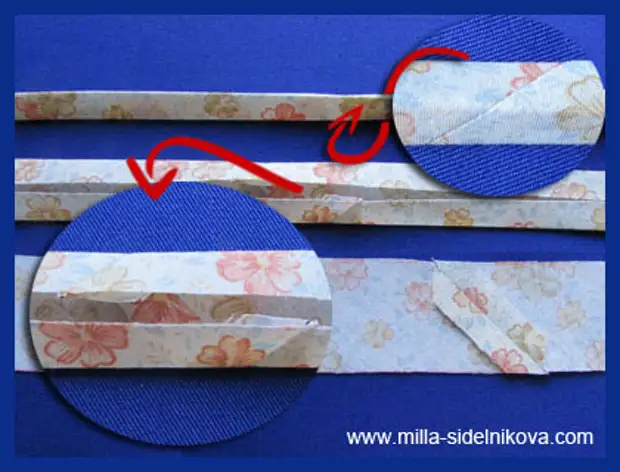
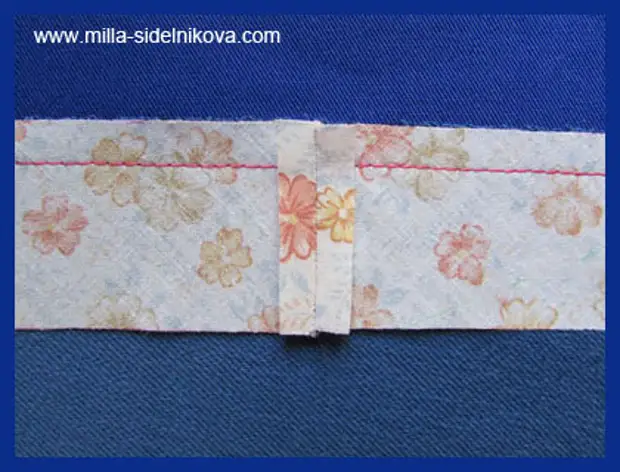
And now the designations of the bays, at the point of their connections, we turn and install perpendicular to each other.
Further. Along the fold of the main part, perform a line. Stitch length stitch 1-1.5 mm or 2.5-3 mm and with lines at the ends.
Excessive cut, leaving the allowances of 6 mm.
Punches are trimmed.
Unnecessary compress.

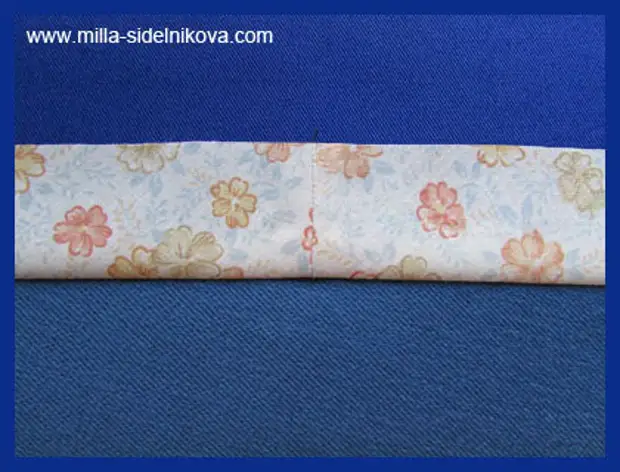
Such a connection of the ends of the bay will not thicken the seam. And good "falls" around the cut.
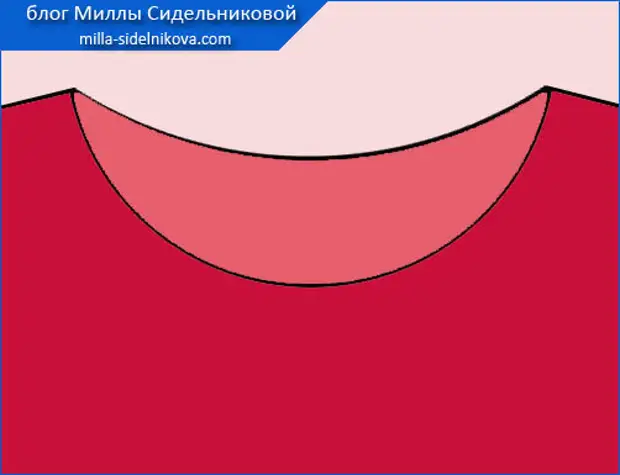
Often oblique beyk need to be pulled to a slice that is not a one-piece circumference. At the same time, the edges of the finished edging, fit to each other almost jack, but in a single whole are not connected.
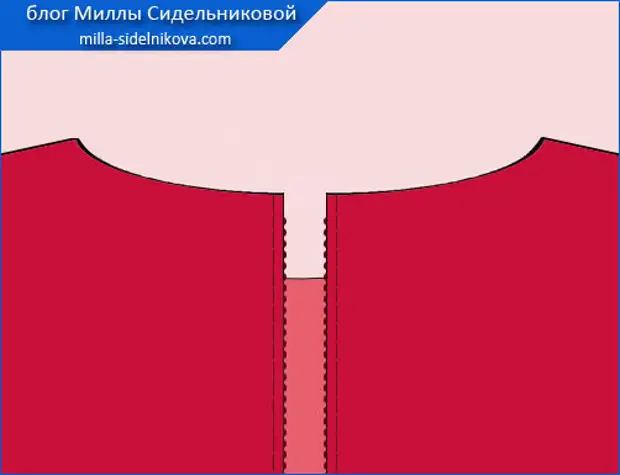
How to do these edges of edging, neat?
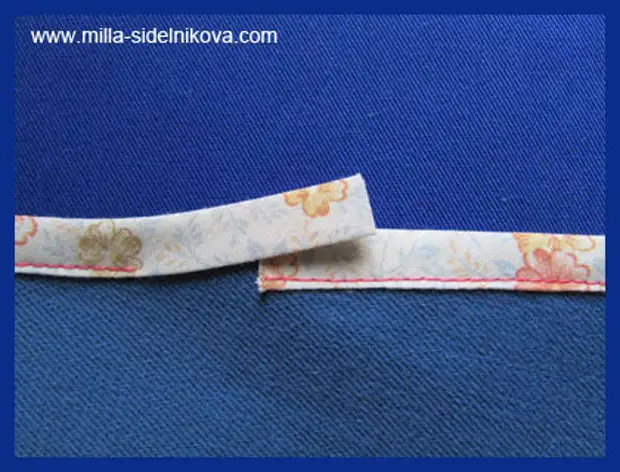
And when attaching to a similar cut Single-layer, ready-made beaks, with letters, roasted in one fold on the longitudinal sides and folded to each other by the Middle Co.

and when attaching 1) a single-layer, ready-made beaks 2) one-layer, ready-made beaks, with one fold-mounted, allowance for longitudinal sides,

Both in the other case, before laying the line, the edges of the faucet, from both ends not a solid circumference, you need to be ground at least 1.3 cm.
And in that, in another case, this folding beaks should coincide with the already treated edge of the product.
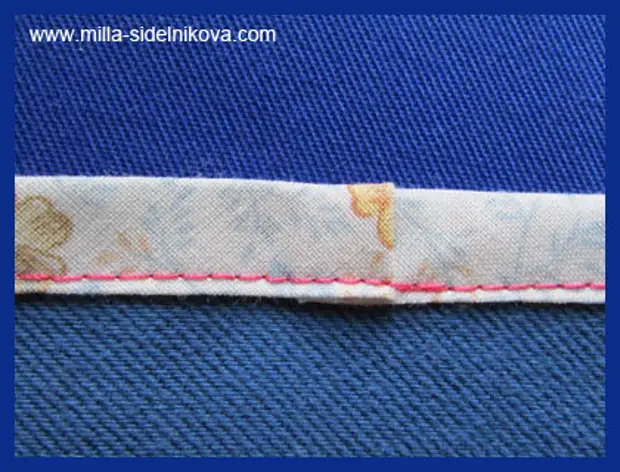
Further, the edging of the cut is completely performed, and the beam's swept beyond the sliced is fixed by the line (depends on the type of bay addition and the method of attaching it to the slice).
Open ends of the edging are additionally fastening with shelling.
And it is possible to further sew a secret seam that is permanent with manual stitching stitches.
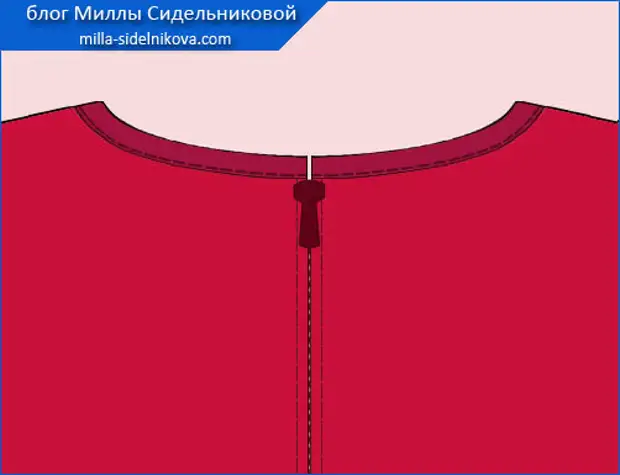
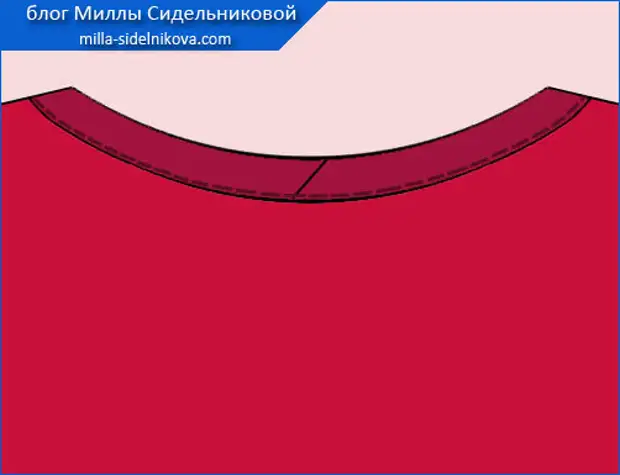
So, neatly, on the finished product, the ends of the edging of the cut, oblique baker will have to look like.
Here, and met, we, with all ways to connect the ends of the Beach.
MK Mill Sidelnikova shared.
A source