
What you need
At first glance, everything seems difficult and incomprehensible, but the mystery of the East is not so difficult in reality! And the handbag can be sewed with your own hands without spending the transcendental sums, because each mistress has several patchwork pieces of fabrics who have long been waiting for their starry hour.
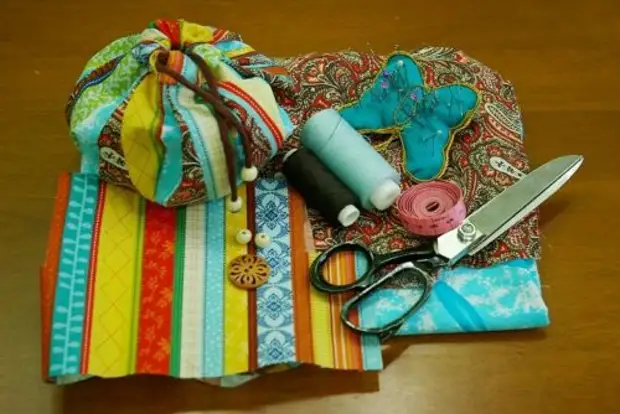
For sewing it will take:
- 2 Piece of fabric suitable in color: one flap with a size of 70x18 cm, the other - two times more. You can take three loskutka, but then you will need to cut from each type of cloth by 12 equal strips.
- Fabric for lining.
- Lace, ribbon or damp.
- Button on the leg.
- Scissors, needle, threads, pins.
- Pattern.
- Technical pencil for marks (you can take a marker).
- Decorative elements at will.
Manufacturing technique
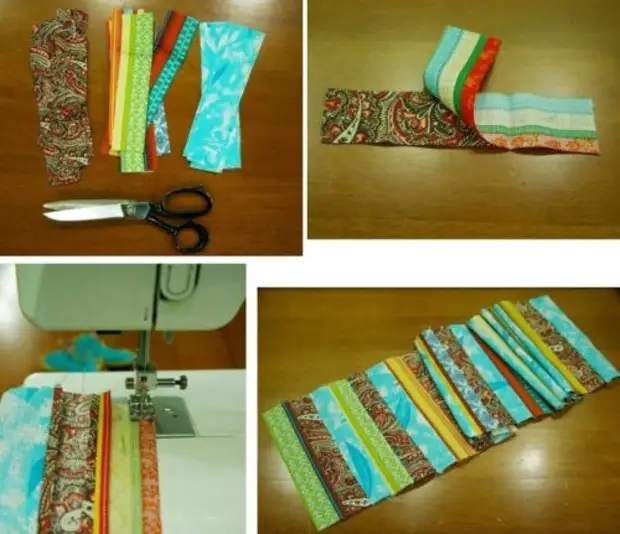
First you need to cut from the larger length of the 24 bands with a size of 5.5x17.5 cm and 12 5.5x17.5 cm in size from a piece of smaller sizes. It turns out 36 lanes of the tissue of two types of 5.5x17.5 cm in size. In the specified dimensions, the allowances are laid - from all sides, 1 cm. For clarity, you can mark the measurements with a technical pencil.
Tip!
For ease of use before cutting the fabric to the strip, it needs to try well with the ferry so that they immediately gave shrinkage.
Strips made of larger fabric fold 2 pieces with an invalid side outside, then sew long to each other. In order for the fabric, the fabric does not closer when sewing it is pre-copold with its pins. Next, turn the stripes on the front side. It is not necessary when turning the bands on the face to use scissors to straighten the angles - they can damage the fabric, or leave traces of punctures. To do this, you can use wands for sushi or stupid end of the knitting needles. Similarly, done with the strips from another fabric.
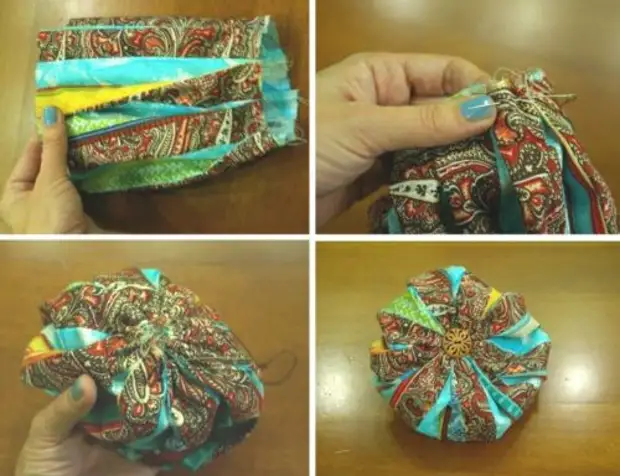
Next, alternating, collect pieces of smaller fabric and larger size in such a way that the lane of matter of the first size closer over the entire design into a single ring. Collect and send sticking folds at the top of the ring in one direction, copp the pins and flash. Similarly, collect and flash the folds of the bottom of the ring. Having done these manipulations, it turns out the part, reminding the harmonica.
Tip!
You can collect the bottom of the ring to collect in the opposite direction from the upper and flash, then the item will remotely resemble a spiral that will make a handbag more mysterious and attractive.
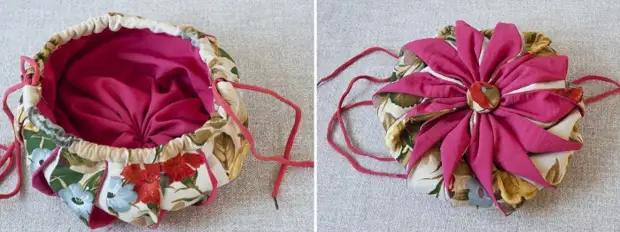
Determine the bottom handbags:
- Along the Niza, it is necessary to note the seam through which the bottom is most tight.
- Strip until the hole, the mocking edge of the omium, is completely reborn.
- To the clutched bottom to sew a button.
It is advisable to choose a button in the dominant color of the fabric, then it will look harmoniously. The outer part of the bag is ready, it remains to begin inner.
For lining will require 42x15 cm flap, which is necessary:
- fold in half;
- flash along the short side.
One of the long parties will pass the seam for tightening. Tighten the lining in the same way as the bottom of the outer part. Lining in the invalid side to put inside omium, flash in a circle. Next, you need to cut two parts in size 5x21 cm and 2 5x8 cm. - They will be required to finalize the top of the bag. Send and flash short sides of pieces.
Small details to sew along the long side to the upper edge of Omiage so that they are located opposite each other. These stripes, tightly hit the edge of the handbags, and sew to the lining inner seam.
Then opposite to sew long details to the unclosed edges of the upper part, so that the gap remains between the workpiece and bag, through which the lace is left or the ribbon, sew to the lining. Throw through the scene (long edges with a gap) lace or tape. Optionally, you can drive beads or charm to edges, as well as decorate the handbag with flowers, lace, rhinestones, or any other decorative element.
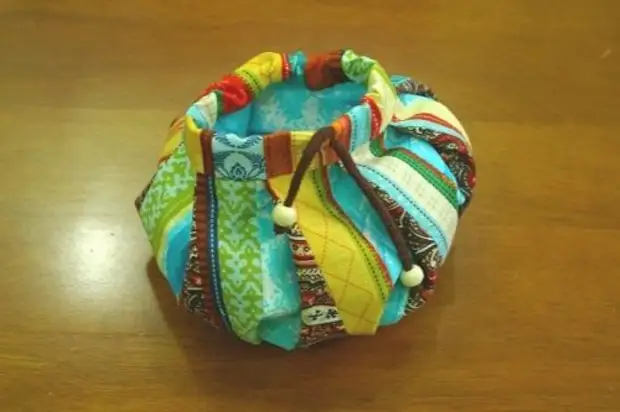
Handbag Omiage is ready! Now one mystery of the East has become less, and you can proudly use the thing made with your own hands.