
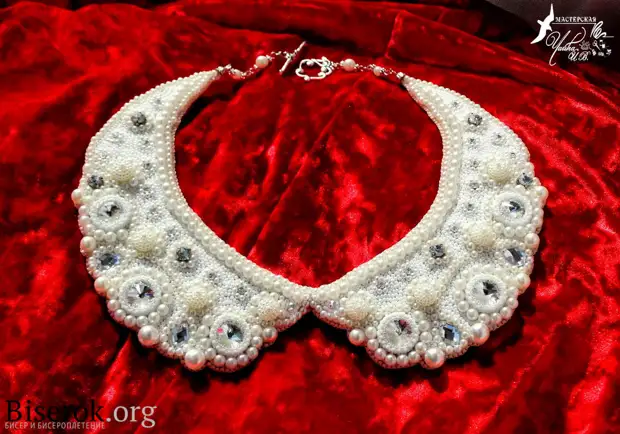
The pearl collar is an up-to-date trend of female fashion. Today
Such a decoration at the peak of popularity. This necklace is ideal for
any along, and to the small black dress, and to the strict business
Suit, and to a chic evening dress.
In this master class, I tried to show the most common
Engineering embroidery beads and beads.
To work, we will need:
white felt or phlizelin (I have a conventional adhesive fliesline); Beads
Round under pearls of different sizes from 3 to 10 mm; Beads
decorative 12 mm, 8 pieces; Rivoli rivolity 16 mm, 6 pieces; rhinestones
sewn in the form of a drop of 10x15 mm, 4 pieces; Rhinestones sewn B.
Tsapakh, round, 7 mm - 6 pieces and 3 mm - 20 pieces; beads round number 10 and
№15; Two bead needles; bead thread, white; white skin or beige;
Glue moment and hot; Metal pins for beads; Beads
Metal 5 mm; A pair of small caps; metal rings;
Clasp Togl.
First you need to make the right pattern of our future
collar. To do this, I took a dress, with a classic round neckline,
circled with a pencil cutout of this dresses on a sheet of paper, then a little
Correcting it, drew the pattern of the future collar.
The pattern I got a 6 cm width, in the widest part, and
15 cm from the tip to the center of the collar. Now we need the basis
for embroidery, since I did not have a white felt, I used
An ordinary sewing adhesive fliesline, gluing it with an iron, about 12
layers. The base is pretty tight to keep well
The shape, and at the same time, easily punctured with a needle when sewing.
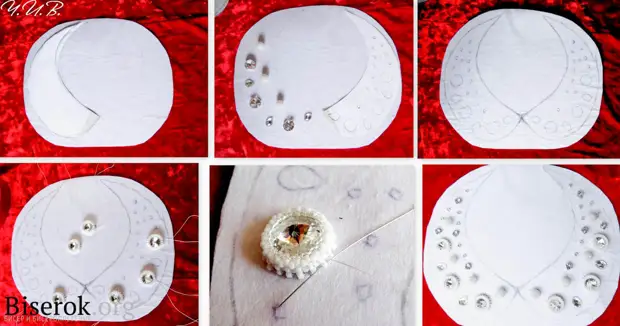
Prepare the foundation thus transfer our pattern to it
Collar, observing its symmetry. Then declared
on the pattern rhinestones, rivoli and basic beads, outstanding them
location, and with the help of transfer paper transfer the drawing
for the future collar. Watch the drawing to be as possible
more symmetrical, and traces from the pencil remained as possible
less because our collar white and drawing can shine
between beads.
Next, the waters of the Rivoli in any way that it suits you. After
The main brave of Rivoli, I proper an additional row of beads
From the bottom, in the future I will explain why it is necessary. After braid
Rivoli, glue them to the base in the outlined places. Glit
hot glue, and in order to use the glue as little as possible,
Apply it only on the sharp tip of the Rivoli, which speaks from
braids from below, while the rivoli braid is not glued and its
need to sew. At this stage, we will need that
An additional row of beery, about which I wrote above. Capturing
The needle these bispers are sewn the Rivoli braid to the base. Then
Send to scheduled areas of rhinestones and beads, covering holes in
They are beerinks. At this stage I adjusted a little
The initial location of the beads and rhinestones.

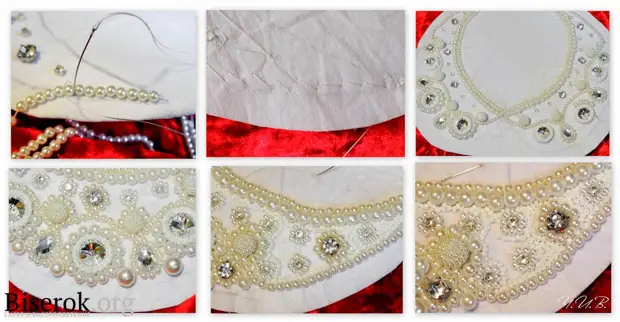
Now proceed to the extender of our collar by beads. We are the first
We will draw collar in a way called - embroidery in
Attach For this, 5 mm beads, we ride a double thread, beads
Must be free, low beads turned out about one and a half
meters. Then the end of this low beads is fixed at the beginning of the collar.
We take another needle with fine thread - the main, and also the end of the thread
Passed at the beginning of the collar. Next, begin to sew, attaching low with
beads the main thread on the needle, sewing it to the base between
Beads, through one. We pave low with beads on the outlined
The contour of the collar. The photo shows how it looks from face and inside.
So we are deposited low beads on the outlined contour, jumping out its rhinestones
and rivoli, to the other end of the collar, then wrap and
We pave further along the contour of the neck. Having finished sewing low
Beads, fix both threads, the main and the one on which were risen
Beads, on the outline of work. Next along the contour of the collar neck
We pave another low larger diameter beads, the same
In the way - right. The next step is wearing rivoli, beads and
The remaining rhinestones are beads, choosing them in size. In this case
We use the usual seam used in the embroidery beads - step
Back or back needle.

Having plays the main pattern by beads, proceed to the collar extender
beaded, we will fill out the remaining emptiness in the way - free
Embroidery. We use for this Czech beads number 10, white.
Which means the term "free embroidery beads", it's when the bispers
Sew on one in chaotic order. I did it like this: I chose
based on a small portion of free closed space and
started to sow it along the contour, gradually narrowing the circles to the center, with
This is already bypassing already sewn beads and filling with beads all free
space.

Here is our embroidery, now it needs to be cut, retreating from
Beads are about 1 mm, and glued to a piece of skin suitable size.
Unfortunately I did not have such a big piece of leather, so I
took a piece with a seam, carefully strengthening the seam and placing it in the center
Collar, in a narrow place. Pretty missing embroidery
Glue the moment, glue our fliesline base to the skin. I do not
began to lay between phlizelin and skin cardboard, as it is not
necklace, and a collar, and he must gently lie down the dress cut,
Therefore, there is no need to make it tough, it is quite enough
Skin density and phlizelin. Cut the extension skin on the contour
collar, and we are wearing the edge beads, taking on the needle on one biserinka,
Piercing the fliesline base and skin needle, and then deriving the needle
through the crawled beerinka.
After we have truncated the contour collar, at the ends of the collar
Firmly sew a couple of pins, then dripping a drop of hot glue,
We put on a small cap on the pin, the second end of Pina bend in
loop. With the help of pins, beads and rings, we extend the collar ends on
5 cm on each side and attach the fastener.
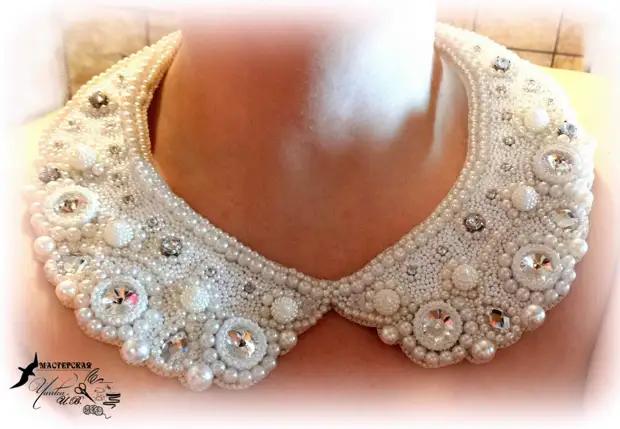
Our necklace "Pearl Collar" is ready. Wear with pleasure
Rejoice yourself and others.
A source