
Most of us - residents of apartment buildings - is the happy owners of a balcony or loggia. The balcony is a pleasant appendage to the total area of the apartment, which everyone uses in its own way, but mostly years here are smoked by anyone unnecessary things that are sorry to throw away: the remnants of building materials, grandmother's chest, grandfather skis, etc.
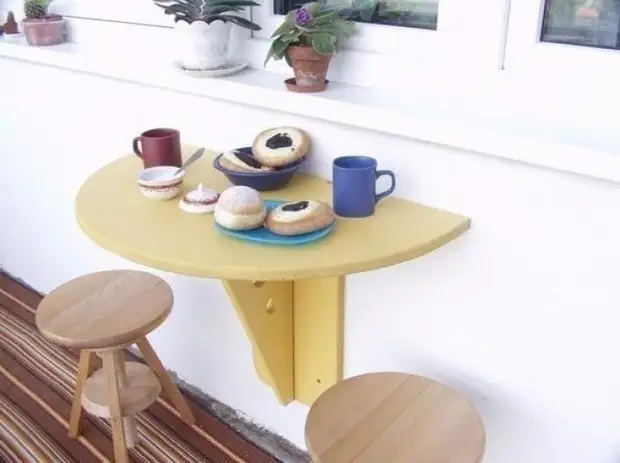
Over time, many are aware of not only utilitarian use of the balcony. This space can be equipped, and then several square meters will turn into a seating area or work. The simplest thing to do on the balcony is to establish a folding table, which can be used for various purposes: drinking tea behind it, work with a noto, decorate a table with flowers, etc.
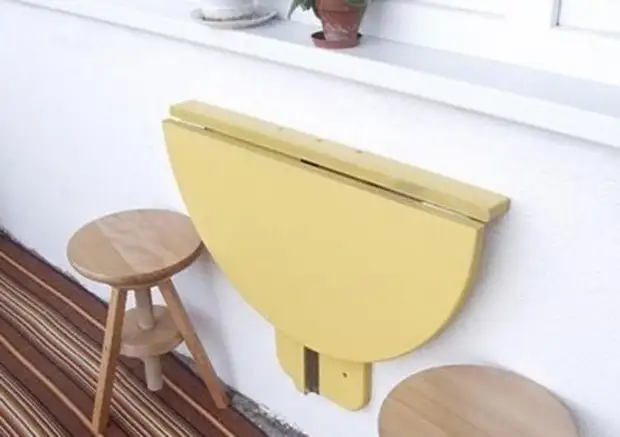
So, let's start with the fact that we choose a place to fix the table. It is selected individually and taking into account several factors. The main ones are illumination and availability. Remember that we have a folding table, and therefore, it will not hinder the passage.
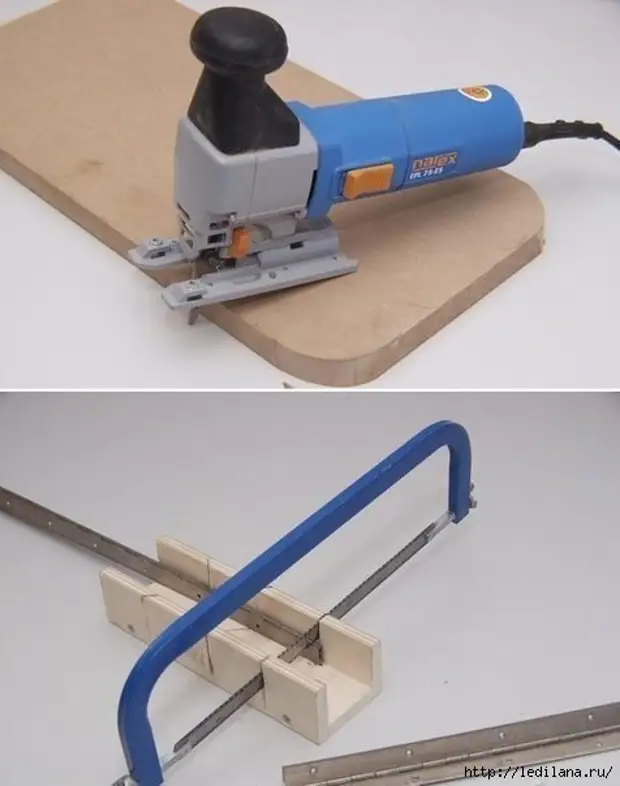
For the manufacture of the table, we will need: 130x60 cm chipboard, accessories (hinges, screws, dowels), drill with perforator function, electric jigsaw.
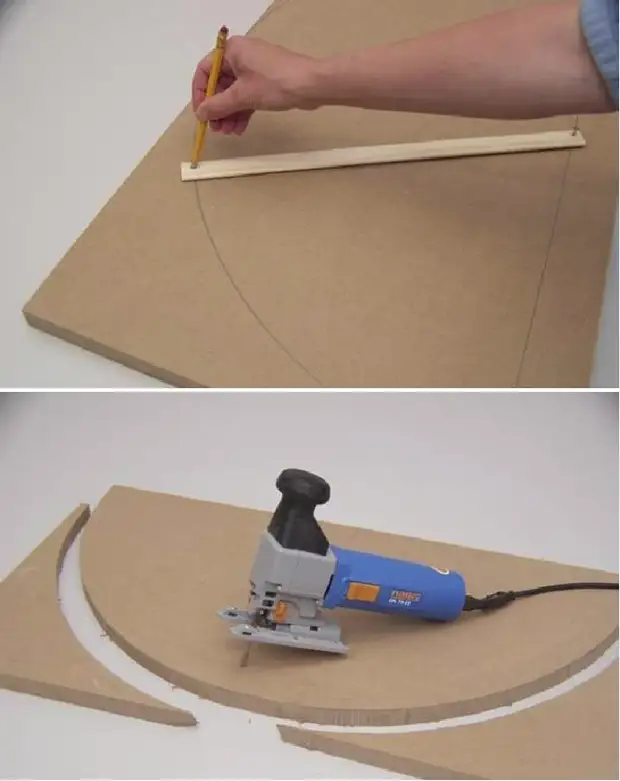
First choose the material for the table top. As a rule, this is a chipboard with a thickness of 1.6 cm. Better, if the thickness is 2.5 cm. On a 40x80 cm with a circular size or with the help of fir-handed items, the semicircles are black. Cut it with an electric bible. By the way, use special sawmills for this to work on chipboard. Also cut off the strip of the same length and width of 5 cm.
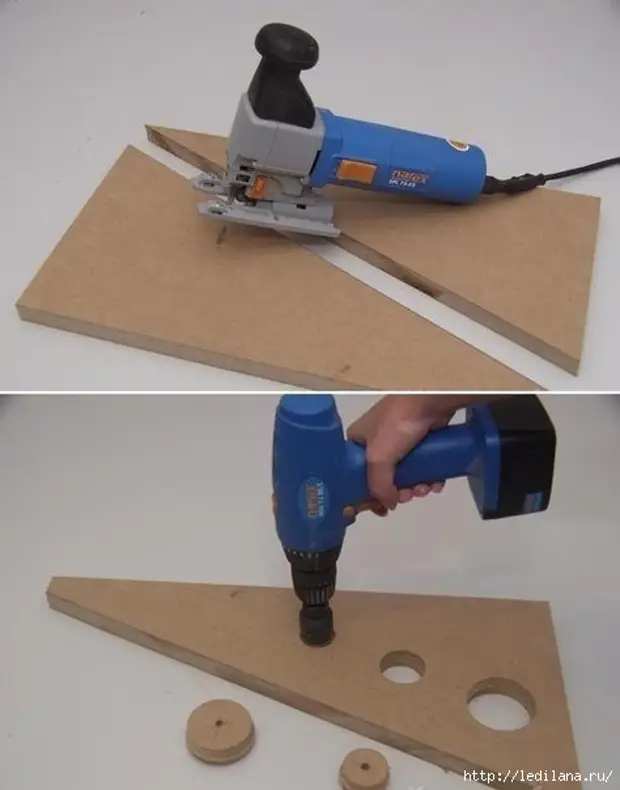
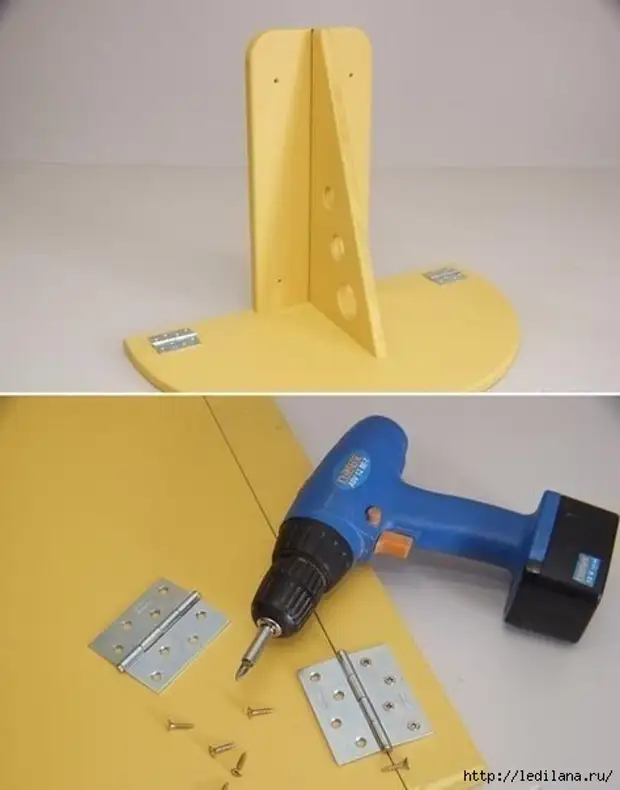
For the folding bottom of the table, it is necessary to cut the remaining chipboard into two rectangles in size 20x60 cm, one of them can be cut into two triangles. Use we will only one triangle. It is possible to make holes of different diameters for beauty, or a decorative slot.
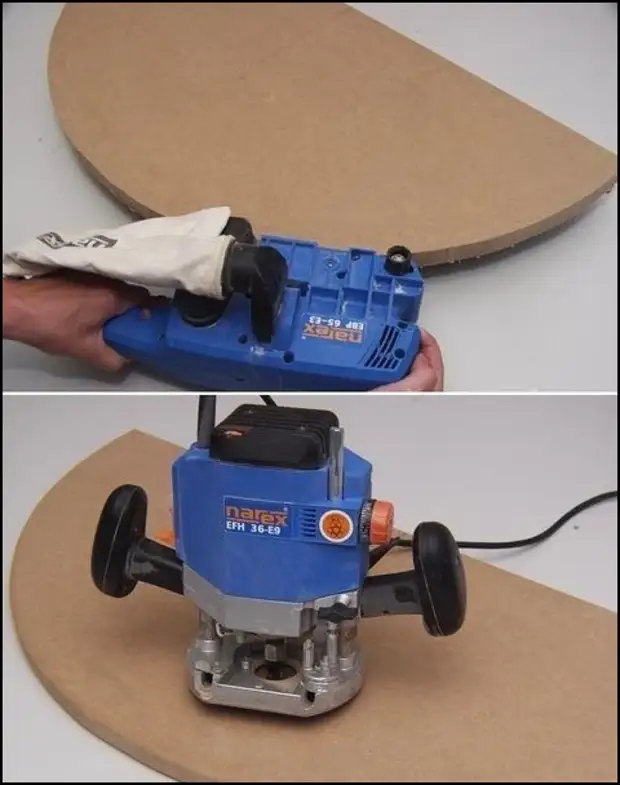
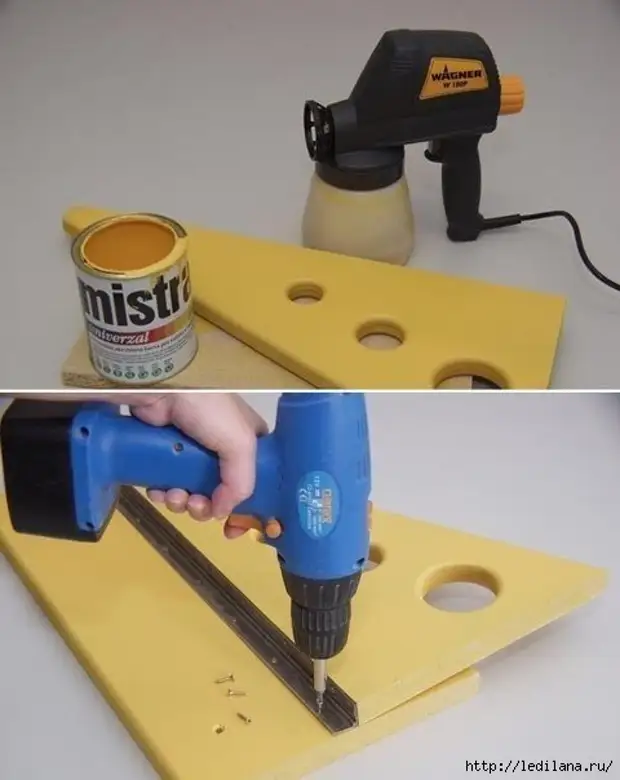
The rectangular board on which the table will be kept, rounded the two lower angle with the help of an electric bike. To attach the board to the wall, drill 4 holes. We process the edges of all sections of emery or sandpaper. Then all wooden parts (4 pieces) in the desired color.
At the middle of the rectangular board, I will attach a triangle with a loop. It must be located 3 mm below the upper bound, so that the table lid does not rub about the folding part. Folding part put on the middle of the board and the attached strip. Moving it and check that the loop does not interfere with the go. Attach the strip to the cover of the table loop.
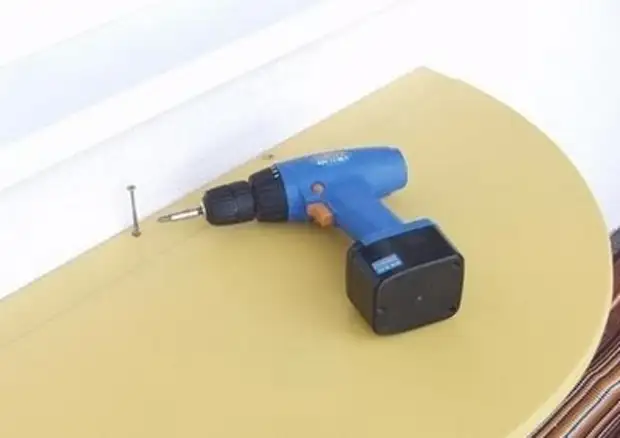
Now choose the appropriate height and crepaim the table to the wall. To do this, place and drill 4 holes with a drill and drill on concrete. After the rectangular part was screwed to the wall with a triangular stand, secure a strip with a lid with the help of 4 long self-tapping screws.
A source