
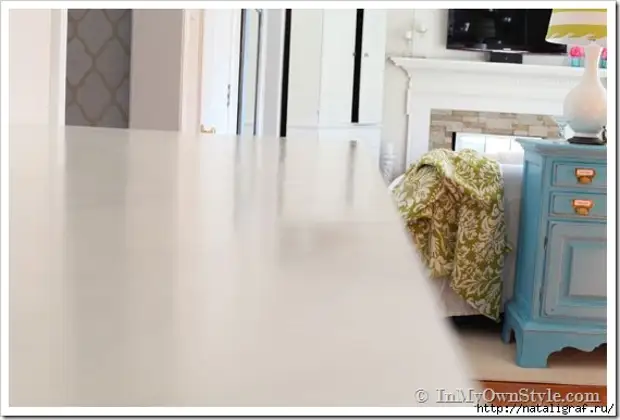
That's it. It can be drawn! White gentle carrarsky marble. I like. For the top of the table - super idea. Inspirational.
The work is not from the easiest and lungs, but the result is worth: Look, what a beautiful countertop turned out!

Watch a photo - Read and try to repeat
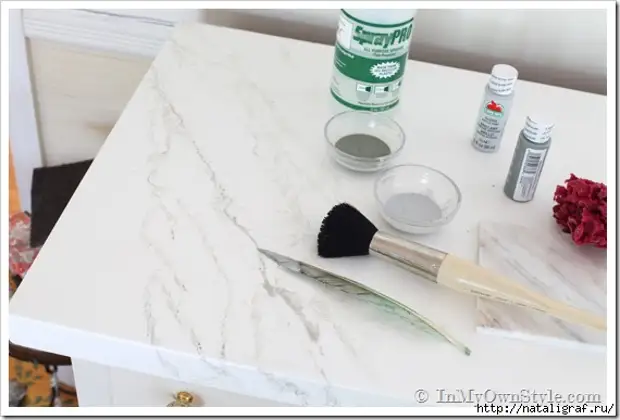
Required:
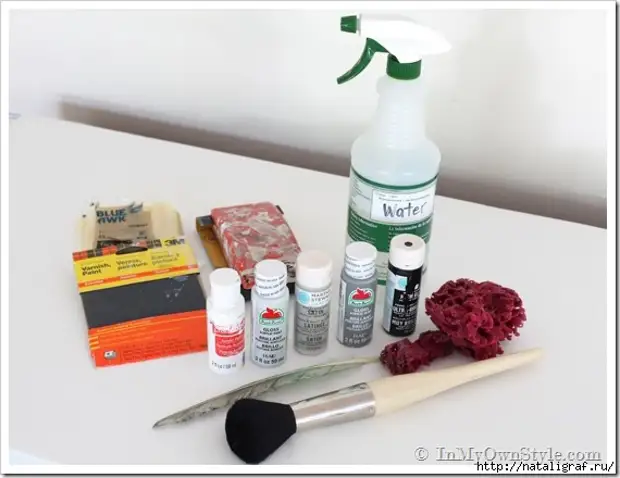
White soil - if we have a clean wooden surface, primer, if we decide to work on the already painted surface.
The colors of the egg shell or matte white, 3 gray paint colors: bright, medium and dark. The author for this countertop used light gray, wet asphalt and dark gray. And also white and black to mix a few more shades of gray to make bodies marble.
Smooth roller, roller, tray. Feather, Sea Sponge, Soft Brush, Paper Towels. Toothbrush. Bowl. Water in a bottle with a pulverizer. Middle and small sandpaper. A piece of fabric or wet rag. Wax. Ragging for polishing.
It would be nice, of course, have a piece of marble for a sample of streaks (but not necessarily, we will confess the author). A piece of wood to try and practice the application of residences before drawing them on the table top.
IMPORTANT. To get a good result and marble, similar to this, you need to have an ideal worktop, that is, to bring the one that is, to a smooth state. To filter all dents or openings with putty. Schucition carefully. And only then paint. Align each layer of paint with wet emery paper. And carefully remove all grains-dust before applying the next layer.
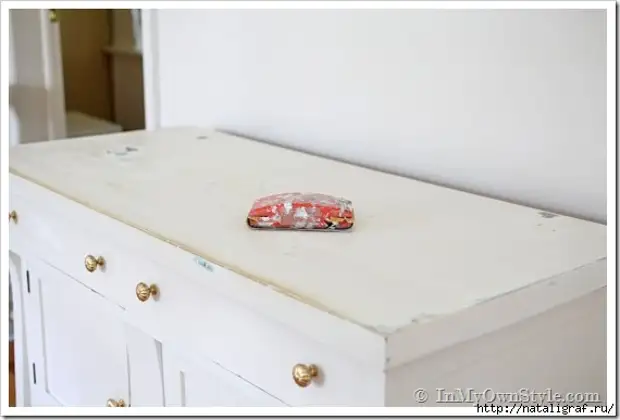
1. We clean the surface with sandpaper with medium grain. We remove dust and sand with a sponge or damp cloth. Apply a layer of primer, let dry.
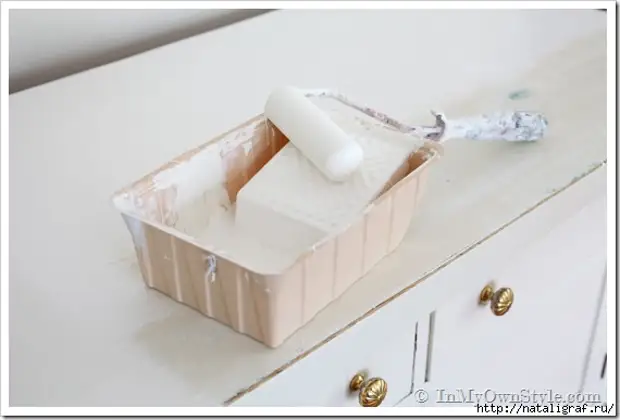
2. Apply one layer of main paint. Let dry. We apply sequentially 2 and 3 layer, with a drying of each. Do not hurry.
If after all the paint layers applied, we like the surface, we can proceed to creating residences.
Here we would need a sample tile, at least a small piece. But ... no so no. NEED TO KNOW. Allowers in marble, as a rule, work diagonally. And they look like that are under water - slightly blurred.
3. Starids are created using a pen. This: bird or chicken.
4. Mix each color paint with water: 3 parts of the paint on 1 part of the water. Now immerse the pen tip in light gray paint, draw a diagonal line with the tips of the pen (as it were, horizontally hold the pen). Our line should not be straight and solid, well if it turns out to be different over the entire length and in the intensity of color and in width. I understand it, I hope you too.
5. After we have done a few lived, we take a bottle with water (and a spacker) and raising her for 30 from the table, splashing to the top (those that darker) part of the residences, so we will wash the line to get wider and blurred layers. Excess water (if it turned out a lot to sprink) to get into correct the error. Now we can make any drawing. For example, if you feed the bristle brush, the part of the core will become more, and its middle of it is lighter, it will be like a light area. Water spray with caution and not much.
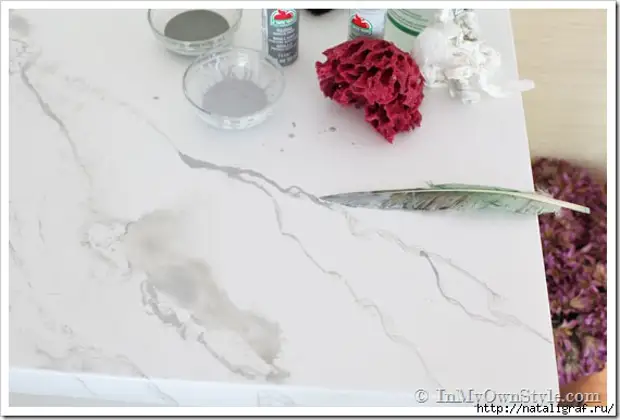
6. After the water dries, take the darker color of the paint to emphasize the veins that have already been made. Use at least 3 different gray colors, including creating your shade of gray, which is not yet. Over the splashes again and let dry.
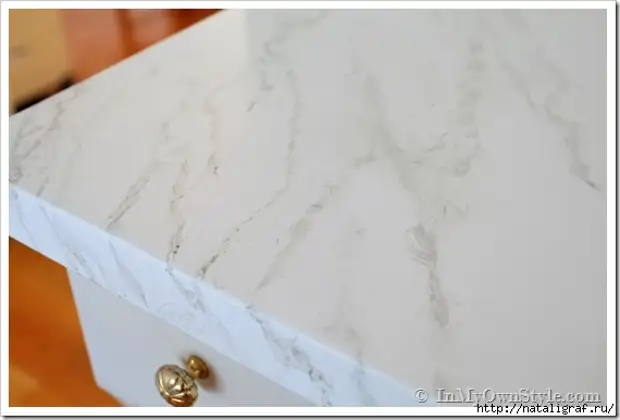
Do not forget to continue the bodies around the table top. Envy.
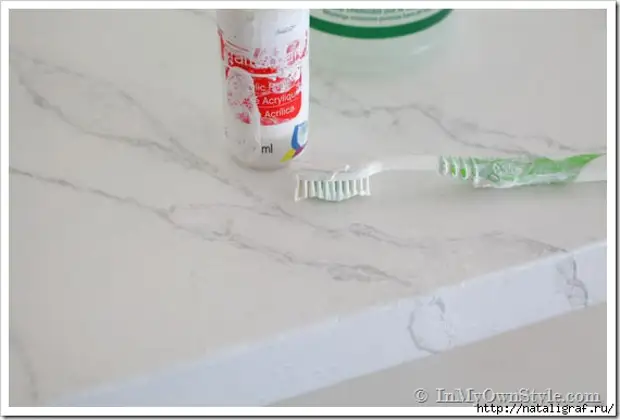
7. There is also some spottedness on marble. Now we will create this spotty. With a toothbrush. We lower the brush into white paint and spend the big finger on the bristle. To emphasize the effect, toothbrush, like a brush, take a drop, creating a stain. Let die within a few hours.
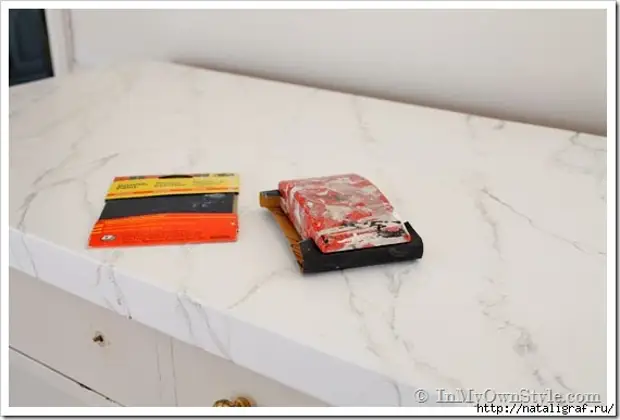
8. Now we will work very small emery paper to sick and not disturb the veins and spots. But only remove possible roughness. The sweater table top is a soft cloth, remove the remnants.
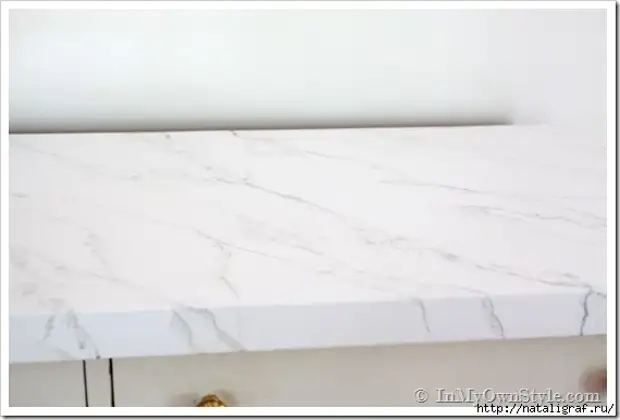
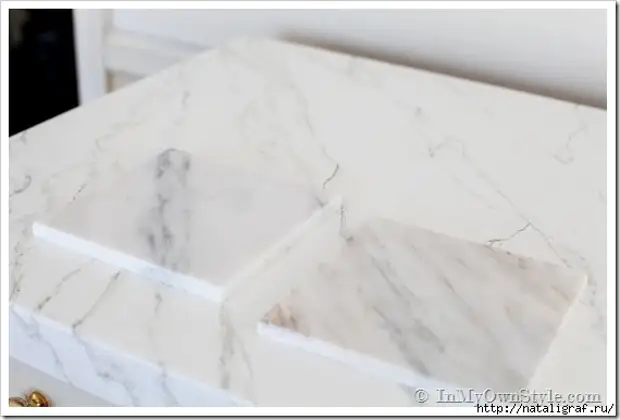
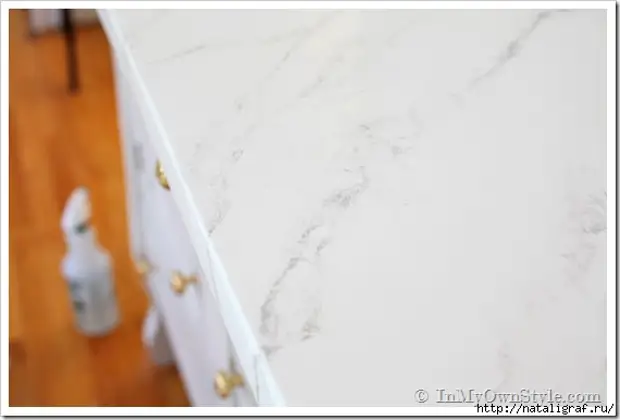
Here are some bodies here: fat and thin ...
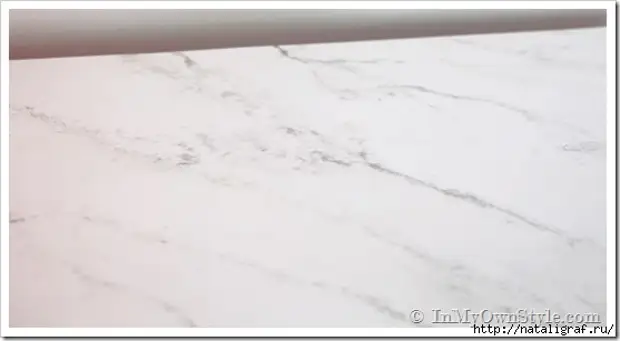
... diverse in shape and color. The greater this diversity, the natural marble looks like

9. Once again we mix the paint: white with water, in the ratio 1 part of the paint and 3 parts of the water. We mix well and put one layer on the worktop and the side of it. Let dry.
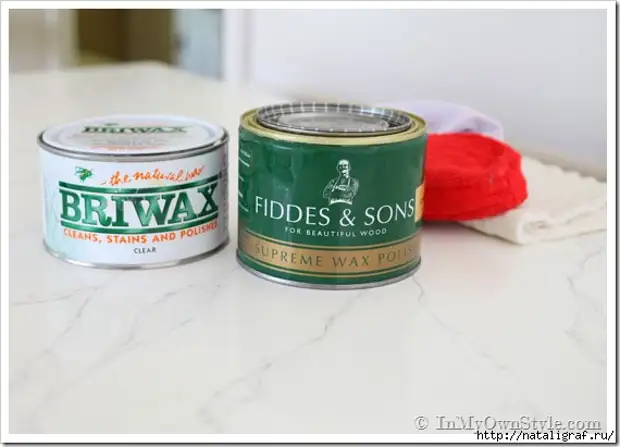
10. Now we have to consolidate - pack your marble under the protective layer. Wax, wax paste. And bring shine. The author says that it is not a yellow wax, for example, the Polish wax for the floor. But we do not know what to use. The bee wax will be shirtless ... In short, you need to search and scroll through the Internet.
We are generously applied wax, let's dry, look the result. If not enough shine, we also apply a layer. And so until the desired shine will achieve.
11. The author inflicted 3 layers of wax. Coloring every layer of old T-shirt. While the shine of the tabletop did not look like a brilliance of the real surface of the marble.
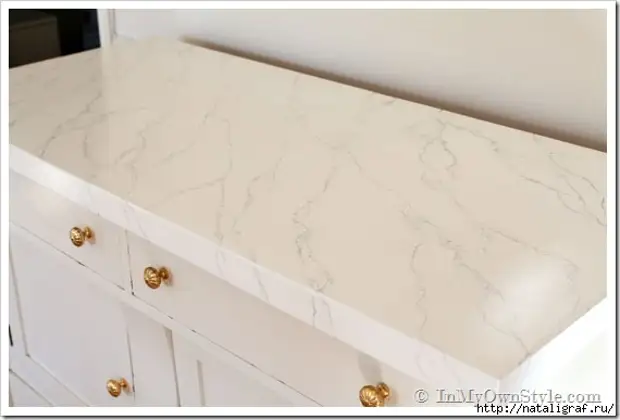
Result Amazes: Natural Stone! I am delighted. Want Want want!
A source