


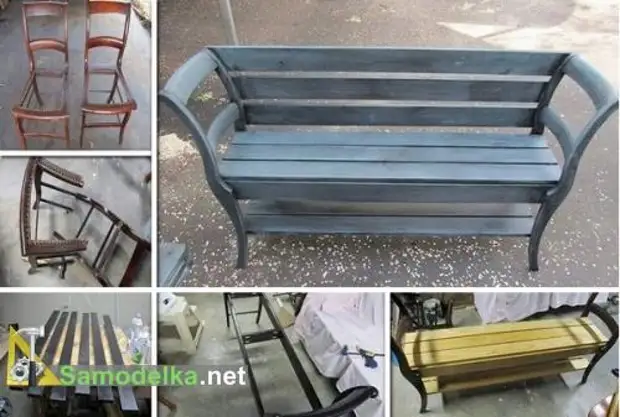
If you have old kitchenware, then do not hurry to get rid of it. Applying your fantasy and our tips, you can make a new headset from this furniture. In this self-made, we will tell you how to make an original bench from old chairs. This option is not only convenient, but is very interesting. You can put such a shop in the courtyard at home or in the country. The original bench will become an unusual piece of furniture.
For the manufacture of this self-made, the following materials will be needed.
Materials
• Old chairs (4 pcs);
• drank saw;
• Lobzik;
• drill and tree drills;
• Dowel (Wooden);
• remedy for lacquer and paint;
• glue joiner;
• Putty knife;
• wood varnish;
• paint;
• brush;
• boards;
• meter;
• marker;

Step 1.
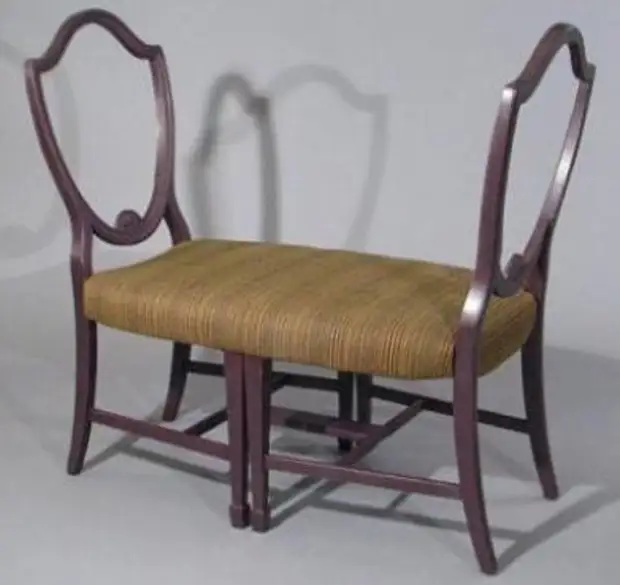
You must first take two chairs and gently remove the horizontal racks that are in front of the seat.
Step 2.
Now we take the remaining chairs. With the help of a meter and marker, you need to make a mark where the cut line will go. This line must be slightly lower than the front seat stand. Take the saw and gently on the planned line cut the legs.

Step 3.
At this stage, you need to remove the old varnish and paint from the chairs. To do this, apply a special toe for this work uniform layer. To make the necessary time (it is indicated by the manufacturer of the means). Upon expiration of the required period, carefully remove the old coating. To facilitate the work, you can use a spatula, as well as sandpaper (fine-grained)

Step 4.
Now it is necessary to drill holes under a dowel in racks with a facial and end side. First you need to make a marker to make a mark where these holes will be. Then take the drill and drill holes.


Step 5.
Take a dowel and insert them into the resulting holes. Before that, dowel must be lubricated with glue (carpentry)

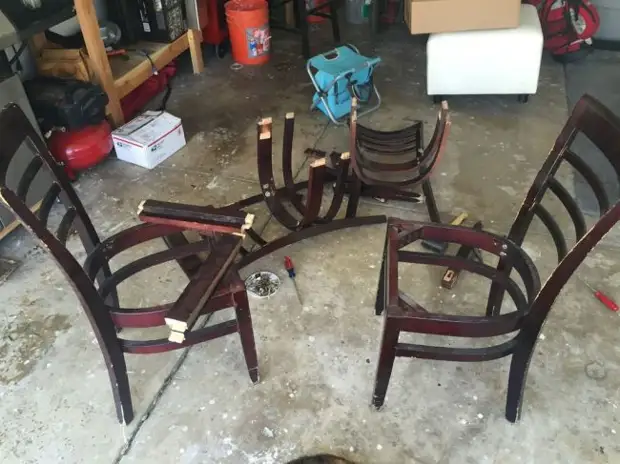
Step 6.
After the dowel sticks firmly, it is necessary to collect the future base of the bench. This is necessary, as shown in the photo below. All components of the benches are bonded with self-draws. After that, all the surface of the bench is sharpened again.


Step 7.
At this stage, we will do the seat of the shop. For this we need a board. The board should be adjusted under the size of the shop. It is necessary to note the desired length, and everything else cut off. Height of the back, do at your discretion.

Step 8.
If you decide to make a seat of several boards, then they must be glued together with carbon black glue. After that, the whole design is worth clamping clamps and wait, when the whole design will dry completely.

Step 9.
Now it is necessary to glue the seat to the base of the bench. Launch the base and the seat itself with joinery glue. Put mute on the board, and also clamp it with clamps.

Step 10.
Wait for complete drying. After that, take the greasy tape and take them the surface of the seat. The rest of the bench is worth painting with special paint for wood.

Step 11.
At this stage, it is necessary to remove the entire molar tape and cover the whole part of the seat by the veil.
Step 12.
The final stage. Pick a special lacquer for wood and cover them all the bench.

Wait for the bench completely dry. Now it can be put on her pillows and enjoy. Good luck!
A source