

Retractable mini-pantry refrigerator do-it-yourself
One of the biggest problems of small apartments is the same small kitchens. But it has long been known that the fourth part of the time held at home, the person is on it. The kitchen is the place in the house where you need to place a lot of useful trifles, and even so that they do not interfere, and at the same time they always were at hand. We offer to equip mini-storey refrigerator.
Consider the opportunity to get a bit of space for such a necessary storage room, and at the same time not to clutter the space. Even approximately a 12-centimeter clearance that is empty between the wall and the refrigerator will fit. Having equipped there mini-storage, you can easily push the locker and take everything you need, and then it is also easy to put it back.
Step 1: Selection of materials

Selection of materials
We will need:
Wooden board 61cm x 122cm x 2 cm - 1 piece,
Wooden board 13cm x 1,22m x 1.5 cm - 1 piece,
Wooden board 61cm x 10cm x 1.5 cm - 6 pieces,
Wooden board for the base 61cm x 10cm x 2 cm - 1 piece,
Handle and screws or screws for fasteners
2 furniture wheels (7.5 cm),
6 wooden aging 63,5cm x 0.7 cm,
wood glue
Screws for wood.
Step 2: Build Design
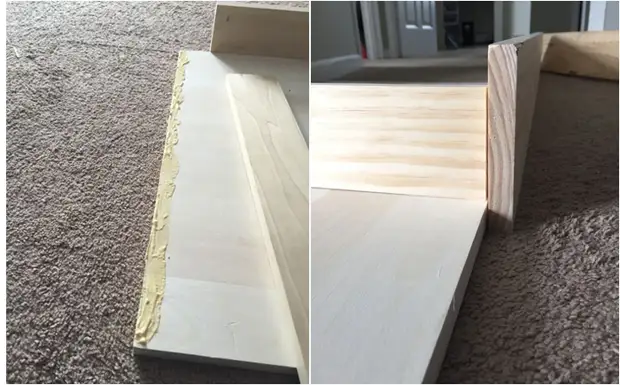
Take the board 13cm x 1.22m x 1,5 cm and saw it on 2 equal boards 61cm. This is 2 side walls of mini-pantry.
For the bottom shelf, take the board 61cm x 10 cm x 2 cm.
For the upper shelf, take the board 61cm x 10cm x 1.5 cm.

Glue the design and secure it with screws.
Glue the design and secure it with screws.
Step 3: Fasteners Shelves

Fasteners of shelves

Fasteners of shelves
The remaining 5 boards 61cm x 10 cm x 1,5cm fasten at such a distance (from the top of the design): 11.5 cm, 16.5 cm, 16.5 cm, 19cm, 23.5 cm, 28.5 cm. Then drill holes to insert a wooden bent into each shelf, prepare the 64.5 cm with a length of 64.5 cm and insert them into the holes done.
Step 4: Final Strokes

Final strokes
Make marking on the bottom of the design and attach the wheels at the same distance on both sides.

Final strokes
Now it remains only to fix the handle. Put the design on the wheels and encircle where you want to position the handle to be convenient. Make marking and secure the handle with screws or screws.

Finished mini-pantry
Mini-pantry is ready for use. Such an adaptation will certainly find its secluded place in any kitchen. Enjoy the creation of your hands!
Little apartment is not a sentence. If using Original storage systems, That will be able to place everything you need for a comfortable life.
A source