
Most children's sandboxes are inherent in one drawback - they have an open design. The ideal will be the sandbox with a bench cover, assembled with her own hands, but on how to make it according to diagrams and drawings with step-by-step instructions and photos, we will stop more detail.
Recommendations for the manufacture and placement
Choosing materials and place where to position the sandbox, take into account a number of factors:
- The design should always be in mind in adults;
- The construction is better partially placed in the shade, and partly in the sun, so that wet sand can sleep;
- To avoid drafts, the sandbox should be located away from water sources and protect against wind;
- Do not install a structure near old trees: there are many dry branches and leaves with them;
- Nearby should not be vegetation, which attracts bees and causes an allergic reaction;
- To design, you should use a thoroughly treated tree so that children do not have the title;
- In the process of construction, you need to exclude sharp corners, protruding self-tapping screws, nails, etc.
Requirements for sandbox
Children always like to play in the sand, sculpt the oak, invent various figures. Since the sandbox is a design that will serve not one year, it should be:
- Safe. For assembly, old boards are often used, so they need to polish well and remove nails;
- Comfortable. The product should take place for seating, a special drawer for storing children's toys, to equip the fungus for shading;
- hygienic. Sand sometimes needs cleaning.
Sandboxes with lid
The convenience of operating the sandbox depends on its design. An important role in this product is given to the lid.Classic option
The easiest way to implement the lid is to perform it in the form of a wooden shield. Since it daily has to open and close, many parents do not suit it. For moms and older children, the cover will be heavy. Plus, the shield occupies part of the free space. If the sandbox is installed in the country, then this factor is important.
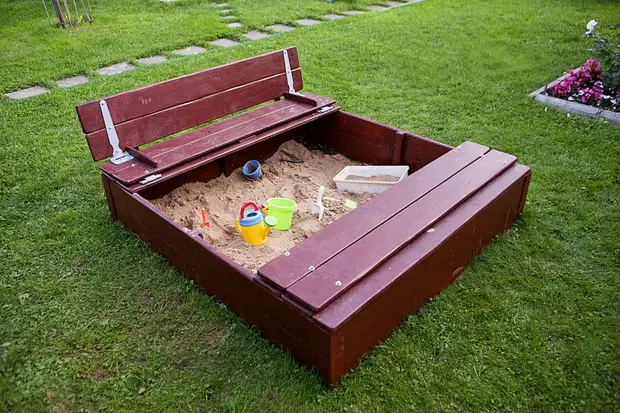
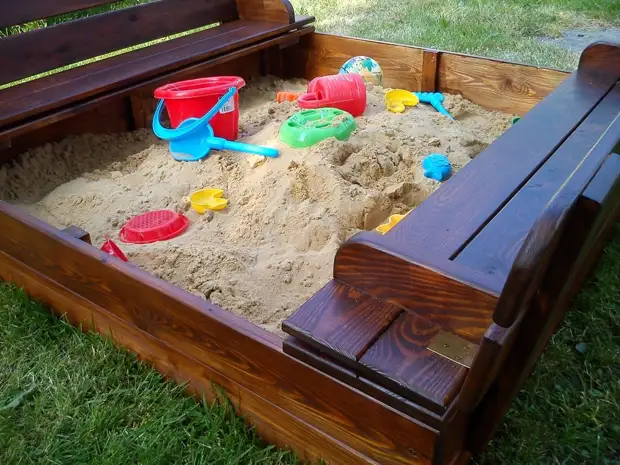
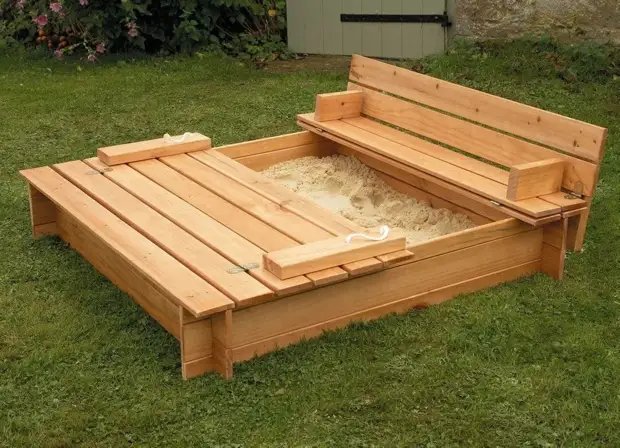
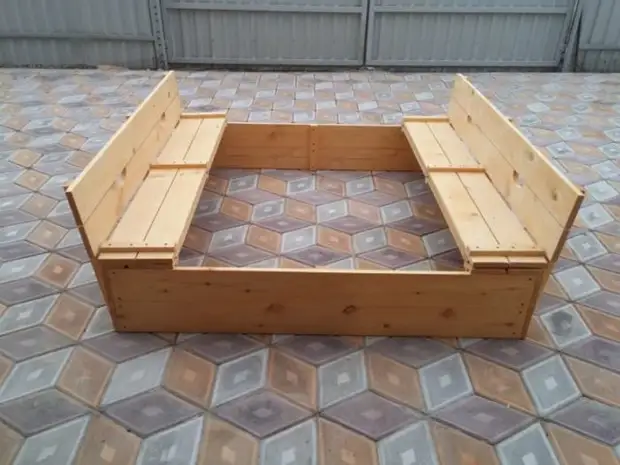
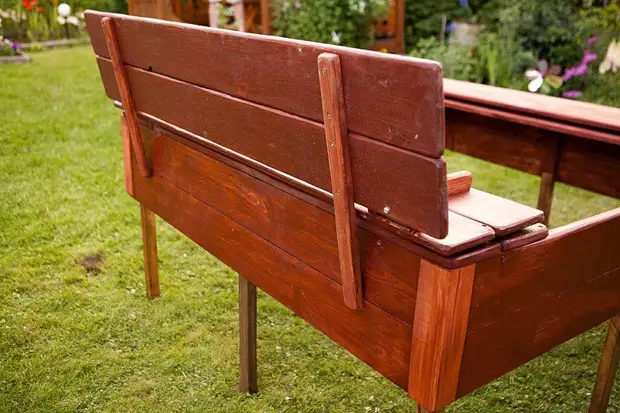
With lid and benches
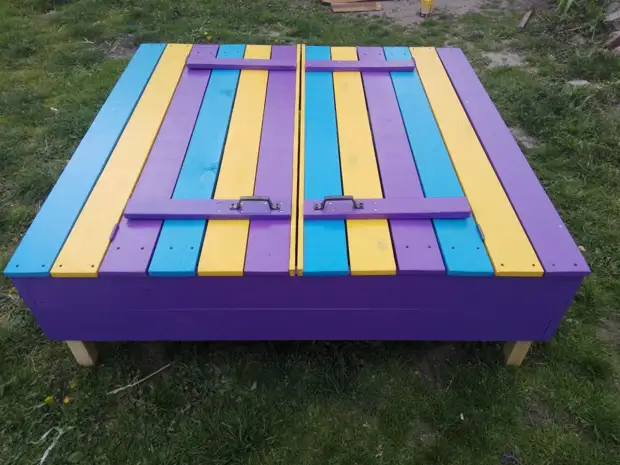
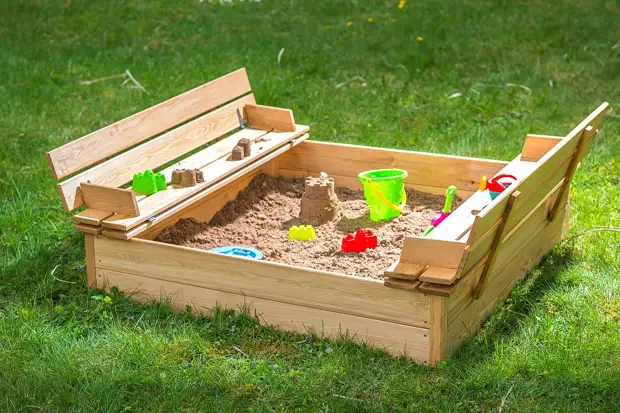
Almost an ideal option is a transformer sandbox. The cover in its design is made of several elements that are folded and folded with loops. By easy movements from the lid, you can collect benches or a table. Even 2 children of the six-year-old age will be able to cope with such a transformation.
What do sandboxes do with a lid
Most often, the sandboxes in drawings and schemes with a lid-bench are equipped with their own hands from a tree, and step-by-step instructions from the photo helps to figure out how to make a product correctly. Wood is the most suitable material for self-construct. Sandboxes from the store are usually made of plastic. Metal today is practically not used, because due to corrosion, holes with sharp edges are formed, which the child may be injured.Wood
The main material for the sandboxes are boards, sometimes plywood or OSB. Wood easily treating, which is a big plus. The simplest design has a square box. If the lid is performed in the form of a shield, then on the edges of the box nourishes the boards planks: they will play the role of a shop for children.
If the sandbox is planned to perform with a lid and folding bears, then first will have to make a drawing, deal with sizes, thoroughly think over the design.
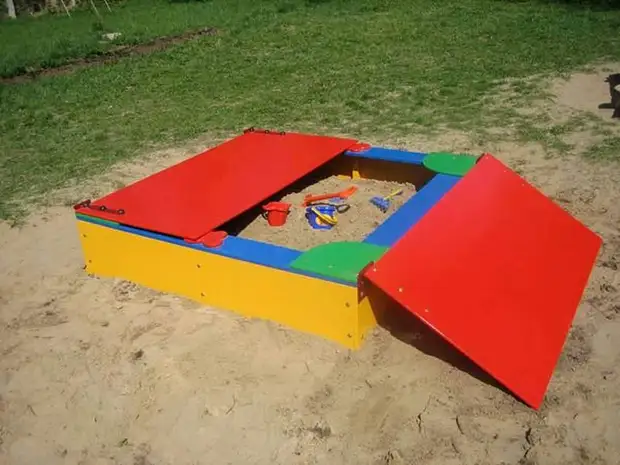
Plastic
Often the parents have no time or the ability to make something with their own hands. Therefore, it is easier for them to purchase a sandbox in the store. Basically such products come with a lid. The main advantages of such structures are an attractive appearance, execution in the form of any animal.

The sandbox from plastics is not subjected to rotting, so more durable. Depending on the selected design, the product can be complemented by benches, stairs, chests and other interesting details for children. For the winter, the sandbox can easily be removed in the barn. However, it is necessary to take into account that a plastic product of good quality will cost non-silent. Cheap options when heating in the Sun can highlight harmful substances and be dangerous to the health of the child.
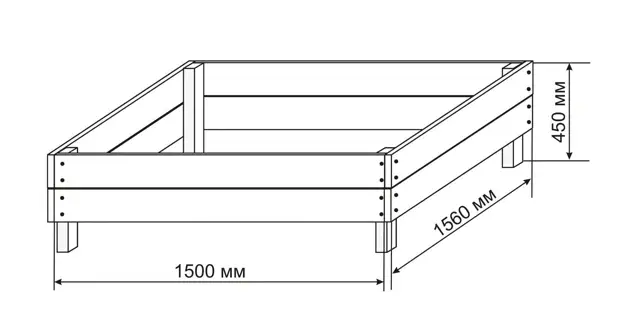
Drawings and sizes
To simplify the work on the assembly of the sandbox, first need to determine its dimensions. For several children, the box is needed 2x2 m. If the child is one, then 1.5x1.5 m will be quite enough. Though it seems simple, but it is better to make a scheme. According to it, in the process of design, it will be clear how many details and what size will be required, how and where to fix them.
Step-by-step sandbox design with lid
The future structure depends only on your ideas, opportunities and preferences.Option 1
To figure out how to make a sandbox with a lid-bench with your own hands, you will need a scheme, drawings and step-by-step instructions with photos.
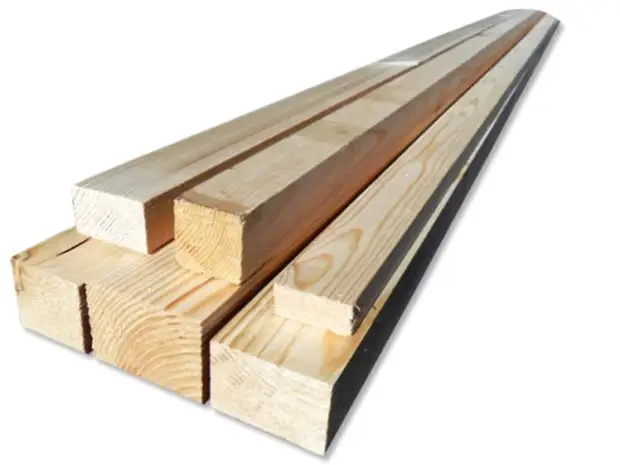
Also need to be prepared:
- lumber;
- loops;
- Nails.
Phased production:
- All boards are exposed to the initial processing of Fugansky.
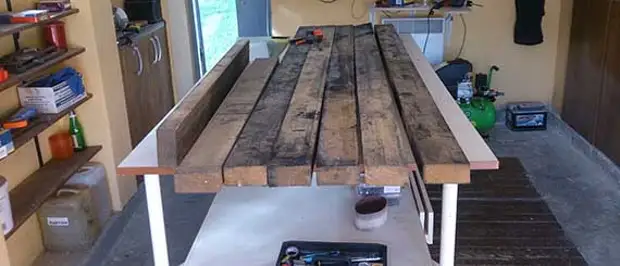
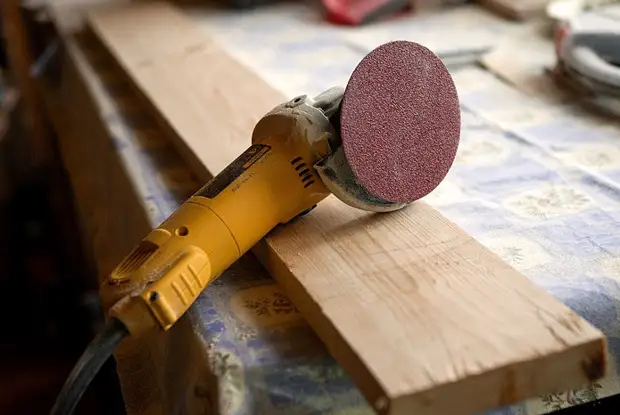
- Using a milling milling edge, we clean the material of the sandpaper.
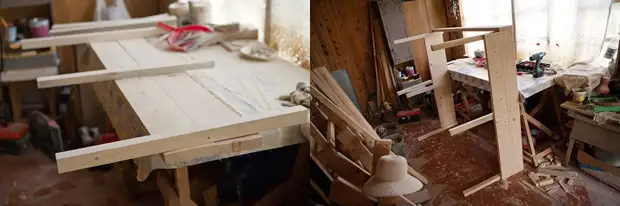
- Collect the blanks.
- We bring up a couple of boards using bar and nails.
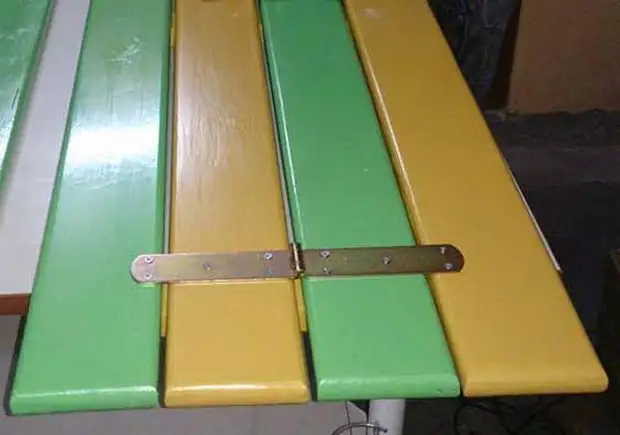
- I turn over the chalkboard from claim 4 by the other side, put another 2 boards on the bars and connect them with loops with self-draws.
- We mount another third, while the fasteners are located below.
- Similarly, we make the second half of the product.

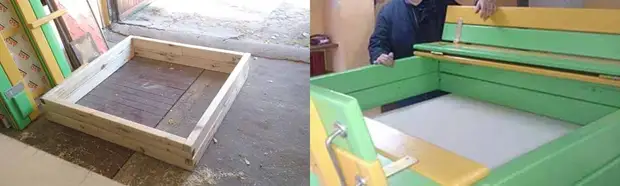
- Mount the boxes from the bar or boards and stain it.
- Fix the lid to the base.
Option 2.
For the construction of another sandbox, the same list of materials is required as for the previous design. From the tools there will be enough electrolovka, a grinder and a screwdriver.

We make in such a sequence:
- Cut the boards in size and processed with the help of a grinder with a sandpaper.
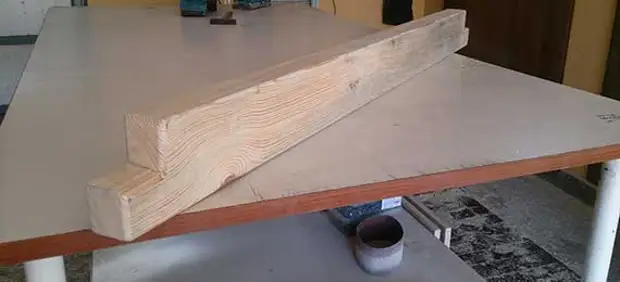
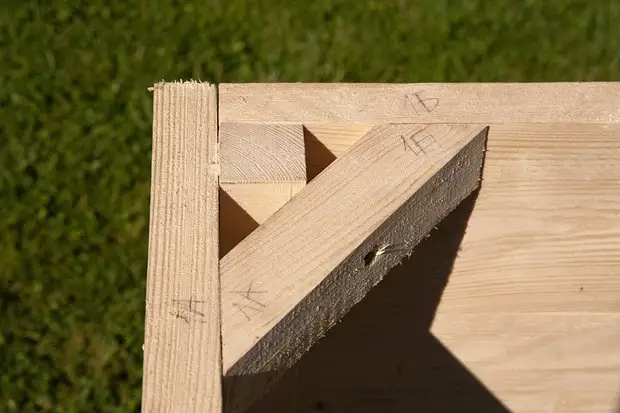
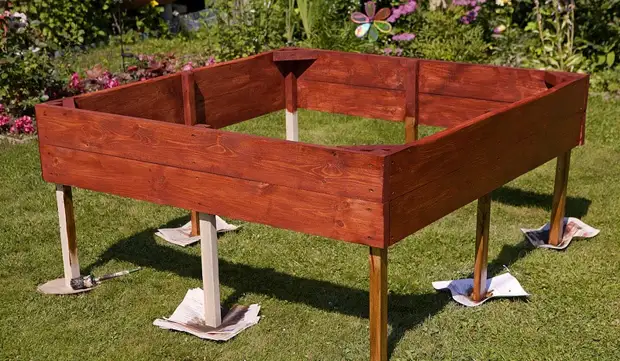
- For box, we use the pair of boards for each of the sides. We connect them with bars, as in the photo. The protruding part will serve as a support.
- In the corners, fix the bars to increase the strength of the structure.
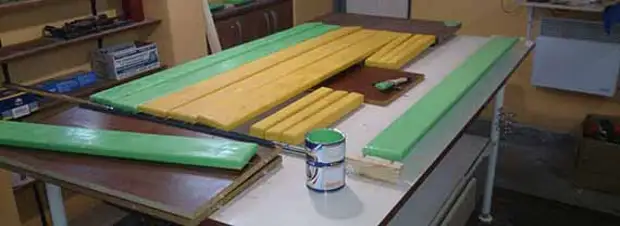
- Cover paint all wooden elements.
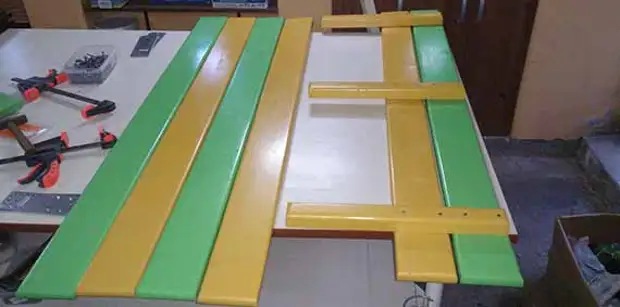
- Screws fix to the base 2 boards. We are still a couple of boards and mounted a loop to them.
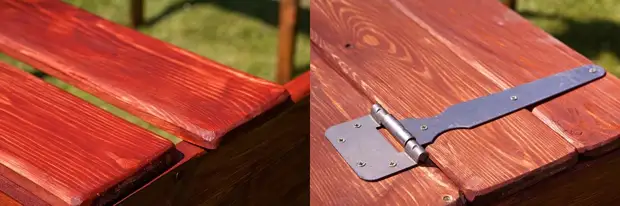
- We put the following two boards on the box and fasten them with the previous things through bars.
- We choose the length of the wooden elements so that when lifting the lid they serve as a support for the back.
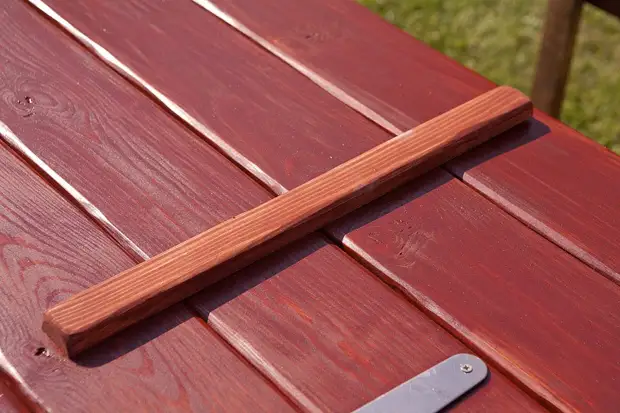
- To exclude the bending of the shops, in the center of the first two boards, fasten the part, as in the photo.

- Similarly, we carry out the second part of the cover.
- To protect corners from moisture, we close them with a wooden element.

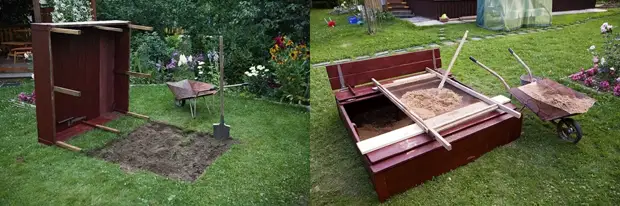
- We prepare a place under the sandbox, put the design and fill it with sand.
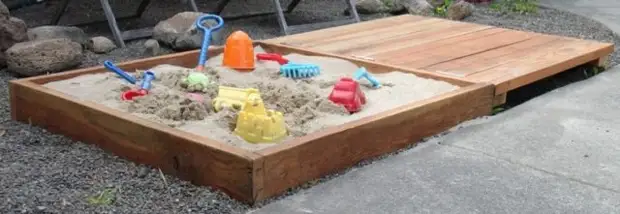
With a reassuring lid
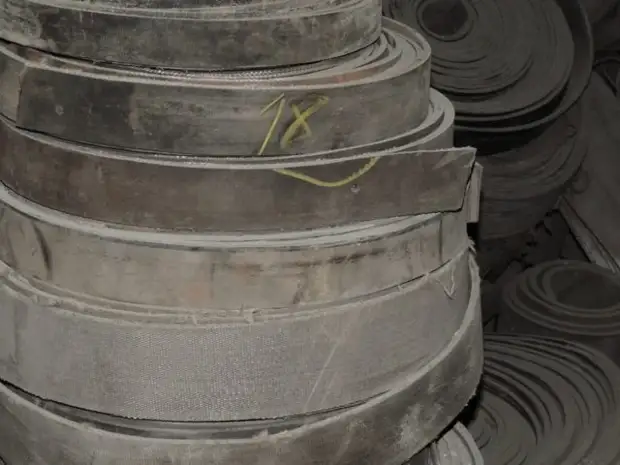
You can build a simpler sandbox design without benches, in which the cover turns into a roll. Tools and materials use the same as in previous versions, but instead of canopies apply dense rubber.
Step-by-step instruction:
- Cut the boards of the desired length, process and cover with protective agents.
- From dense rubber, we prepare the stripes of the same length as the boards for the lid.
- We collect a shield using rubber for connecting boards.

Roof for sandbox
Supplement to a sandbox with a lid-bench, made with your own hands on step-by-step instructions with drawings, a diagram and photo, there will be a roof, and how to do it, we will understand more detailed.

The material will also be a tree, and an OSB is suitable as roofing.
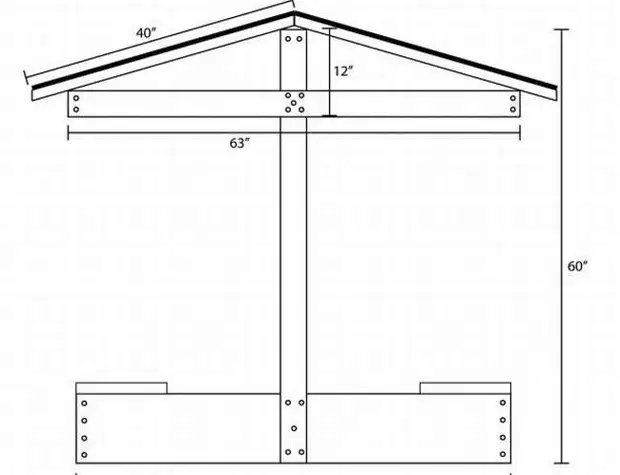
The assembly process is:
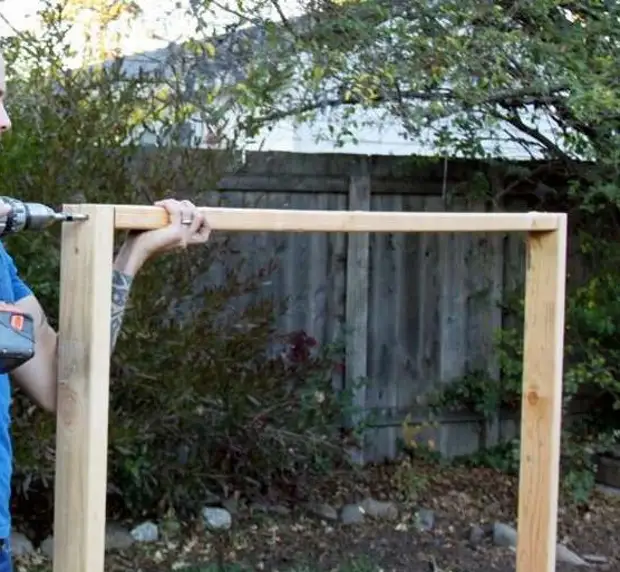
- To the side walls of the box fix the vertical elements from the bar 50x80 mm and a height of 150 cm.

- Align the racks using a level and connect them horizontal bars.
- Collect the base for the roof.
- Cut the rafter with a length of 1 m, put and fix them to the prepared framework.
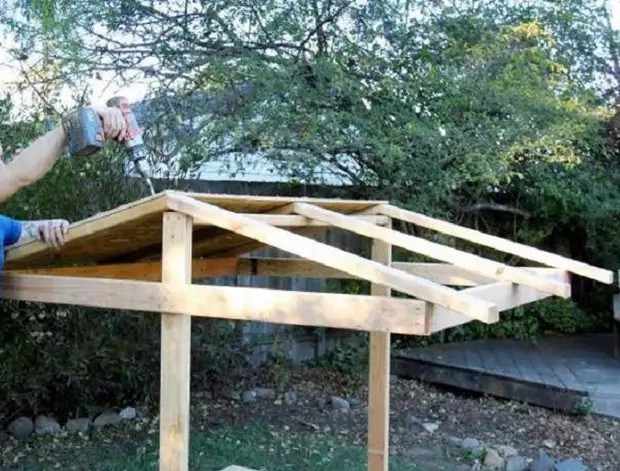
- From thick plywood or OSB cut out sheets, fasten them on the frame.
- Strace the roof in the desired color. If desired, the design can be decorated with different drawings using stencils.
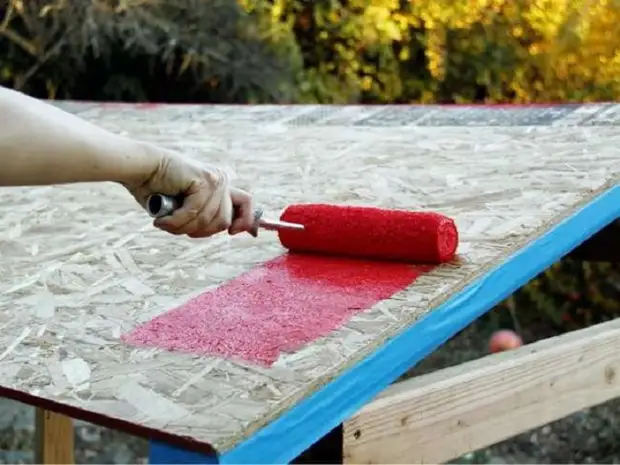
How to separate a wooden sandbox
After graduating from the construction, the sandbox must be covered with special means: they will make it more attractive and will provide protection against moisture. To do this, it is important to correctly select material for processing.
Cheap funds when exposed to heat can allocate toxic evaporation, harmful to the health of the child. There are also long-haired paints that are not very suitable for sandboxes. Therefore, it is better to contact the specialists: they will be prompted by choosing the most suitable and safe material.
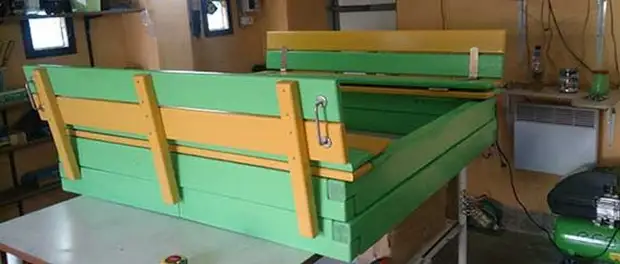
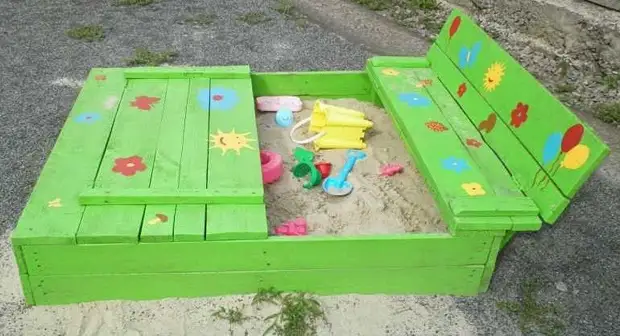
In order for the product to be an original look, it can be treated with paints of different colors, decorate with various figures from cartoons or fairy tales. This design will interest not only children, but also guests.
How to care for sand
To exploit the sandbox to be long and secure, it is recommended to adhere to such rules:
- The height of the side is chosen such that the sand does not pour out. So it will be possible to avoid trash in the filler. Better if there will be a tile or special coating around the structure;
- If initially no cover was not provided, the sandbox can be sanded or linoleum. The bottom should pass water, and better if it is not available at all. So moisture will not be stated and promote the development of various parasites;
- Sand must be changed periodically, because over time, garbage, dust, dust, is accumulated in it, the favorable environment for the development of harmful microorganisms, which can lead to infectious diseases in the mouth or eyes.
To please your child, it is not necessary to invent something supernatural and spend big money. You can collect a simple sandbox with a bench cover, and how to make it with your own hands according to the scheme and drawings, tells step by step instructions with photos. The main thing is that the design is attractive, safe and comfortable.
