
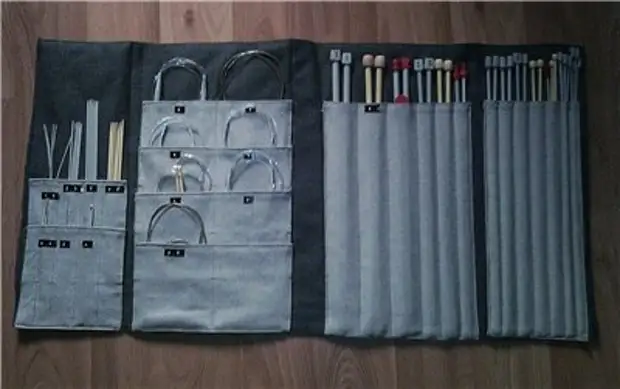
I propose to sew this comfortable thing for the spokes. Who has a lot of them, he will understand)).
I'll start with the preface.
If you have conceived something to make something (what exactly does not matter), then for the desired result, take two things: draw the scheme and write yourself instructions. Then success is provided to you. Believe me, this organizer I sewed only thanks to these two actions, because I am not particularly and able to sew.
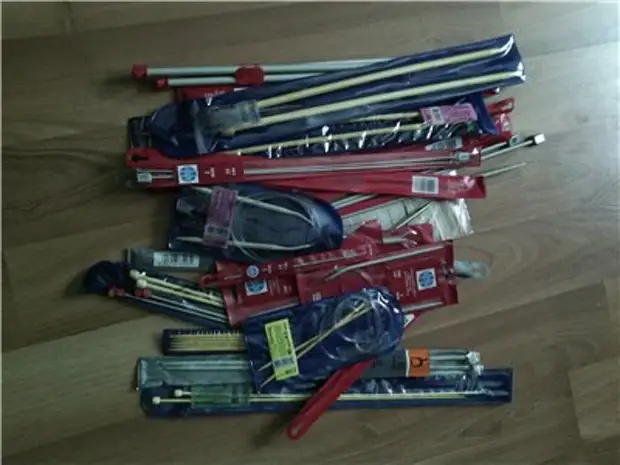
To begin with, we will define the amount of direct spice, hooks, round spokes and stockings.
Next, make up a list.
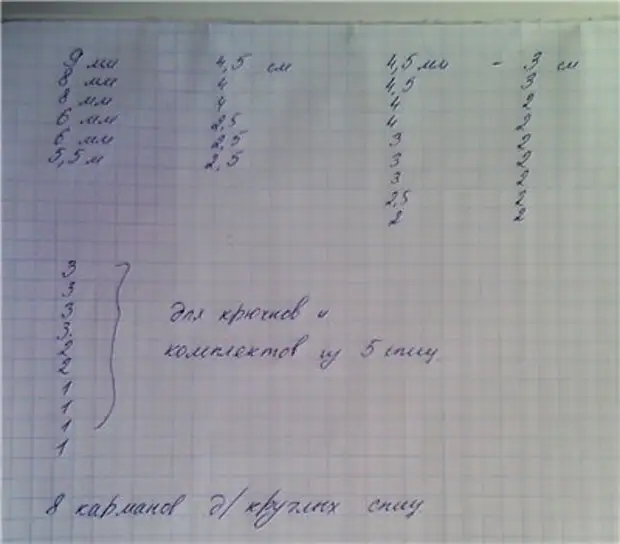
Here I counted how much and what size, as well as about the width of the pocket for each pair.
You, of course, the list will be different. This is me for example.
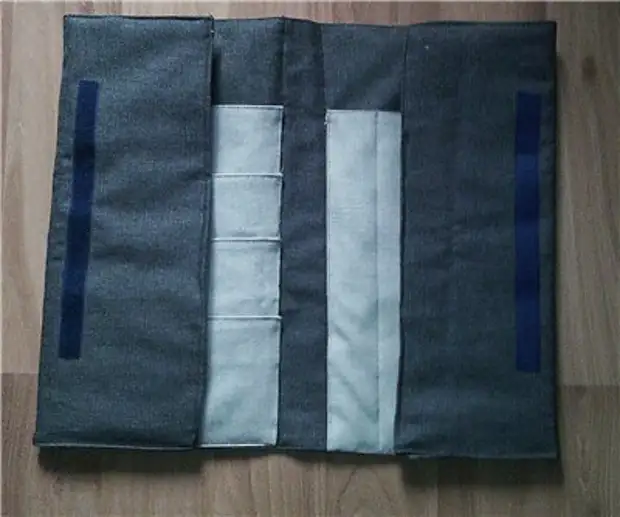
Next, I draw a scheme, i.e. I paint in detail with dimensions like it will look.
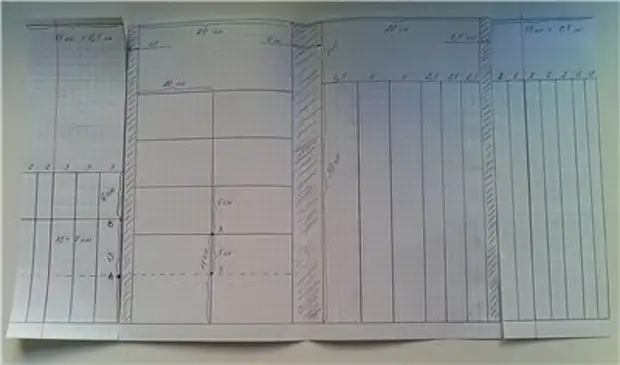
In my scheme, shaded stripes are the seats of folds separating the departments from each other.
Next, I write my step-by-step actions in detail. Why am I doing this? The fact is that it is impossible to keep everything in my head. And it may turn out that when you have already sewed one item, it comes to you that before that it was necessary to sew a clagging or to expose some kind of edge. And with the help of the instructions, you will be laid out on the shelves in the head. Intelligent, in the sewing process you will change some actions, but they will already be insignificant and do not collect the whole process.
I got this such instruction.
With a red handle, I covered the dimensions of the details that I end up to cut.

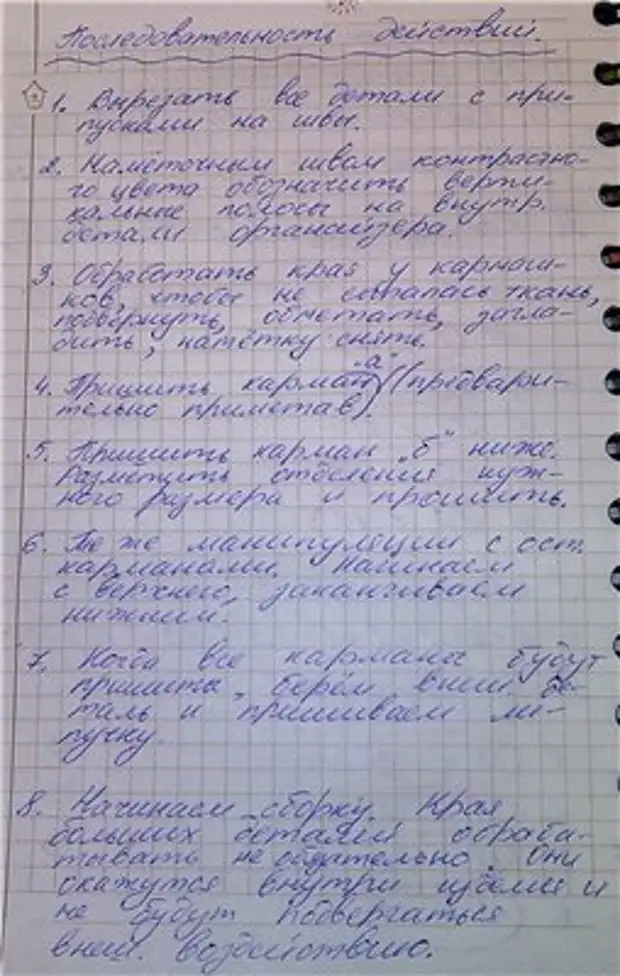
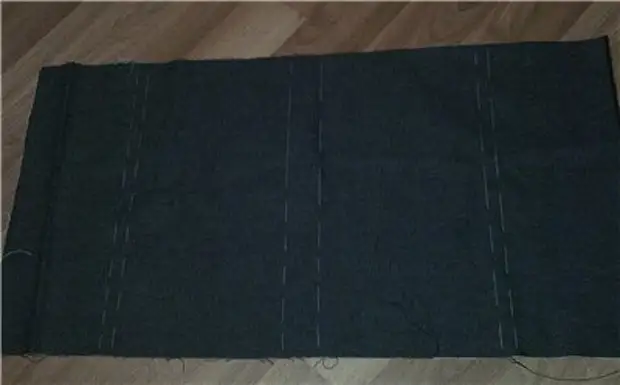
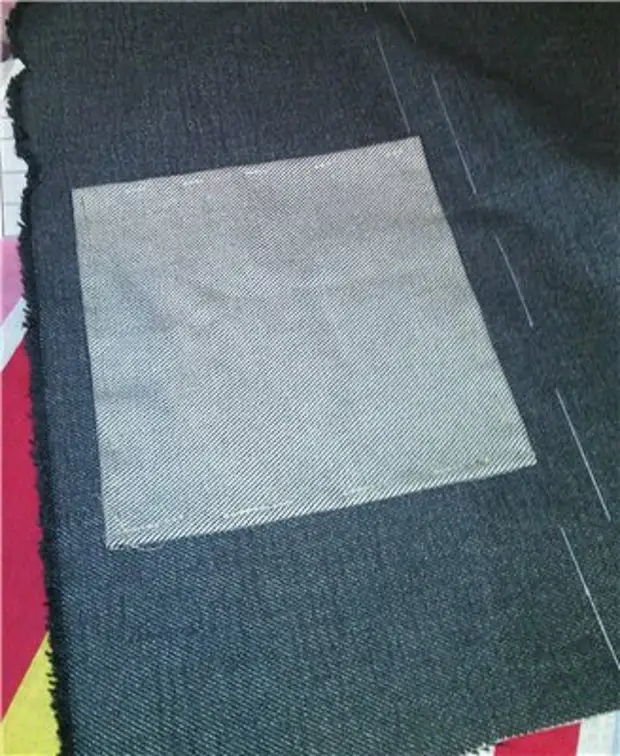
Cutting the two main parts (I have from denim), I have a wounded line (along the edges of the shaded stripes) on the inner detail. This is done in order to note the borders of the sewing of pockets.
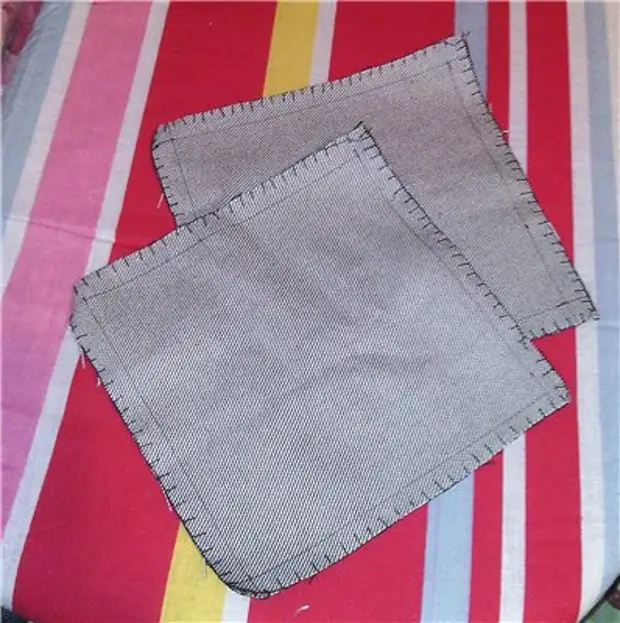
Next carved pocket details. They all need to be processed so that the edges do not pour and turn. The top edge of each pocket is immediately strained.
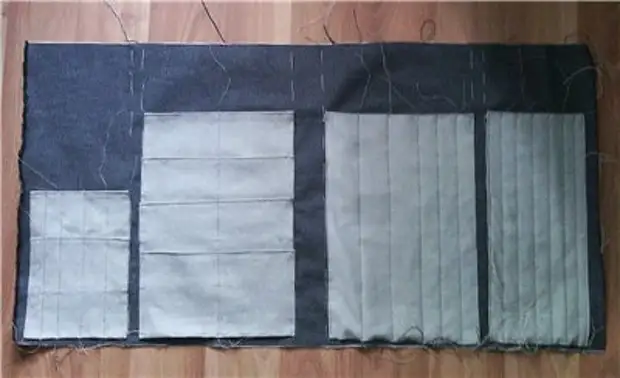
The picture presents two pockets (first department, if you watch the scheme from left to right).
These two pocket are located one on the other. Therefore, we begin to sew the upper pocket first, previously noting.
Then you sew the upper pocket in the second department (and here we have 4 outlined). Then one large in the third and fourth (last).
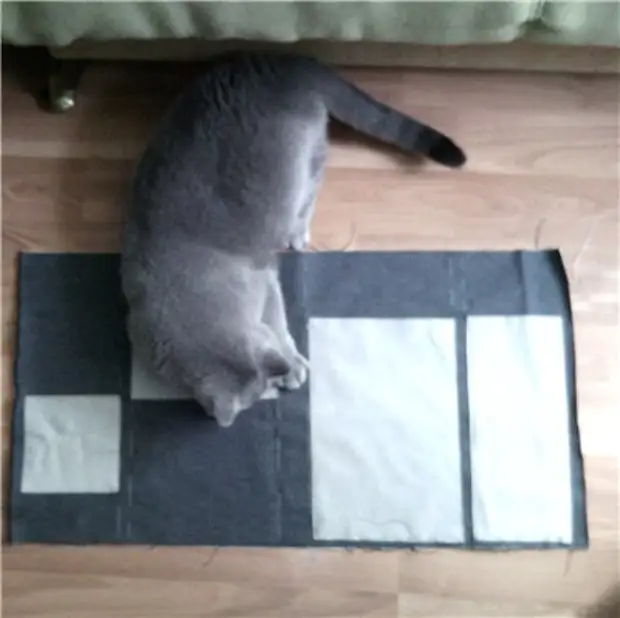
It turned out such a billet. Without a cat did not cost)).
After these pockets are stitched, sew the second bottom pocket in the first department and the remaining three in the second (also sequentially).
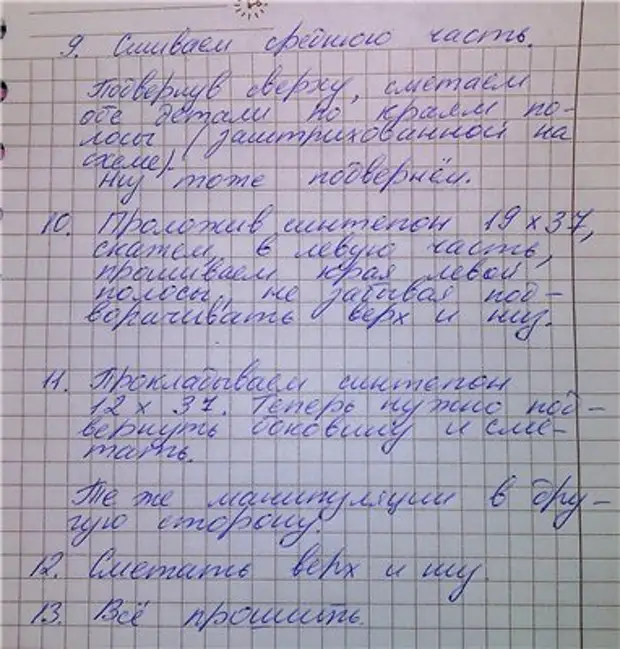
After the pockets are sewn, we mark the velcro place, i.e. clashes. It is better for us to sew it before they are sewn both main parts so that all seams remain inside.
I sew the velcro for the first and last departments, but on the reverse side.
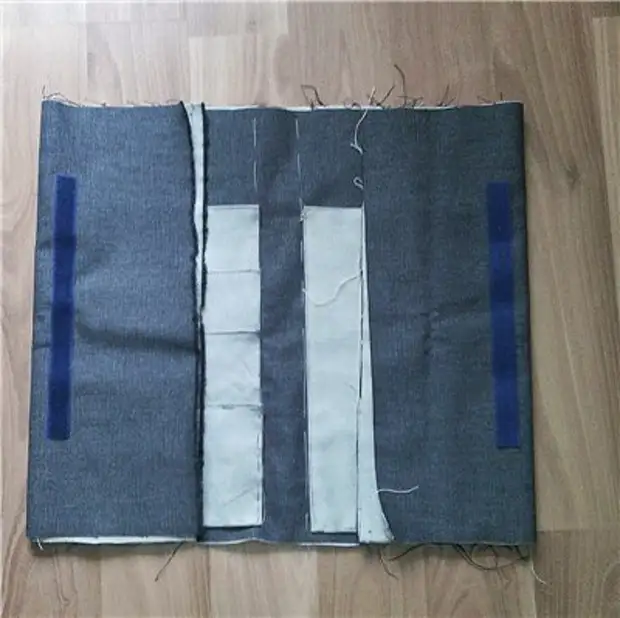
Slight advice: Velcue plant on double-sided scotch, and then immediately place without any hint. This will reduce the time.
We deploy our item with pockets and pencils. We celebrate the lines that will share big pockets into small. Then we simply flash on these lines.
Next, take the cut-off syntheps. Why is it needed? In principle, it is possible without it, because he will not give hardness, but I like it volume and softness. If you too, I explain next. We work a pure needle now, hinting.
Take the external main part and connect it with the inner. We cross the bottom (having turned over), left side. Insert a piece of synthesis of the desired size in the first department, we sew the top of the first department and its right side.
We cross the left side (the other side of the shaded line) of the second department, insert the syntheps, sew the top of the second department and so on until we do to the end and we will just stay all this to the typewriter.
As you understand, in the shaded sections of Sinytender.
You can pave a hardness cardboard. But it will not be able to wash such an organizer.
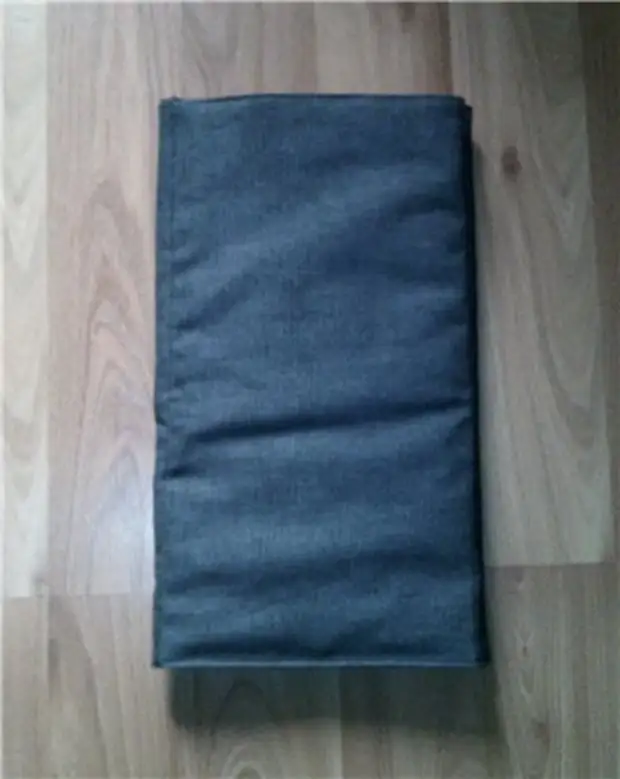
And folded.
A source