

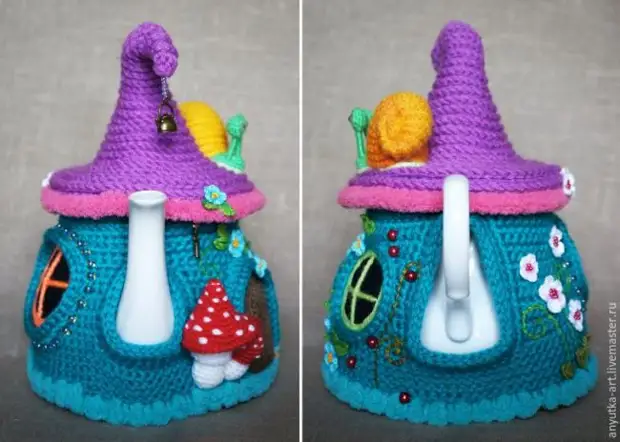
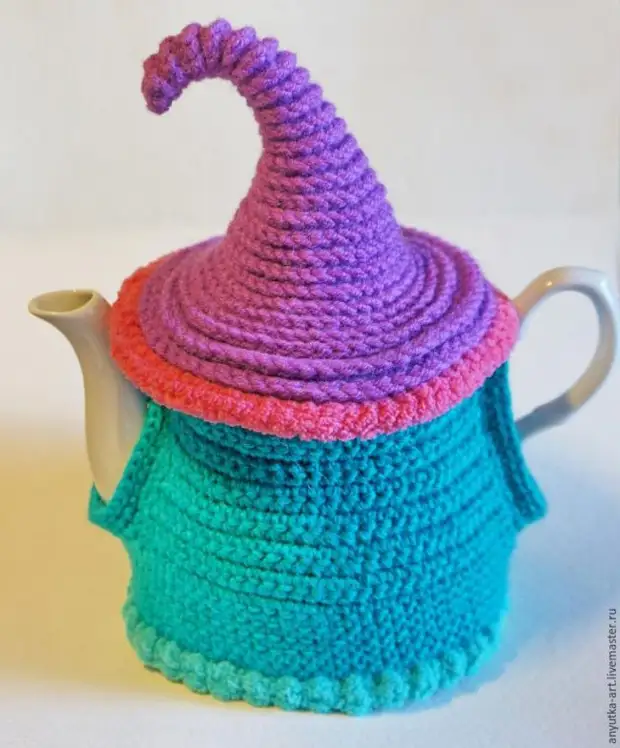
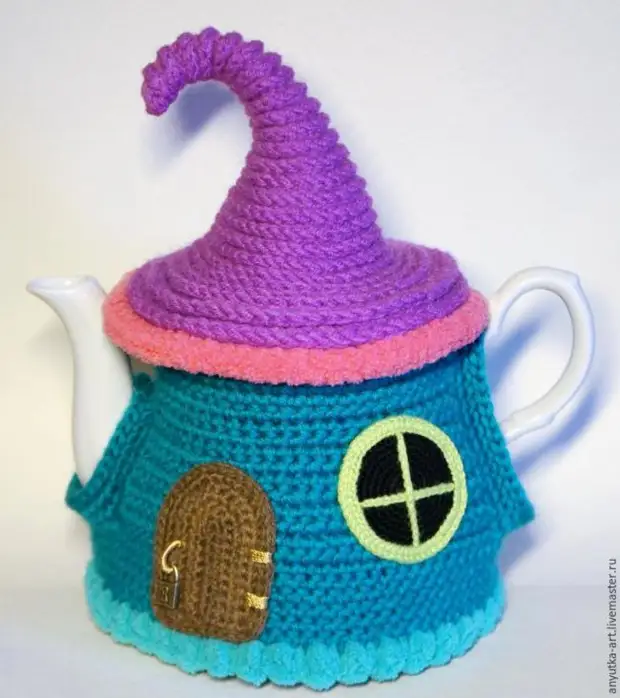
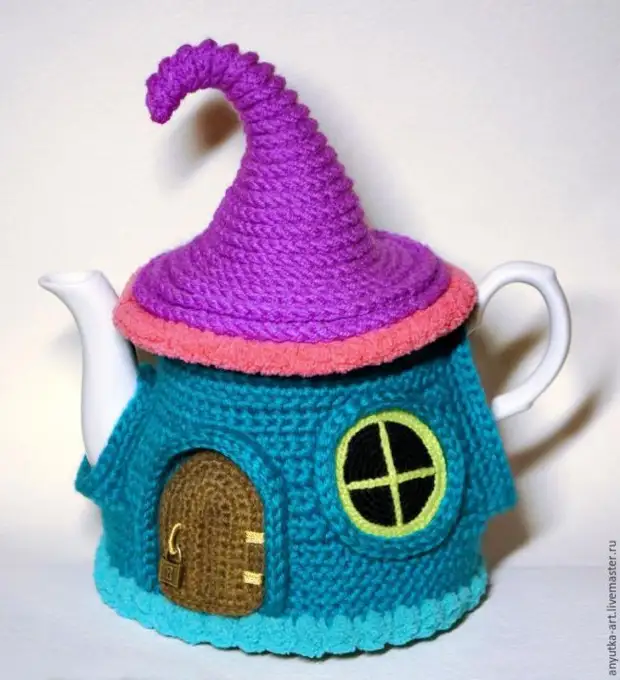
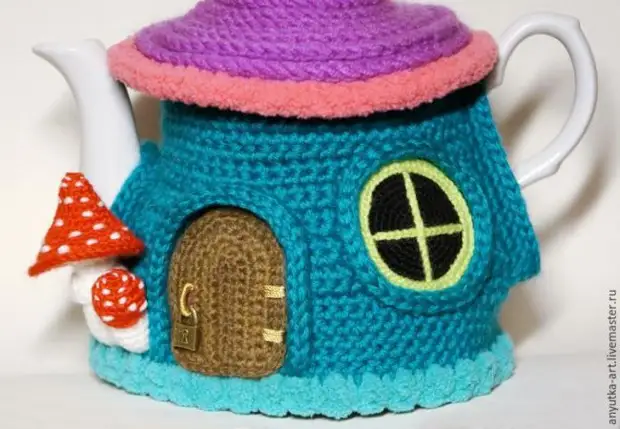
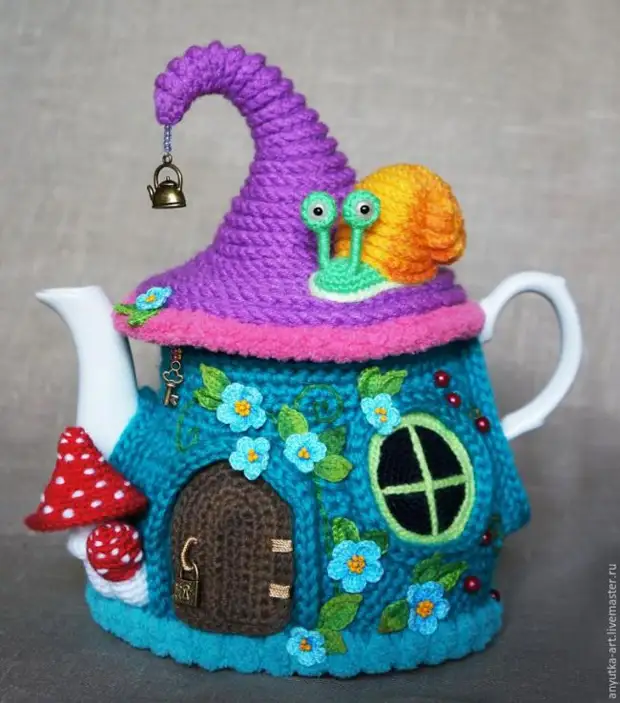
Decorate the teapot fabulous warming and every tea party will be held in the miracle atmosphere!
Necessary materials:
- yarn of different colors and thickness for the base;
- black yarn for the window;
- Brown yarn for doors;
- Thin cotton yarn for small parts ("Iris", "Soso", "Chamomile", etc.);
- Beads, beads, suspension, etc. for the heating decor;
- Wire;
- 2 beads for snail eye;
- filler;
- glue "Moment Crystal";
- Mononite.
Required tools:
- hooks for knitting different sizes;
- Pins;
- sewing needles;
- Gypsy needle;
- water sprayer;
- Scissors.
Step 1
First prepare the yarn for all parts - it should be contrasting colors.
The author draws attention that the larger the size of the kettle, the greater the thickness you need to take the yarn.
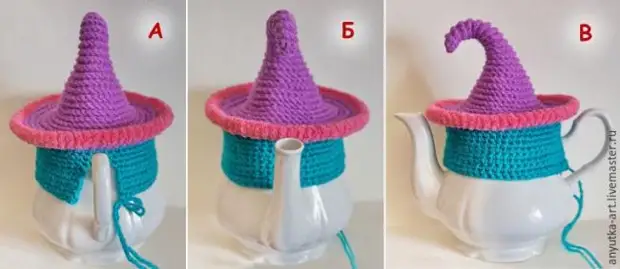
Step 2.
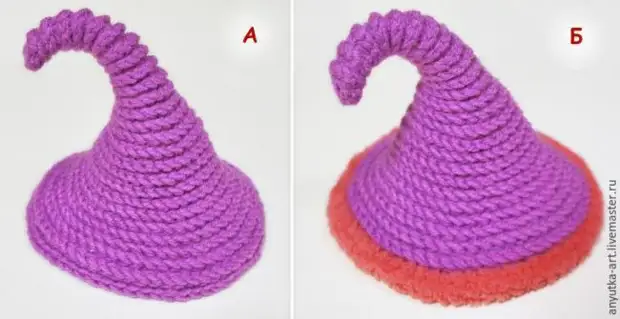
Tie the roof for the rear half the following scheme:
6 columns without Caida closure to the ring amigurum.
Then tie 5 rows, making 1 add-on through a row.
Then tie a couple of rows, making 1 add to each row.
The author knits 12 rows (photo a).
Further knit, gradually increasing the amount of additives (photos b).
Step 3.
To tie the hats fields, make 6 add-ons in each row.
Complete the knitting by the connecting column, without cutting off the end of the thread.
Step 4.
Now deploy the part and knit the connecting columns on the unbound weaptions, moving to the beginning of knitting (photo A-B).
After completing knitting, do not cut off the end of the thread.
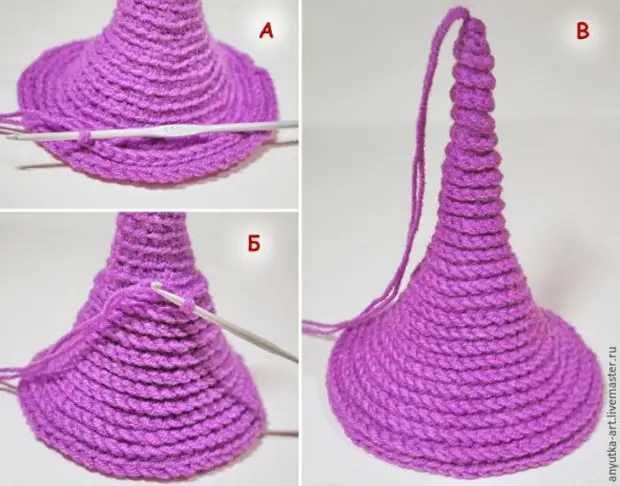
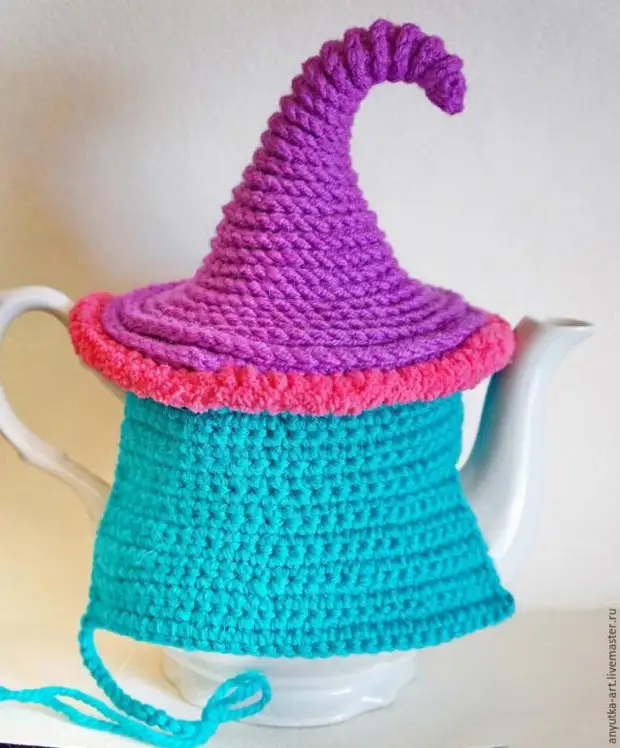
Step 5.
The end of the threads to the needle in the needle and stretch inside the detail by passing along the edge of the canvas.
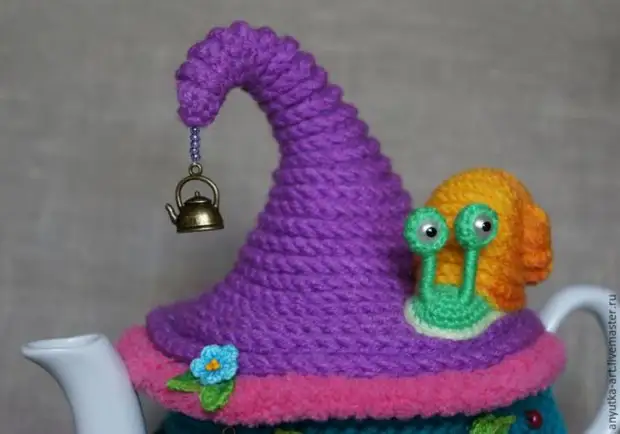
Tighten your thread so that the roof spire is twisted and secure the knot on the involving side.
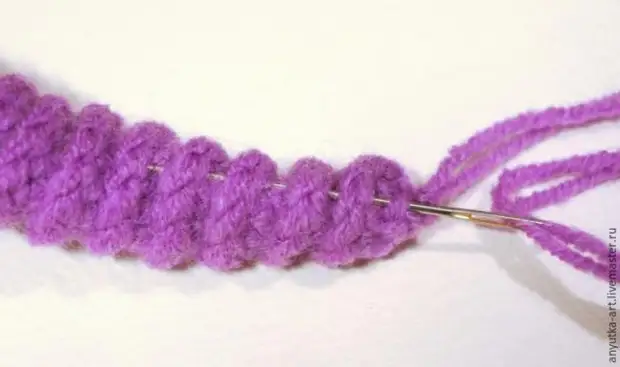
Step 6.
The edge of the roof is tied by several rows of columns without a nakida from yarn of a different color.
Step 7.
Put the roof on the kettle's lid and secure the roof and kettle mat.
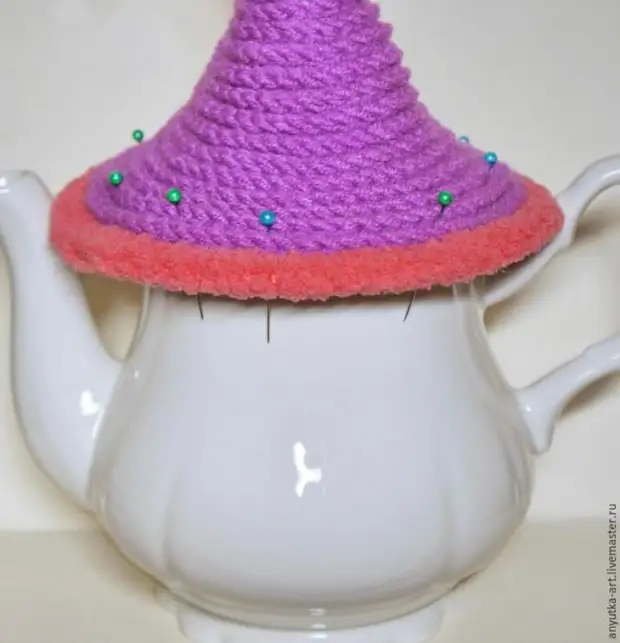
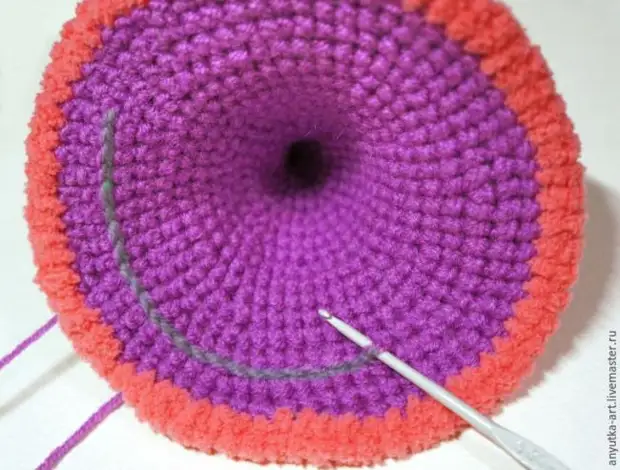
Step 8.
In the offline of the roof, tie a number of connective columns where the pins are located.
For greater clarity, the author lies this series of gray yarn.
And so that the pins do not interfere with during operation, draw the circumference with an endback marker in the places of their attachment, and then get them.
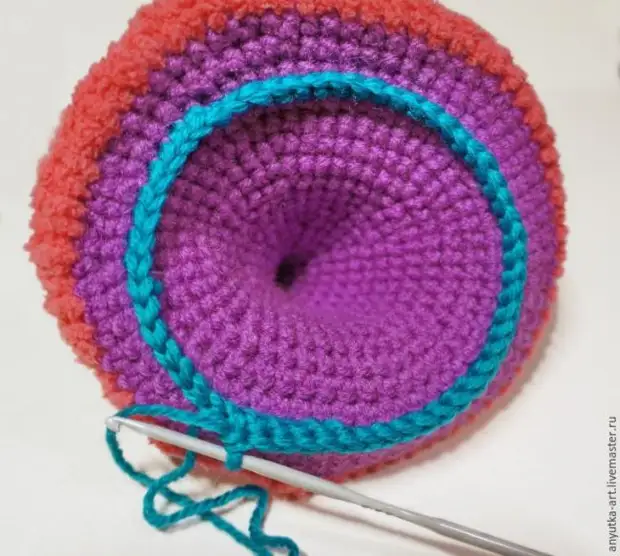
Step 9.
On the received hinges, insert a number of columns without an ingiety of the main color.
Step 10.
Thus, start knitting the foundation for a house of medium thickness yarn.
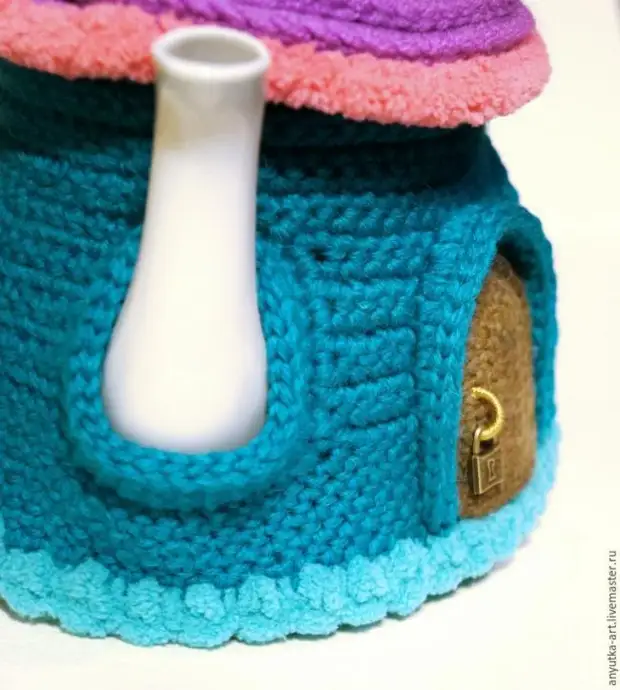
Tied to the top base of the nose and handles, tie two sidewalls of the heating plates separately.
I do an increase in the rows as the kettle expands, and where the kettle is straight, the additions are not needed.
Also, the author advises during knitting to constantly try to race on the kettle and write down the number of additions. This will help you associate the bottom item symmetrically top.
Step 11.
Having finished knitting the top, make a chain of air loops for connecting the upper and lower parts of the heating.
Step 12.
After both parts are connected, connect them with chains from air loops under the nap and under the handle (photo A and B, respectively).
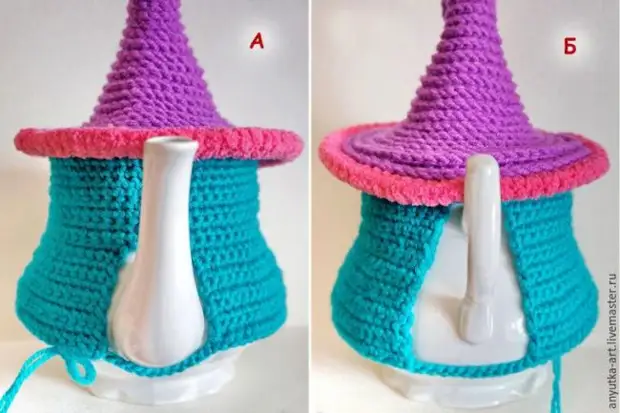
Step 13.
Then knit on the spiral until the distance remains a couple of rows.
Step 14.
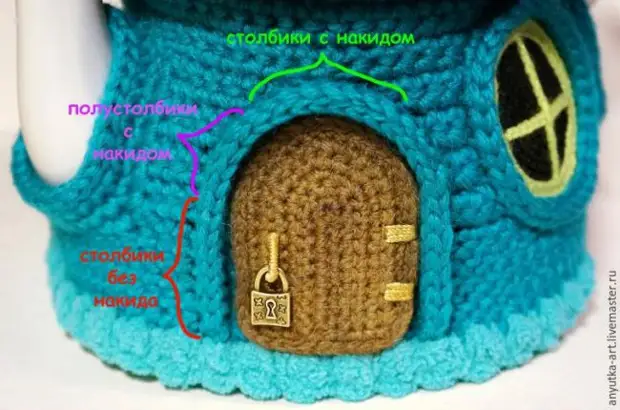
Reinforce the basis of lush bars from yarn, different in color from the main one.
And the holes for the nose and knobs are reinforcing with 2-3 rows of columns without Nakid or 1 near the connecting columns. You can also bind them with a "rachy step".
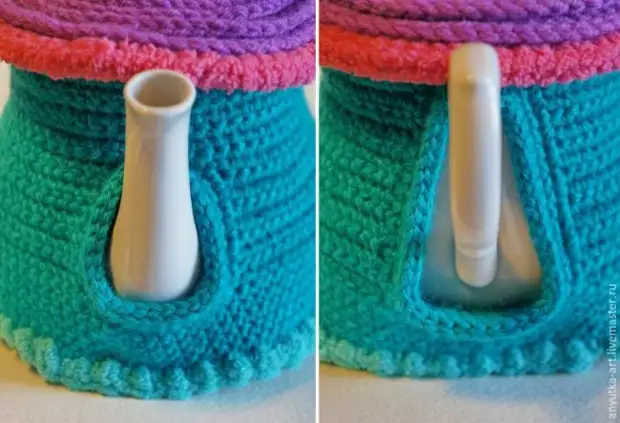
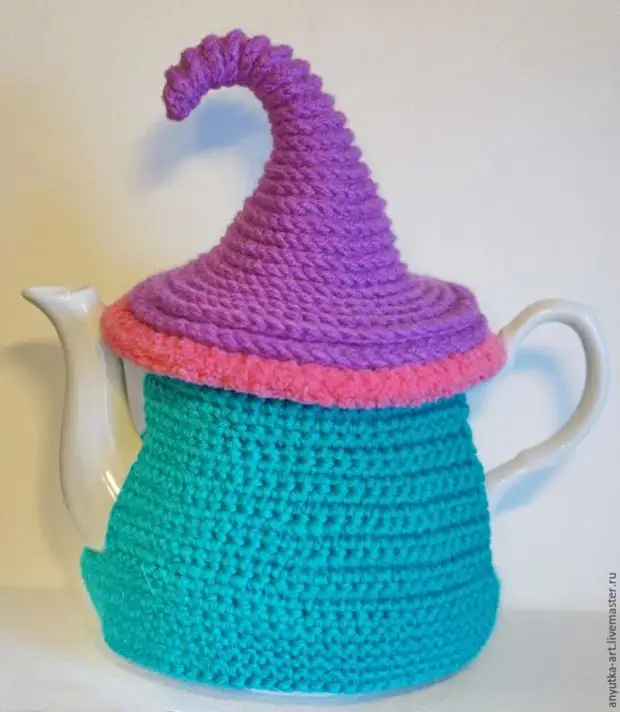
Step 15.
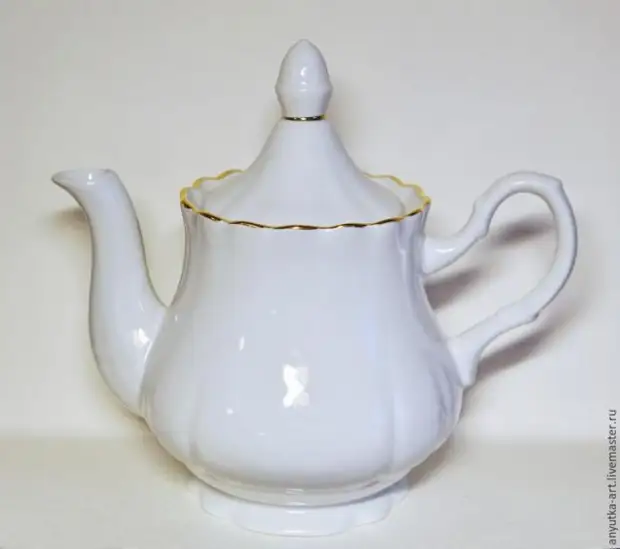
Next, put on the harvesting on the kettle sprinkle with water from the sprayer.
Leave the heating pad straight on the kettle.
Step 16.
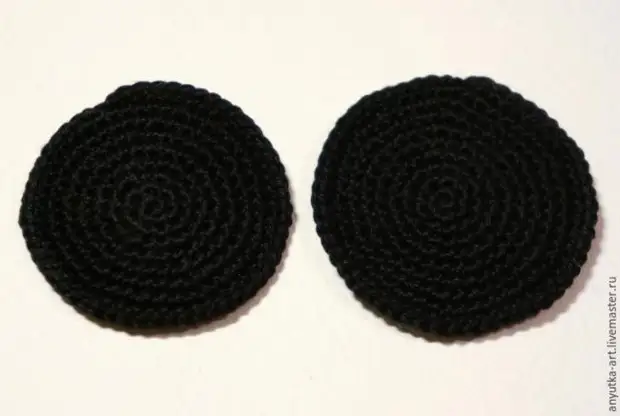
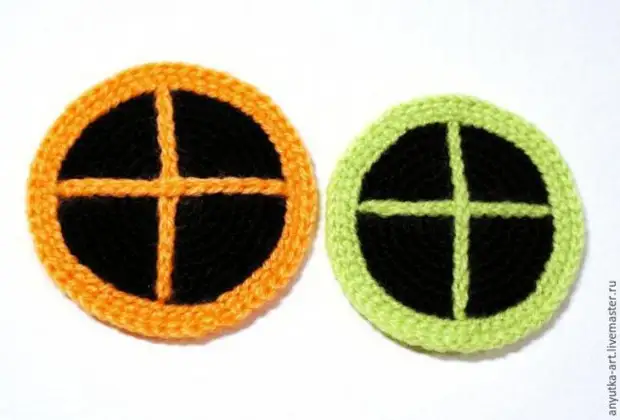
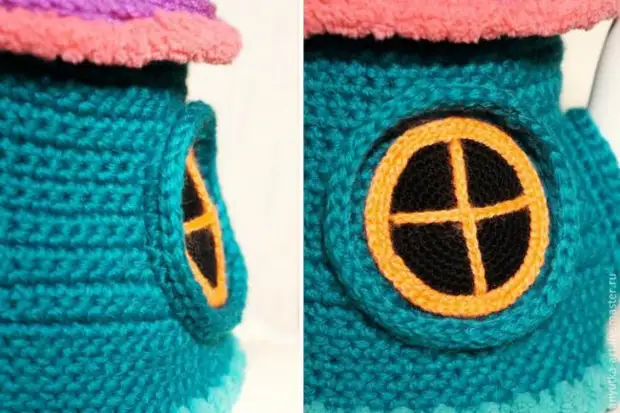
The windows knit the column without a nakid in a circle of yarn "Iris".
The author notes that the increase must be made with the displacement so that the circle does not turn into a hexagon.
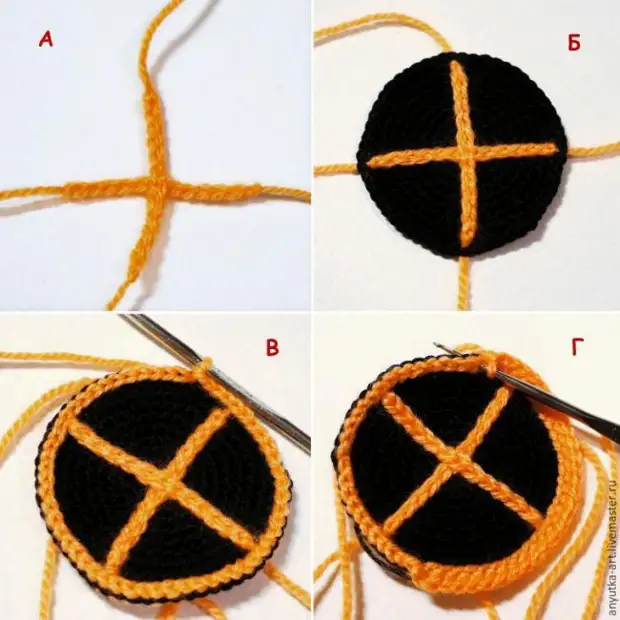
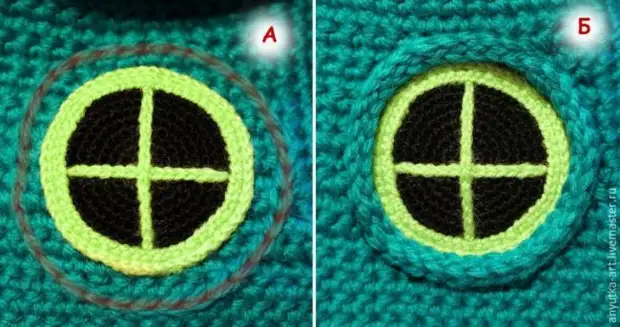
Step 17.
To make a frame, tie 2 chains of orange yarn air loops.
At the same time, during the knitting of the second chain, check the middle loop through the middle loop of the first chain, thereby having them perpendicular to each other.
Then tie a frame to the window, and on the edge of the circle, tie a number of a connecting column, introducing a hook to the center of each chain cover.
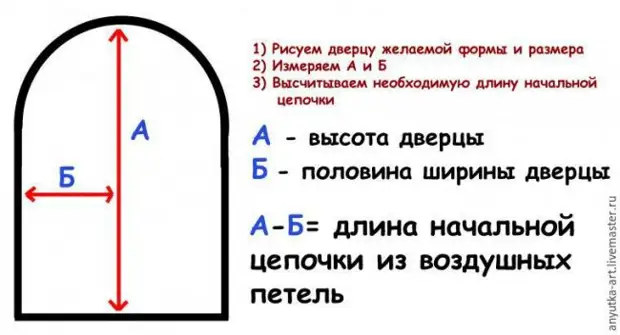
Step 18.
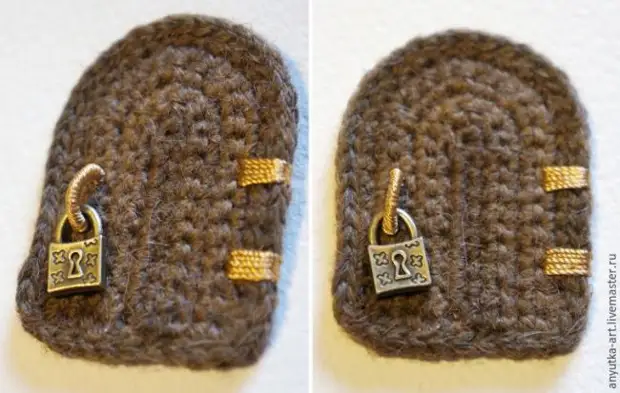
Calculate the dimensions of the door according to the following scheme:
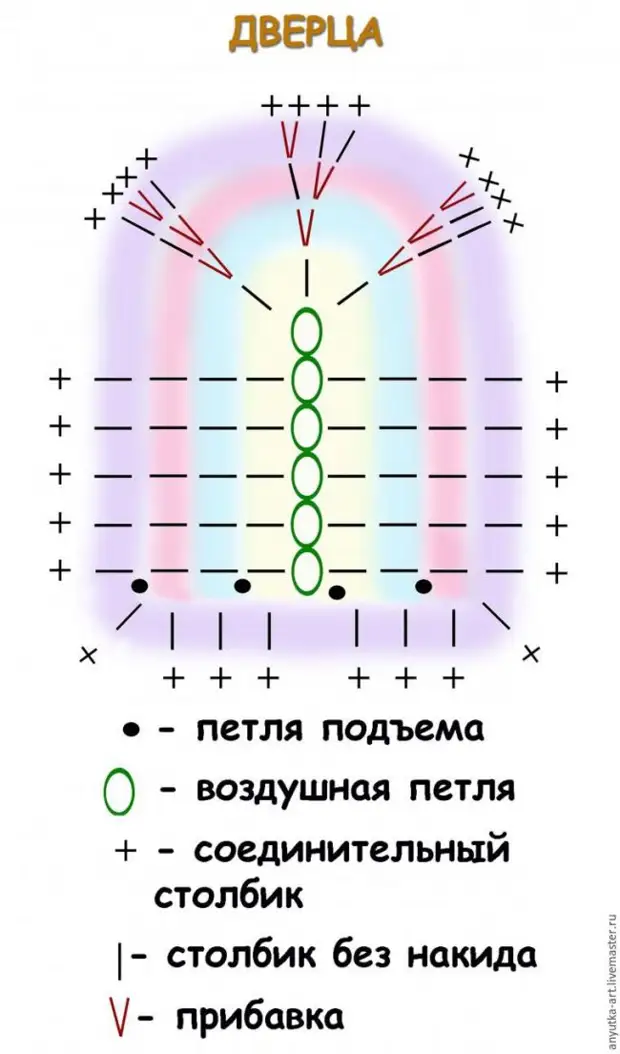
Tie the door in the form semi-shaped.

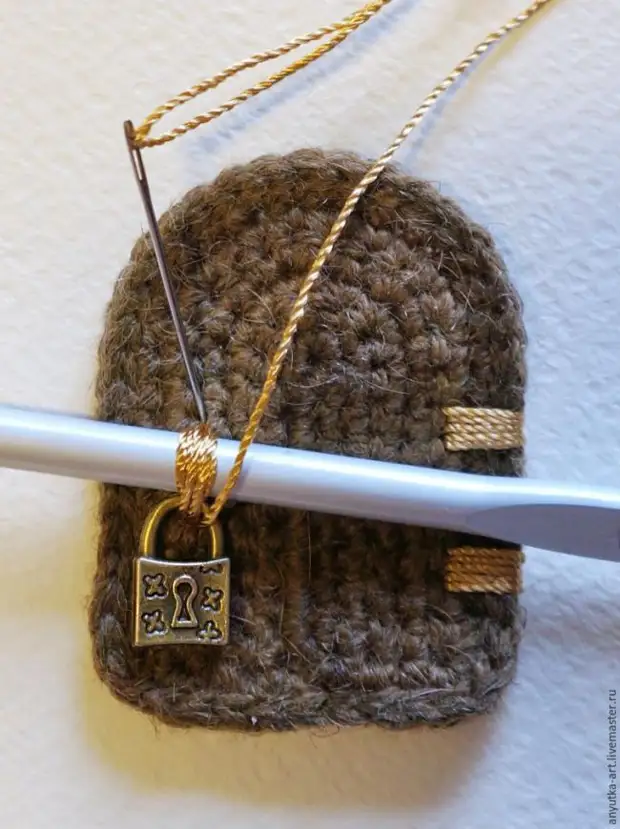
Step 19.
Threads of beige color bulb and doors handle.
Insert the handle, making the loops around any tube (a pencil or handle is suitable).
At the request of the Suspension Castle knob.
Step 20.
Thin threads of the windows and the root of the heater.
Step 21.
Optionally, reinforce the frames near the columns without Nakid.
Step 22.
Similar way to place the doorway.
As a result, it should be like this:
Step 23.
For the house decor, tie agosmorers arbitrary sizes.
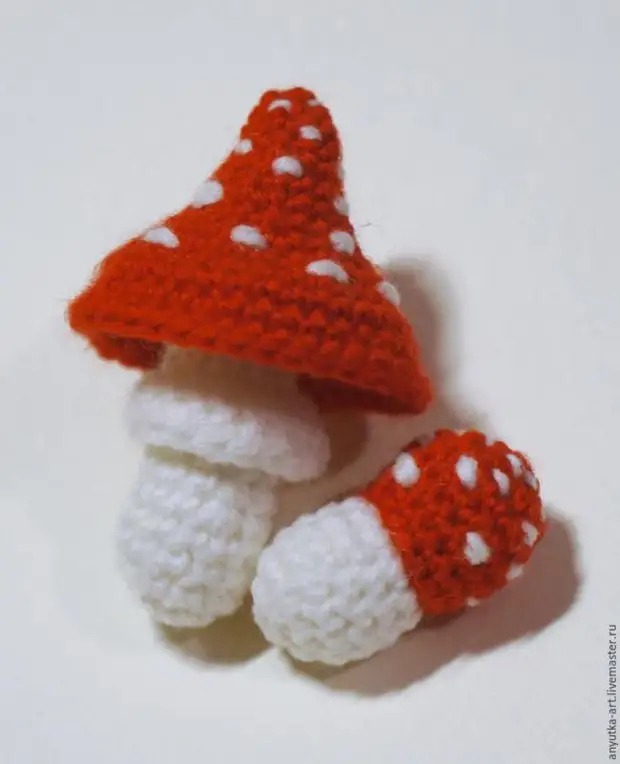
Also, if desired, tie the leaves according to the following scheme:
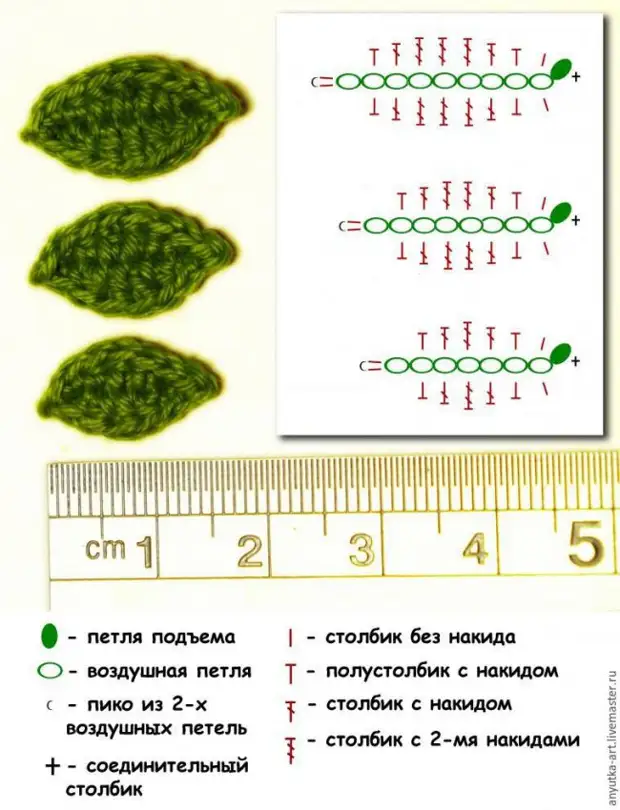
Step 24.
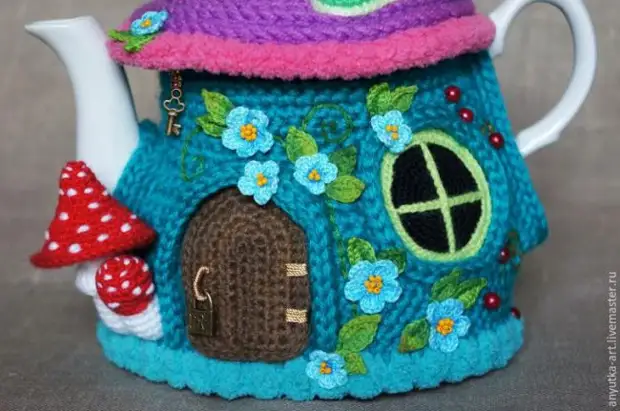
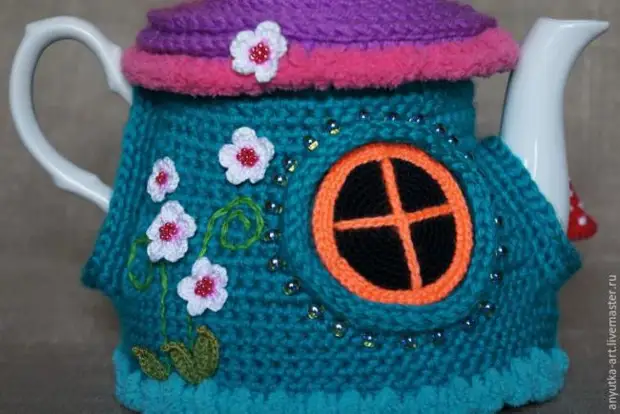
Fit the house as you can tell you a fantasy: you can link the flowers, sew beads and sequins, etc.
Decoring is a complete step of this master class and after it the height is ready!

A source