

Could you think that your favorite photos, printed on a laser printer, can be applied to a tree, climb and they will serve you forever! You can easily make it with your own hands following the steps described below.
1. What we need
- Photography printed on a laser printer
- Board of arbitrary wood and thickness
- gel medium (it must be acrylic)
- Brush for applying gel
- Rubber roller for smoothing photos, it can be purchased in any construction store
- paint for wood (optional) and rags
- soft paraffin or matte adhesive for decoupage modpodge to align and cover the image
- Paraffin brush
- Mounts for hanging the picture
2. Image selection
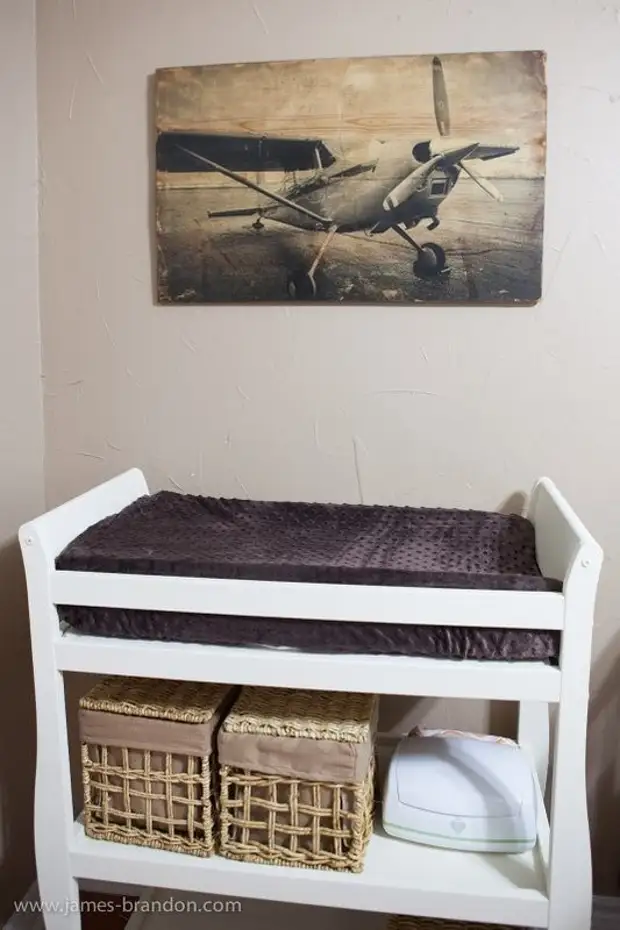
Obviously, you first need to decide what exactly you want to transfer to the tree. Most often bright, clear photos with high resolution will not look too stylish on the tree. In our case, such a photo of the aircraft was processed in the Lightroom. In order to give it a vintage view - translated into the monochrome, contrast was reinforced and film grain was added.
3. Printing photos and search for wooden blanks
It is very important - the photo should be printed on the laser printer!

4. Application of the gel medium on a tree
Cover the entire surface of the tree with one layer of a gel-medium, not too thin, but not too fat. If the layer is too thick and dense, it will be hard to remove the image after the procedure. Too thin layer most likely will not allow the image in some places to be moved to the tree. Try to create a smooth, high-quality layer.
After the gel medium is applied to position the face of the face. The picture will definitely be bubbles, so do everything to reduce their number. In our situation, a rubber roller was used to not damage the drawing.

After the image is based on the basis and smooth up it overnight and do not let anyone close!

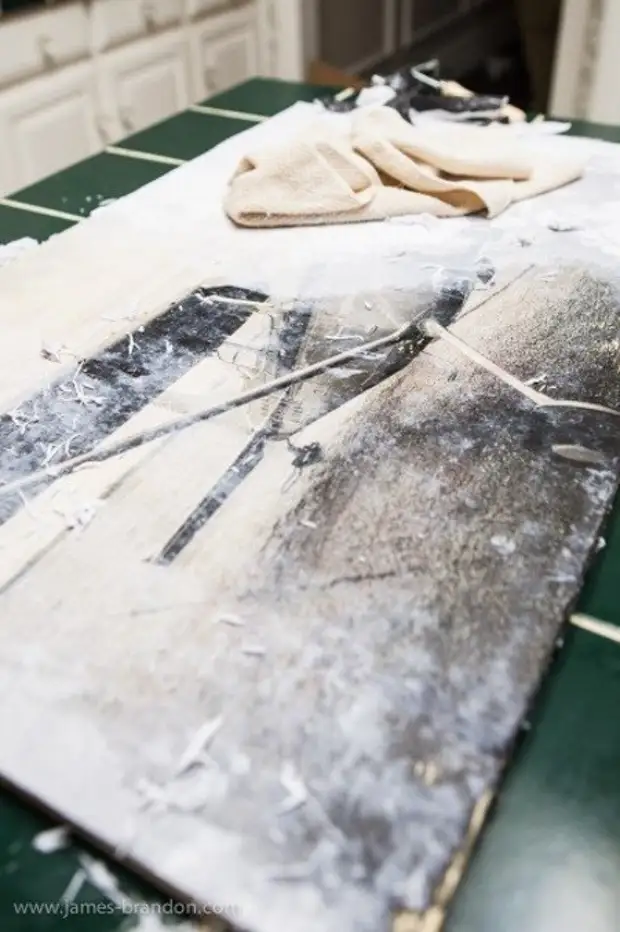
5. Remove paper
This is a very busy stage. To remove paper, we just need to wet it and drop it with your hands. This is a rather dirty process and possibly there is another way, but our fingers seemed to us the most suitable tool. Some parts of the image will be easier to be easier than others, but keep in mind that by the end of the procedure your hands and fingers you will definitely get tired. Perhaps the procedure will have to repeat and all of this will take it all up to 30 minutes. But this extremely exciting moment is to see how the photo is manifested in the tree. Prepare a vacuum cleaner to remove the mess, which will definitely appear after this step.
6. Final strokes
At this stage you can show your creativity. Since we strive to ensure that the image has a vintage look, we covered it with one layer of paint for wood. Be careful so that the work does not become too dark or did not acquire an undesirable color. You can after applying to impregnate the surface with a cloth to remove the surplus.
Then we have a little handled the edges of the sandpaper to remove the excess gel and align the wooden surface. We also took advantage of a certain product called Pigment - put it with a sponge on the edges to create an effect similar to vignetting.
At the final stage, cover the picture with soft paraffin to make it smooth and smooth. After drying the first layer, the procedure can be repeated.


7. We hide on the wall
In any store of household goods and tools or goods for the home, you can find special brackets for paintings, do not forget to capture shorts of length, no more than the thickness of the tree.


A source