
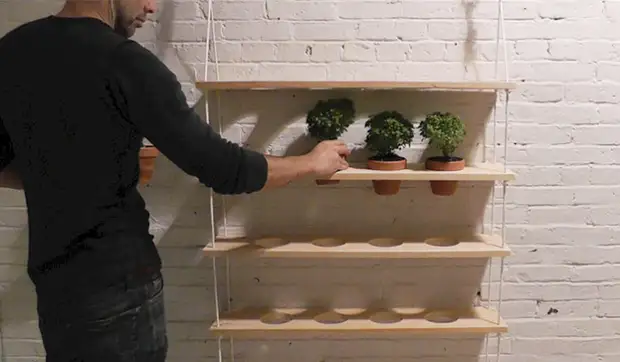
How to make it yourself a vertical shelf for flowers, suspended flower, you will learn from the master class below. A system of shelves and vases on the ropes can be placed in any convenient, sunny place, and if necessary, it is easy to remove.
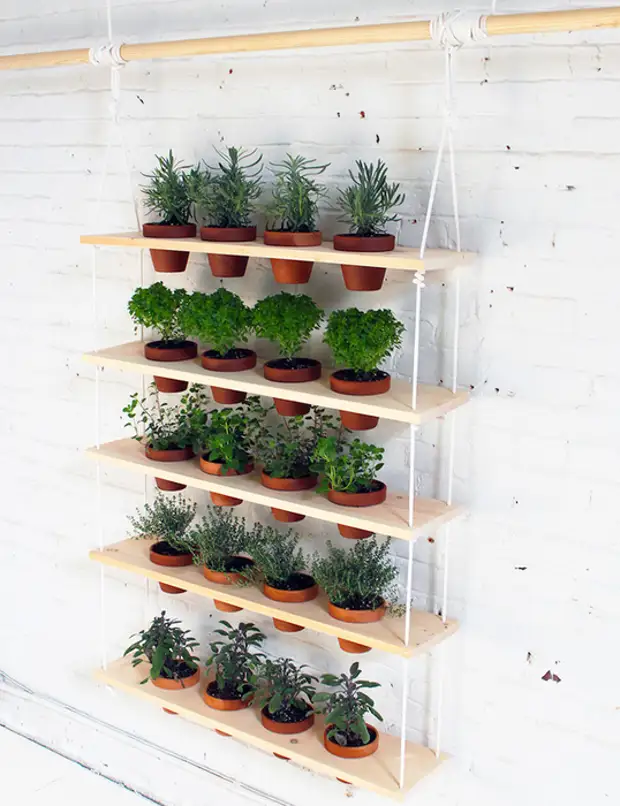
For sitting, terracotta, clay pots, with a diameter of about 100-120 mm, are used. . Other sizes are suitable, but this is the optimal format.
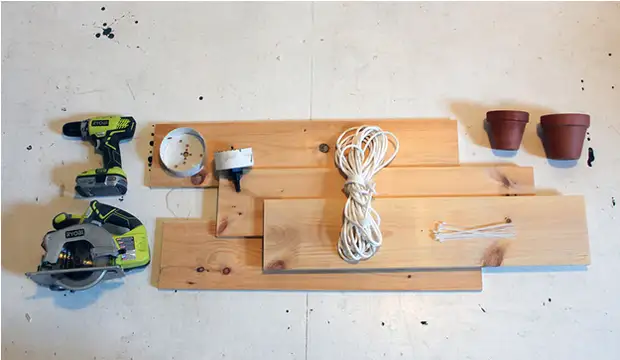
For suspension, kapron twisted ropes or a panel, a diameter of 6-7 mm, is used. .
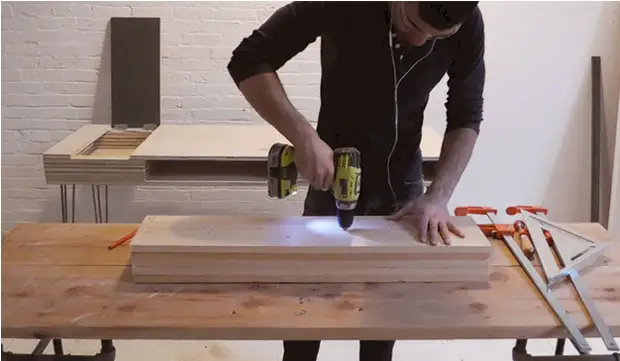
Shelves made of planed boards, or moisture-resistant plywood, 150-200 mm wide. 20-25 mm thick. .
The length of the boards depends on the number of placed pots, there were 800-900 mm long boards. .
For fixing the shelves, plastic grippers for electric cables serve, they must be high-quality to withstand shelves with pots.
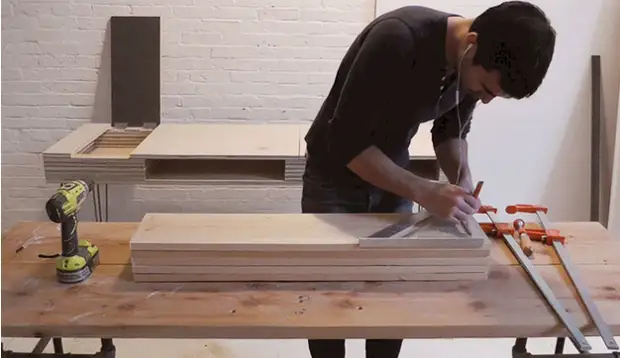
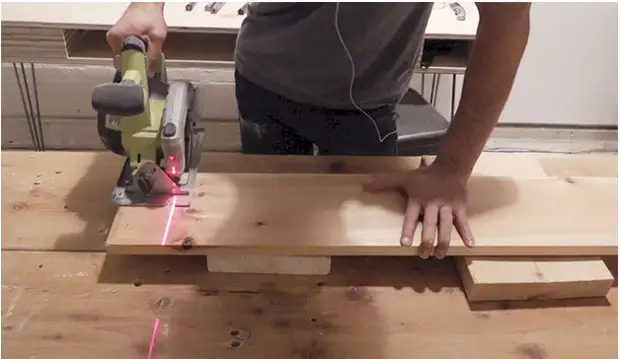
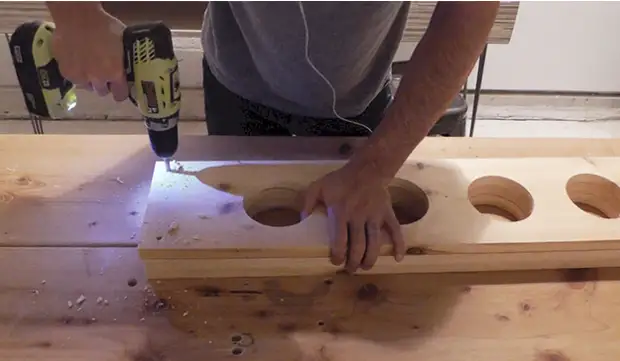
On the board paved along the length, we mark the central longitudinal line and we note the centers of drilling holes. The intervals between the holes should be at least 50 mm.
The most convenient version of the work is the drilling of the holes with a drill - crown, with a diameter of 100-120 mm. . When choosing a drill, the main thing is that the pot does not fall into the hole, and clinging to the rim for the shelf.
There are no crowns of this diameter in cheap sets, it is a special tool that is bought separately. If there are no crowns, then the holes can be filled with a jigsaw.
To do this, first with a circulation mark the circle on the board, then drill a hole of 10 mm. Near the line from the inside to insert the pubsik pylon. And then drink around the circle and watch uneven edges.
Returning from the ends of the shelves of 25-30 mm. , drills two holes on each side, with a diameter of exactly the diameter of the Fala, that is, 5.5-6 mm. . So that the boards during operation were not running out, it is better to immediately fix them to the desktop by clamps.
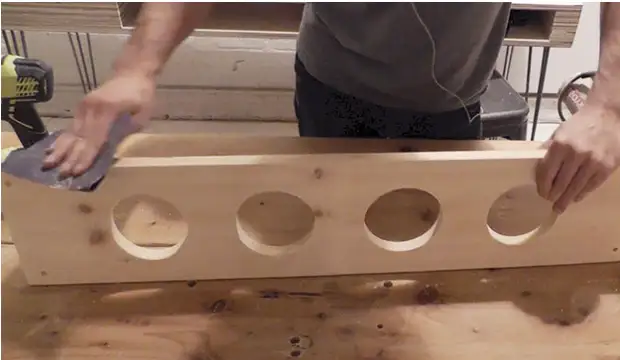
Before starting the assembly, it is necessary to immediately extract the surface of the shelves, the outer edges and the inner edges of the holes.
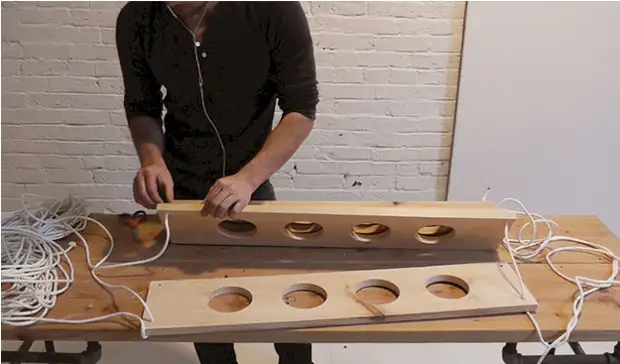
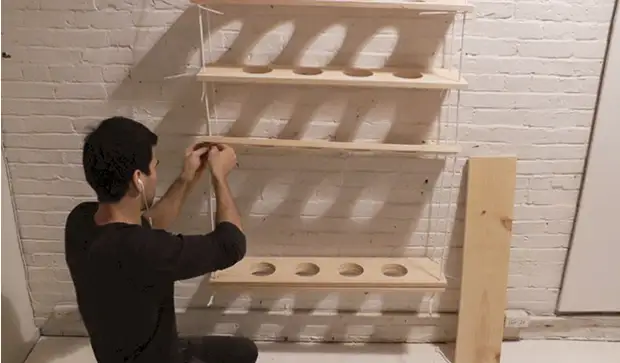
We produce four end of the rope into the holes on the bottom shelf and renovate the nodes.
Next, we produce the ends of the ropes in the following shelves, leaving the intervals of 250-300 mm between the shelves. . Let me remind you, ropes in diameter must be tight into the holes.
When all the shelves are set, hang the design in the selected place and immediately align the lower shelf with a construction level.
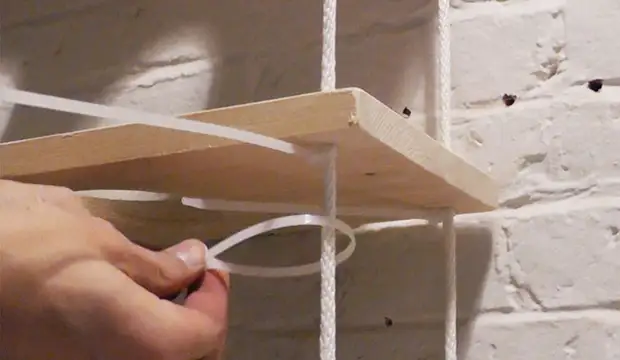
Now we need to finally set the intervals between the shelves and fix them in place. To do this, we use plastic grippers for wires, tighten them at the desired height under the shelf.
For reliability, it is better under each shelf to tighten two - three clamps and check how firmly they keep weight.
A source