
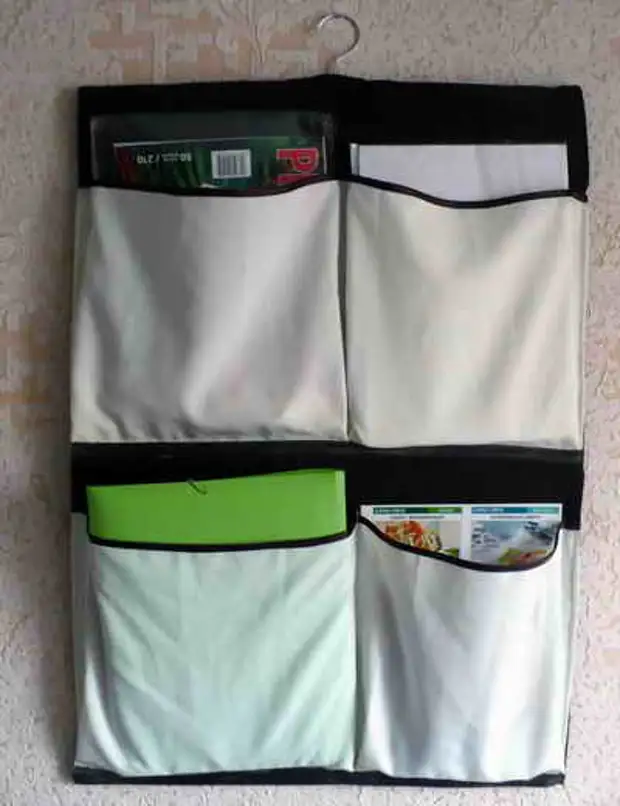
Place a comfortable home-made organizer in a schoolboy's room, or if your apartment can not boast of impressive dimensions, in any other place - a very practical idea. It is very simple to build it, even without having special skills in needlework. Creation can be attracted to the younger generation, children will gladly pick up this idea, because it will be much easier to maintain order. The magnitude of the organizer, as well as the size and number of pockets, can be varied depending on what and in what quantity it is planned to be stored in it.
Necessary materials:
- The cloth. Any, the main thing is that it is strong, for example, the remnants of synthetic gabardine, dark brown taken as the main panel (55 sizes to 150 cm), beige - for pockets (2 flap 30 by 75 cm).

- Kosya Beyk - about 2.10 m
- Threads (can be taken in tone, and you can contrast)
- Metal trouser hanger
- Three wooden rails 51 cm long (the length of the ridge is determined by the width of the finished organiser). They are needed so that the loaded organiser pockets keep the form.
Process description:
Step 1: Turning the oblique bay future pockets from beige gabardine on the top cut.

Step 2: The bottom slice of the flaps to handle the zigzag lines, adjust the approximately 3 cm and firm. The winding sections are also processed so as not to be crumbled. If you use a permanent fabric, then cuts can not be processed at all.
Step 3: folded brown flap twice in length and firm, leaving in the middle a hole with a width of about 5 cm is not fired (it will need to sell hangers in the future). Side sections to handle a zigzag line, fasten the inside and strain (the side sides are not sewing together!).

Step 4: Outline spaces based on future pockets, and also conventionally outline the middle of the pockets. The lower pocket is located at a distance of 2 cm from the lower edge of the floor panels - in order to then turn the rail. Save pockets to the middle lines.
Step 5: The side sides of the pockets are adjusted to approximately 2 cm and pinch pin to the side edges of the base cloth. Start over the outlined pins places.

Step 6: Then lay the side folds of pockets on both sides. The depth of the fold is about 2-3 cm.

Step 7: From the inside, towards the middle soup of the pocket, too, to lay fold so that the fabric is evenly distributed. Start the bottom of the pockets along with the folded folds.
Step 8: The bottom of the pockets can be decorated with oblique baking - at the same time and strengthen it the bottom of the pockets, silent the double line; But in principle you can do without it.

Step 9: In order to suspend the organizer, we use this iron hanger for trousers.

Step 10: Remove the limiters from it and firmly to climb a scotch with one of the wooden plates to lengthen the hanger to the width of the organizer.

Step 11: Now it remains only to strengthen the racks of the bottom of the bottom of the pockets. Rice under the bottom of the upper pocket (between the layers of the base fabric) is close to the seam and shut out the pins of the seam line under the rail. Start seam. Insert rail and hanger to the organizer.
Step 12: The finished organizer is placed on the wall and lay out all the necessary things in places.

A source