
The child will not learn to restore order in the room on his own until he is where he will fold his toys. You can organize a comfortable space for storing children's toys with the help of an organizer, you can buy it in the store, another option - make it yourself. The last method is less costly due to the fact that most of the necessary materials for the assembly are in every home.
An organizer for children's toys is a comfortable device that will help the child not only to fold all the toys in the room, but also decompose them in categories. The main task when assembling the device with your own hands - the final result should like the child, otherwise all efforts will be in vain.
Organizer for toys can be done with:
• old cardboard boxes of various sizes;
• Multicolored plastic boxes and buckets;
• old suitcase that is not used for a long time;
• From the remains of the old fabric, if you want to store small toys (Lego, rag dolls, kinders, etc.).
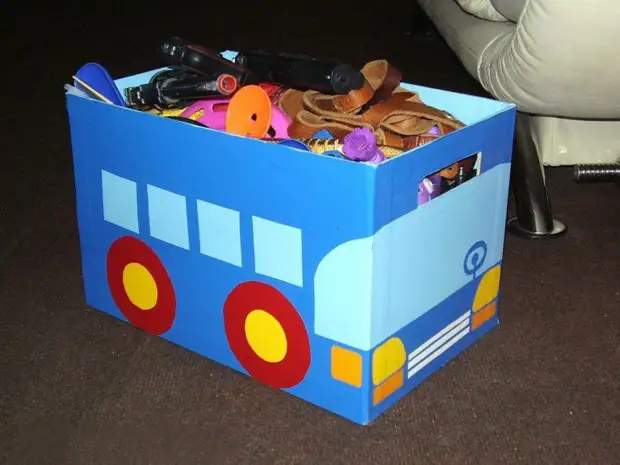
Cardboard boxes
The most affordable and inexpensive option is to make an organizer from old unnecessary boxes. The boxes of any size are suitable - from small for electronics to large for household appliances.
For the manufacturer of the organizer will need:
• Color or packaging paper for finishing external and internal surfaces;
• scissors or stationery knife;
• glue;
• Scotch.
The manufacturing process provides for the following steps:
- The box is inspected for the presence of pollution and cleaned, the remains of old tape are also removed.
- With the help of a stationery knife, all elements of the top cover are removed.
- If the box is large - inside you can place partitions from cardboard to divide the space on the section. If you work with small boxes, you first need to glue several elements with each other to create a single design.
- Cut the packaging or color paper on the part for further more convenient operation. The color of the paper is better to select in the tone of the decoration of the children's room, also with the help of the organizer it is easy to make color accents when selecting contrasting shades.
- With the help of glue (it is better to use PVA), perform an internal and exterior trim box.
- Wait for the whole drying of glue before paying the organizer to the child (1-2 days).
So that the organizer is enough for a long time, it turned out more durable, it is possible to strengthen the side walls and the bottom with the help of additional sheets of thick cardboard.
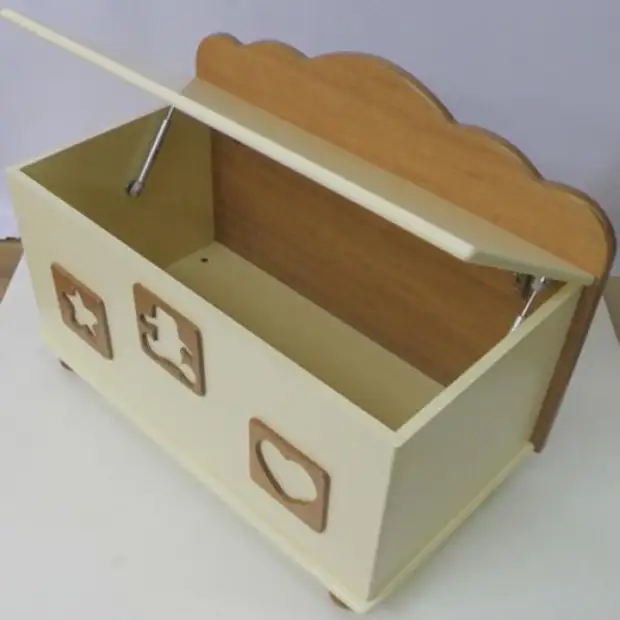
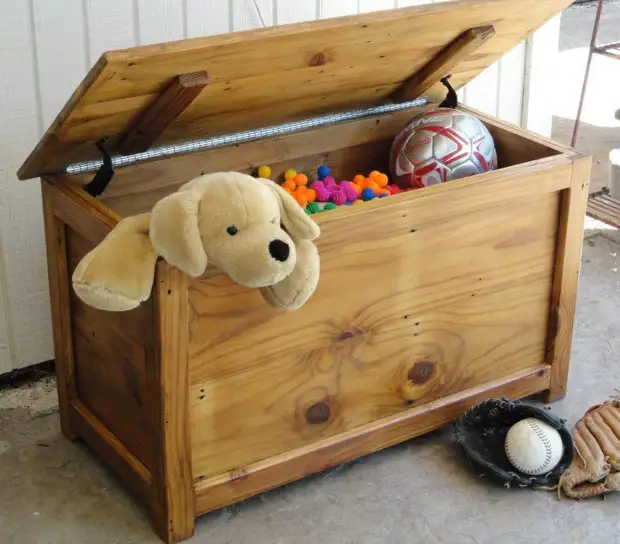
Box of wood
A more costly, but reliable option for the manufacture of an organizer for children's toys - from wood. The box can be deaf either with through holes, it all depends on the size of the stored toys.
For manufacture, you will need:
• sheets of plywood needed thickness;
• Brush and paint;
• loops for doors;
• screws;
• Furniture corners.
The manufacturing and assembly process provides the following steps:
- Draw a sketch of the future organiser on paper, deciding in advance with the size of the finished box.
- Perform the markup of plywood, make a cut of the sheet on the outlined parts using an electric bike or a conventional saw. Carefully treat all the edges with sandpaper, so that the bodish of the tree remains, which can injure the baby.
- Via
- With the help of the corners, collect the bottom, lateral parts and partitions of the future organizer, check the strength of the fixtures. If you need to clean the screws or self-screws, you can close with special plastic plugs.
- Secure the lid with the help of loops.
- Paint the box outside and inside the paint suitable color.
- Leave the product to dry.
The appearance of the organizer for toys from the tree completely depends on your fantasy and wishes from the kid.