
Everyone who is interested in pottery skill ever conceived about the acquisition of a pottery circle. But, as you know, the circle is not the pleasure of cheap. Although the professional tool and justifies the funds invested in it - not every beginner master can afford such a machine at the beginning of the creative path.
A pottery machine or a potted circle is a car that is easy to make himself, with your own hands and which makes it possible to get pottery from clay the right rounded shape.
The general view of the machine on the bed is depicted in fig. 1. From here, its design is quite understandable. The size of the bed in the figure is given exemplary. Everyone can change them somewhat, how to change and the design of individual parts according to its conditions.

This remark also applies to the rotating parts of the machine, which are the main. The machine spindle (children 1) is pulled out of a wooden bar on the lathe, but you can make a square cross section, accordingly, changing the parts associated with the spindle.
The top, slightly narrowing, the end of the spindle is pulled by a ring "A" and an iron rod is inserted into it passing through the bearing (children 4).
The bearing is made from the metal plate and is reinforced in the top bar of the bed. As it is done, explains fig. II. The end of the end of the rod is hipged or spilled into four converging upstairs. At this end, the table of the machine is satisfied (children 5).
The table is also best to pull out, but you can cut off the saw. In this case, the workpiece for the table is first drilled from the bottom, then put on the end of the spindle, the spindle will be thrown and on the go, they draw a circle on the workpiece.
Screwing the workpiece, again embarrassed it on the spindle, turn, mark the plane of the table, mark on the collar edge and the surface of the workpiece is coiled along this label. This way make a table when everything else is ready, and the spindle is in place.
At the bottom of the spindle, it has a thickening on which a heavy hoist wheel is lying (children 2). This wheel consists of a wooden rim, a wooden sleeve and two plywood disks. All these parts are connected to the glue and nails.
The rim can be made of four pieces interconnected using wooden or plywood knaps (Fig. III). The wheel must be built carefully and firmly, as it will be pretty hard: its cavity is poured dry sand through the hole "B" in the upper disk.
Tightly popping the wheel, closed the hole with a plug and put on the flywheel on the spindle. So that he does not turn around, it is jammed by two clins (children 3), part of the "6" groove on the spindle and the sleeve.
The lower end of the spindle is also pulled by the ring "A" and has an iron rod with a cone-shaped sharpened end. This is the "height" of the spindle, which rests on the "groove", a metal plate with an appropriate recess, fortified in the lower bar of the bed (Fig. IV-general view and section of the plate).
The finished spindle with the planned flywheel is made by the top rod in the bearing (children 4), put the fifth into the backbone and install the bottom ram of the beds in place. The spindle should stand completely sharply.
On the outdoor end of the rod, the table is tightly planted and check the entire installation, without forgetting to lubricate the bearing and the spike of oil or vaseline. If everything is done correctly, the spindle should from the push on the flywheel easily and evenly rotate.
Uneven rotation comes from bad centering and skewing of the flywheel. In turn, the table should also rotate strictly in the same plane. The skew can occur from incorrect installation of rods, upper and heel, which must lie on one straight line. Therefore, before installing the flywheel, it is better to check the spindle first and correct the shortcomings in it if they are.
It remains to do some more tools for work. They are very simple. It is a "string" - a thin wire tied to the handles (Fig. V). It is necessary for cutting products from the table.
"Stacks" or various shapes of the sticks (Fig. VI) are used to level the surface of the clay and apply to it drops and patterns.
Patterns may need (Fig. VII), cut from cardboard, plywood or tin. They serve to reconcile the form, especially in cases where you need to do a few identical objects.
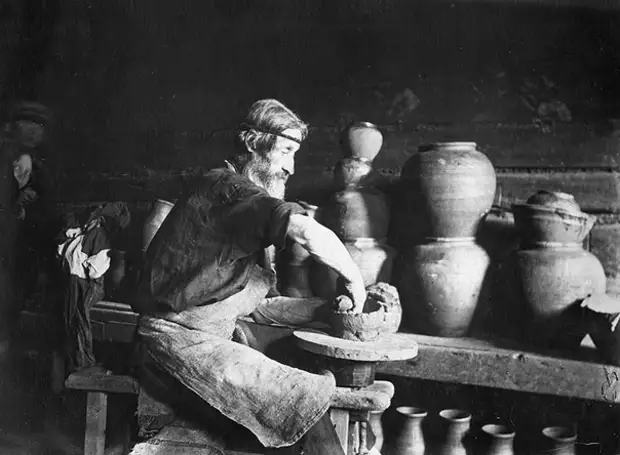
Work on a pottery circle, sitting on a high stool or bench. The height of the seat should be so that the leg is rotating the flywheel, hung. The second foot can be resting in the bed.
The table leads to rotation and thrown into the center of the table a piece of very well-smeared clay. Posted by clay in the middle of the table, the thumbs of both hands, all the time rotating the table, squeeze the hole and gradually form the walls of the product.
So that the clay does not stick to the hands, they are wetted with water. It is, of course, it requires a known slighting and skills, so it is necessary to start with low plates that "appear" is quite simple, gradually complicating the form of the product.
The surface of the finished product is driven by a wet rag and apply, if necessary, on raw clay drawing. The finished thing is cut off the string table. If the thing is very soft, it is dried some time on the table and then cut off.
Cut products are dried gradually in the shade so that they do not crack, and then burn. If there is no possibility of burning, the dried "shard" can be painted with oil or enamel paint, but, of course, it is necessary to remember that the water is afraid of such a shard.
Special attention in pottery should be paid to the quality of the material. Clay should be plastic and very carefully stirred in a completely homogeneous and suitable density of the dough.
A foot drill circle with their own hands
