
You will need:
- Basic coating
- White nail polish
- Nail polishes of different colors (according to your choice)
- Fastening coating
- Liquid latex
- Nail polish remover
- 2 small nail polish brushes
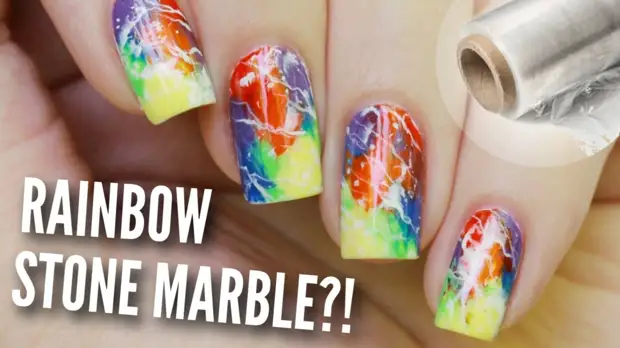
- Polyethylene film
How it's done?
1. Start with a good layer of basic coating that will protect your nails.
2. Cover the skin around the nails with liquid latex.
3. When Latex dries, apply a layer of white varnish on the nails and dry.
4. Make a few multi-colored smears on each nail, and then put on each nail on a piece of polyethylene film.
5. Rate the polyethylene film there, while the mixing of colors will not satisfy you.
6. When the colored layer is dry, apply a bit of white varnish on another piece of polyethylene film and with the help of a film gradually apply it to the nails.
7. With a small tassel, draw thin white lines on the nails, creating the "marble" effect.
8. Remove Liquid Latex. Remove the excess nail polls with a brush dipped in a varnish removal fluid.
9. Apply a fixing coating for long-term enjoyment of a manicure and a healthy brilliance of your nails.
The best thing in this design is that you can mix absolutely any colors, selecting them, for example, to your wardrobe. And every time the manicure will look amazing!
A source