
What could be more pleasant than giving gifts for holiday, especially those who keep warm hands that made it with the love of man?! For this you need the smallest thing, about which you remember with regret in the fuss of the last holiday days, is the advance preparation!
I bring to your attention an interesting and easy-to-create souvenir made by your own hands, which will be pleasant to get relatives, friends and friends, who turned out on New Year's Eve for your festive table, or unexpectedly looking at your New Year's light !!!
Posted by: Marina Pyusov

Master class on the assembly.
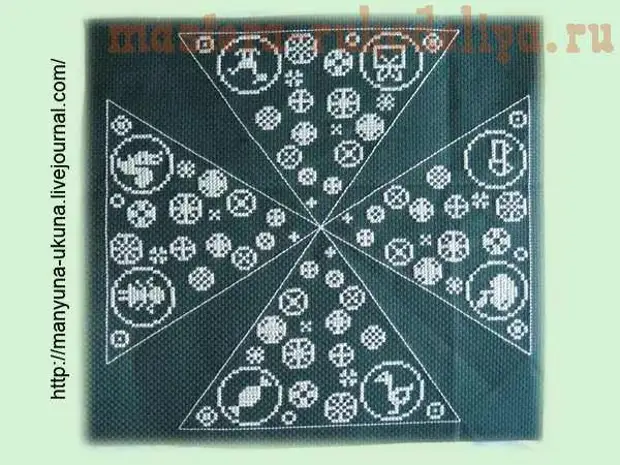
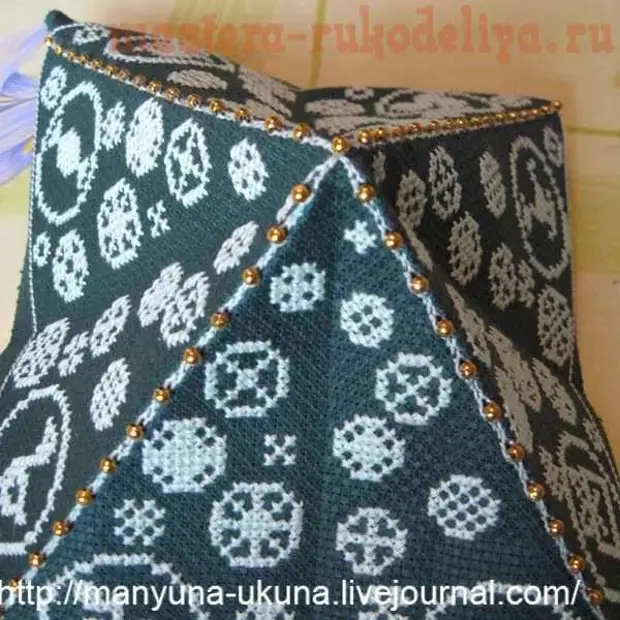
1. Embroide the picture, note that the canvas have a uniform cross - and then I have difficulty when assembling, but about it later.
We embroider only four triangles, we are cutting them backstage, the rest of the seams do not yet do. If Canva is soft - strengthen it with phlizelin.
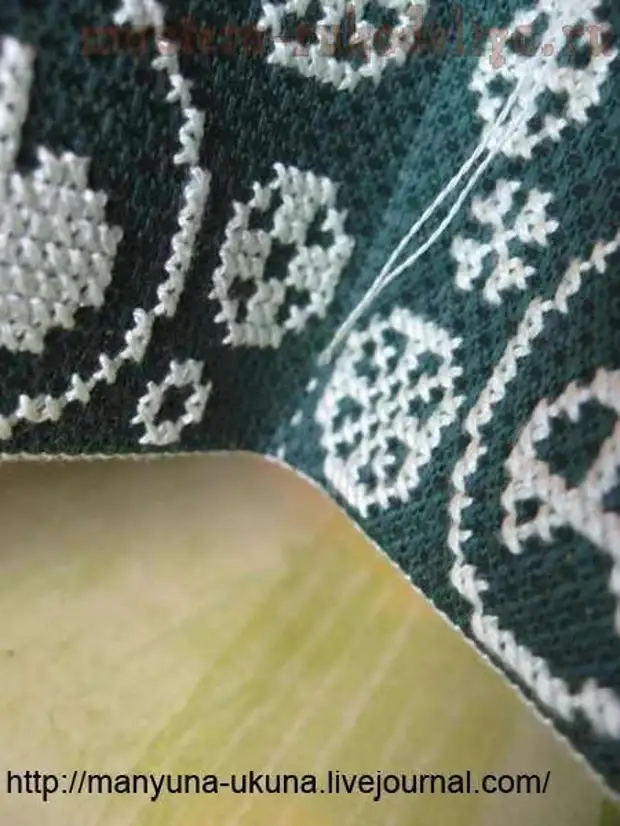
2. Cut the corner, wait a few canvas for about 3 cm.
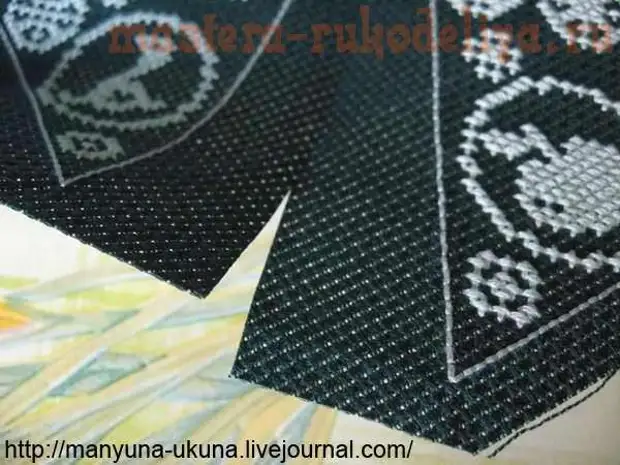
3. Conduct the fabric to make a Christmas tree later. By the way, at the same stage, I folded and changed all the bends from the Christmas tree (right as in the origami :))
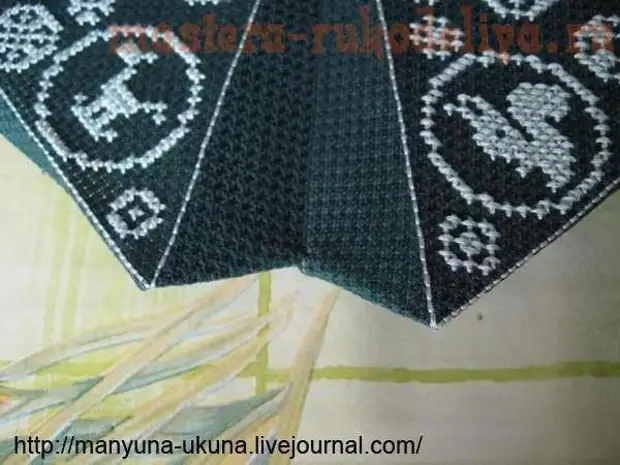
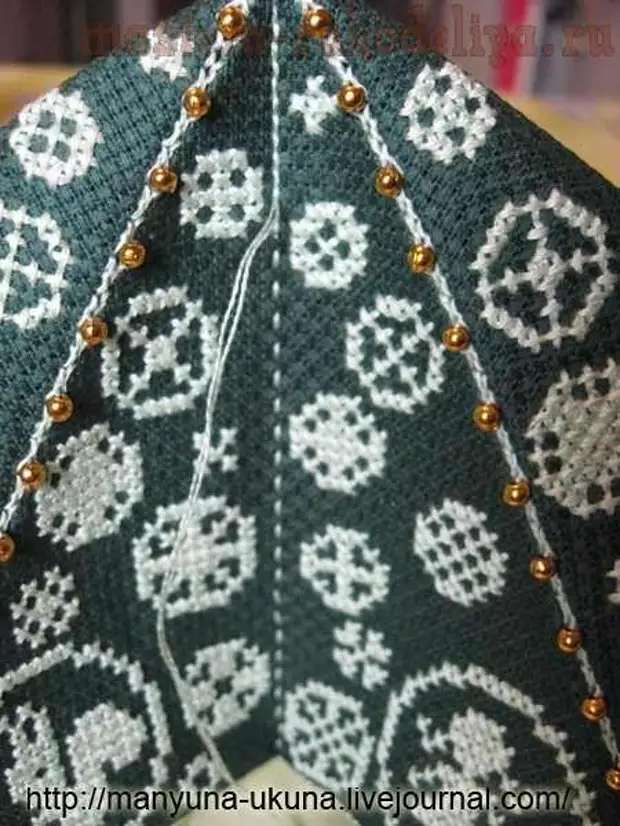
4. We begin to cross the face of the Christmas tree (in the scheme marked by the arrow). At the same time, as if we are laying the fold inside, along the fold line, which is also signed in the scheme. This can say that we can do it easier, and not to invent these empty places that are still hiding inside, but Then the Christmas tree will not succeed in such a slim and will not look like a Christmas tree. We cross the same seam as a biscuretop. I immediately sewed beads.
5. It turned out such a pyramid.
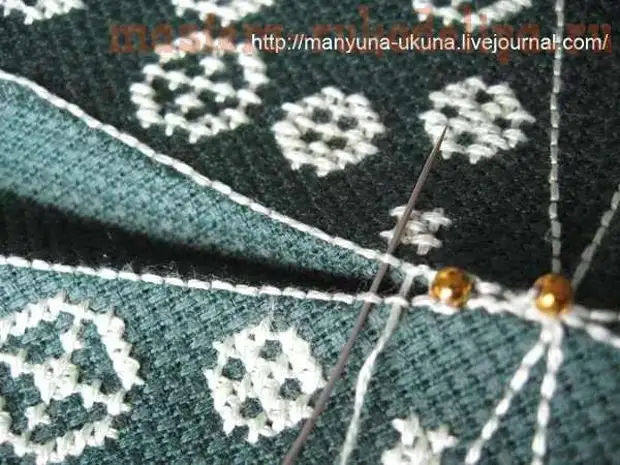
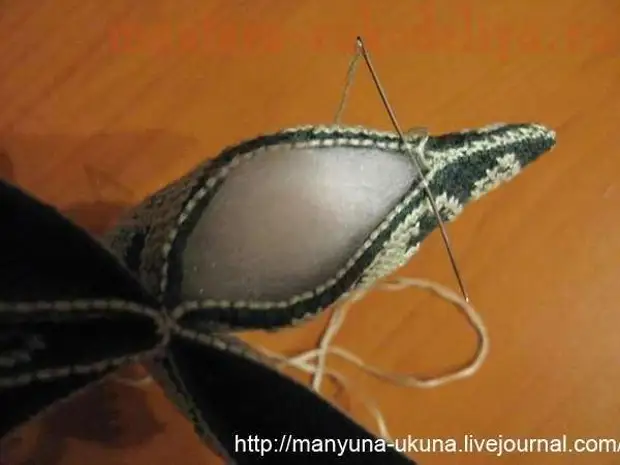
6. The most complicated. You need to connect the middle of the opposite faces. We stitched up and down the needle ahead, piercing the middle of the edges of the two opposite triangles. At the same time, the allowance of the bottom will be adjusted. Then you do it with two other opposite triangles, following each time the needle takes place inside, without getting out on the face.
7. Then you can insert cardboard or rigid, then the Christmas tree will be strict lines and very geometric. I have a little bit because of the non-uniformity of the canvas, so I had to correct the situation with a synthetic hyprometer.
We flash each "petal" again with a seam as a biscure.
All I congratulate you, the Christmas tree is ready :)
P. S. If you still doubt the non-uniformity of the canvas, you can enter the following Oration. Each triangle is embroidered on separate squares, while there are all squares at the same time (so that the stretch is one side or vertically or horizontally from all squares). Then, from the resulting triangles, collect a pyramid, as in paragraph 5, and further as in other points.
Download the scheme for the New Year's Christmas tree: http://www.mastera-rukodeliya.ru/images/stories/vyshivka/manyuna_ukuna/geometricheskaya-elka/2.jpg
a source