

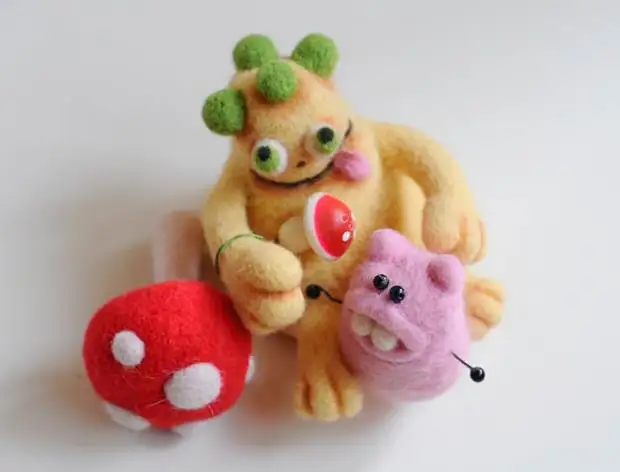
Dry felting technique or felting allows you to create very intricate forms and figures, only "sculpt" them is not from clay or plasticine, but from an indiscriminate wool. After reading the basic methods of felting and trying in practice to create an independently simple figure, you can proceed to more complex forms. In this master class, I suggest you advance further in the study of this interesting type of needlework on the example of funny monster. According to a similar principle, you can, of course, any other animal or a little man, using its own ideas and sketches.
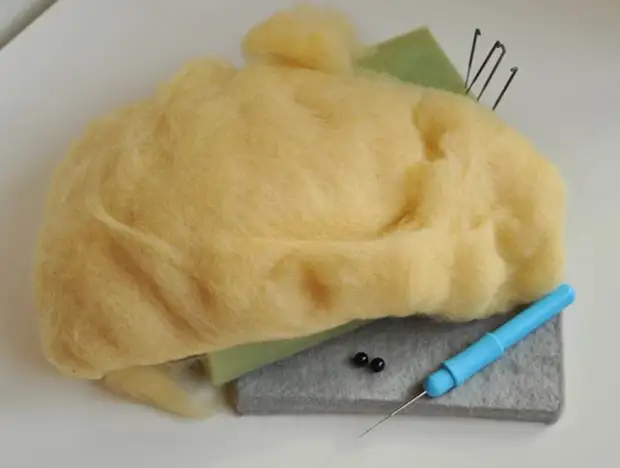
Materials for dry felting toys
- indiscriminate wool of any color (it is better to use Cardoches)
- Small quantity of other color for creating frills and decor
- Wall needles: № 36, 38, 40 (according to international classification)
- substrate
- Color pencils or pastel crayons and tinting brushes
Dry felting equipment toys
Like any other creative work, filling figures begins with the idea and sketch. A simple form can be started to be used without prior view, however, when the conversation is about the figure, which has more complex proportions and its own character, without sketching can not do.
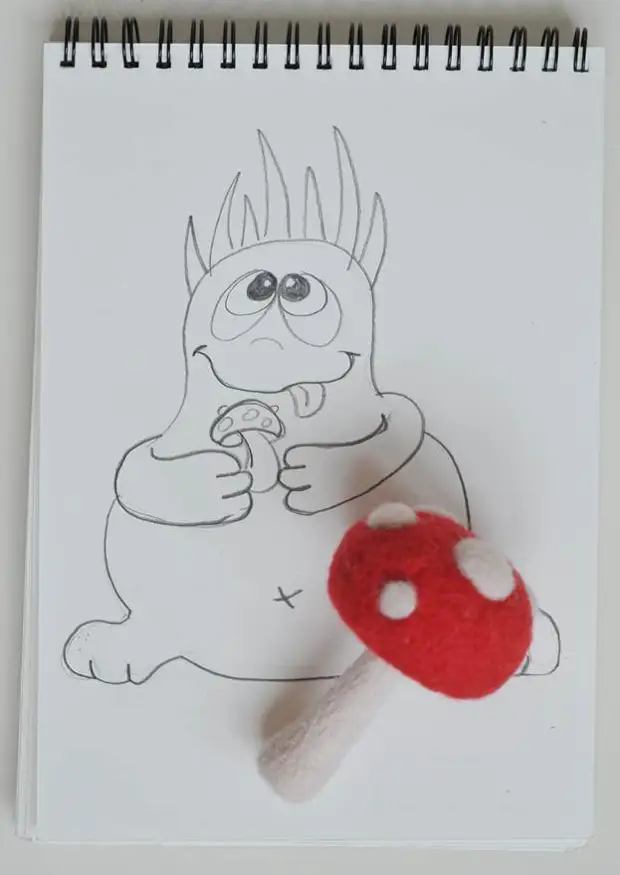
When the idea is fully formed, we mentally divide it into simple parts. In my case, the head and body of fantastic monster are one of the whole, and the limbs and decor will be supplied separately. Usually, the head and body of the figurines are separately lying individually, if approximately equal in size or have a very complex form.
In this master class, I will not stop in detail or choosing the necessary materials, nor at the stages of the preparation of wool, since these issues were considered in detail in previous articles.
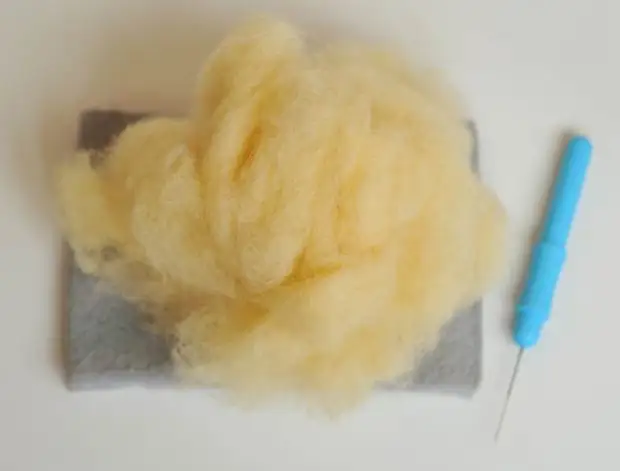
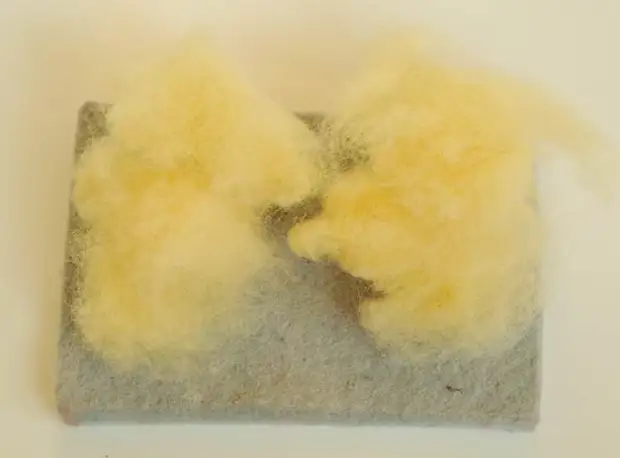
We prepare wool, separating it in different directions before the formation of a completely homogeneous mass. If you roll out of the cardiches, it will not need a lot of effort to do this, however, for example, with a rowing ribbon will have to be tinker. The number of necessary wool depends on the desired size of the toy and in the process of operation will decrease several times, which should not be forgotten.
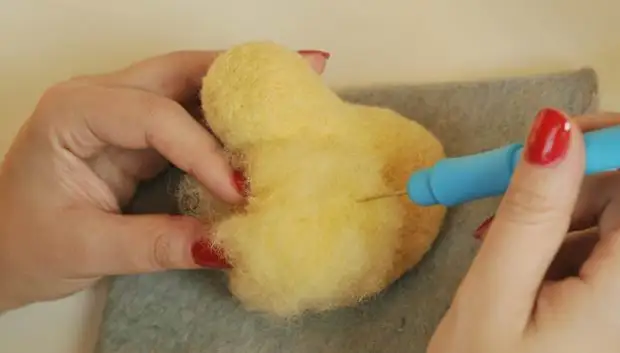
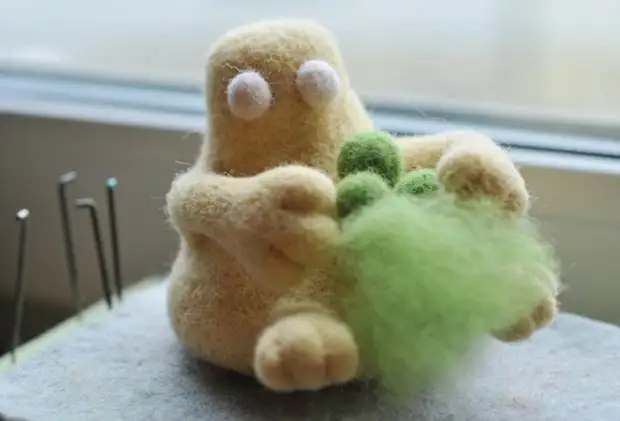
The figure of my monster has a pear shape, highly expanded at the base that gives the sustainability of the entire toy. A thick needle is beginning to dump wool first in a round lump, gradually fingers forming the desired outlines and turning on the medium thick needle.
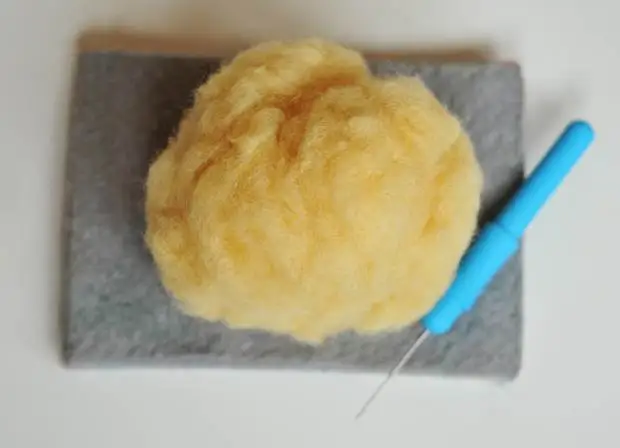
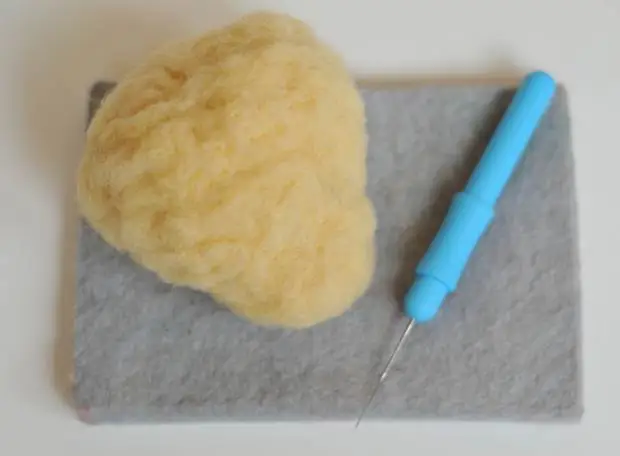


Remember that at this stage your main task is not perfectly align the surface, and make the toy as thick as possible without any internal voids.
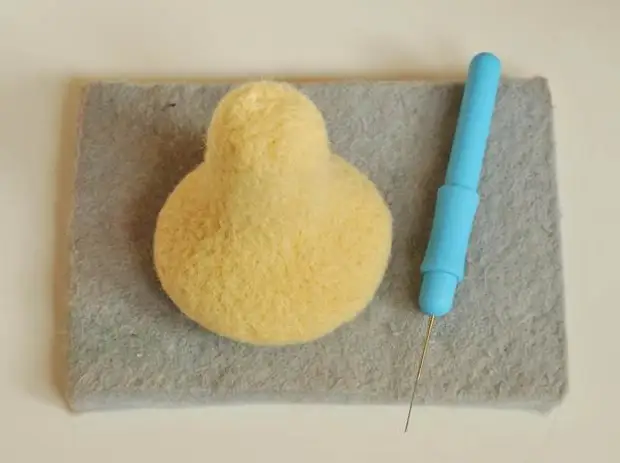
If during the work you understand that the resulting form you do not quite suit you, it is not necessary to despair, since these shortcomings are easy enough to correct. For example, I decided to make a small pumine monster. For this, I will need to make a separate "cloud" from wool, preliminarily poured it on the substrate. Corrently, we take the resulting lining to the right place, coming by a needle for filling in a circle.
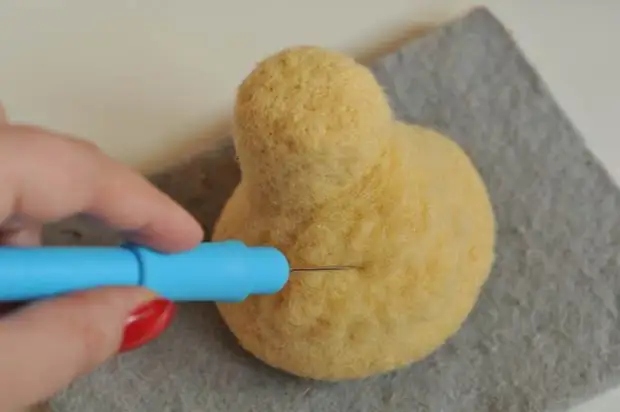
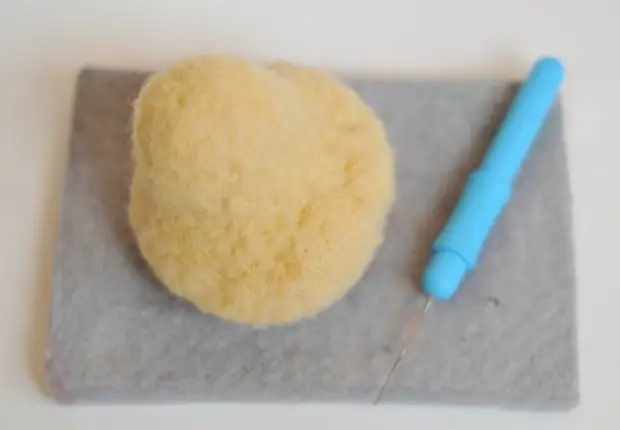
If the resulting form suits you, we grind the surface with a thin needle. It should be homogeneous and smooth, despite the fact that it is still far from the final alignment, because our figure still has to get the limbs.
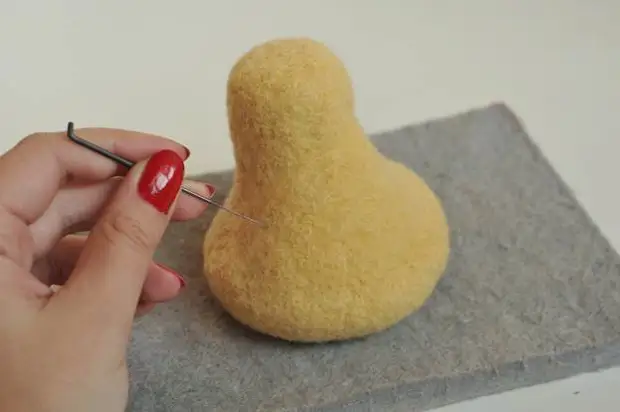
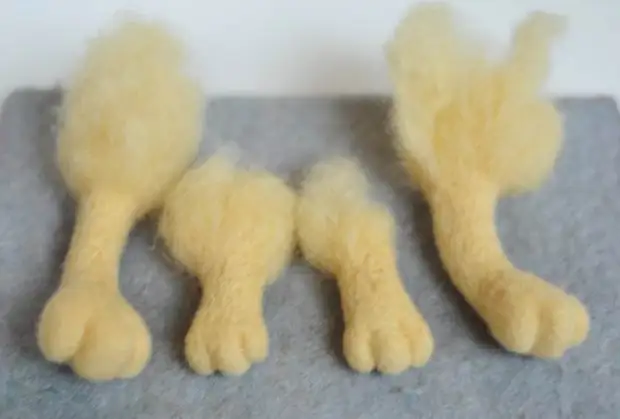
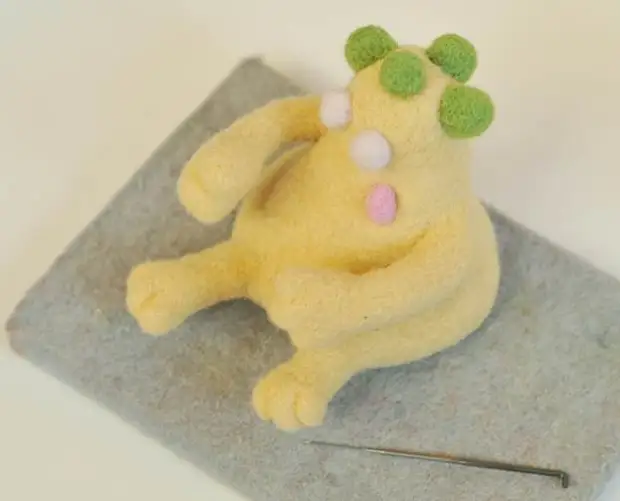
If the body and head are ready, proceed to the creation of foot-handles, on the example of which we will try to master the elaboration of small parts in the Felting technique.
It is very important to remember that when creating symmetrical parts (hands, legs, eyes, ears, horns, etc.), an equal amount of wool should be harvested at the same time! If you fully match one hand, but only then try to cancel the desired amount of material for the second, chances to get two identical limbs are small. Ideally, you must have both hands in parallel, constantly turning and comparing the details together.
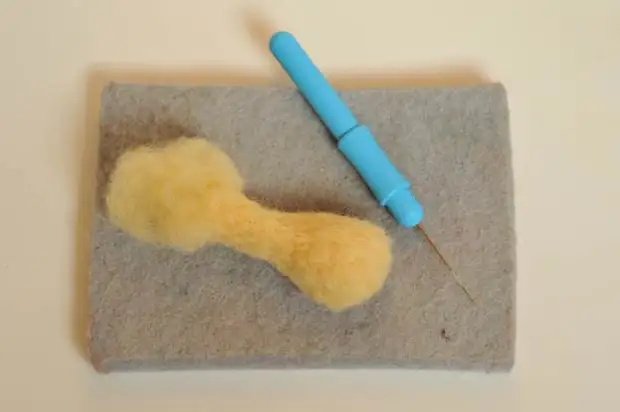
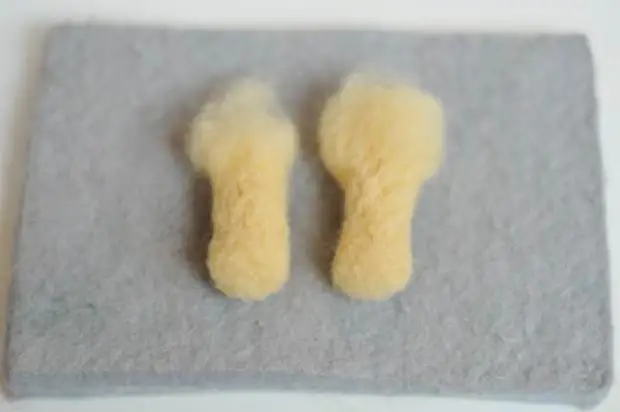
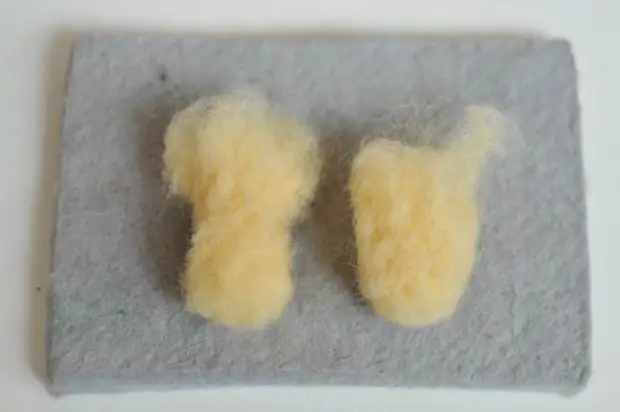
We make individual wool blanks for the upper and lower limbs of monster and proceed to felting, not forgetting to leave loose feathers of wool at the ends. It is with their help the part in the consequence and will be attached to the body.


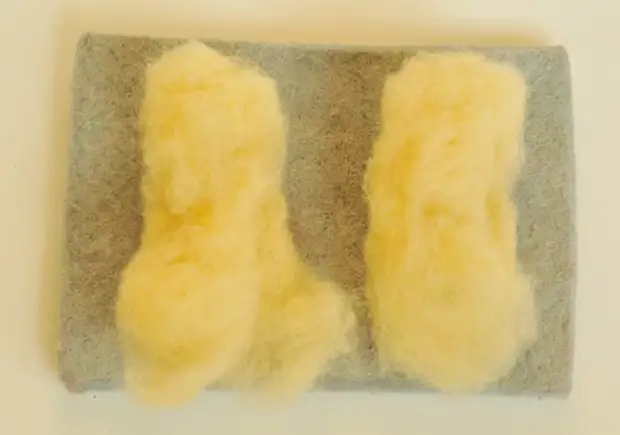
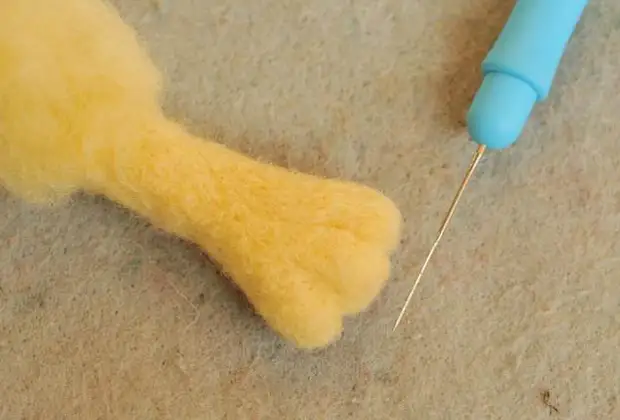
Please note that the paws in shape can be more complex than just two cylinders, it all depends solely on your initial idea. For example, I made a monster deliberately big palms, for which the hand was most tight as much as possible, and more wool added in the area of the logos.
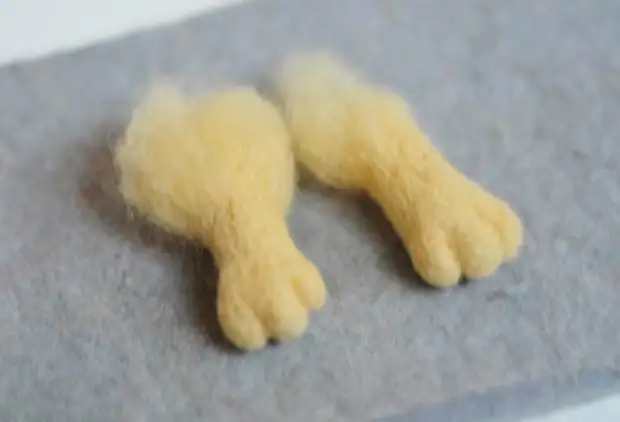
When the workpiece has already acquired an average density, you can proceed to the elaboration of small parts. To do this, we will need a thin needle and utmost attention.
Tip: Note the contours of small pieces of face or paws better than a thin needle, and then to work out all the bends and bulges of a thin needle with a cross-sectional cross section, not only by the desired hardness that gives them the desired hardness, but also leveling surface irregularities.
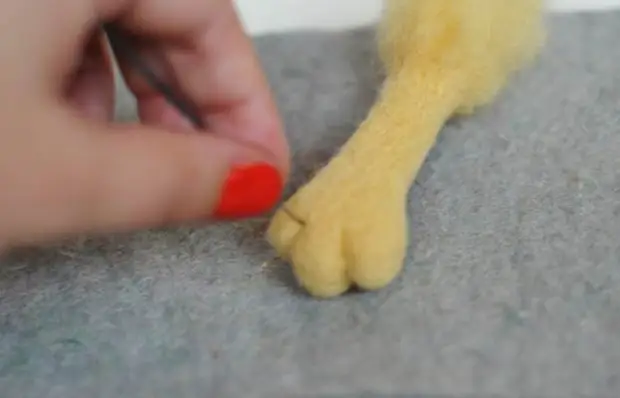
Having finished the study of the upper paws, I wanted to give them a smooth bend, because monster still have to keep the mushroom in the hands. It is easy to do it enough: it is enough to be a bit of the workpiece between your fingers and work out its medium needle in such a position.
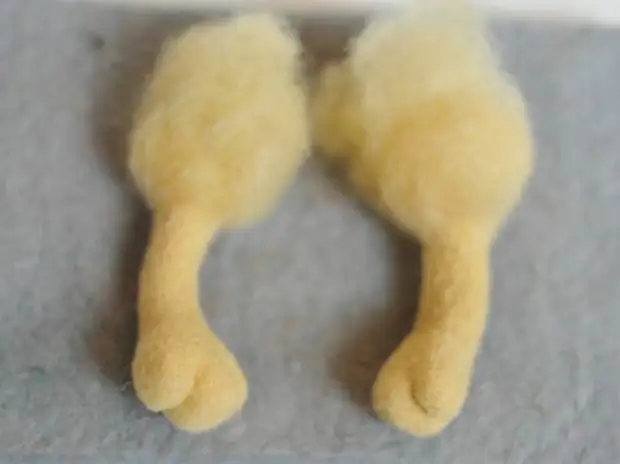
The lower limbs of my monster is smaller in size, as they should not interfere with the figurines to save a stable, "sitting" position. They are manufactured completely similar to the upper legs.


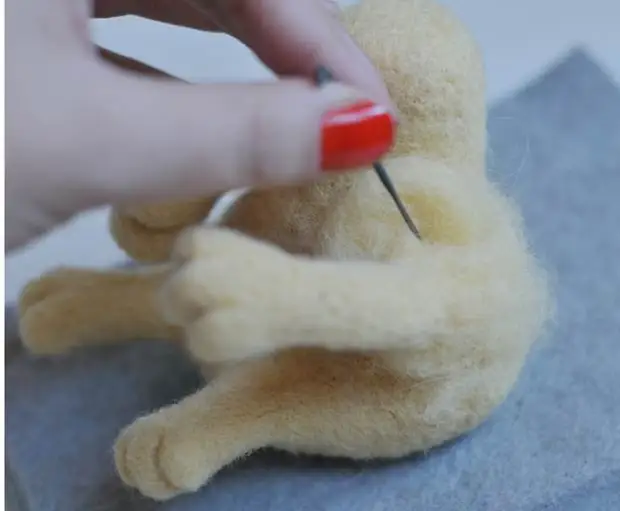
Total, we have a complete set of limbs that should be securely combined with the torso. We apply them to the main part, finding the most successful position symmetrically to each other. Paws can be fixed in its places with ordinary pins. Purchase begins one by one, walking with a needle in a circle and diligently straightening the fibers.
If an inaccurate edge turned out when the parts is connected, this deficiency can be hidden, taking a bit of a little wool and finishing the junction with a thin needle.
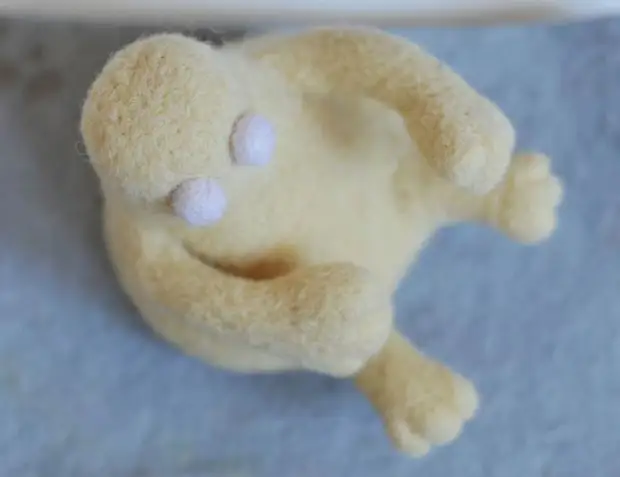
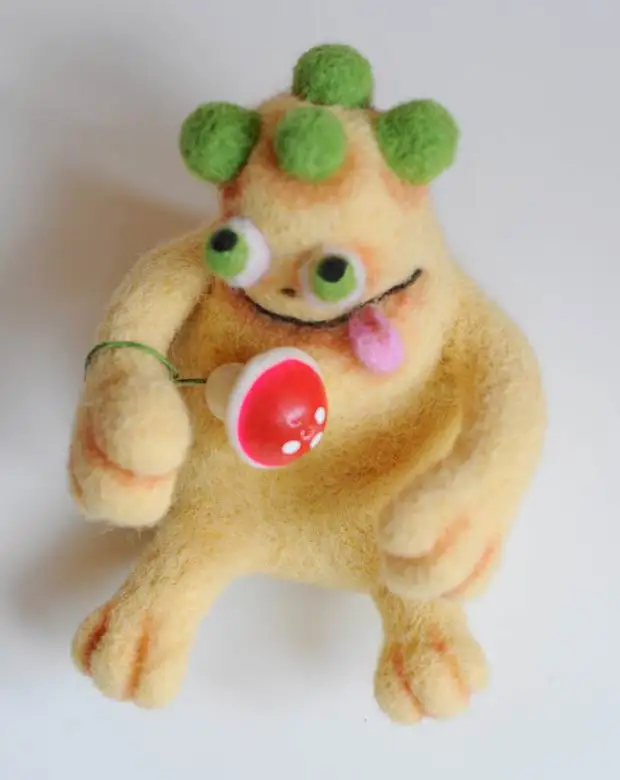
If all the basic details firmly occupied their places, and the surface has acquired an even and homogeneous species, you can move to the most interesting and creative part of the work - the design of the face. I offer only one of the possible options for such a decor and suggesting, having mastered the technique, experiment with the decor yourself.
Eyes toy can be made in different ways, the easiest of them is to glue beads or ready-made plastic eyes that are easy to purchase in the store. You can, as in my case, put your eyes from multicolored wool. To do this, you need to eat two not too dense the same ball and, using a thin needle, to push them to the muzzle.
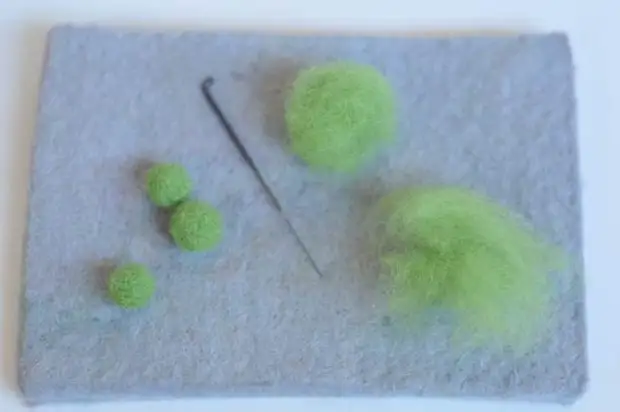
The scalp options are also a great set. You can make a monster comb along the entire back, big ears, horns or magnificent mace from cone-shaped wool blanks. I chose a fairly simple option, sprinkling colored balls to the manner of small rozing. Not too dense blanks are separately lying on the substrate, and then fixed in their places.
Tip: Small details can be accumulated or glued with a transparent glue type "moment-crystal". In the latter case, it should be noted that the bonded fibers of the wool can no longer be pounding with a needle for filling.
In addition, you can always draw some details on the surface with a gel handle or felt-tip pen, however, it should be extremely neat. You can combine several options at once, for example, I spoiled monster a convex language, a thin needle has set up a smile line, and then emphasized the resulting relief with a black handle.
Another interesting and important reception of the decor of wool figures is toning, giving for forms greater expressiveness. So, with the help of crumbs from pastel chalks and dry brushes or soft watercolor pencils, you can emphasize the face, impose shadows between your fingers or arrange a hairstyle. Pastel and pencil is easily entrusted to wool fibers and will not be emitted from touch.
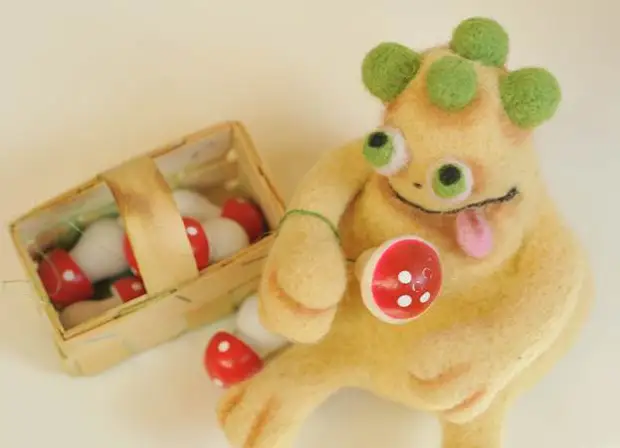
Boldly combine various forms and options for decor, experiment, giving your work a different mood, do not be afraid to decorate the figurine with drawings, lay beads, ribbons or buttons on it, the more individual and original will work your creation, the better!
A source