This article was created for newcomers who wish to create good photos of their works, and for lovers of excuses "I have a bad camera", "I have nowhere," "I do not know how to work with photoshop."
I want to assure you that without Likebox, a mirror camera and the ability to work in Photoshop, you can make a decent photo for your jewelry. Yes, and go to the photo studio is also not necessary!
Take advantage of the following tricks and, even if you do not have professional technology, you can make a good picture:
1. Slip closer to the source of natural lighting, for example, by the window. Take pictures when the street is light. Remember that direct sunlights should not fall into place of shooting.
2. Severy 2-3 backgrounds for photographing work. A good background will serve as a common paper for scrapbooking, an embossed sheet of watercolor paper or a cloth with a pleasant texture. Let the backgrounds be monophonic, without bright spots and patterns.
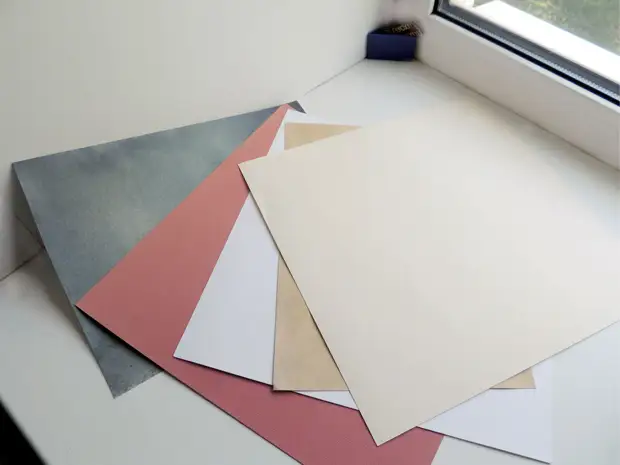
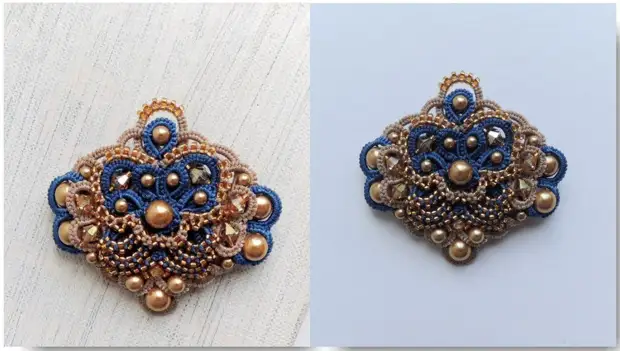
3. Dark decorations worth photographing on a light background, but not white. The background simply should be lighter than decoration.
When working with a non-professional camera, it is better to avoid using a white background, because such cameras can hardly cope with strong contrasts. Impotes can get marked, too gray and even can have a bluish shade.
Example: photos are made at one time, but on different backgrounds - on the left brooch on the background of the book and looks like a picture of pretty light. On the right photo of brooches on a white background and even processing of photography does not make it possible to make it lighter. The photo passed the same processing in the editor (more about this later), but, as you see, the editor will not help you if an error has been made when choosing a background.
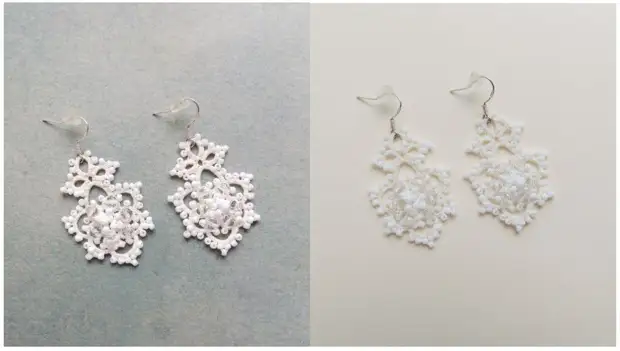
4. The background for bright jewelry should be darker of these newest decorations. On bright background, light products are lost.
5. Select multiple accessories for photographing products. Supplements must be universal so that you can use them in the photos of each work. Then your photos will be recognizable and when making a store will help withstand a single style of work.
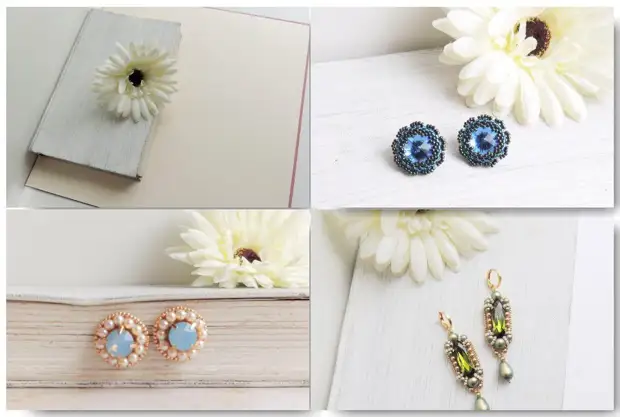
6. Beautifully stacked every detail of the decoration, so your photos will be harmonious. It is recommended to build the composition and take photos horizontally - in this position the photo is perceived better.
7. Use simple in circulation by photo edits.
Pay attention - the stronger than the original photo, the less to process it.
Immediately I want to note that it costs to choose editors that, after the changes, retain the size of the photo and its permission. Such programs in which the quality of the photo does not suffer. It can be processed even in the standard Microsoft Photo Editor, which is on each computer.
If your camera is not macro, then it will not focus on it and you will have to take pictures of the decoration from afar. In this case, the photo editor will help to trim the extra edges of the photo.
The photo without processing, of course, is dark, therefore it is worth raising the brightness, moving the slider of the corresponding parameter.
"Contrast" will help if the details of the decorations merge. Rate the slider and select the most appropriate level of contrast. Use this parameter only if there is a need.
Some cameras with difficulty distinguish close shades of red, blue and other colors. So, for example, burgundy earrings such a camera will show red. "Saturation" will help to cope with this problem. Moving
Runner, watch color change. Get the maximum design of the decoration color in the photo and in reality.
"Temperature" will help get rid of a bluish shade of photography, just take the slider toward the warm temperature.
If your photo is blurred, then increase its sharpness.
The editors have additional dimming parameters, evilution and blur of edges of photography. They can take advantage of you.
In any photo editor, you can put your personal logo / signature on the photo, choosing each time the same font.
Remember! Just in moderation! But do not forget that you need to improve constantly!
A source
