
Many owners of apartments and private houses equip their kitchen or living room with a bar counter - very convenient and functional interior item. A worthy addition to it will be the original and at the same time comfortable bar chairs. But in stores you can easily meet the option of the soul: they may look too official, uncomfortable, not homely. Yes, and prices bite. Therefore, we suggest you make the bar chairs with your own hands.
Necessary materials and tools
The easiest version of the bar stool is made of wood and plywood.
To create such chairs you will need:
- screwdriver;
- Drill with 3 and 6 mm twisers;
- a hammer;
- electrolovik;
- roulette;
- carpentry corner;
- bit;
- plane;
- self-tapping screw;
- sandpaper (if possible, use the brave machine);
- Morilka;
- solvent;
- brushes;
- varnish.
Depending on the selected option, you need to take a wooden array or phanener. You can use metal, but in this case the work will be more complicated. We will tell you more about this in a step-by-step description of the work.
Before proceeding, make a drawing or a scheme where exact dimensions of the product will be indicated. So you decide with the required number of consumables.
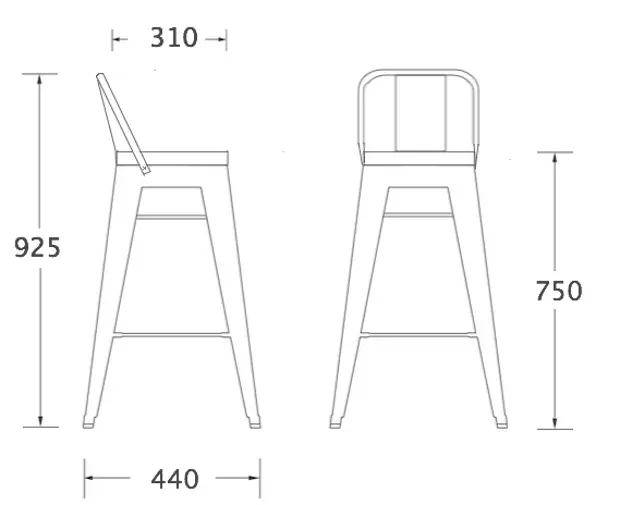
Standard Bar Chair Scheme
Standard sizes of bar chairs are calculated based on the distance from the lower surface of the table tops to the floor. The surrounds between the chair seats and the table top is usually 30-35 cm.
Relying on these basic data, you can create your product design.
Collect bar chairs
So you have decided which material will be used. We gradually consider how you can make the chairs of several species.From the array of wood
Choosing wood for the product, pay attention to the most affordable breeds - pine and birches. They are great for such a job, an array can be bought in the store in the form of furniture shields. The required thickness is 20 and 30 mm. Some details you can borrow with old chairs.
Cut 10 details:
- Detail 1 is one circle with a diameter of 36 cm and a thickness of 30 mm;
- Detail 2 is one circle with a diameter of 26 cm and a thickness of 20 mm;
- Detail 3 - four legs with a thickness of 30 mm;
- Detail 4 - four ribbon ribs with a thickness of 30 mm.
The first item will serve as a seating, the second (small circle) - the substrate under the seat.
Silent chair and substrate
Carry out the legs of the future chair, make sure that the structure of the tree in the array is vertical.
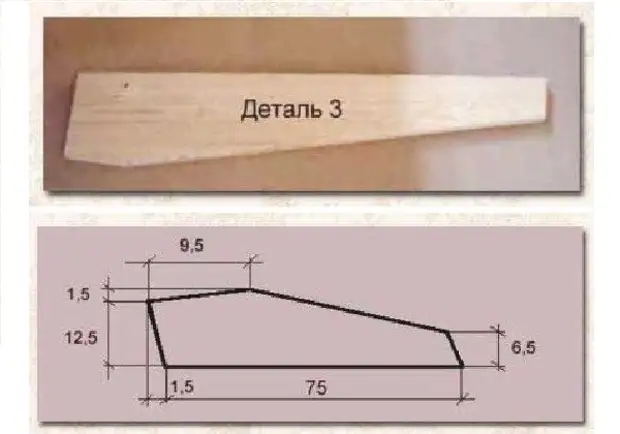
Leg of the future chair and visual drawing to her
From an array of 20 mm thick drink ribbon ribbon - they will serve as a stand for feet.
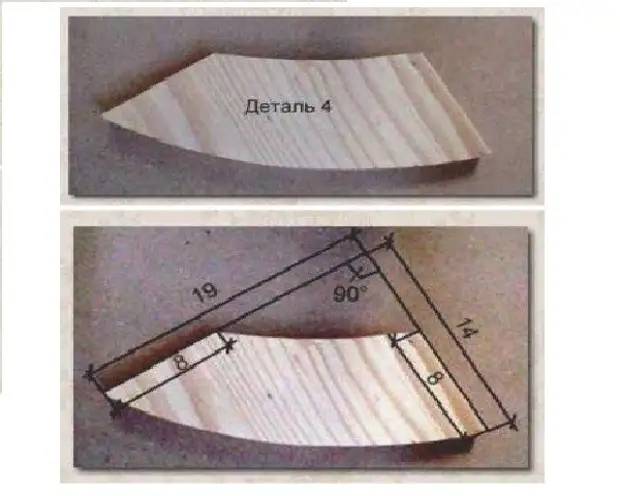
Stiffening rib
Now proceed to the assembly of the chair. To do this, you will need a screw of 3 species:
- 5 x 80 - to fasten the legs to a small circle and to each other;
- 5 x 40 - for fastening the seat to a small circle;
- 5 x 20 - to consolidate Röber rigidity.
Ribs are attached to the legs using the corners that are delivered from the bottom side.
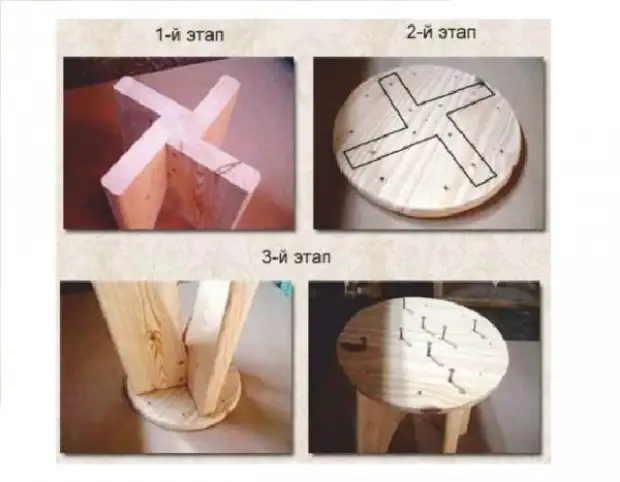
Bar Chair Assembling Process
The diameter of the holes for the self-tapping screw in the plane should be 6 mm, in the end - 3 mm.
You have left to toned the stool of the verse, dry and operate with varnish in 2-3 layers. Bar chair is ready!
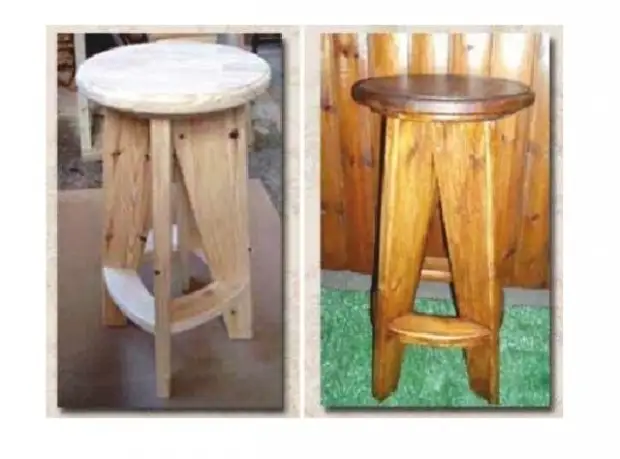
Ready bar stool
Second version of the wooden chair
Such bar chairs are very simple and easy to use. Their peculiarity is that the seat can be made straight or bent, and later, if desired, hammer the cloth.
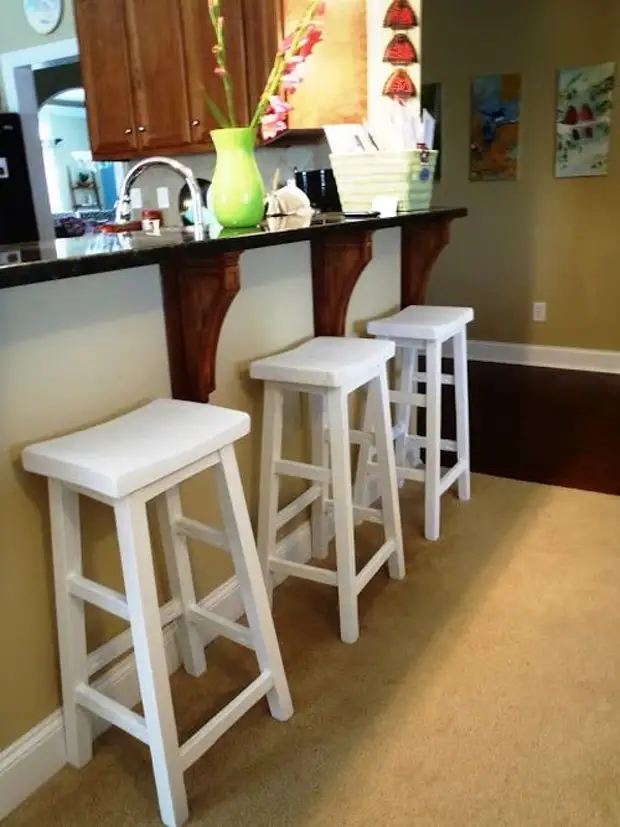
Bar chairs from a wooden array
- Draw a drawing;
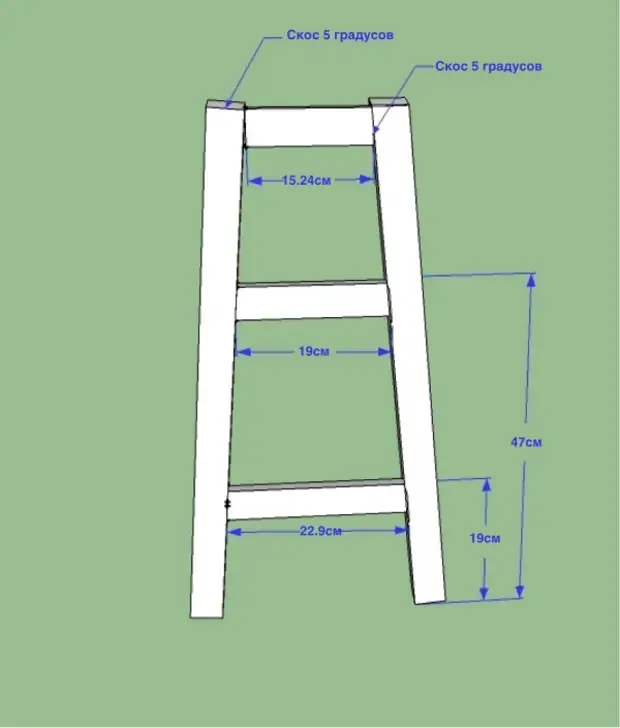
Drawing stool
- Look carefully at the second drawing: For the simplicity of the image, there are no two-top crossbars under the seat. Do not forget that when assembling they need to add;

More visual and detailed drawing
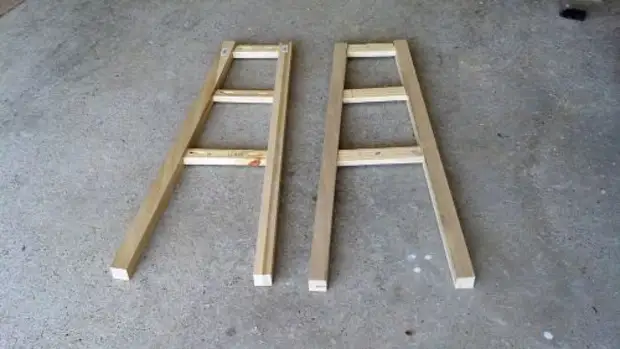
- For the legs of the chair, use bars with a size of 38 x 38 mm. You can take a poplar wood if there is no pine or birch. The length of the legs will be 71 cm. At their ends, make a sleeve at an angle of 5 degrees;
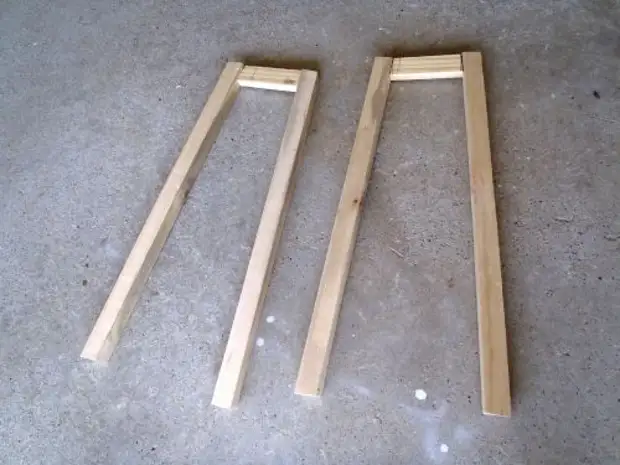
Stula legs
- At the top, attach a short crossbar, the so-called chairs apron. In the same way, fasten the middle and lower crossbar;
Fixing the crossbar on the legs of the chair
- To the top of the rack on the right side, attach the second crossbar of greater length. Also install the bottom - it will perform in the role of the steps;
Fastening of the crossbar
- Do the same on the left side. To be comfortable, put the height of the footboard, respectively, the growth of people who will sit on these chairs;
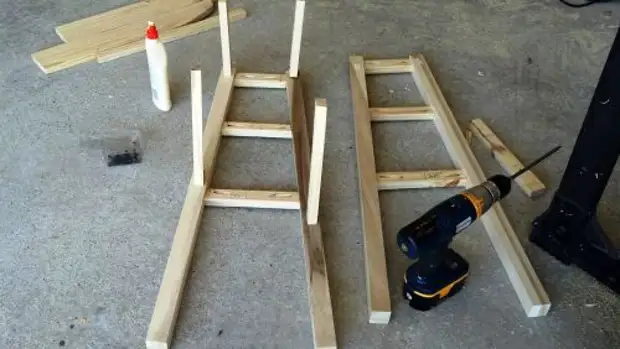
Fastening the footrest on the other side
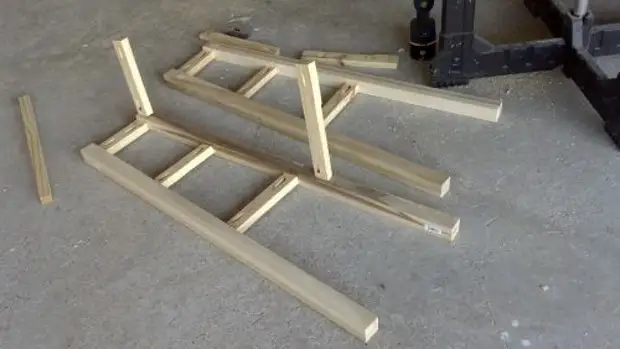
- While half the chair with each other.
Assembling chalk chalk
How to make a deepening on the seat? For this there is a way, however, it is not from the lungs. Make a few out of different depths on the surface and make the deepening of the chisel.
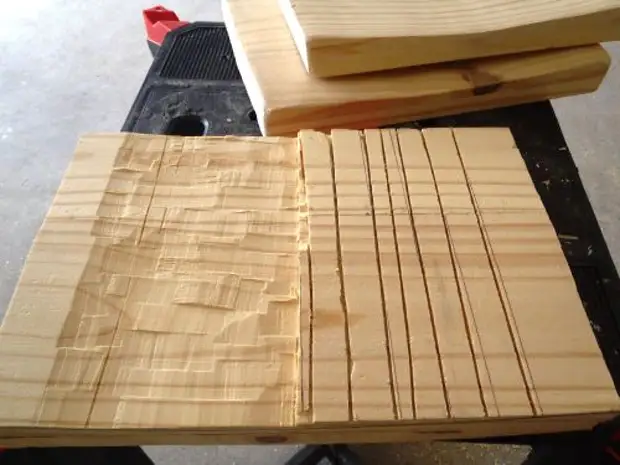
Deepening in the seat
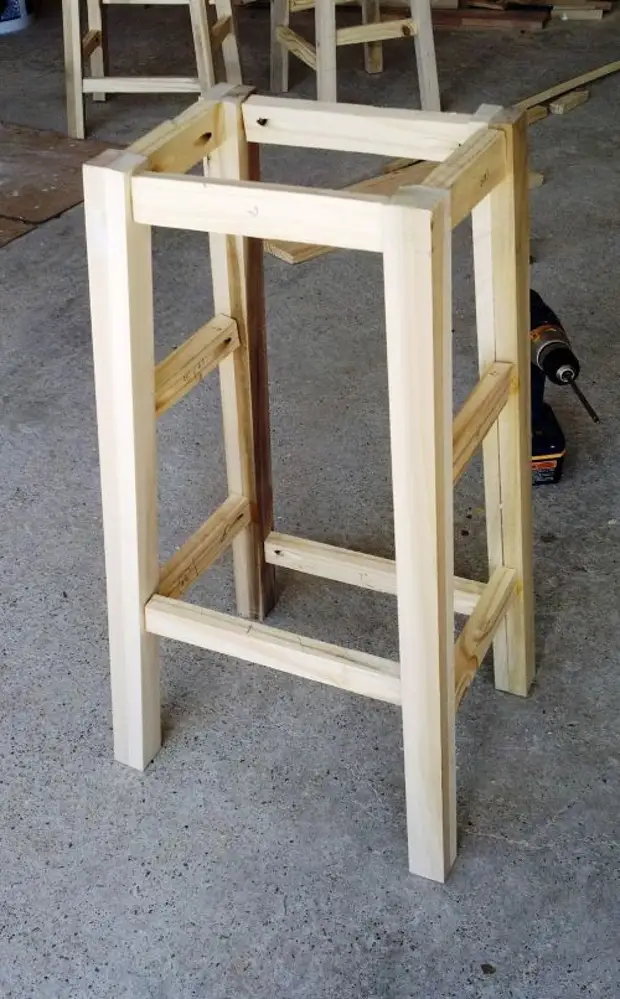
Onsulating the surface of the seat, attach it to the legs. Fill the holes for oblique screws, polish the stool and paint the chair.
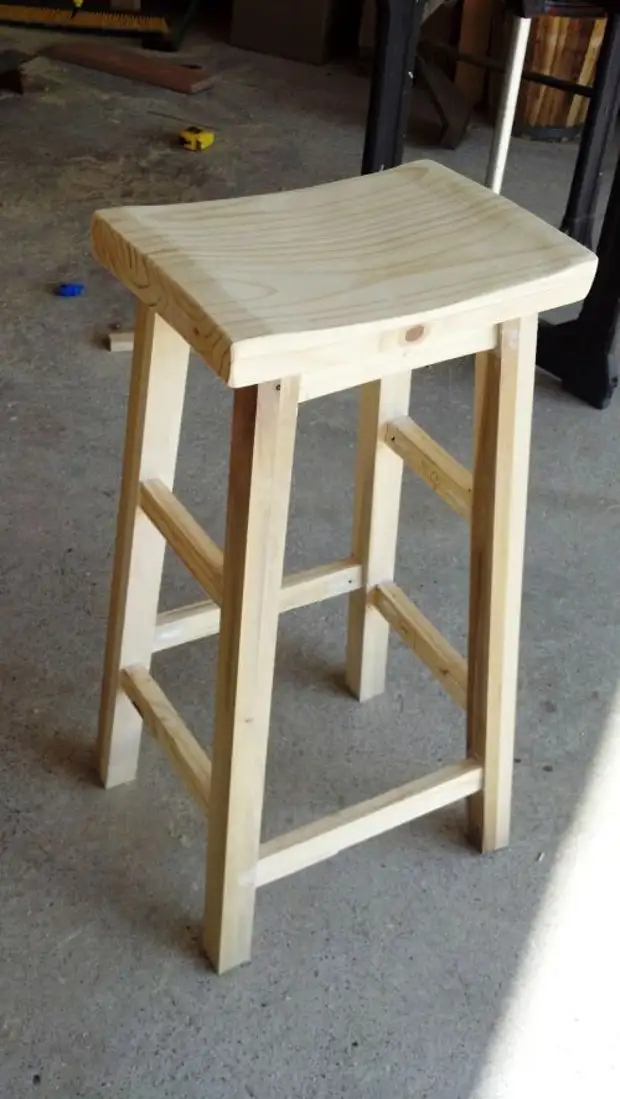
Chair is ready, it remains only to paint
Note! In the first and second options you can use for the manufacture of the seat Fane or Chipboard.
Metal bar stool
This chair will become a real exclusive, so you will not have to regret the time spent and attached efforts.
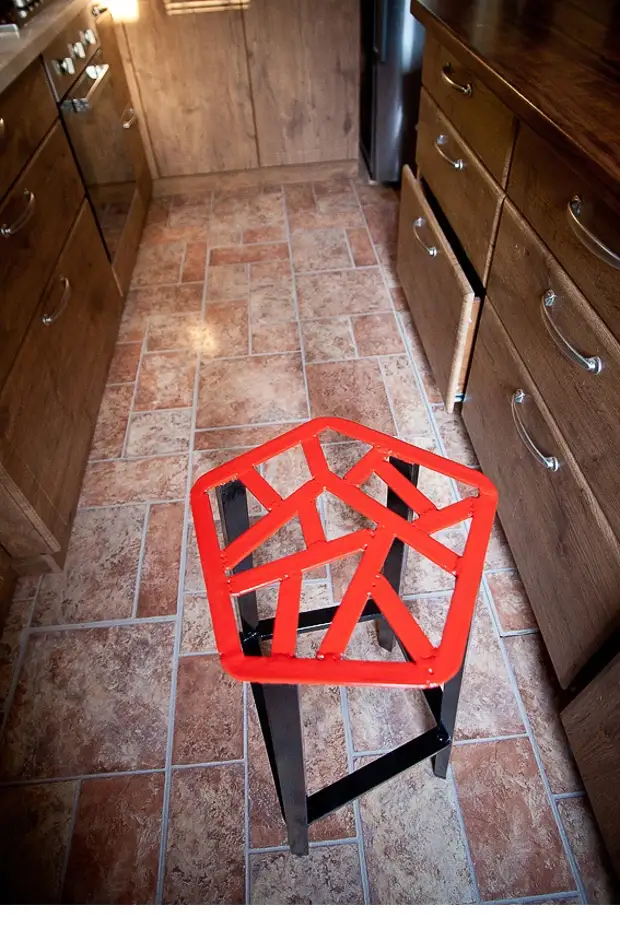
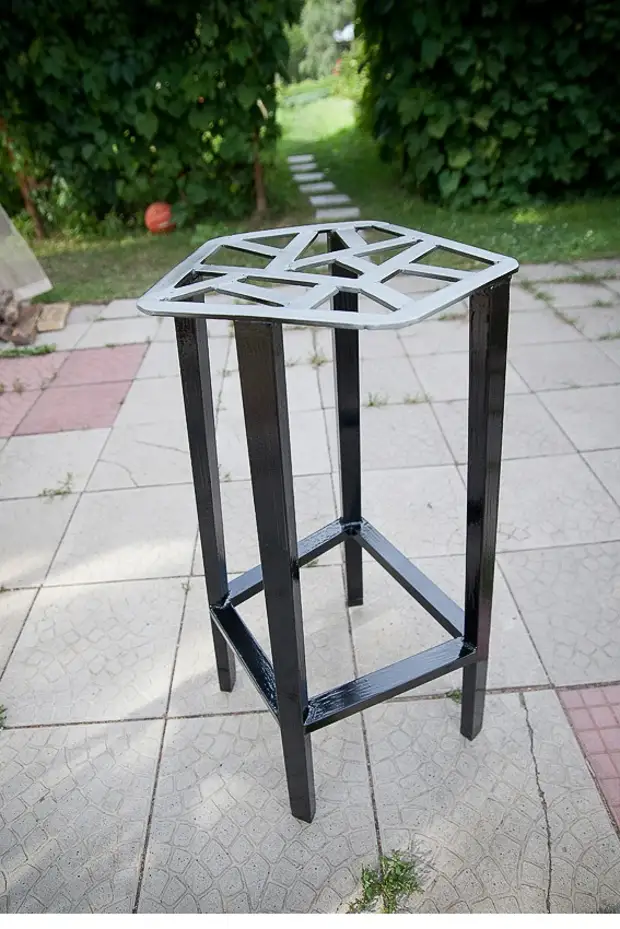
Metal bar stool will become a truly exclusive work.
Surely you have remaining leaf iron, metal profile and cropping. All this goes to move.
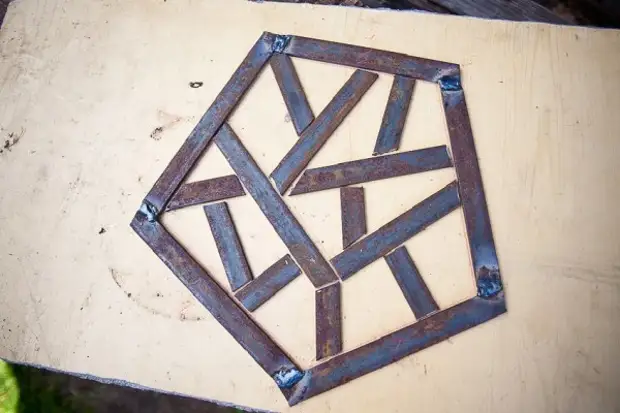
Pail with a pencil form of a future seat on a flat asbestos sheet for welding. In the photo, it is indicated by red lines.
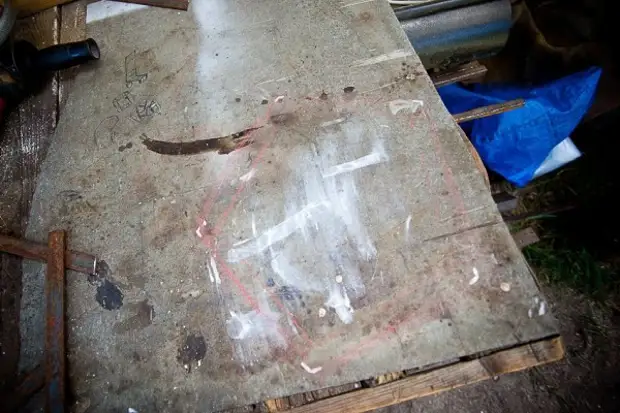
Sketch of seats
Sketch from the strip 25 mm cut the blanks. Cook them with each other.

Welded blanks
For internal layouts, cut the blanks from the same strip.
Billets for internal layouts
Cook the workpiece and work out. Corners round up.
Stripped billet for seating
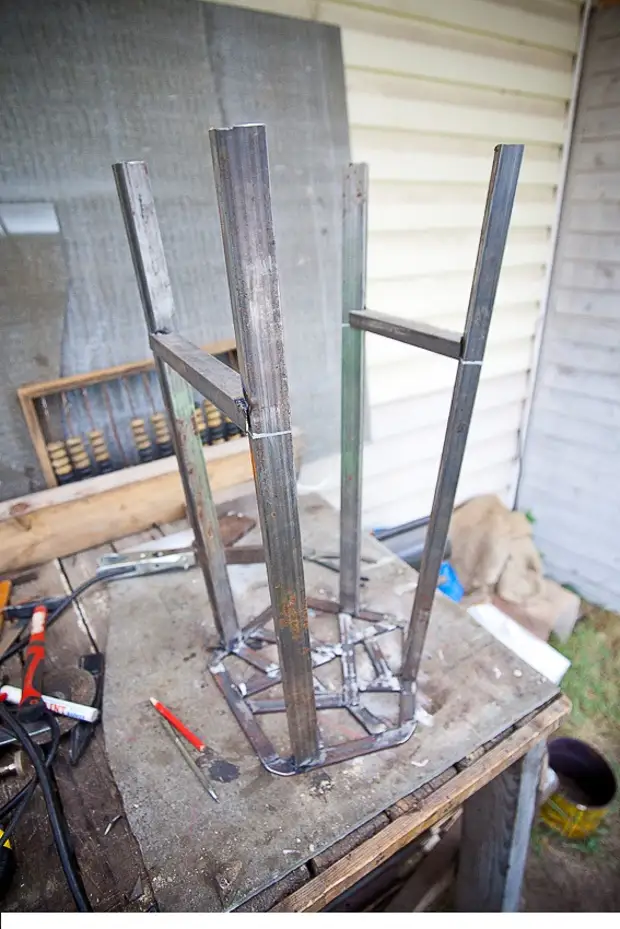
We weld to the seat legs from the profile of 30 x 20 mm. During the welding, grab the legs on one welding point, carefully push the desired position.
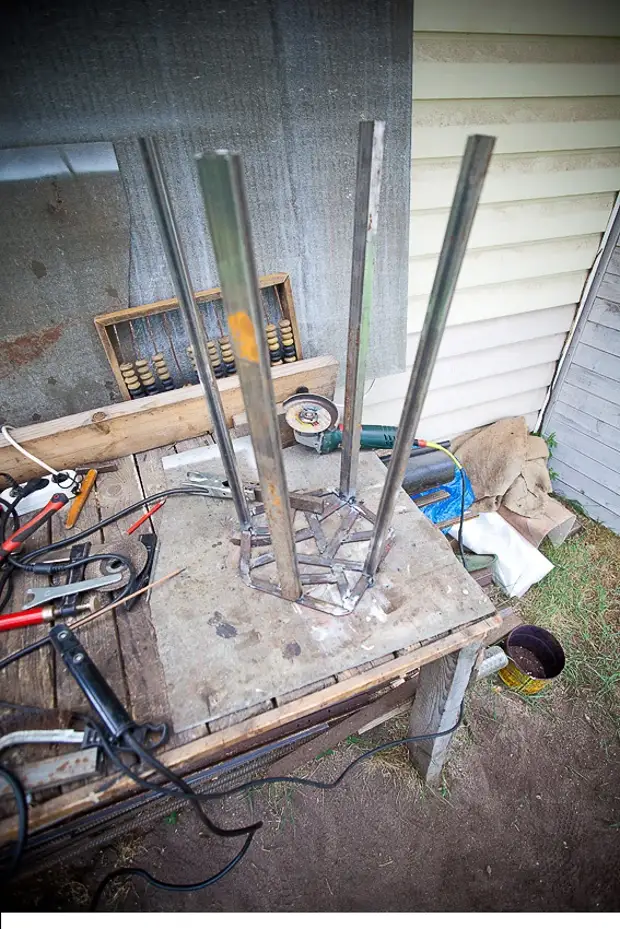
Brew legs from the profile
Note the levels of foot stop, for example, 45 cm from the seating. Follow how comfortable is such a height for your growth.
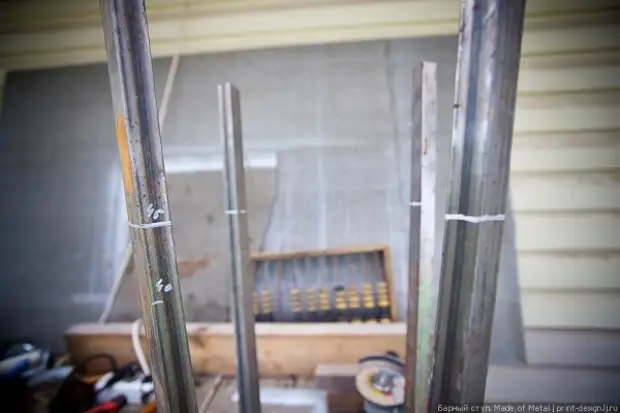
Level Stop Mark
Foot stops also make a profile of 30 x 20.
Foot stops are made from the same profile.
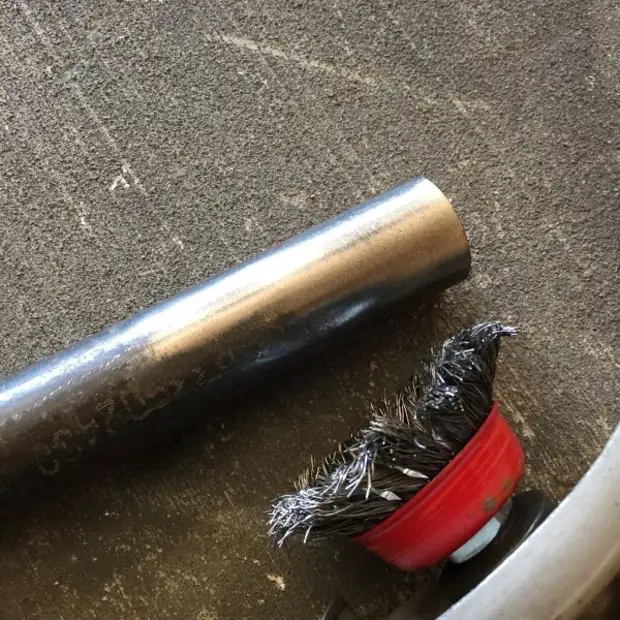
Instead of plastic or rubber stoppers for legs of a metal profile, you can use wooden "heels". They do not scratch the floor, and you can always treat them to the desired size.
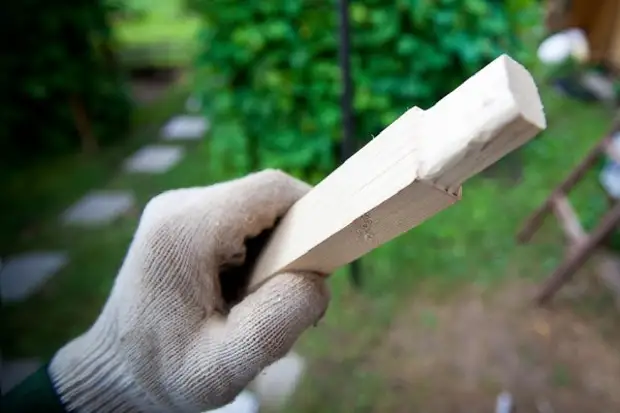
Wooden stopper tube for metal profile
These traffic jams are not necessarily fixed with screws or fix glue - they are perfectly held on friction. The main thing is to undermine them in size with legs.
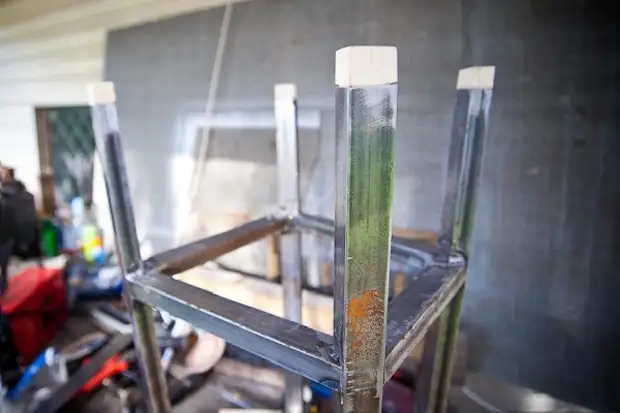
Set wooden traffic jams
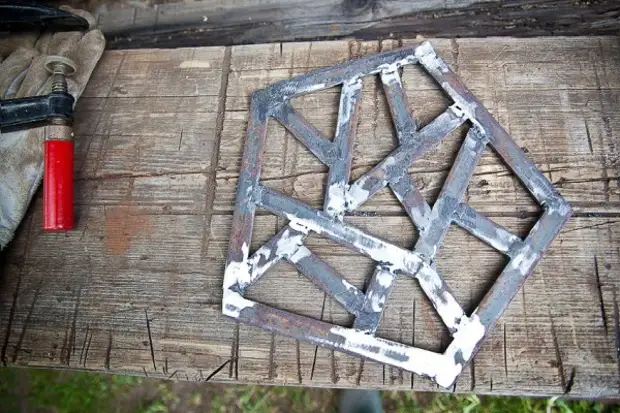
Chair is ready, it remains to paint it. First apply the soil layer.
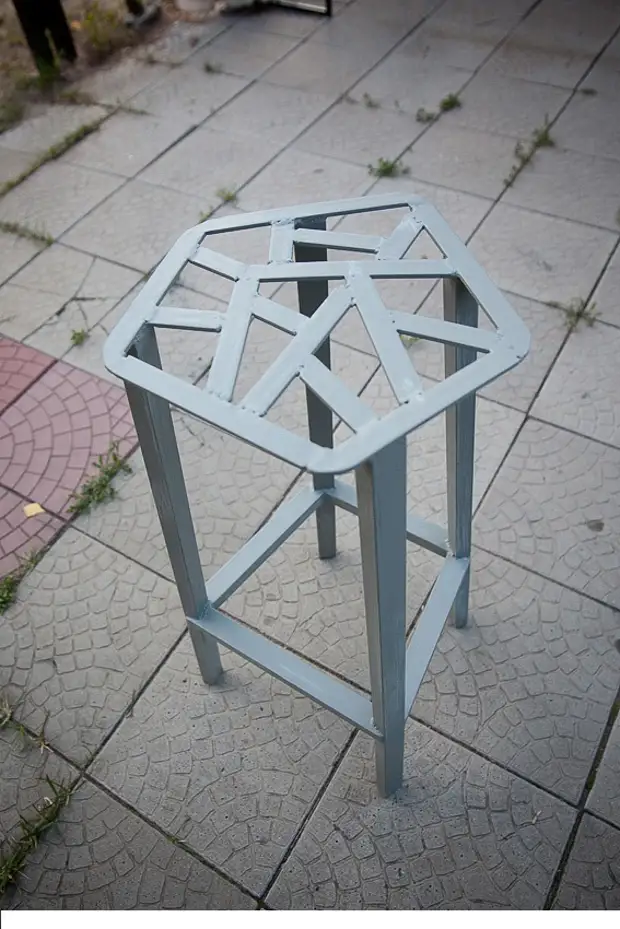
Groundovka stool
After the soil dry, color the black paint seats. Wait until driving.
Painting the legs of the chair
Wrap the surface of the surface, painted in the black color, so as not to stain them during further work. Seat paint red.
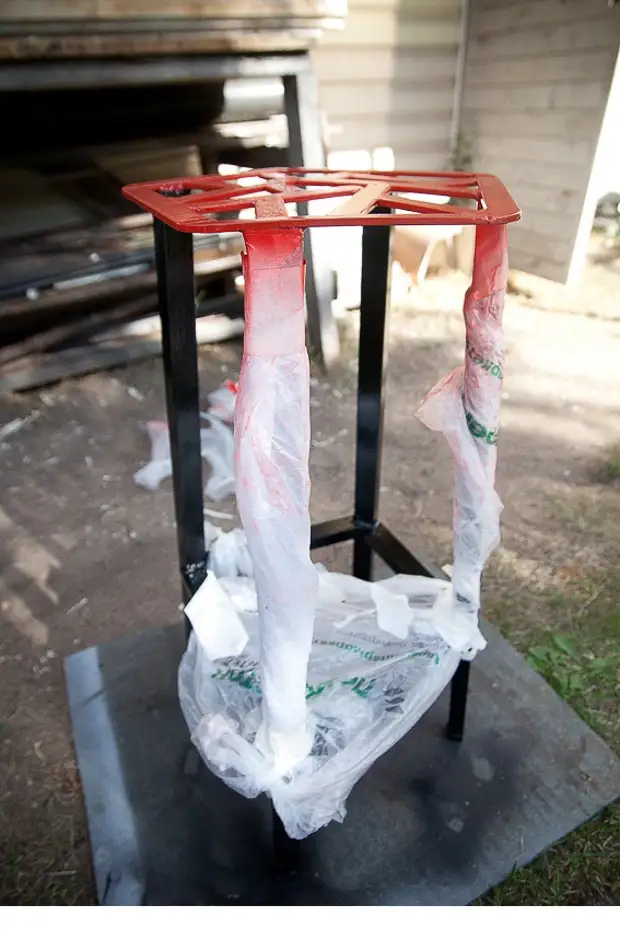
Painting seating
After the chair is dry, you can use it in your pleasure!
Bar chair
Ordinary metal pipes can also serve you as a body for a bar stool. The most suitable material is chrome stainless steel. Plastic, or PVC pipes, it is better not to use: compared with the metal, their strength is very low.
You will need:
- plywood or chipboard;
- Stapler construction and brackets to it;
- Metal blanks of pipes;
- several plumbing pipe bending;
- screwdriver or drill;
- fastening bolts;
- Upholstery fabric, foam rubber for seats.
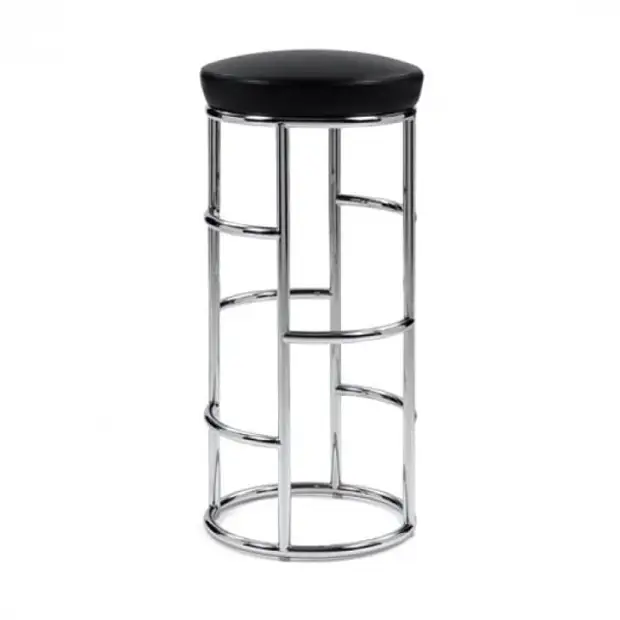
Bar chair made of metal pipes
- Decide which model you will make. This will help you with the relevant magazines.
- Measure the height of the bar counter to know the size of the future stool. Pre-prepare the blanks made of metal pipes for the base of the chair, cutting them into pieces of the desired length.
- To select a suitable diameter of pipes, take into account the maximum load on the chair.
Carefully select the size of the workpiece: diameter and length
- Each blank, bent at the top of the pipe-bender in the form of a semicircle. Crerate the workpiece between them with fastening bolts - so you will provide a large stability to the future chair.
- Make a seat from chipboard or plywood. Determining the necessary diameter, consider the weight of a person who will sit on the chair. To the made skeleton of the seat, attach a staple foam rubber and cover the upholstery cloth. Use stable pollution material that is easy to succumb to dust and dry cleaning.
- The finished seat is attached to the place of connection of metal blanks. Make it with a screwdriver (or drill) and fasteners.
- If you want to make footrests, mark the necessary height on the legs of the chair and secure the segments of the metal pipe at this level, along the length of equal distance between the legs.
A source