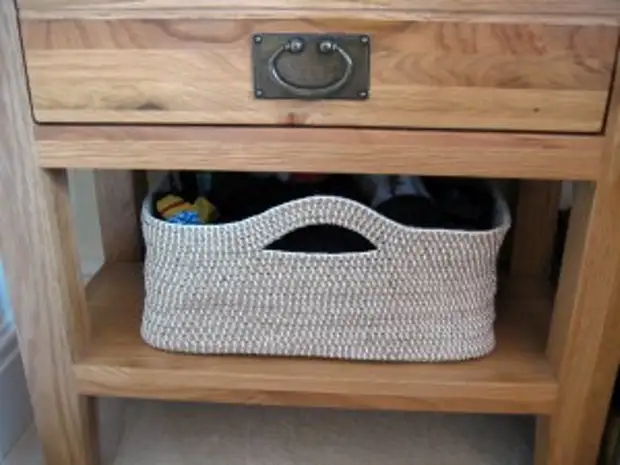
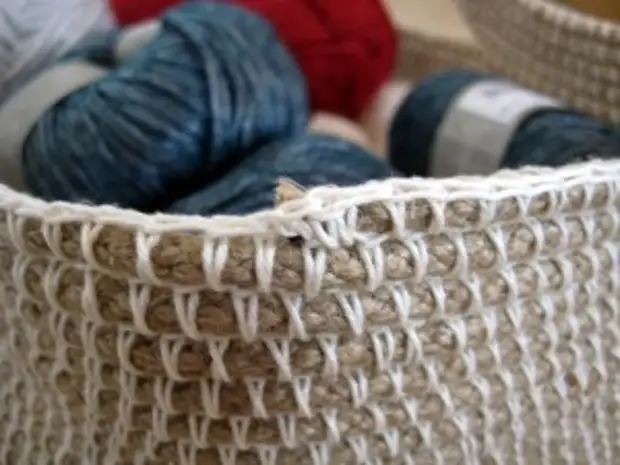
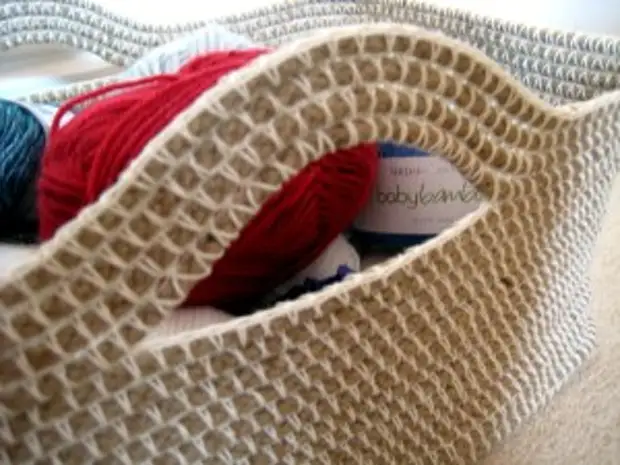
Here is such a basket for needlework of a woven crochet found on the Internet. Computer transpetode, but in principle you can understand.
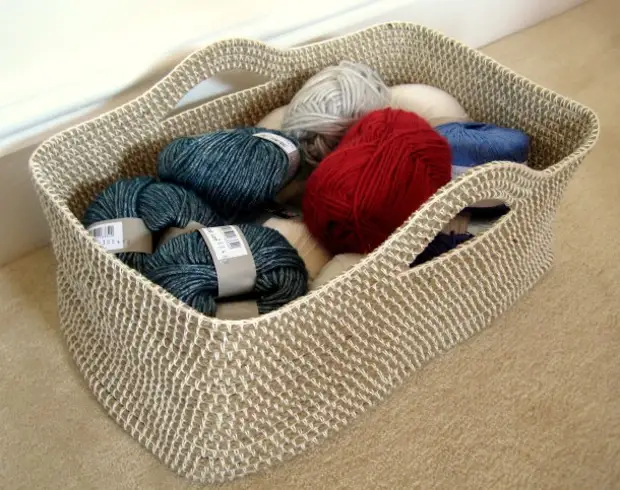
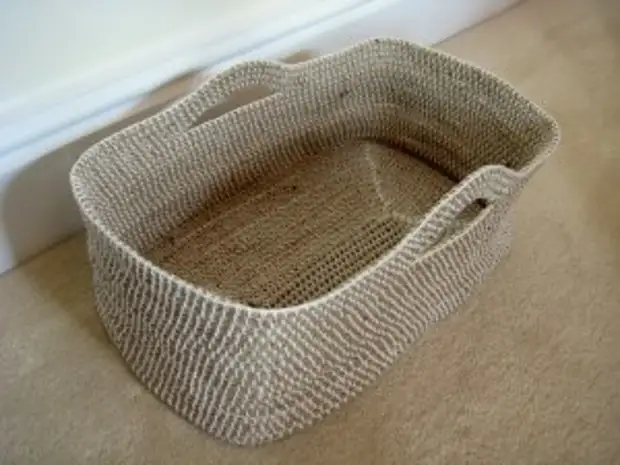
Basket with crochet from rope for needlework
You will need:
- Rope length (mine was 38m in length and diameter of 6 mm, for 22x42x17cm Basket)
- Hide yarn (I used 310m from Patons 100% cotton 4ply in a creamy color combination)
- Size 5.00mm hook (use a metal hook, if possible, how the work is rather tough), or more if your rope is thicker.
Picture:
Foundation range: Decide that the basic size you need. My was 22 to 42 cm. The difference between the two dimensions (in my case 20 cm), as long as the chain you need to do to start. It was 30 or so chain for me.
Part 30 (or the number that requires the desired size for you) +2, turn
Put the rope along with the chain to work with the overlap of several centimeters.
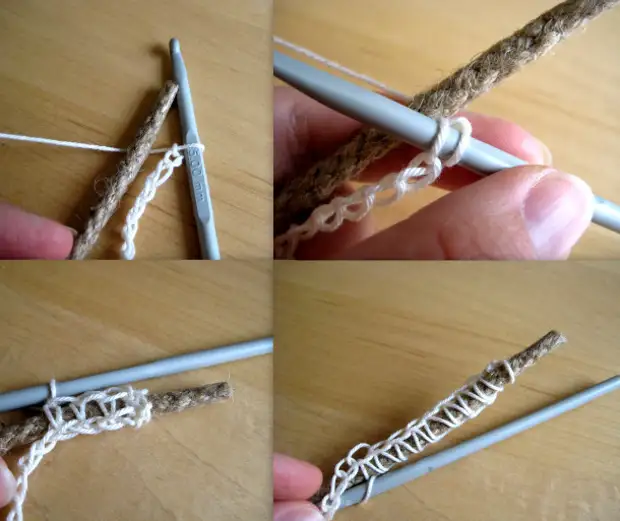
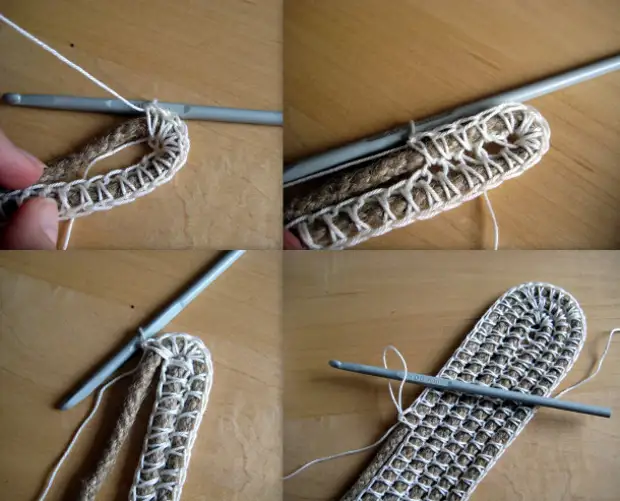
How to start a round 1
Round 1: SC (works through the rope) 3-h from the hook. Fill out a few more subcutaneously, and then shook the rope forward on the line ultimately from the beginning of the line (i.e., get rid of the overlap). SC to the final CH, more than 5 subcutaneously in the end h. (Turn the rope around the "corner" and rotating work), SC to the end.
[NB: I subcutaneously into the reverse loop of my chain, so as soon as I turned around the corner easier to complete subcutaneously. You can see it in the photo, but you should not do the same, you can fail in your chain, as usual if you prefer.]
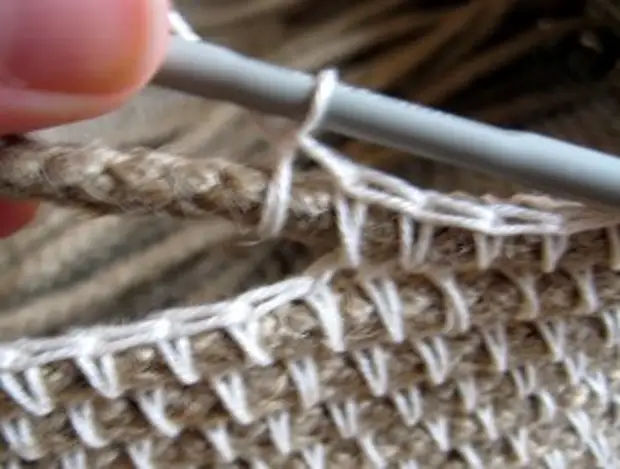
Subsequent rounds: 3SC in every corner of ul and subcutaneously in all other loops. Continue while the work is not desired basic sizes.

1 & 2: Wraping an angle on the 1st Round, 3: Starting Round 2, 4: part of the path through 3 rounds.
Go to work: After the base is large enough, stopping the 3SC in every corner of the street, just make 1CC in every street around. For the first round of this, you will need to make sure that you learn the rope vertically on top of the next line, which may be a bit uncomfortable.
Pens: They are not mandatory. When the walls are high enough, and after the round of the round, Place Star markers, where you want your handles to be. Now that you reach the marker, leave the next set of raw loops (I left 15sts to do my), and instead of a crochet through the rope more hinges than you have unprocessed (I made 20 tons through the rope). Continue subcutaneously in p. After marker, as before.
Starting handle
Finishing handle
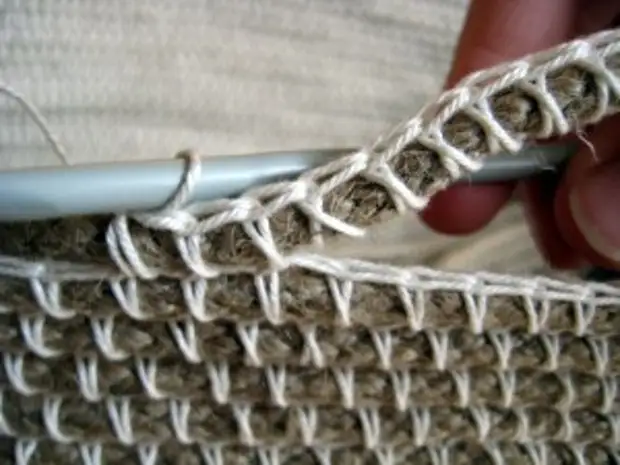
Providing end (s): I modified SC ST at the end of my rope (and when I needed to join the new length part of the path through):
Insert the hook to the next loop, make a cycle, yarn over, spend through one loop, insert the hook in the same loop, make a cycle, yarn over, carry out 2 loops.
Secured end
Finish with subcutaneously to the next loop, but not through the rope. Cut the rope if necessary, and weave in all ends.
Handle