It all started with the fact that I started and implemented repairs as a result of which I finally appeared a workshop. I made a workshop from a big room and instead of her. But nevertheless, some suspicion and sickness wanted to save and combine with all my endless types of creativity :) And for most of them, a long and comfortable table is categorically necessary. It was clearly originally that it would not be ready to find. In addition, it would be better if the table is not one and a couple of pieces for mobility. And then I have furniture cunning color. In general, some difficulties :)
And therefore I thought and decided ... I will do it myself! I am not a master of furniture. But our anywhere disappeared! So I share my recipe :)
For two tables we need:
1. Balaasins for legs - 8 pieces.
2. Furniture shield for countertops - 2 pieces.
3. Wooden door trips (I used for a screed).
4. Self-tapping screws up to 2 cm.
5. Metal corners for assembly 44 pcs. (Take with double holes on each side, otherwise everything will hang out).
6. White acrylic paint.
7. Paint lacquer "Ledsing".
8. Brown and black kel.
9. Parquet or furniture lacquer (I have a parquet VGT).
10. Sandpaper (I have with a holder for convenience).
11. Screwdriver.
12. Brushes.
13. Sponges for washing dishes for lesing.
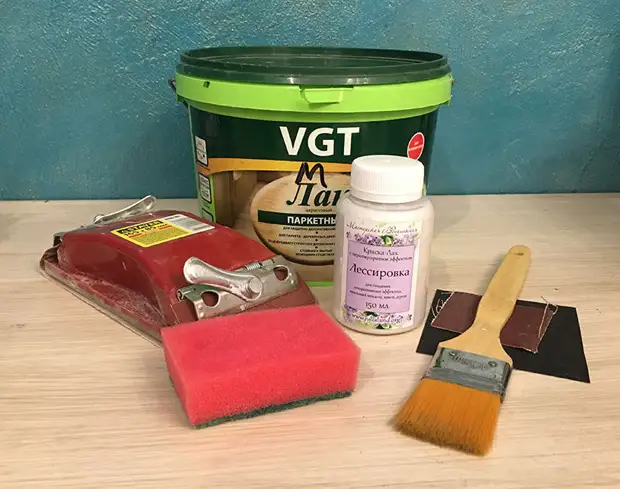
By the way, this partial set lies just on the painted tabletop of the finished table :)
1. Prepare details to paint and stain.
Details themselves neatly wrinkled in Lerua in my sizes. Furniture shields for table tops I took ready, there was almost my size 60x120 cm. But the balusters were cut to me - they are too tall for the table. I rooted up to 72 cm. Taking into account the table top, the height of the table as a result is 74 cm.
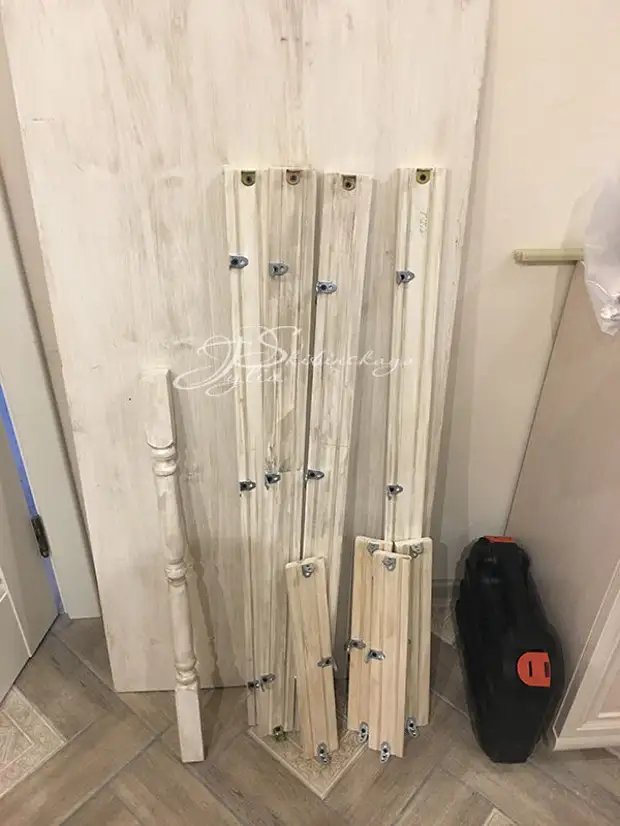
Door platbands wrote me slices in the same place. I used them for the screed of the table frame. Sizes I composed right in the store. Since I did not know in advance what section would choose a baluster. I solved that the distance from the edge of the table top to the frame and the legs will be 6 cm, respectively, 120cm-12cm = 108 cm. Of these, we submit the size of the two balaasine cross section (I have 5 cm) and we get the length of our crossbar of the screed - 98cm. Also we do with a narrow side: 60-12-10 = 38cm
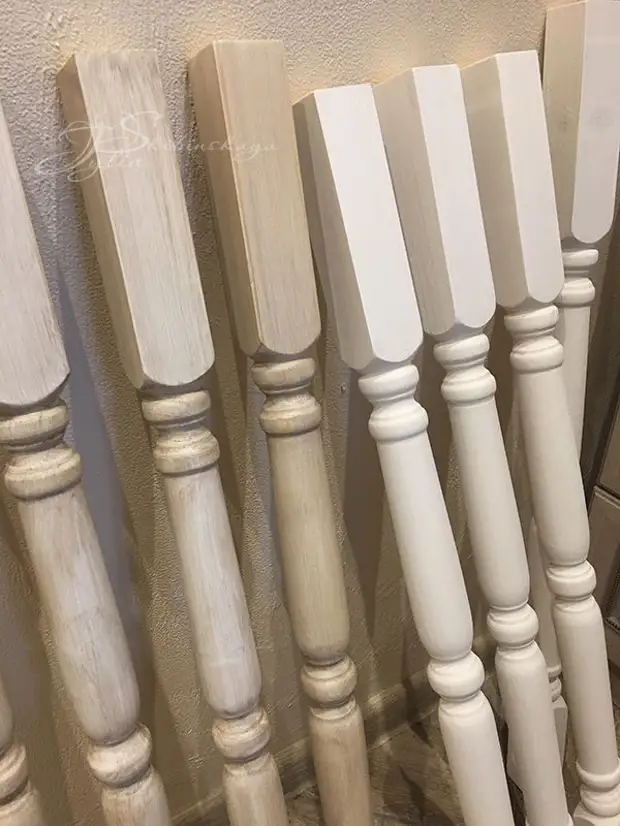
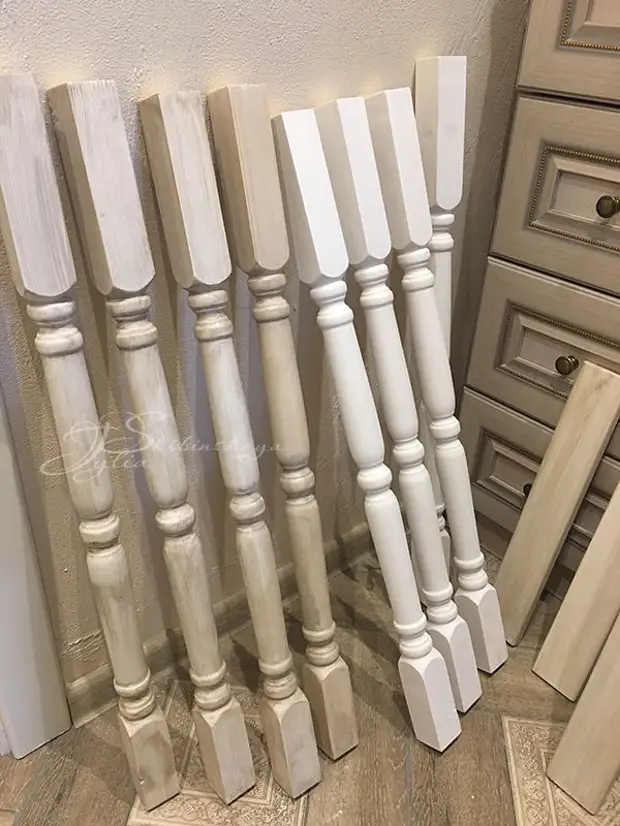
Drill details I squeary and covered light beige paint in two layers (I added a stoic acrylic white paint to a liter jar for the walls a little brown flat. After drying, the paint was with a shade, but very bright, close to white color). After that, again Okatril to remove the woody pile and irregularity of paint.
On the right in the photo just the chest of color and the textures in which I had to get.
2. Decorating the details.
For the final folding, I took the paint-varnish "lesing". I did not have time to mess around with complex imitation. It was necessary to quickly and as much as possible to get into color and texture. Since my house always has the simplest killers purchased in ancient times and still lively, I used them to create a complex shade, resembling and very close to the color chipboard, from which furniture is made in the room.
So, in the "lesing" (she herself is colorless) I added brown and black kel. I had a trim from the platband - I tried a color on it and added a new portion of the colors, to achieve the desired shade.
The occupation is not long. And after about 10-15 minutes later, I was ready to lescate the desired shade.
I took a sponge for washing the dishes, moocked it with water and dug greatly (this reduces the amount of paint chipped and more paint remains on the surface of the sponge for applying to the surface). Sponge Macay in the finished lesing and nano on the tabletop with long strokes. The sponge imitates wood fibers and leaves a beautiful drawing on top of the painted surface. And the color and texture fell almost one into one with my furniture, which I was very glad :)
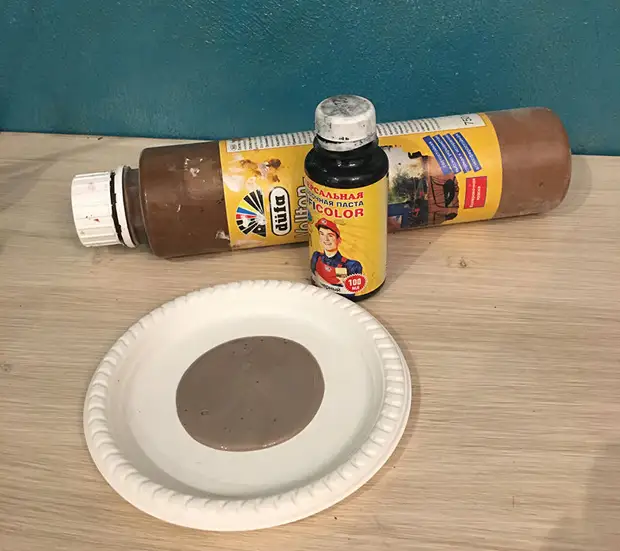
Also an indicative photo. Colors and palette stand on ready-made, painted countertop. The table top was originally painted in the color of the palette. And on top of the sponge I inflicted this very toned paint in the brown color, which is nanitis in the palette. Interesting effect.
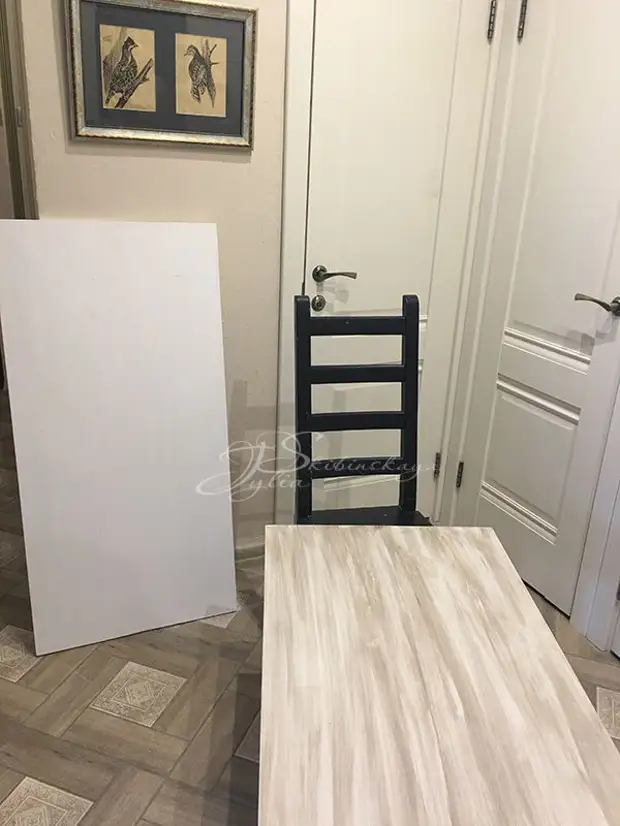
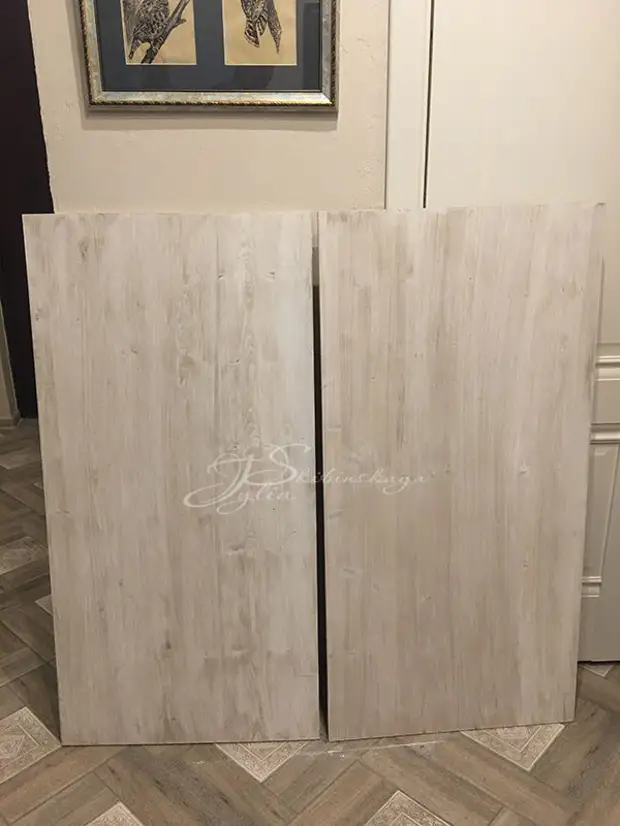
Similarly, painted each baluster. Also a sponge. Erasing all the drops and droplets at once, trying to apply the paint evenly and do not pass twice on the dry place - otherwise there will be stains. Paint transparent. So overlapping on itself, it forms more tightly painted areas. This can be used to make dimming in the grooves of Balyasin.
Paints went very little. If I have a 1 liter of white paint on the coloring of two tables and the shelves, then I spent the decamental coating, give God 200-220 ml ...
3. Covered lacquer.
Every detail I covered parquet VGT in several layers. Next, you can all shlind the shallow sandpaper and collect.
4. Assembly.
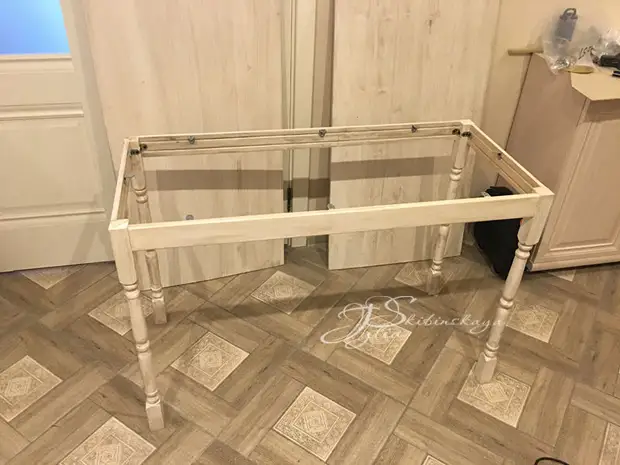
For the assembly, I used conventional metal corners. I do not have equipment and devices for a more professional version. I needed a simple and handy way. First of all, I collected a framework.
First to each crossbar of the screed (former door platbands), I screwed the corners at short edges. To the long side for further attachment of the table top, screwed one or three corners (depending on the length of the crossbar).
And already the crossbars with shielded corners fucked to balusters.
The design turned out to be smooth and firmly stood, without fascinating, without a tabletop.
I fastened the corners with paired holes at this stage with only one screws. The second screwed up at the finish stage to avoid the gaps and be able to align the items.
Further, the countertop I put on two stools (they also painted them) and watershed over my collected framework. The linear surface measured 6 cm on each side, leveled the frame in size and screwed up with screws to the tabletop.
The assembly of one table took less than an hour.
And that's what happened in me in the end :) It's better not to get up for their legs (for this it is worth making a knockout of the legs at the bottom of three sides), but the tables came out quite strong, suitable for needlework and suitable furniture suitable. So, as a budget and pretty option - quite yourself! :)
Later, the regiment was added to the tables, made as from the furniture shield and painted in the same way.
I am satisfied with my desks and a new workshop :) I will go to sleep there, by the way :)
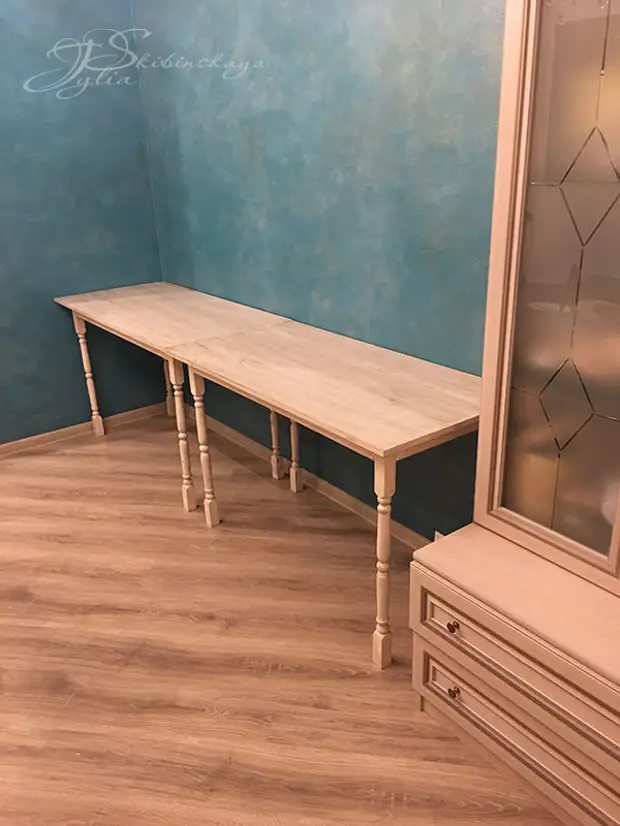
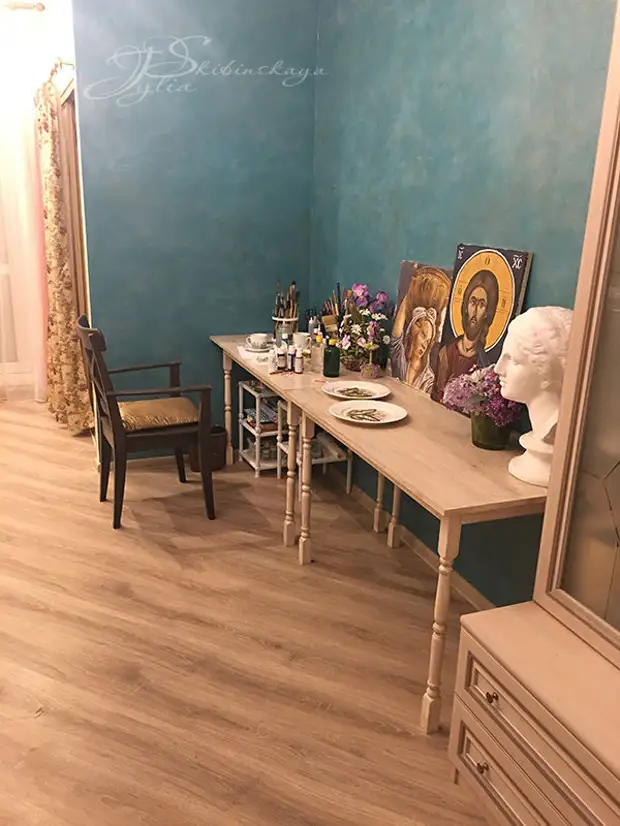
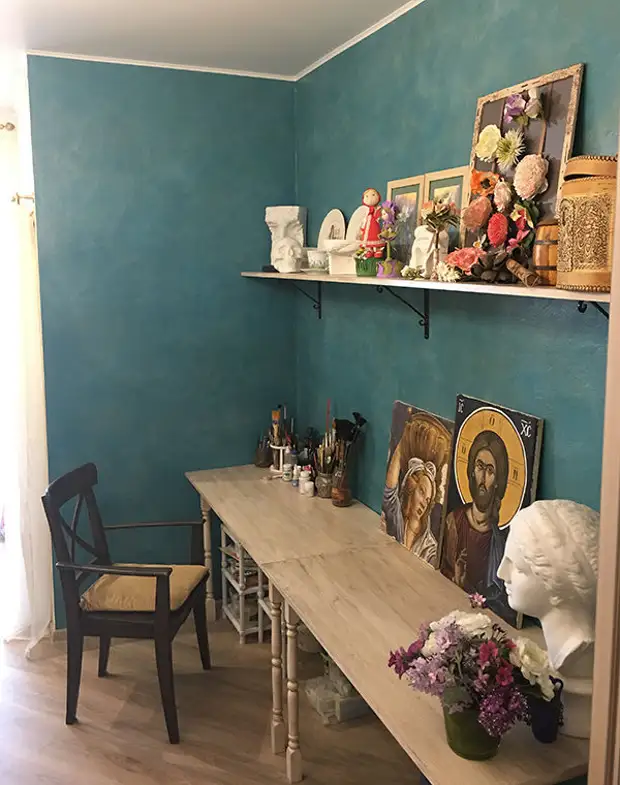
I will be glad if my master class is useful to you and your creative ideas will appear from the self-rationalizer series :)
Successful creativity!
Author - Julia (inspiration workshop)
A source
