
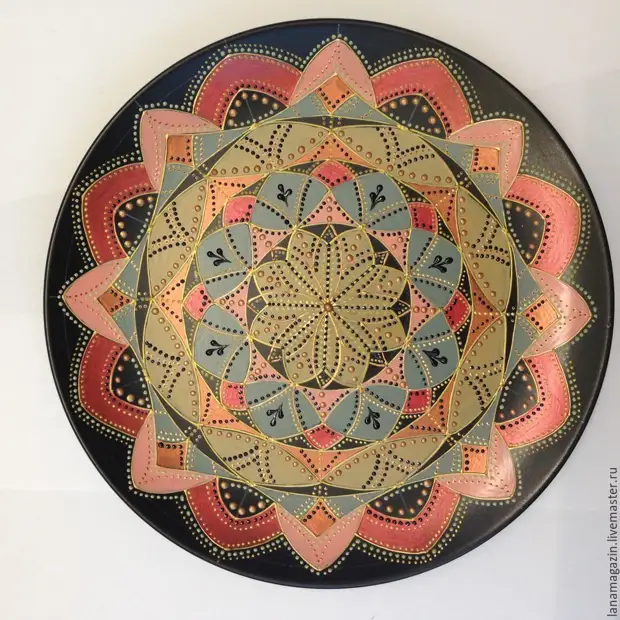
Recently, decorative plates are increasingly gaining popularity in interior decoration. They can be decorate the interior of the kitchen, hallway, dining area, living room, the interior of the country house and so on. And the plate painted with your own hands, you see, give even more heat and comfort to your interior.
So, in this master class we will paint the plate in the Point-to-Point technique. For work it will be necessary:
- plate
- contours of glass and ceramics
- Paints on glass and ceramics
- Pussy
- compass
- Pencil on ceramics
- Flexible line
- Transportation round

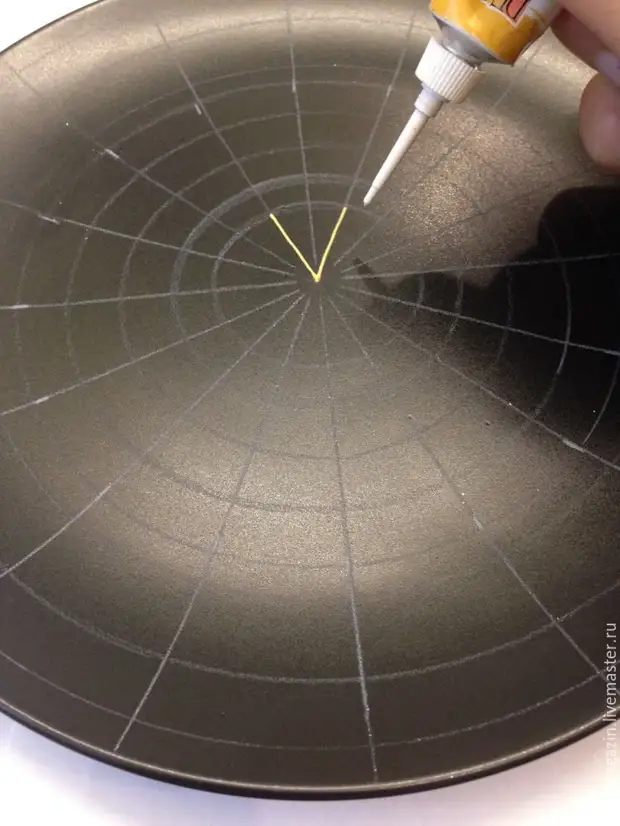
First, the plate must be deguted (for example, alcohol) and find the middle of the plates.

Then we combine the transportation with the center of the plate and divide on the equal parts. You can put any number of points, the main thing is equal to the distance between them - the transporter is done very convenient.


Now we spend rays.


Then the circulation is made of the circle (I fastened the circus with a piece of plasticine)

You need to make several circles for the convenience of creating a picture.

Well, all the preparatory work is completed, you can proceed directly to the painting.
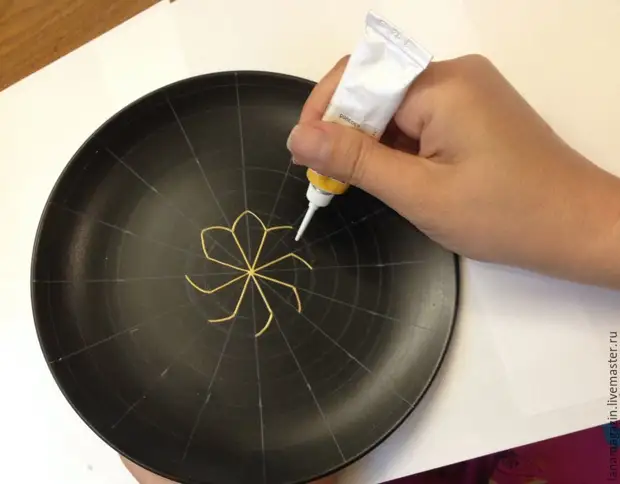
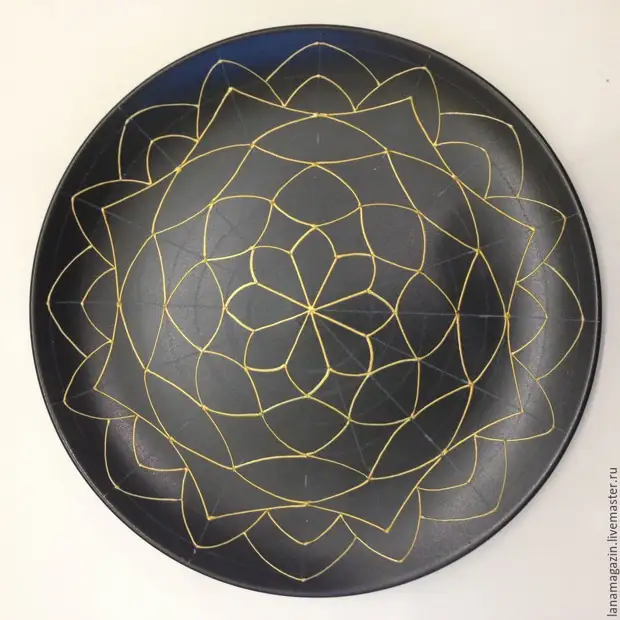
The painting is performed by contours of glass and ceramics and ceramics paints. Everyone chooses the lipping gamut itself, in accordance with its idea and color in the interior.
My plate will be in the warm range, so I took the outline "Gold".
In the contour, we create a drawing, which will be filled with color. Relying on the preliminary pencils, invent the painting pattern.
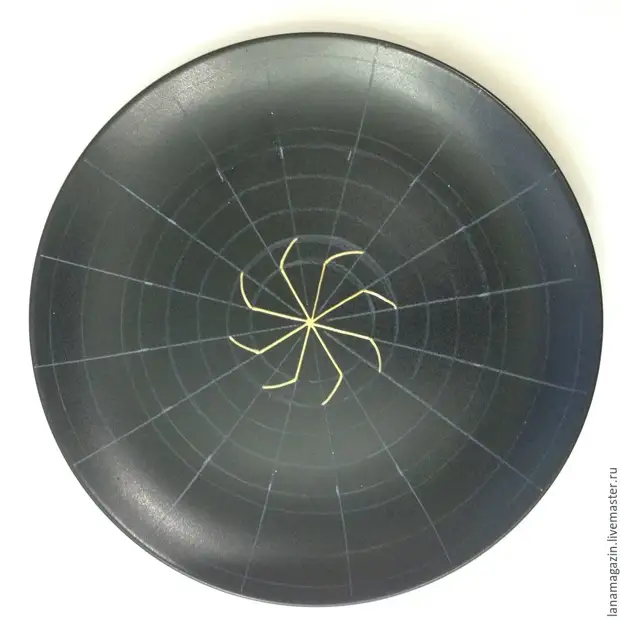
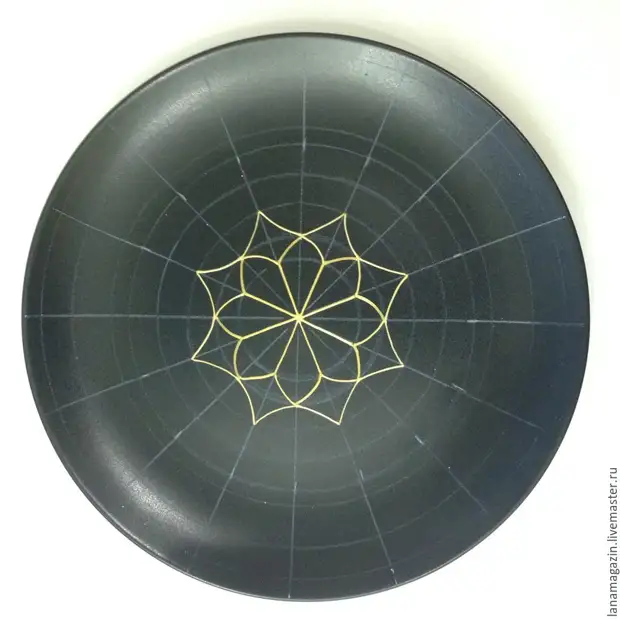
Drawing circuit ready.
Now you need to fill it with color.
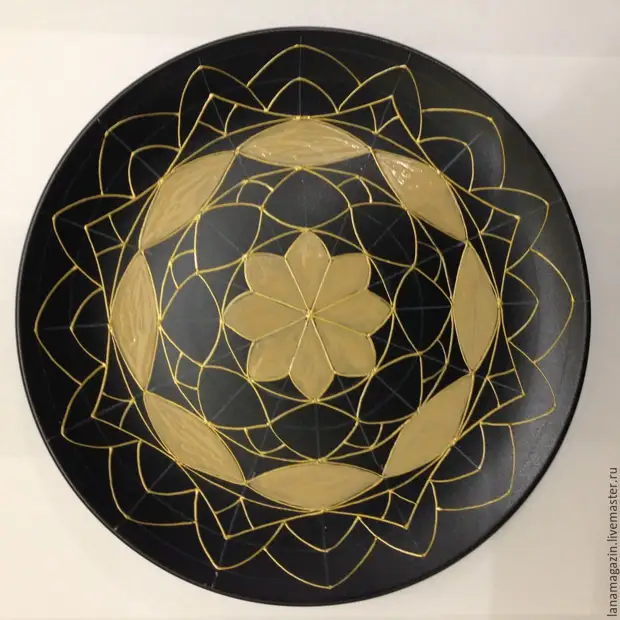
Showing the phased painting. Although already, probably, everything is clear.
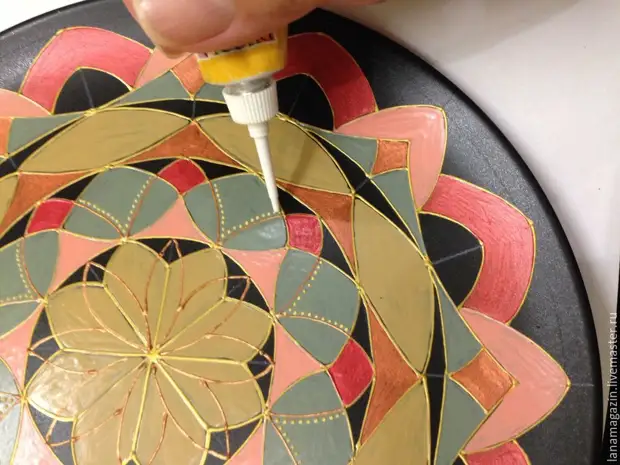
Now, after drying, you can proceed directly to the points.
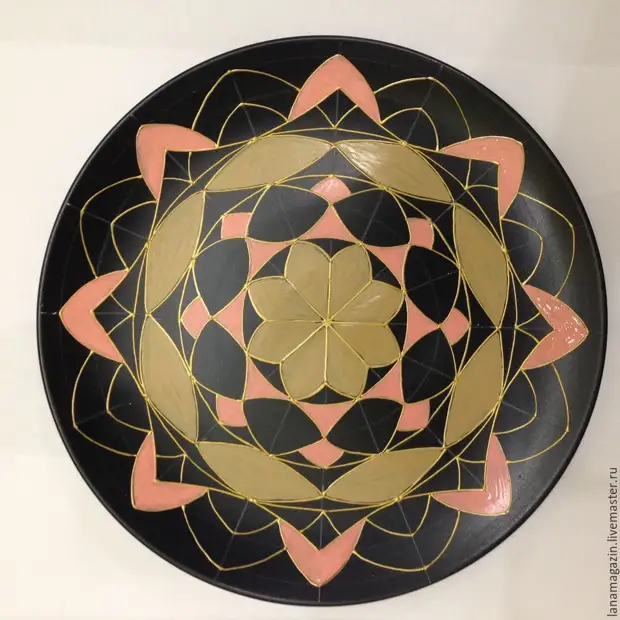
Since I have a warm gamma painting, I use the outlines "Gold", "Copper", "Bronze" and black - color background.
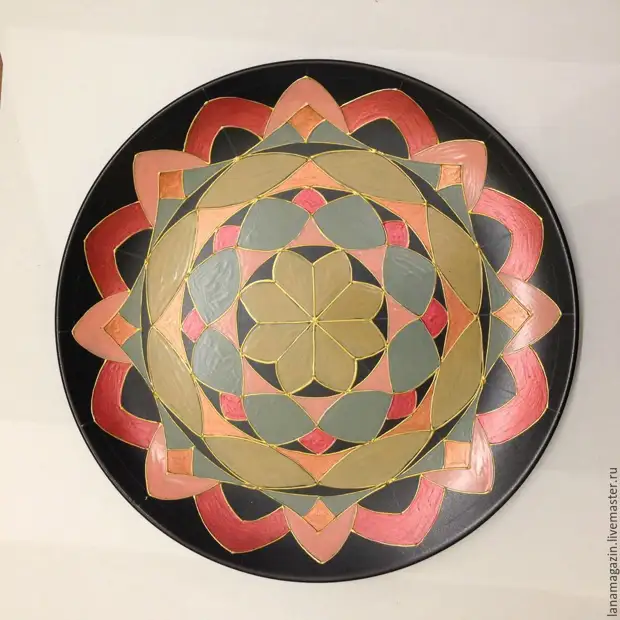
It turned out like this:

After the points are completely dry, it is necessary to erase the remaining pencil lines and cover the product with varnish. It is convenient to use acrylic varnish from a canister.
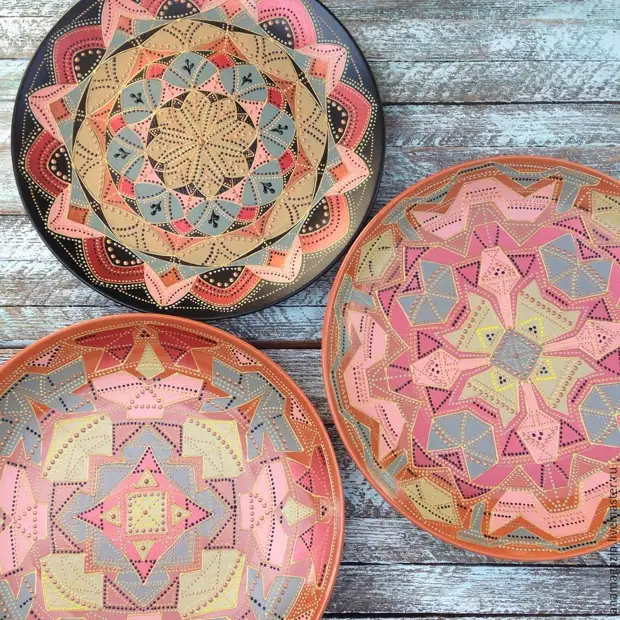
If on the reverse side glue the suspension, then the plate can be hanging on the wall. You can paint another to two plates in the same range, but with another ornament. Then it will turn out a whole original composition on the wall!
I hope my master class comes in handy. Thanks for attention!
A source