
Today we will talk about how to sew Cape, having previously built its pattern.
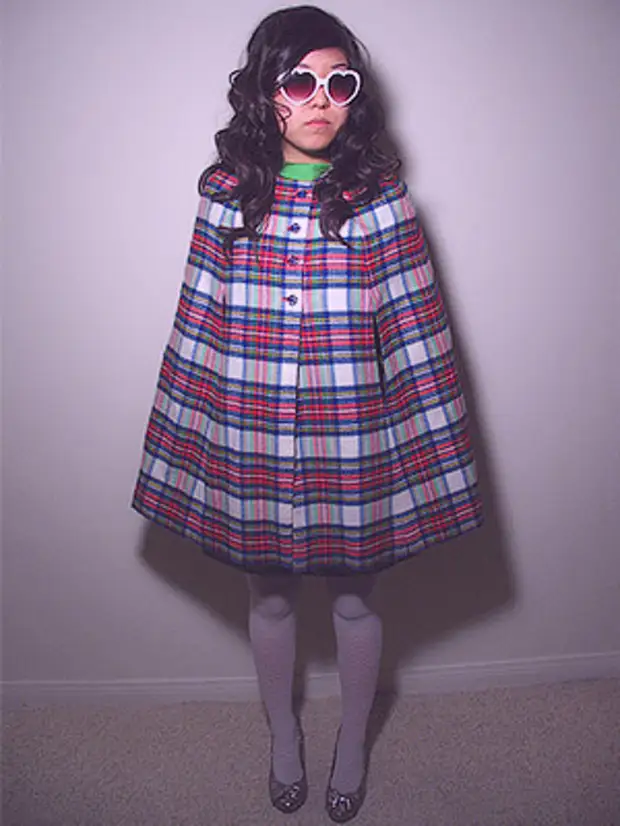
Cape pattern , as well as the decoding of the "mysterious" word is simple. After all, to build a cappa pattern and sew it in just 6 steps!
First, choose a cloth. Step One: Fabric Choice.
Cape can be worn from spring through autumn, so the fabric can be both warm and easy. Pick up the fabric that you like best. If we talk about autumn, then it can be a soft lettering wool, which can be used for both spring and early autumn. If this is summer, pick up a light flying fabric that will emphasize your gracefulness!
Chose fabric, proceed to building patterns.
Step second.
We will need a fabric size somewhere 130x260 cm. With such sizes of the fabric itself, the cape itself will be approximately 100 cm. We are folding the fabric in half, the front side to each other. Gets a rectangle with a size of 130x130 cm. Once again we put the cloth, so that the triangle would be (see Figure).
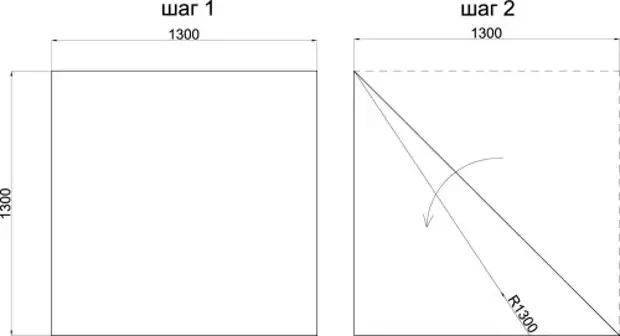
Cape pattern, decay the fabric.
Step second.
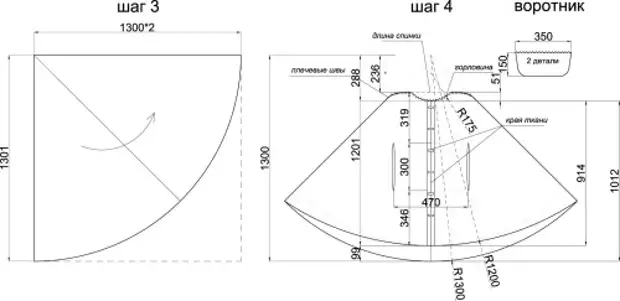
We deposit from the top currents by a radius of 130 cm. Cut up too much. We deploy the made cape pattern on the fabric. We look: we got a big wedge of skirts the sun jelly. Put the fabric so that the edges of the fabric hit the middle (place for the fasteners).
Step Three.
Put the backrest length. Smooth lines indicate the shoulder seams and planning the neck. Cut. We sew shoulder seams. You can throw Kay on yourself. Sits as needed!?
Step fourth.
We make rosters for hands, at such a distance and width from the center of the product, what would be convenient for you to walk in Cape. The height of the slot is somewhere 30-35 cm.
Cape pattern.
Pitch fifth.
We carry out the trim of the sections of the fastener, the bottom of the product and the rosters for the hands. You can make a kant from another material, you can use the same, and you can take the skin, the main thing is that the fabric does not grumble much.
Cut the strips of 2.5-3 cm wide. If the fabric does not grind, we put the finish first from the front side and add it to the main fabric, and then wrap it on the wrong coming side, adding again. Also we do from the bottom of the product and with slots for the hands of Cape. Send the clasp selected by us. You can fasten the cape only with the top with the help of a homemade strap, button, chain - what you like more. You can use velcro, separating them in advance. Choose the option you like!
And so remained the last touch. Collar! Step six.
You can replace the Cape Collar with a hood, just need it and use the collar-clamp.
Consider the same collar option.
Cut the two parts with a length of equal length of the neck, with a height of 10-15 cm. We fold them with the front sides, we make the edges of the planet, and may be acute, stitching, leaving a staircase one long side of the collar. Let's turn out. Apply to the neck - stitch.
Congratulations!!! Now you know how to sew Cape, building it directly on the fabric!
A source