
I looked at this plate for a long time. Hands screamed, but still did not reach. The reason appeared - I wanted to make a pleasant person, I immediately found time, immediately ended the spring splin. And there made two plates at once. When I made the first and placed it here in my blog, I began to pour it with glassy glue and it seemed that I had spoiled - I didn't lie so much. I began to fix this master class in parallel, and the first plate "recovered" ... and the second turned out.
(Author of the very idea of such use of Elena Bendasov's napkins.)
So, as I did a plate:
Need to work
1) Dish (plate)
2) Response drawing on the printer
3) rice paper
4) Acrylic primer
5) PVA glue
6) acrylic paints
7) Composition "Maimery" No. 742 for cracker
Getting to work:
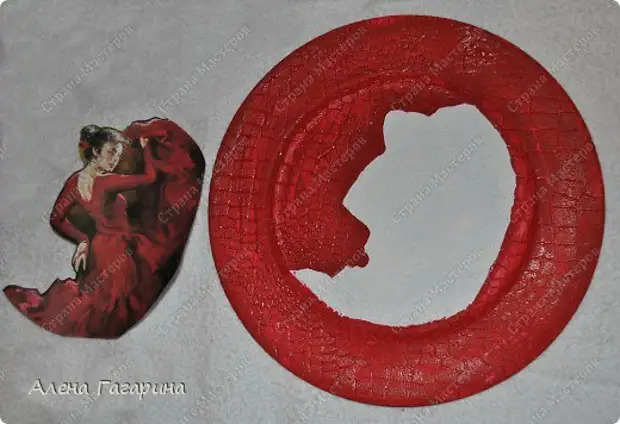
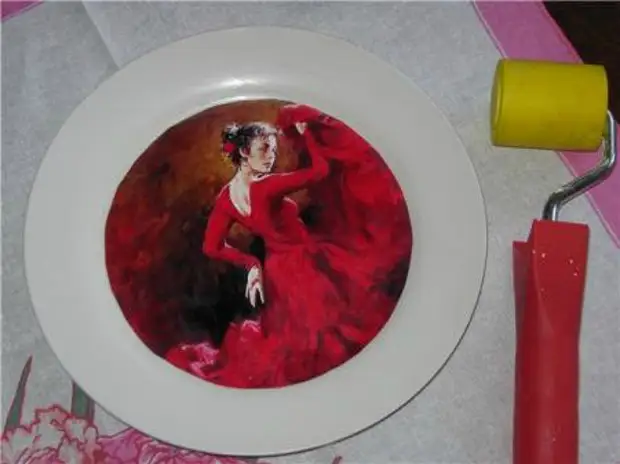
Take the plate of the desired diameter.
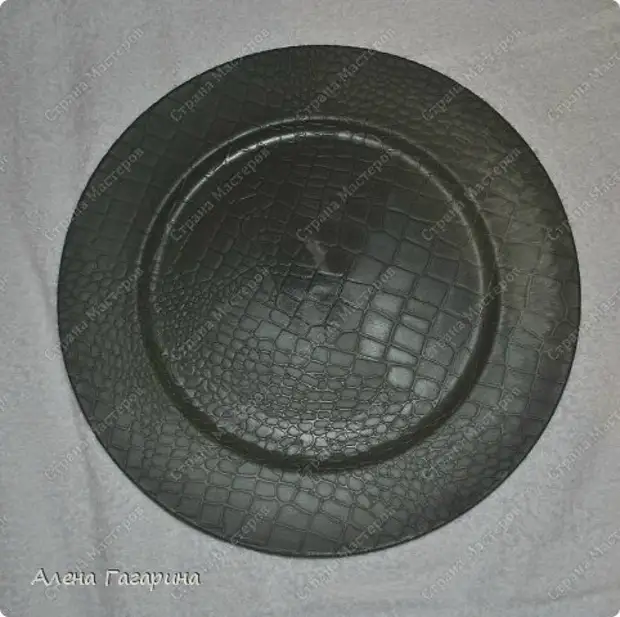
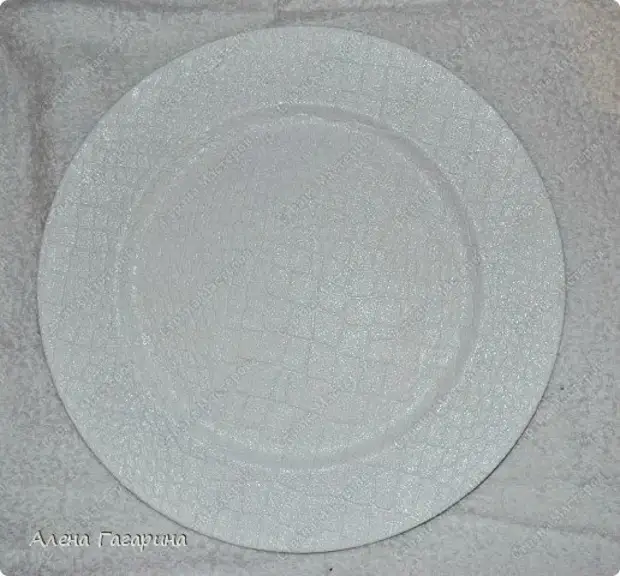
3. Greate it. I am so stupid any product necessarily. For the first time I put the soil with a brush. The second is overlooking the sponge.
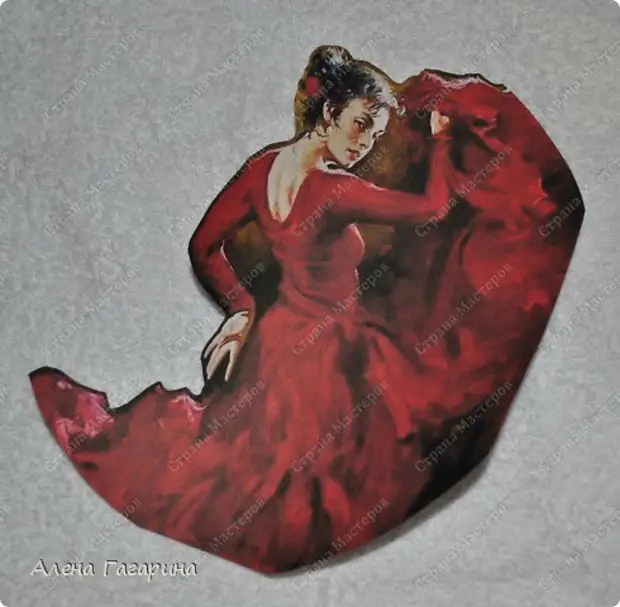
4. Break printout. Cut the silhouette you need.
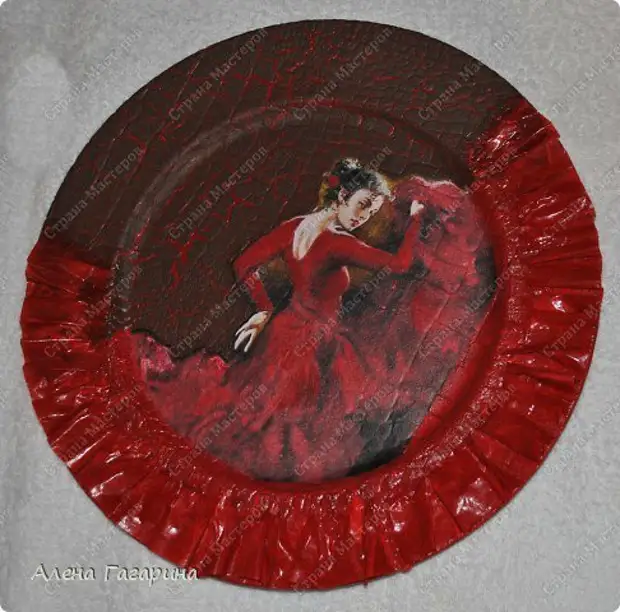
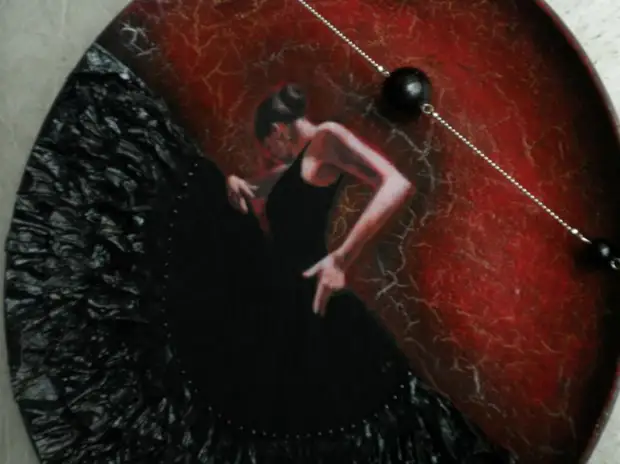
The printout is found very easy. Open Yandex.ru, in the search bar, write "Flamenko's dancer", press the "Search" button, then open the section "Pictures" and choose from 24 thousand proposed that motive that you will like most.
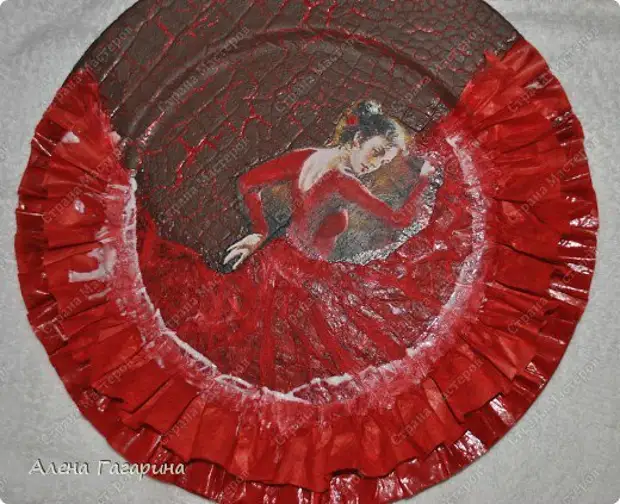
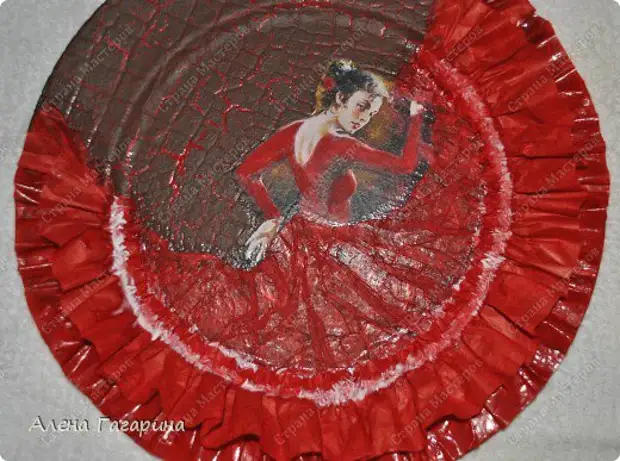
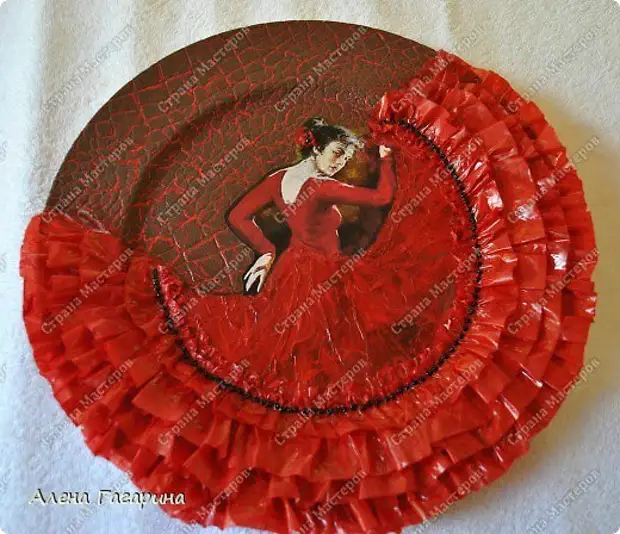
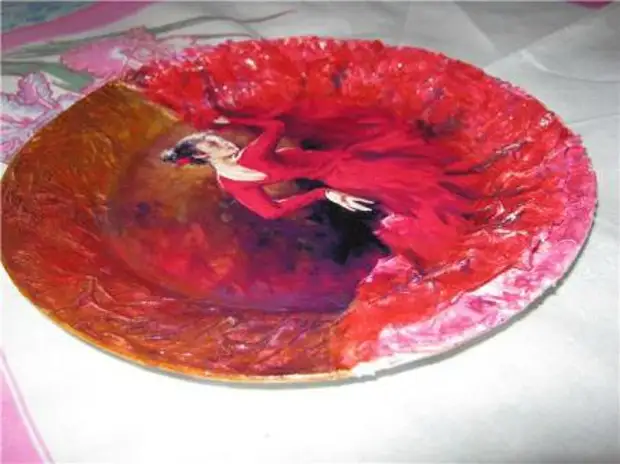
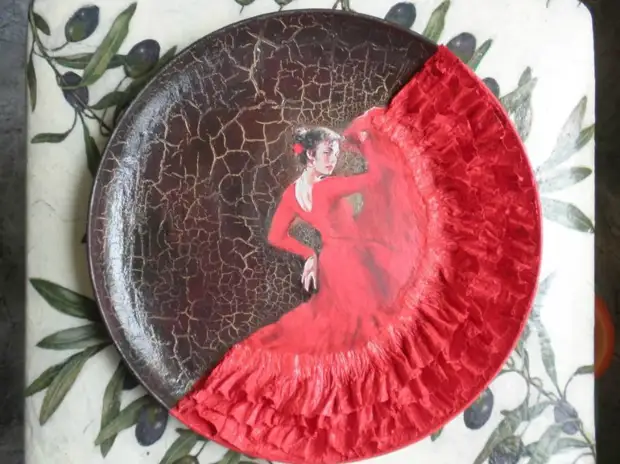
5. I took as a scrapelor of scarlet color. When it is on a plate, and the place where you are to glue the printout to leave white - for the brightness of the printout. The glued on the white background it will be brighter than on red.
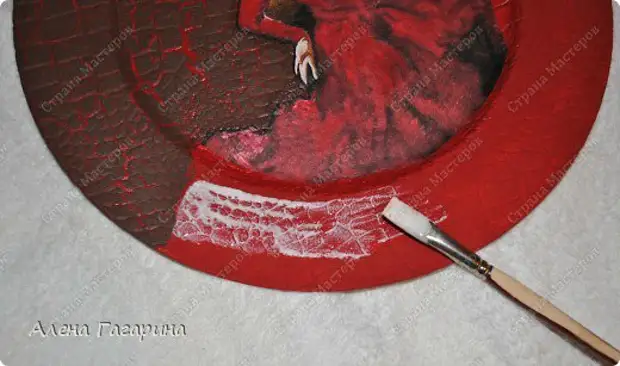
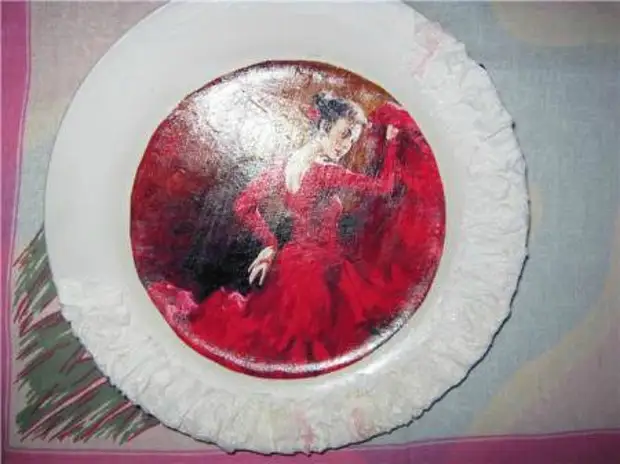
6.Stave the IDEA series "Maimery" No. 742 for collaborates are applied on top of acrylic paint. And leave for 30 to 40 minutes.
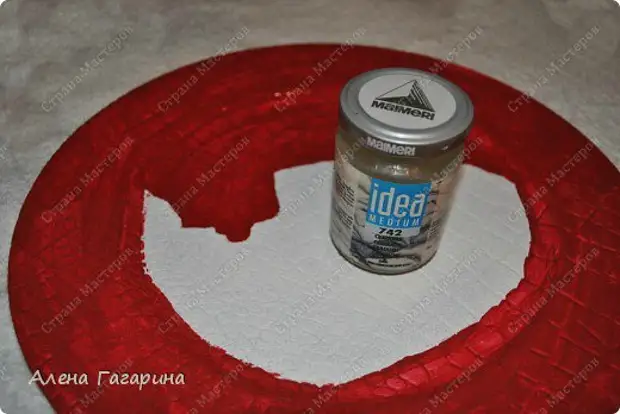
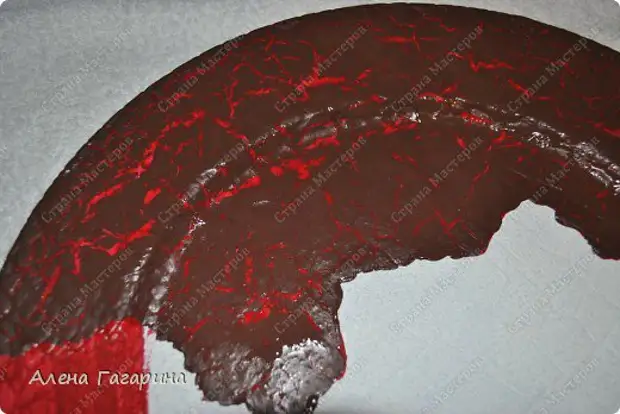
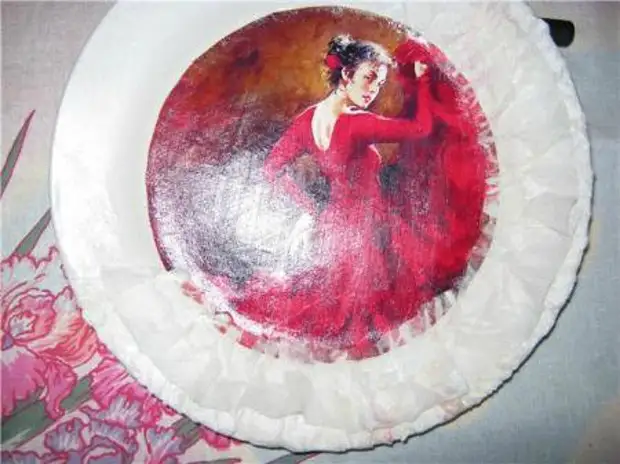
7. For 30-40 minutes, we apply on top of the "Maimery" with a third layer of acrylic paint chocolate color. Cracks begin to appear almost immediately.
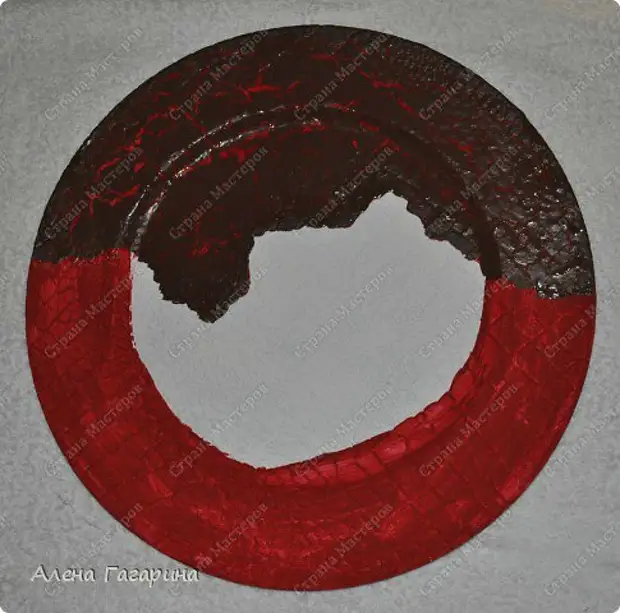
8.What does it look like that. The "call" cracker will be not only 30-40 minutes, but also a day after applying the upper layer. I usually do it in the evening so that in the morning continue to do work already on the float layer.
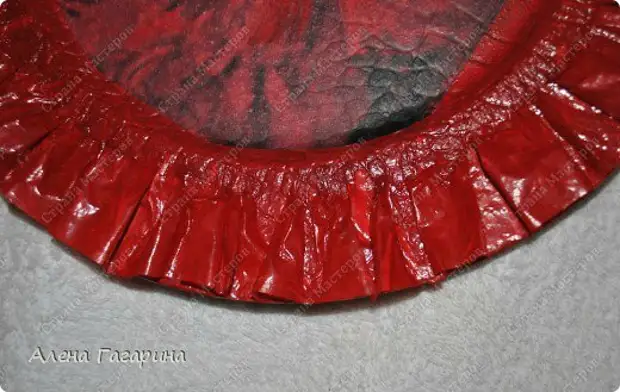
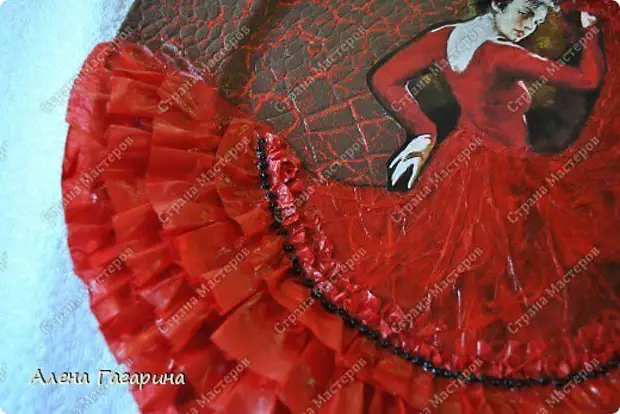
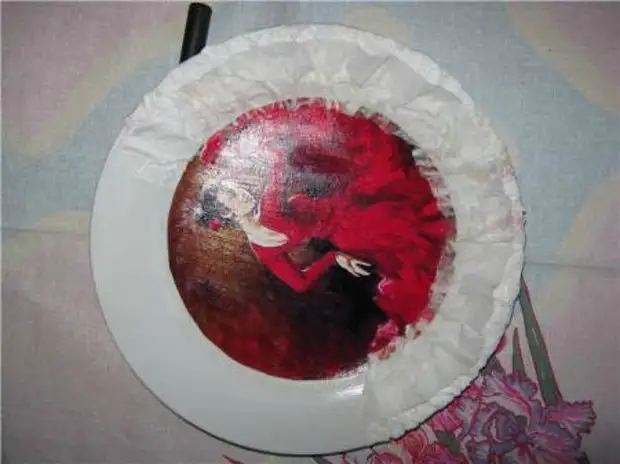
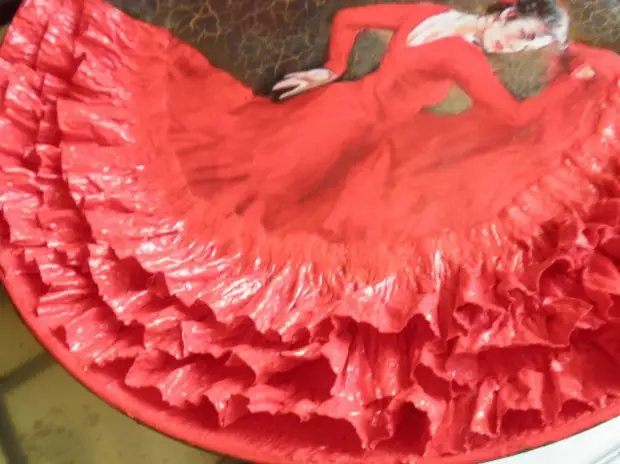
9. Now take rice paper and cut it on strips. The width of the strip depends on the diameter of your plate, and on the number of ruffles that you want to see at your work.
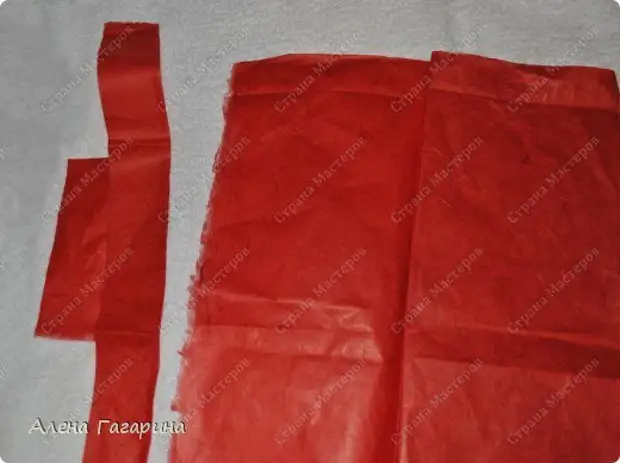
10. Gather "Letting". We collect in folds on the one hand.
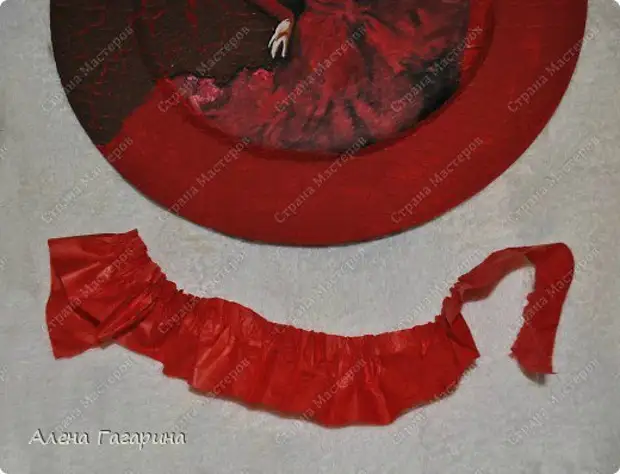
11. Apolution of the PVA place where we will stick to the rim.
12.Realous ruffles.
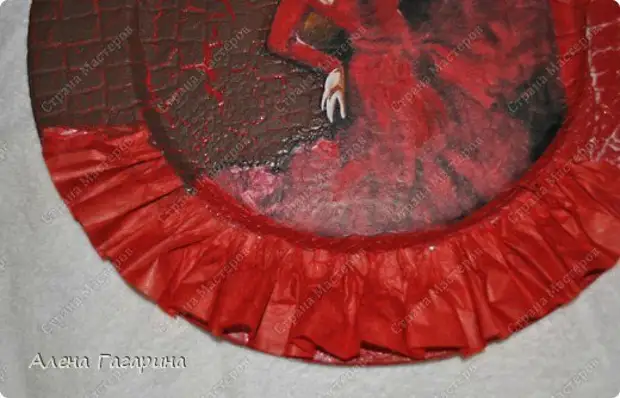
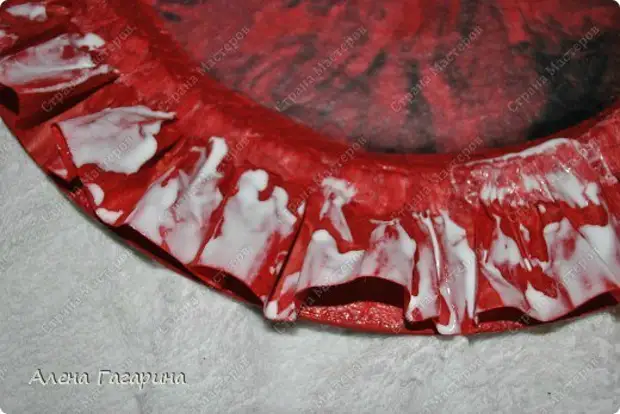
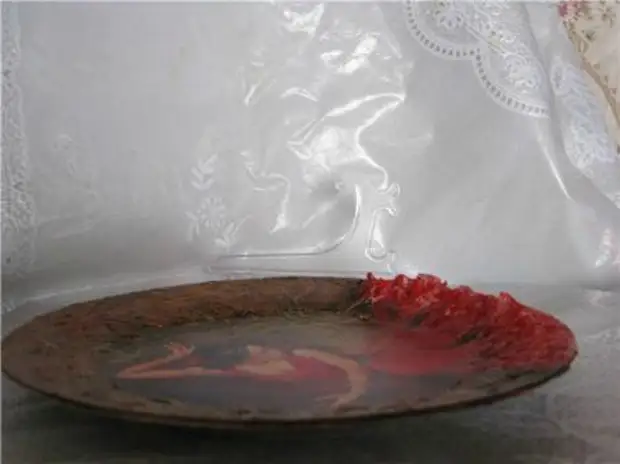
13.After how the rolling was glued ... I welt it the edge, "retreating" the joint. The transition from the plate to paper becomes invisible.
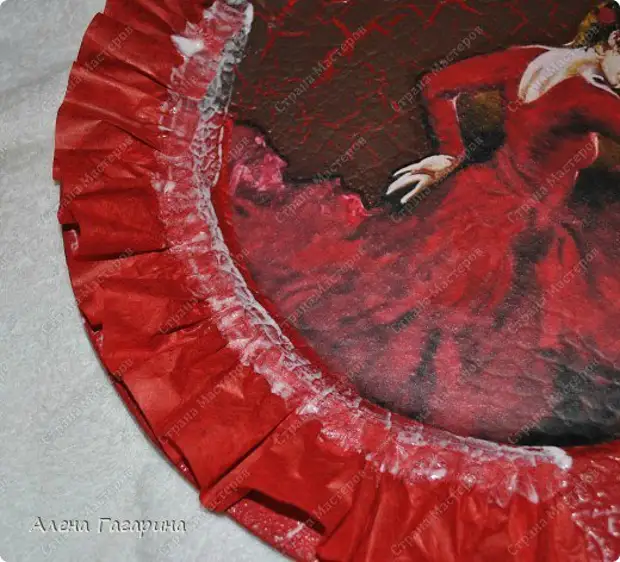
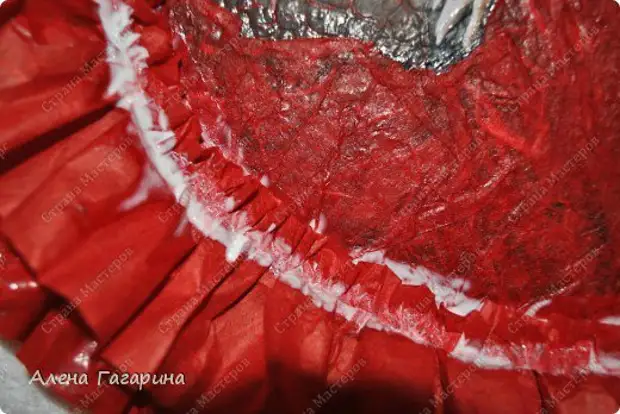
14. Now we apply a PVA on paper folds. PVA do not regret. Thus, we are "primer" folds, make them hard.
15. Drew from above - Dali dry PVA. And until complete drying (will be transparent). Then, when the top layer of ruffles is dry) the bottom (on both sides) dry. And again we are waiting for a completely dry.
16. Now, when the paper has become tough, I'm missing and outside and inside the ruffle, I do not regret PVA and I'm waiting again until it dry. Only after that, I begin to glue the second ruffle.
17. That's how it looks like a dust having to
18.This closer.
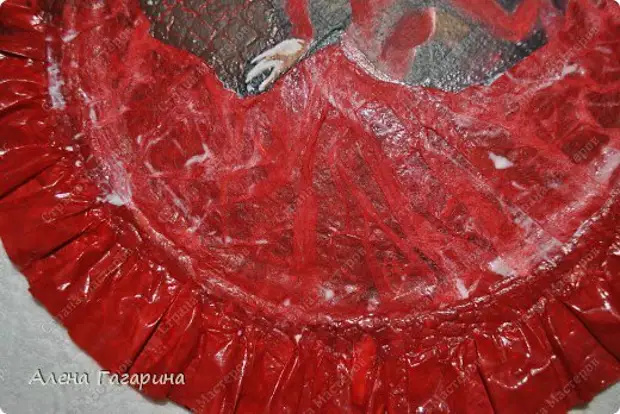
19. Having cut the skirt ... We drape, glit.
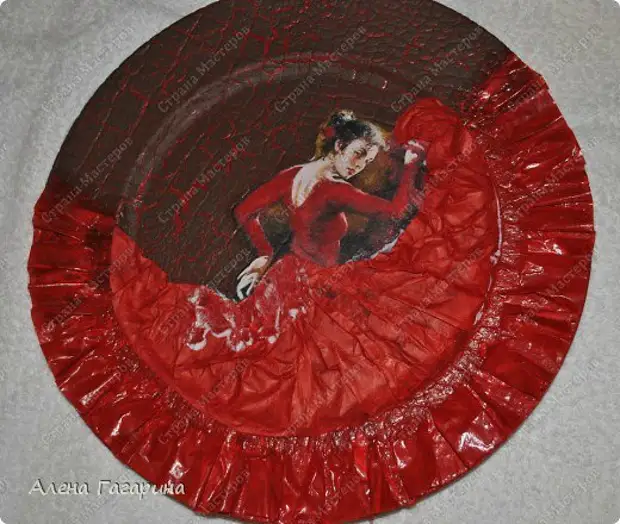
20. Moving completely.
21. In the same order, we glue the second ruffle. The procedure is the same, so I miss the details. On this photo we prepare the edge to the counter little rolver.
22. Exercise the counterclock.
23. Moderate the junction. So that not a single fold, not a single jar ... with rice paper it is easy to achieve this.
24.To in a fully missing the skirt with a layer of PVA, I do not regret it. All the same, when it dries, will not leave the trace, it will become transparent.
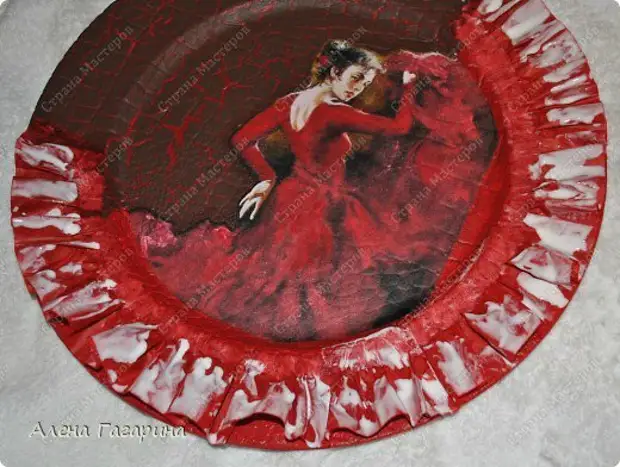
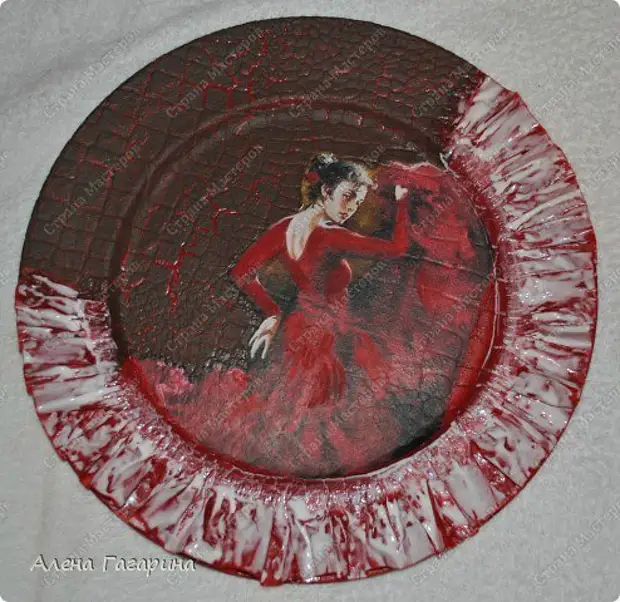
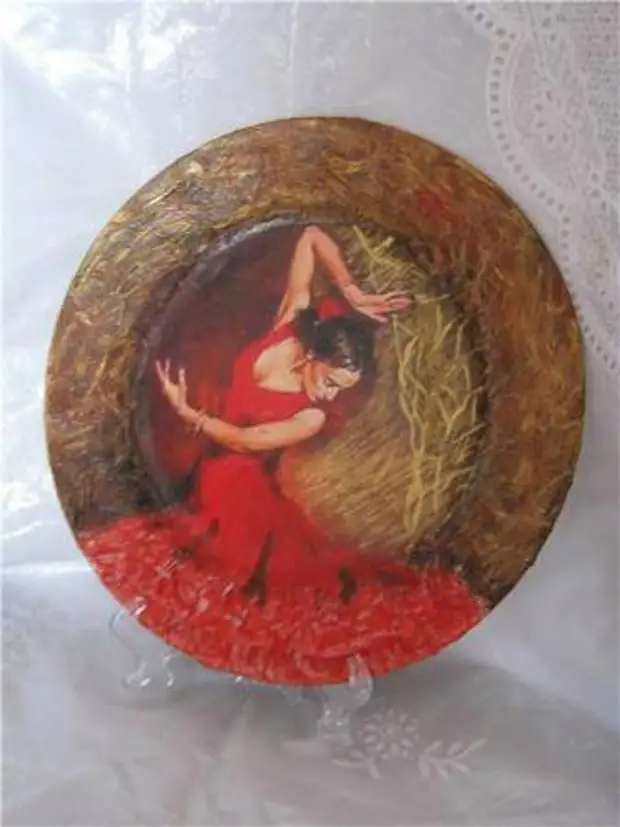
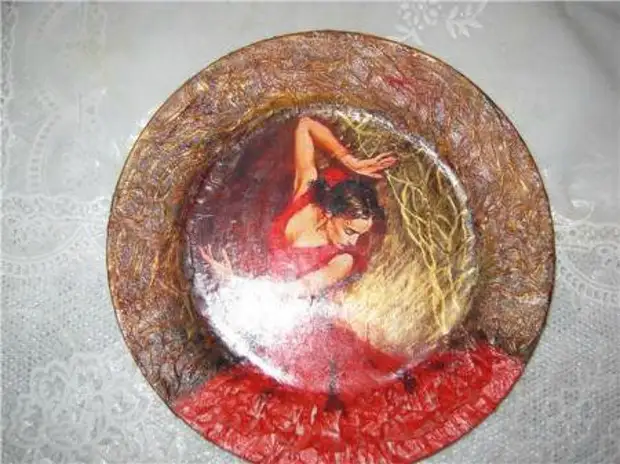
25. Work dried, draw there where it is necessary to shadows, we increase and make a rich color in the right places. After all, cover the work of varnish.
26.
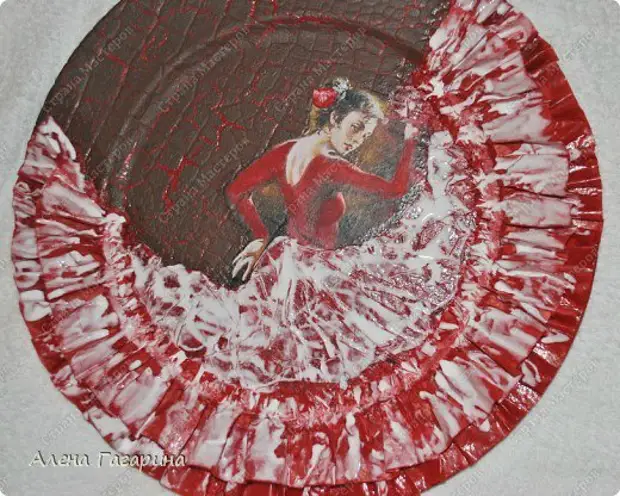
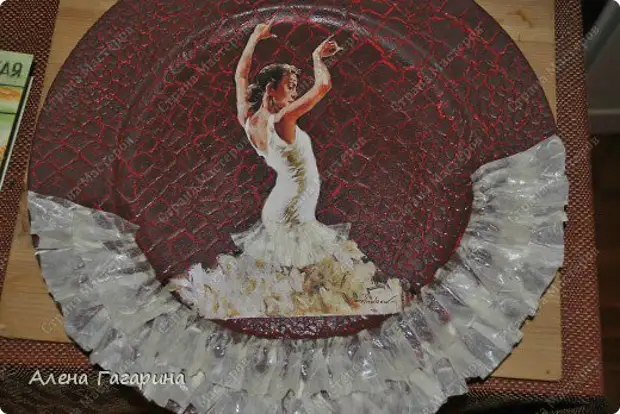
27. Invassed a plate with a white dress.
Like this. I wish good luck, if you decide to make yourself a similar plate))
Incarnation from Lyudmila Mironova (Adulika)
The author of the idea with such use of napkins - Elena Bendasova - Eleeenka (artist from Peter). True, I changed the embodiment. She has one "web", and I did 2. This is a skirt, and 2e is the lower skirt ...
1) made a printout on the inkjet printer. I gave dry an hour 2. sprinkled with a lacquer for hair "shine." Dried out. 1 more layer dried.
2) covered 2 layers with a drying printing with acrylic varnish. Dried out. The plate was pre-missed undiluted PVA - dried. Printed a printout to a plate.
3) began working with a white layer of napkins. "Made" the lower skirt, tried to lay out Faldami. Dried out.
4) made a continuation of the dresses skirt. Making many folds so that they climbed over the lower skirt. So that they do not fall, I covered them with a hair varnish. Gave dried.
5) Stick a white layer along the remaining surface of the side of the plate, but without excessive folds. PVA missed, after drying. Dried out.
6) It remains the most difficult - to connect the entire composition color. Made the background - brown.
7) picked up the color paint for the skirt - painted. For the bottom skirt decided to make a background of lighter dresses.

Allocated lilac inclusions and continued them on the napkin. But extended them to the printout, because Colors did not very coincide. I painted the remaining place in color, close printing.
8) varnish. And it turned out to be difficult to do, because Falda and folding opal. And they had to "return" to the place raising up ...
Well, this beauty in the "profile".
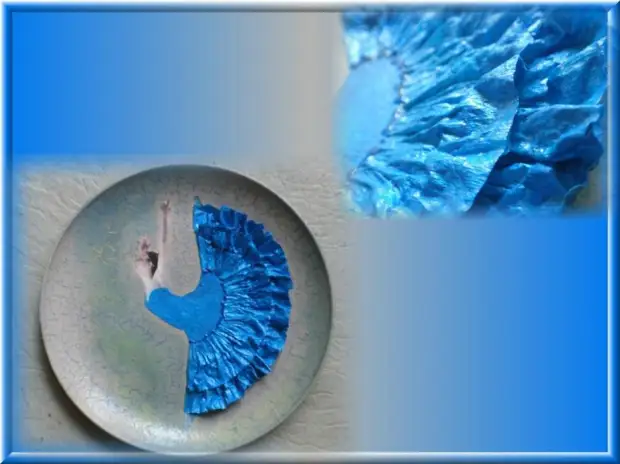
It can be seen that folds are raised above the plate. It went 4 times with acrylic varnish. The second dancer did also, but changed the background and expanded the dress in a width on the printout, so that there were more folds ... well, that's all. You can try. But do not be afraid and everything will turn out! Dare !!!
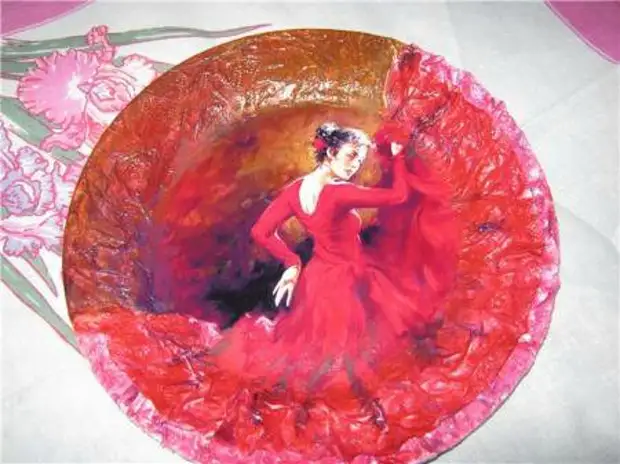
Embodiment from Lyudmila Beak
On half a year ago, I was inspired by the master class Lyudmila Mironova (Adulika).
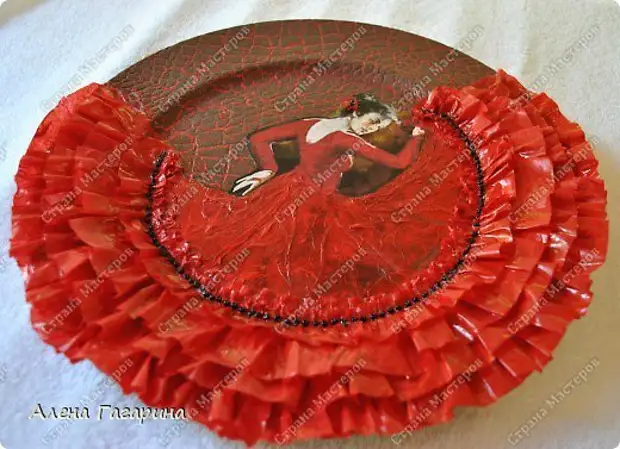
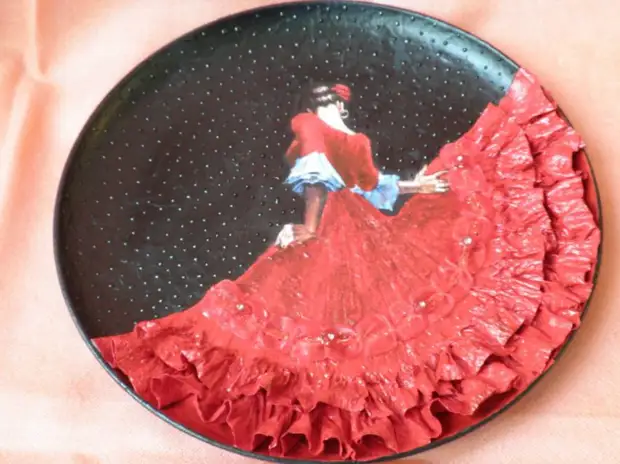
Made during this time the plates six. I used different pictures (there is a photo of a plate on a ballet theme), and it came to the conclusion that it is the most despicable flamenco and it is red.
I did not make the bottom skirt, like Lyudmila, and immediately Kleila Volani - two or three. After sticking on PVA (and after drying, of course), I splash the volans with a varnish for hair twice.
After that, I immediately begin to cry around the volanesses - first from below, inside, raising the wave up, I pass the entire first floor. After that, I begin to cry around it already from above, capturing at the same time the bottom of the top volana.
It does not fall out (as Lyudmila writes). It may have used thin napkins, and I make a double-layer toilet paper. Probably the difference in this?
After drying, the paint looks from different sides to the plate, I paint the "cutters" - they often remain. And cover everything with varnish in three layers. In this case, the lacquer is ideal, which I used only on one plate. In other cases, missed everything with a brush.
A source