
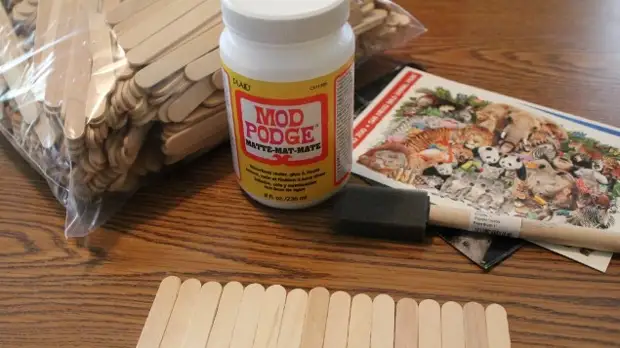
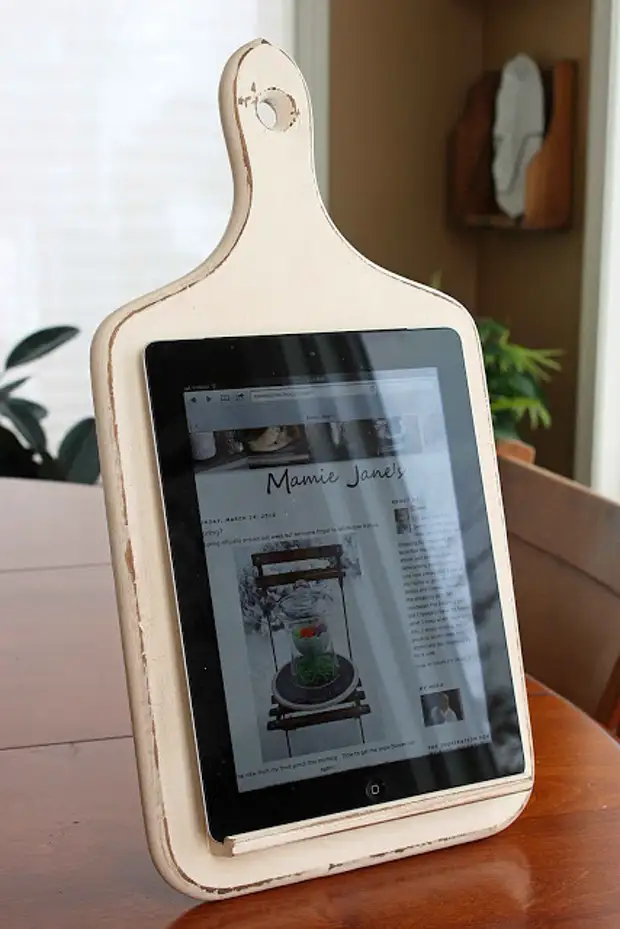
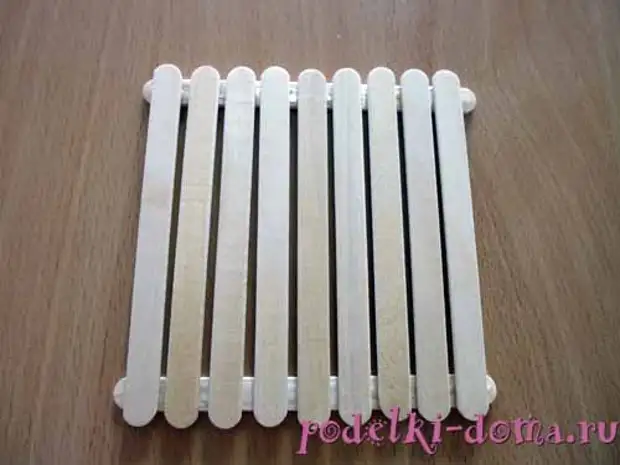
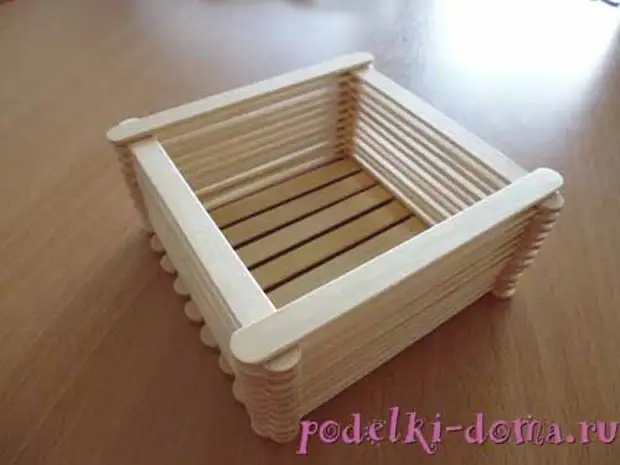
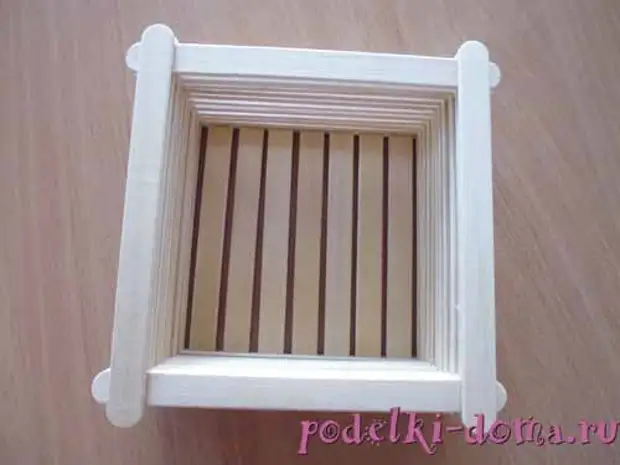
Tablet holder.
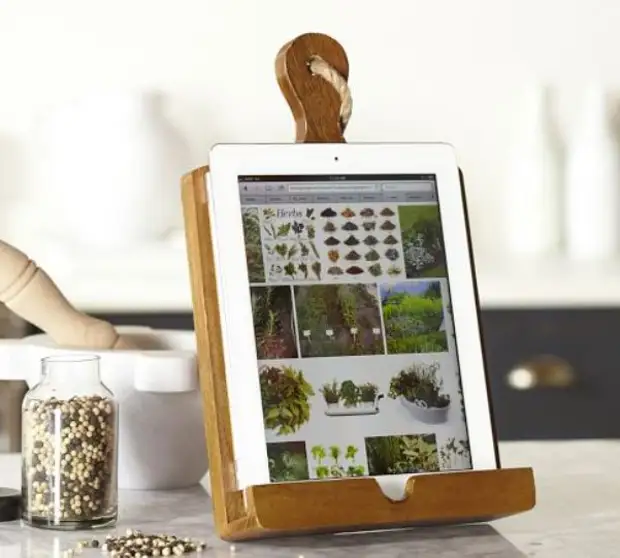
If you have old cutting boards, you should not throw them immediately, as you can make a comfortable stand for the tablet.
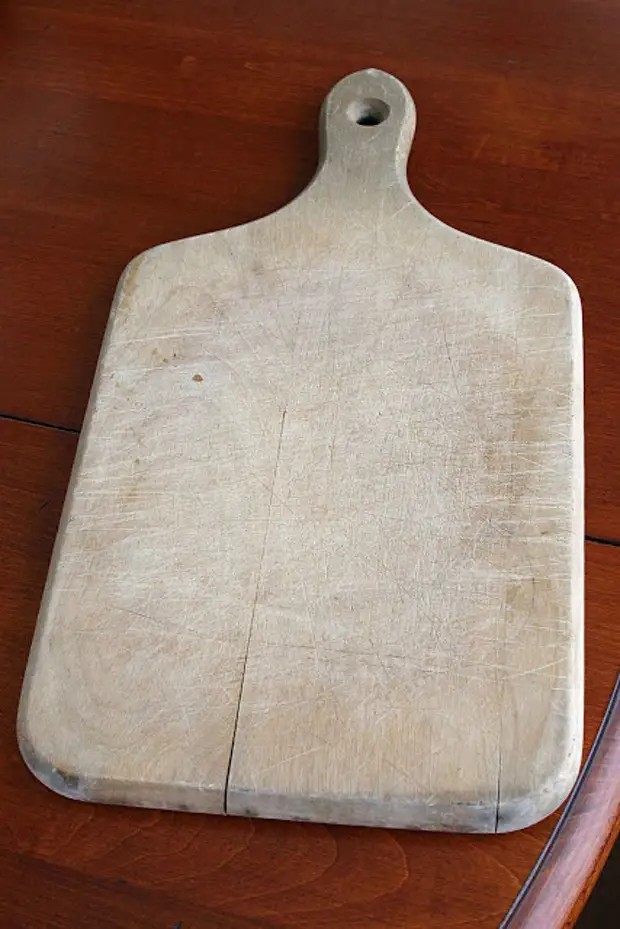
In this example, wooden details from the children's designer were also used.
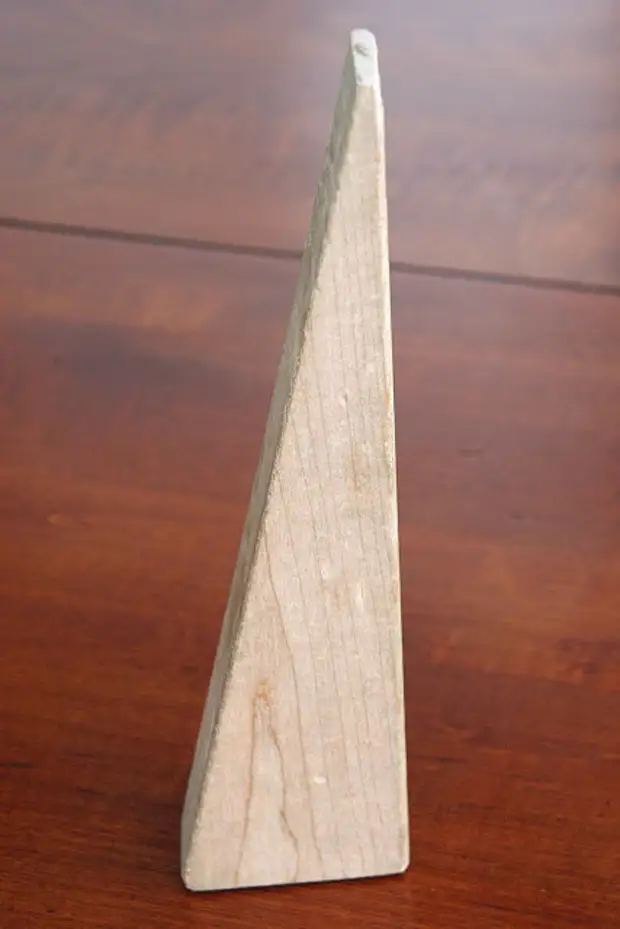
Use your imagination to make a similar craft, and it will be very comfortable for you at home.
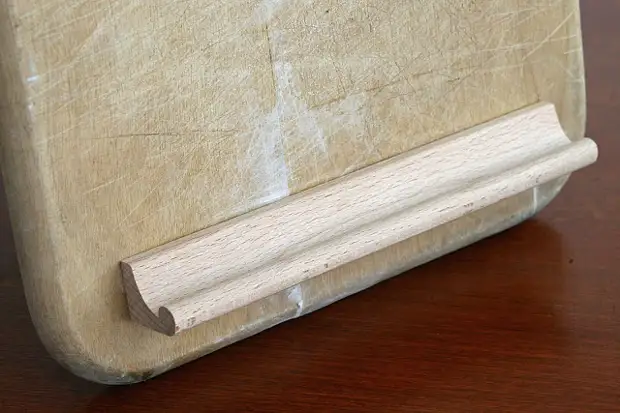
To attach the boards, you can use superclauses.
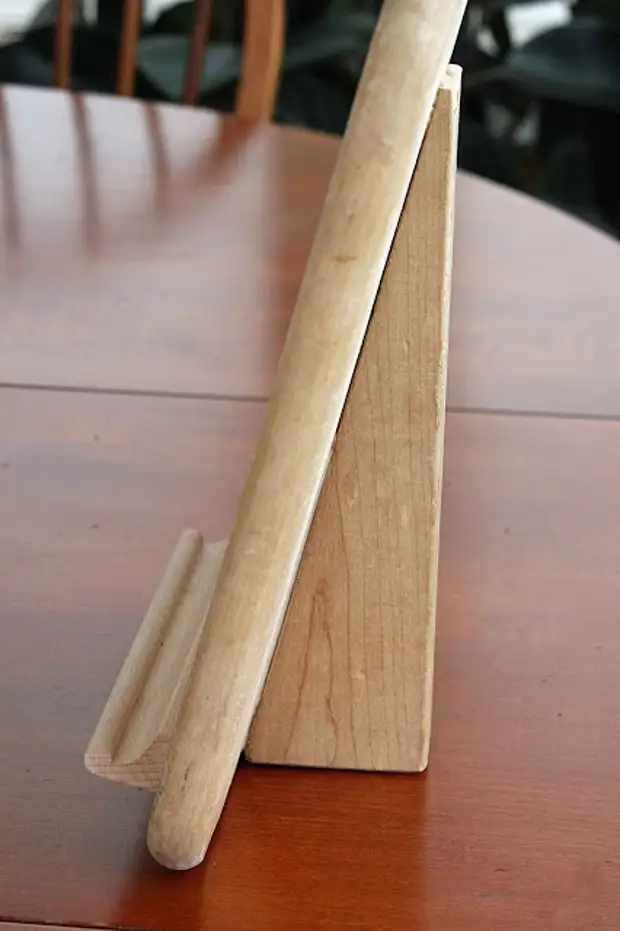

You can also paint your product.
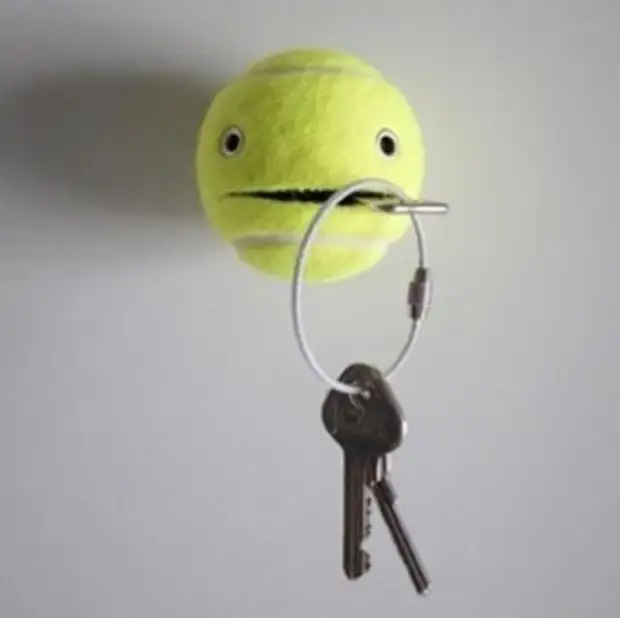
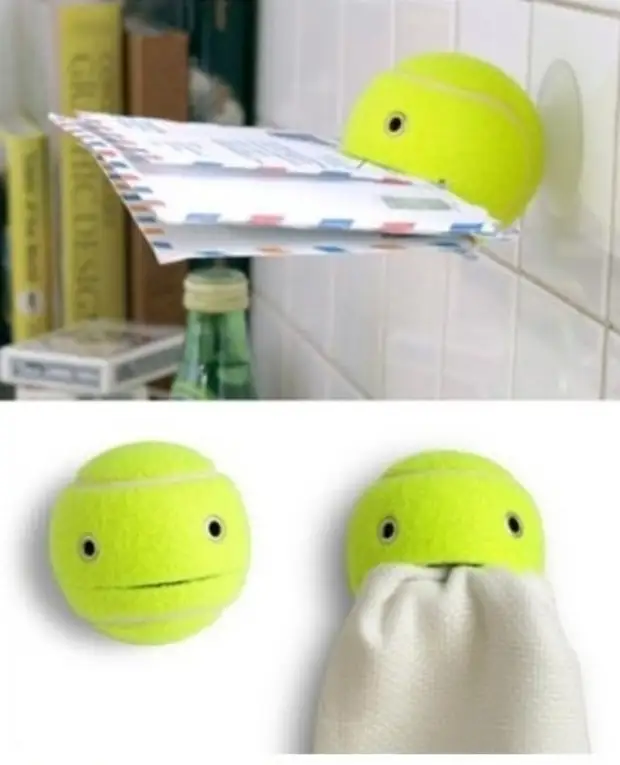
Crafts from old things. Old tennis ball.
Crafts from candy. Butterfly.
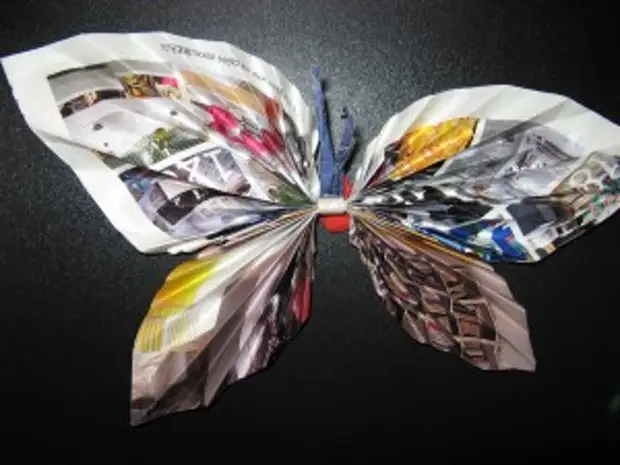
To make a butterfly you will need 2 candy candy.
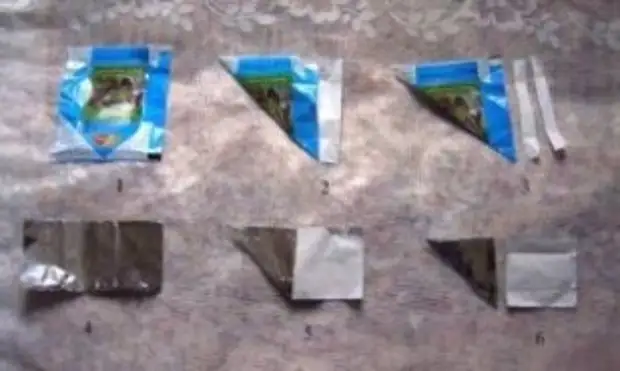

one. First you need to bend the phaliki (see pictures 2 and 5)
2. Scissors cut down too much, thereby making two smooth squares (see pictures 3 and 6), with one square you should have more than the second.
3. Now the squares need to bend the harmonica, starting from the middle.
four. Fold both squares together and put the strip on top of them, which you should stay after you cut a fantasty.
five. Tie squares in the middle with a thread.
6. It remains to straighten the butterfly wings.
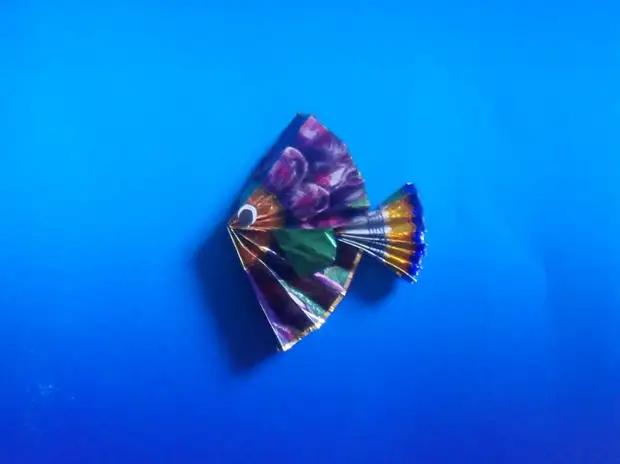
Crafts from candy candy. Fish from candy.
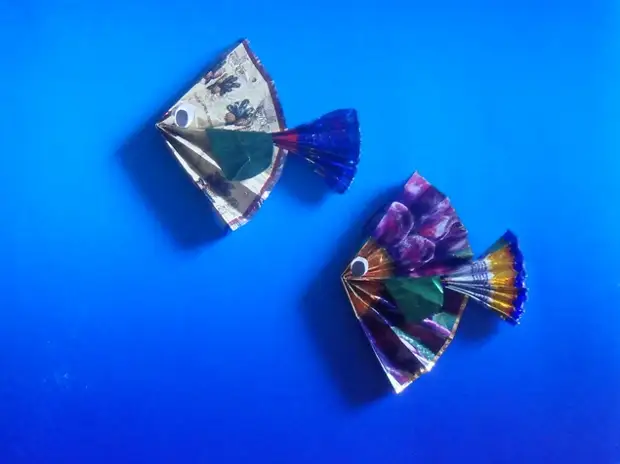
Like the previous handicraft, this work can be done, naturally with an adult.
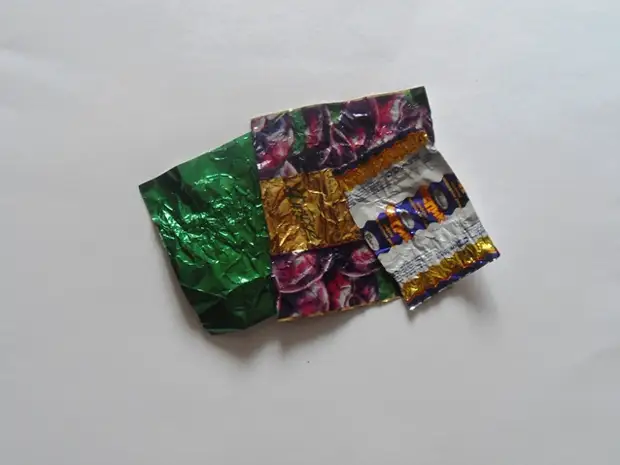
You will need 3 filhes from chocolates of different sizes.
one. For the manufacture of the body and the tail of the fish, you need to prepare 2 filhes (one large size, and the other small). These candeks need to be folded by the accordion and then in half.
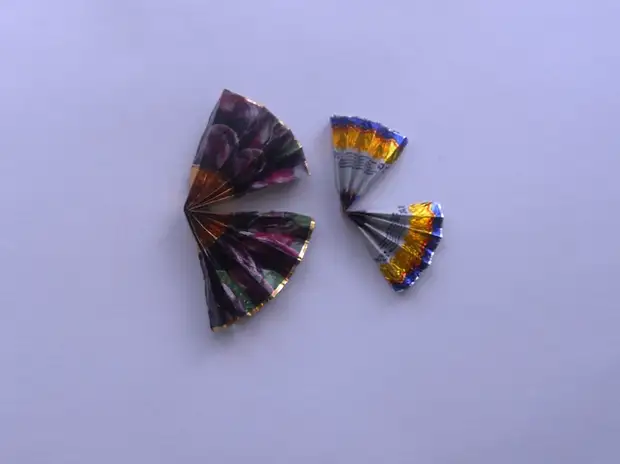
2. Slit both harmonica from the candy in the middle.

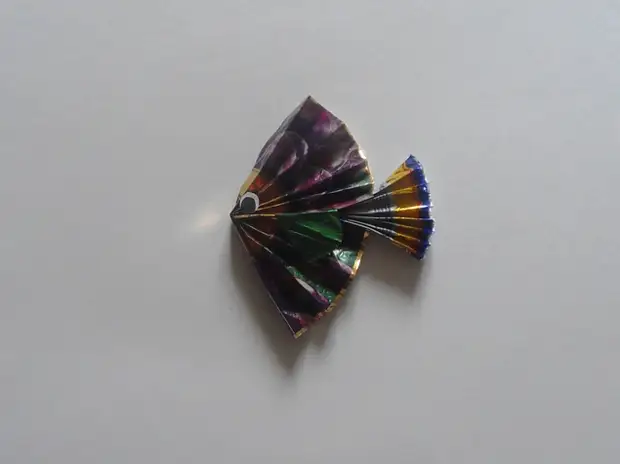
3. Use the glue to glue the tail of the fish to the body.
four. Stick eyes and fin
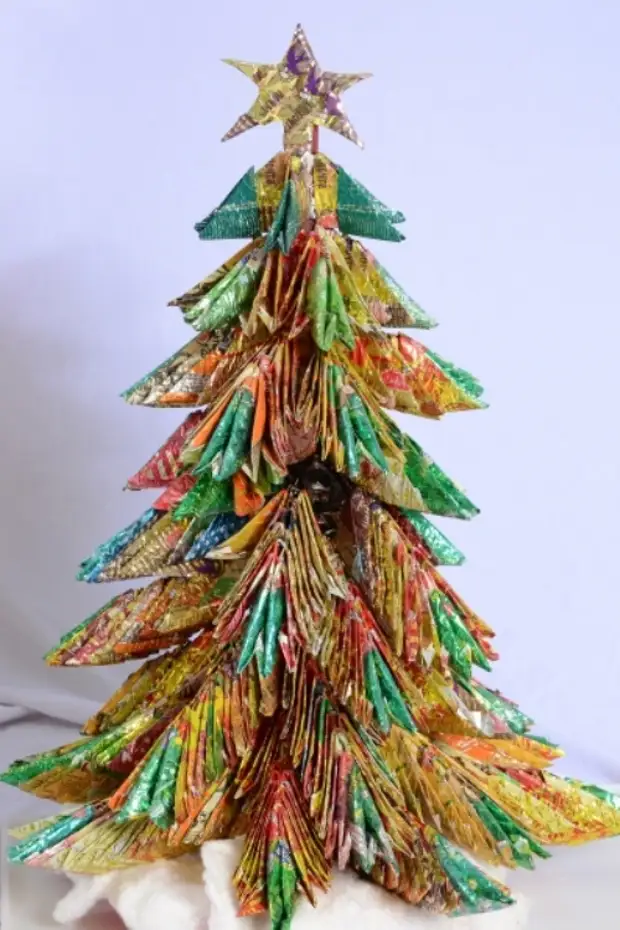
And from the candy you can make a Christmas tree.
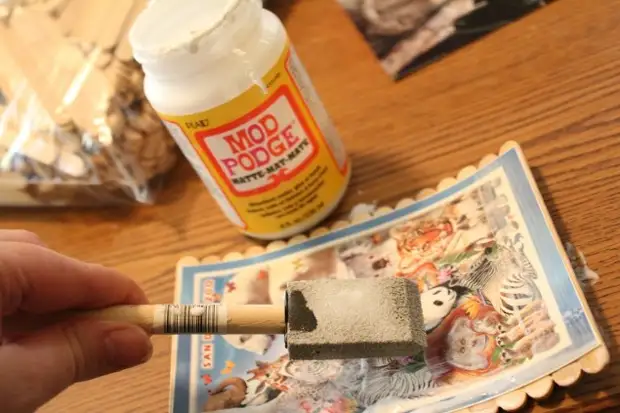
What to do from a girlfriend. Photo puzzle.
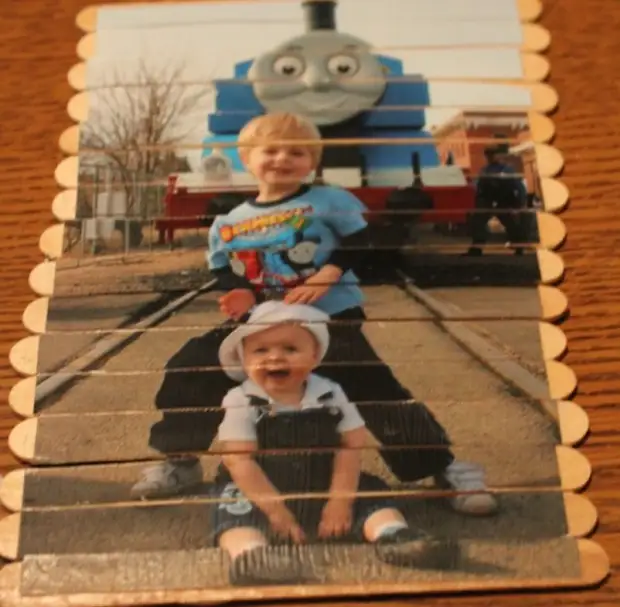
You will need:
- Sticks from Eskimo (or Wooden medical sticks that can be found in the pharmacy)
- White glue
- Scotch
- stationery knife
- the photo

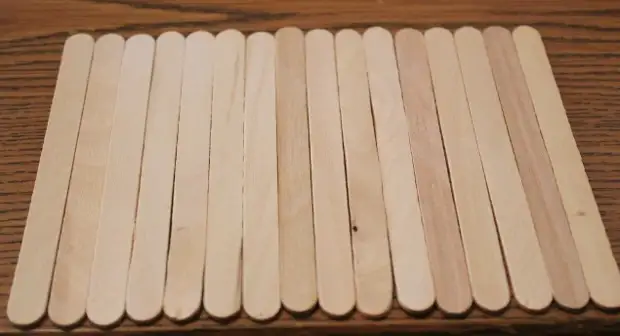
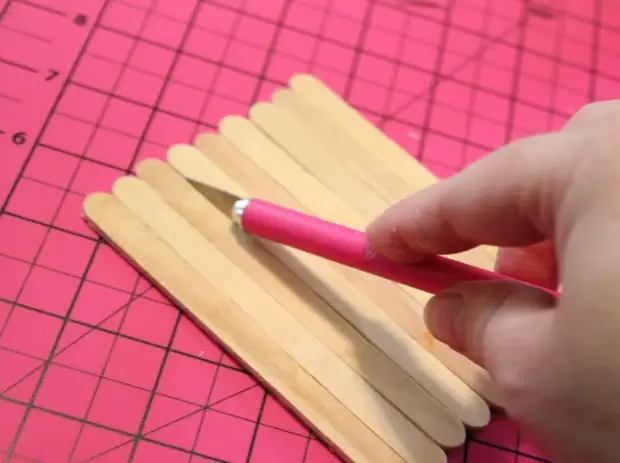
one. Put a few sticks with each other and compare them in height.
2. Using the scotch glue the sticks from above and below.
3. Prepare a photo, wake all its glue and smoothly stick it on the opposite direction of the sticks (where there is no scotch).
In this example, special glue is used, which can be applied to the image to give it a gloss.
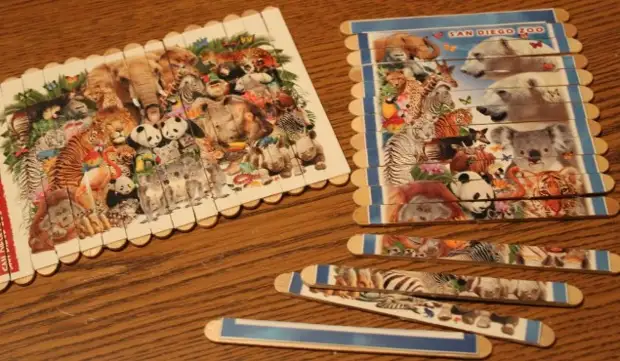
four. Put the workpiece under the press until the glue is dry.
five. Remove the scotch.
6. Now you need to separate the sticks. To do this, use a sharp stationery knife and another wand that you need to put on top.
Puzzle ready!


Beautiful designer project of an unusual lamp, which forces to each lover of homemade. The main thing is that we need - a lot of wooden sticks.

Step 1: Required
- Wooden sticks 7 cm long and 5 mm diameter (130 pcs.).
- Thermocles and ordinary wood glue.
- Cardboard.
- Pencil.
- X-ACTO knife.
- Ready lamp assembled (or assembly set) and rack for it.


Step 2: Squares
Here you need to show great patience. We have to glue the wooden squares, which are shown in the photo, in the amount of 31 pcs.


Step 3: Cardboard
Cut the square from the cardboard and we do a hole for the lamp in it.


Step 4: Base
We glue 3 squares together, and we glue the cardboard on top.


Step 5: Lamp
We glue one more 3 squares and attach them to the previous one at an angle of 45 °. We continue to glue until it turns out the same figure as in Fig. four.


Step 6: Completion
Insert the collected lamp inside.
Decorative lamp-skyscraper is ready.
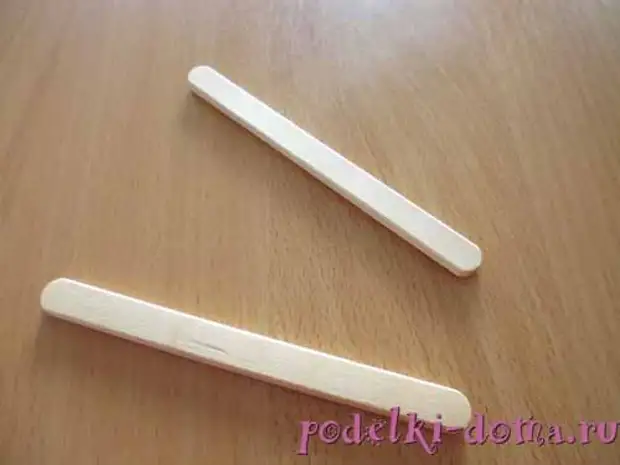
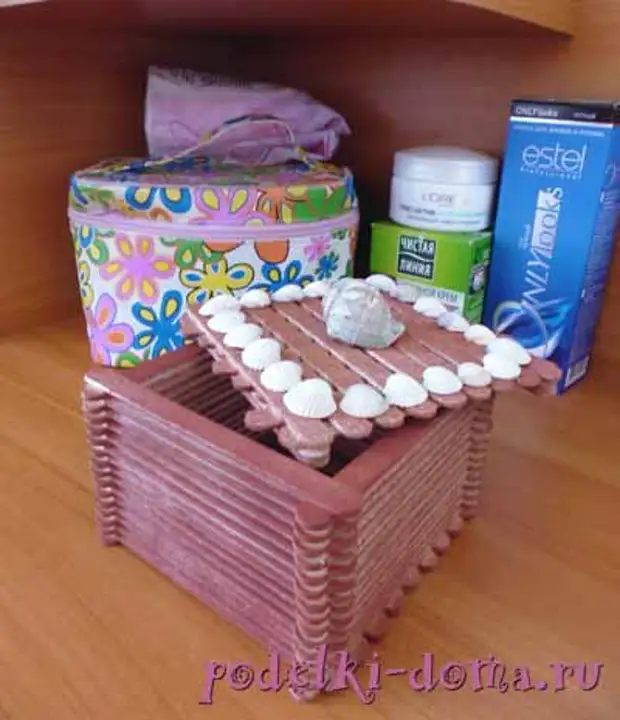
"Sticks from ice cream - original material for creativity. By the way, it is an environmentally friendly material! Work with such a material is a pleasure! Yes, and gifts, in my opinion, it turns out nothing!
In the box of sticks from ice cream, you can store, for example, decorations, hairpins and gum for hair, threads.
We need:
- Wooden sticks from under ice cream (70 pieces);
- glue "Titan";
- shells;
- Paint aerosol.
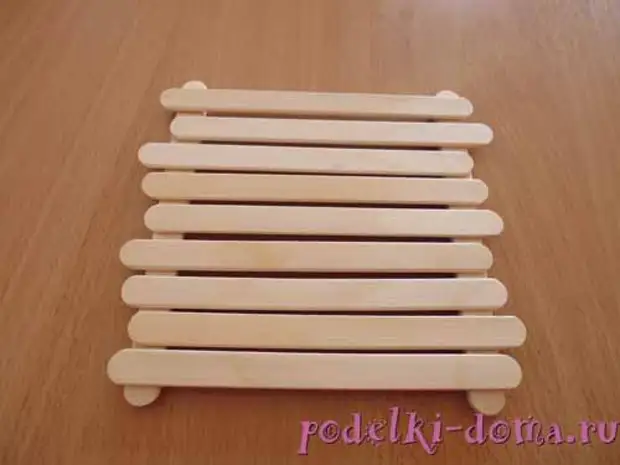
First, we will make the bottom in the box - we put two sticks horizontally parallel to each other and will be on them, withsting the distance between the sticks of 2 mm, stick sticks vertically.
Then we glue the sticks only on the sides (2 on each side).
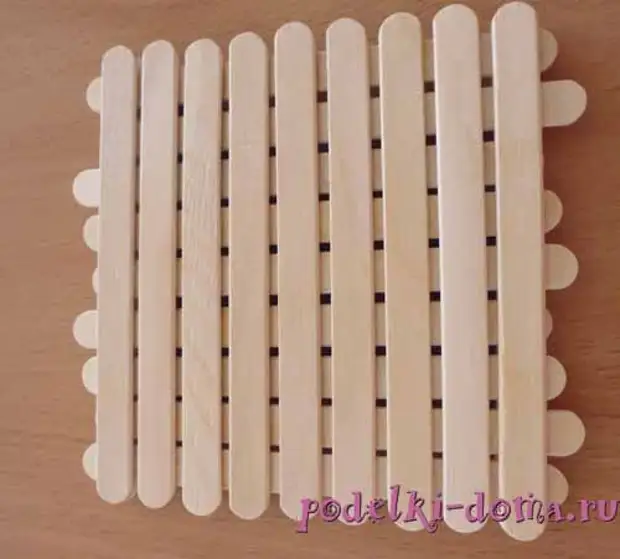
Start making the lid. Take 4 sticks and glue them 2.
Shop new sticks on glued sticks (from the sides, they should perform differently, where more, where smaller).
Stick the second row (vertically).
Place the cover of the shells. At the edges of small shells, glue more into one of the corners - using it you will open the box.
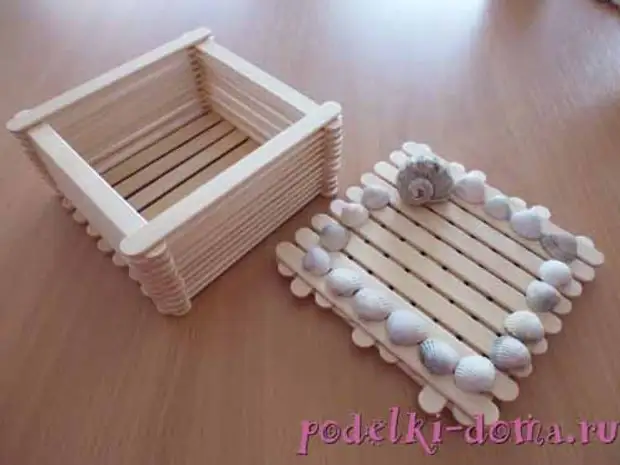
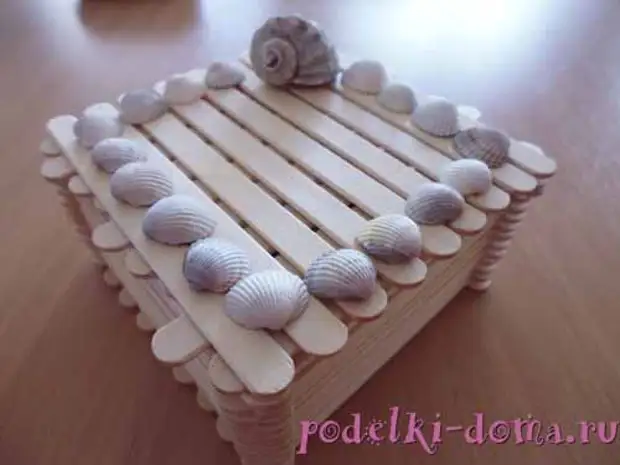
With the help of aerosol paint from the canopy, paint the casket. Subscribe her seashells. Such a casket I gave my sister on March 8.
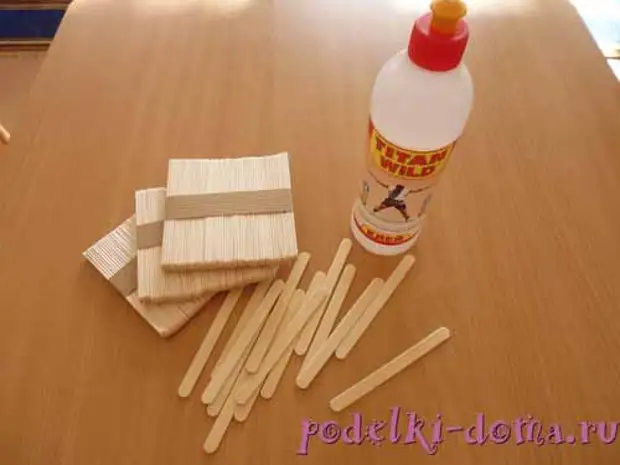
We will need:
- sticks from ice cream (130 pieces);
- a piece of fiberboard;
- glue "Titan";
- foam balls of white color;
- clay for modeling;
- machine for shaving.
- Paints.
Stages of execution:
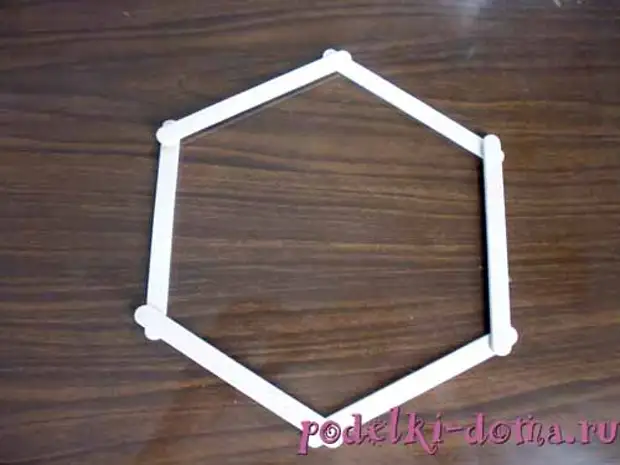
Make bottom Caskets: Take sticks and fold the hexagon, glue (photo 1).
Verify sticks on the edges, stick (photo 2).
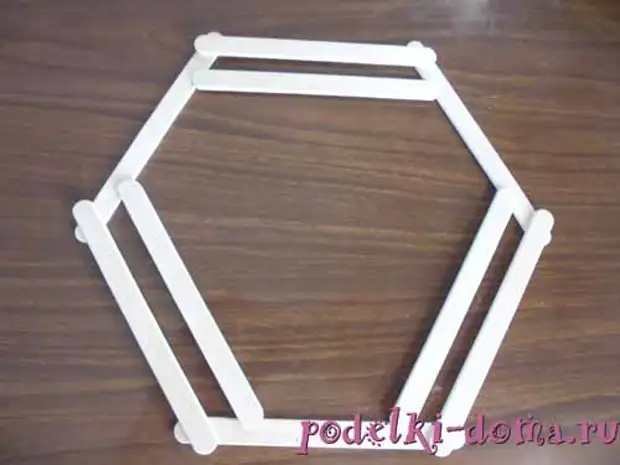
On these chopsticks, lay out a triangle, stick sticks (photo 3).
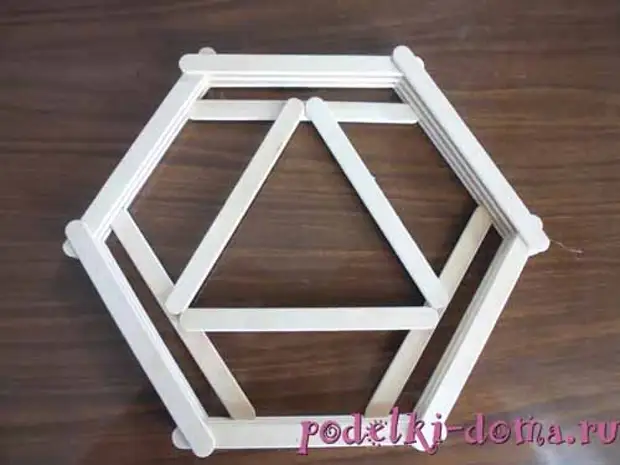
Put the carved hexagon from the fiberboard on them (stick it).
Lay out the side walls from sticks (photo 4).

Cover We first do the box in the same way as the bottom (photo 1, 2, 3).
Turn over, stir up 5 sticks from the corner of the cover (photo 5).
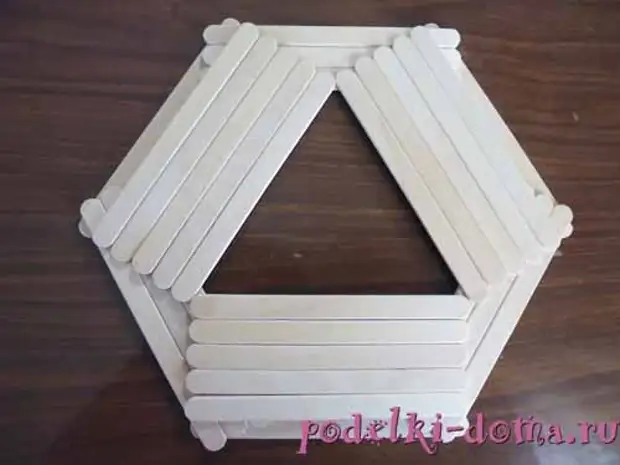
Overweight and tap the hole with chopsticks (photo 6).
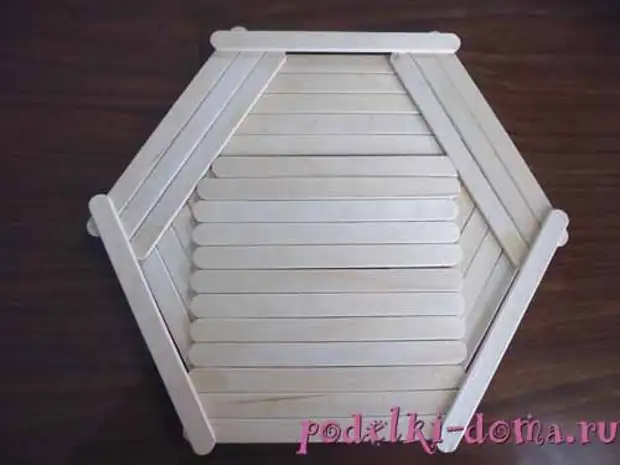
Turn over. Put 1 stick from the corner and lay out a triangle on them (photo 7).
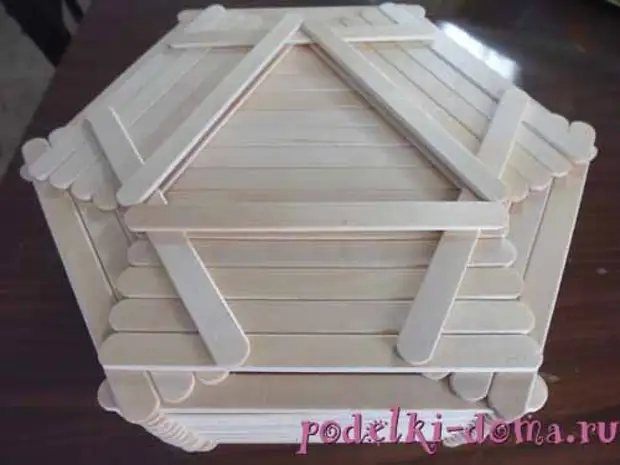
Decorate the box with foam balls - make flowers. Flow from clay petals (pattern on the petals I made a shaving machine - on it drawing as the core of the leaves). After drying the leaves, paint. Stick. (Photo 8.)
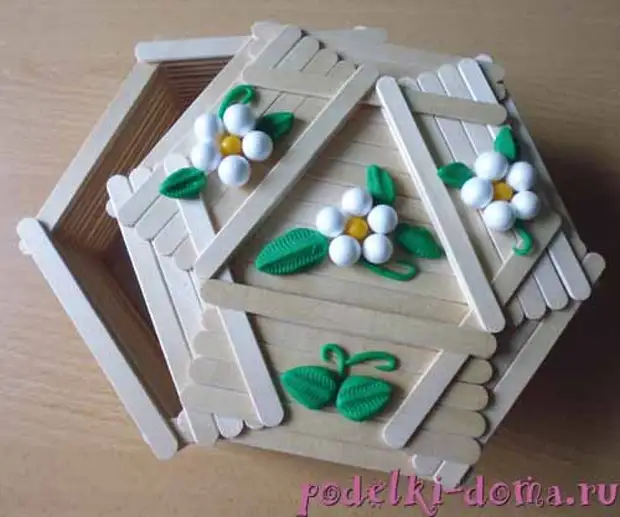
Casket can be covered with varnish or paint.
Master classroom prepared: Pivneva Olga, G. Gryazovets
A source