
At that time, when we just started meeting my husband, I lived in my apartment for 8 years, and she frankly needed alter. We decided so: a new life is a new apartment. And they decided to make repairs on their own. I hope that our experience will be useful or inspire someone to improve their living space with minimal cash. I will tell in stages, why we started, with what difficulties were faced, which stages were divided into work and how they tried to save.
Replacing windows on plastic
Start decided with the replacement of old windows on new plastic double-glazed windows. Initially, terrible wooden frames were stood - curves awakened and not preserving heat (which frankly frustrated in winter). Since the repair was raised global, changed all over again - in the room, in the kitchen and on the balcony. Of course, it was not profitable. However, in any case, cheaper than individually repairing each room, because firms tend to give big discounts on large orders. Replacing windows on plastic - the case is quite dirty and dusty (actually, this is the main reason why we started precisely from glazing).
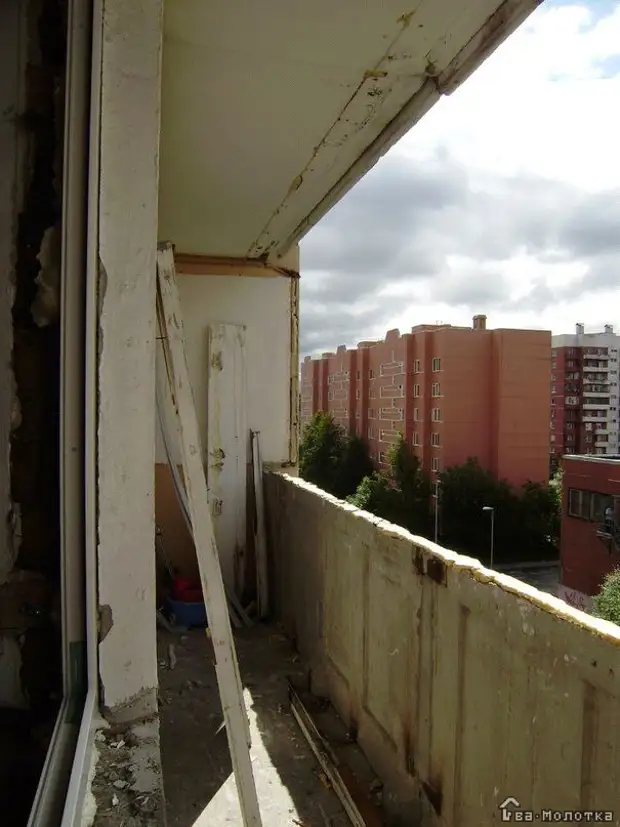
My admiration for the workers - managed with all the work in the day with a little. In the first day came at 10 am, everyone dismantled (the balcony, by the way, was too glad to be glazed), put new windows, finished at about 20 pm. The next day, one worker came and for 2 hours set off, the windowsill and all covered. In the remaining time we made cleaning and endured old windows (because I frankly fellowly pay for garbage collection).
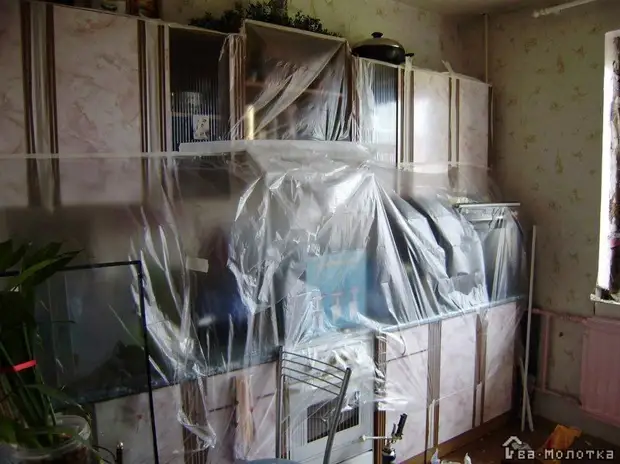
Then we took the kitchen. Photos "to", unfortunately, no. But there is a photo "During" - just in the process of replacing windows.

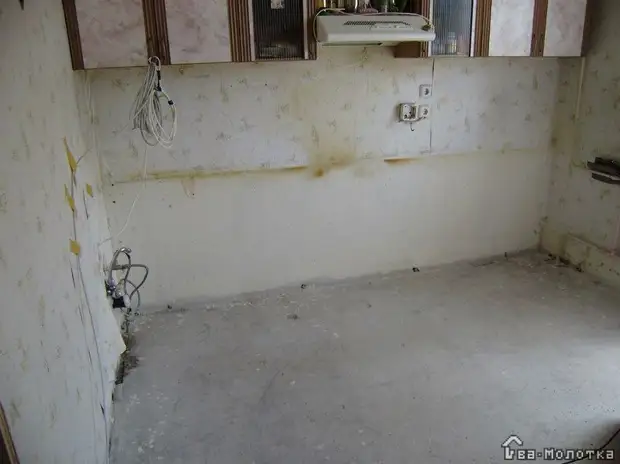
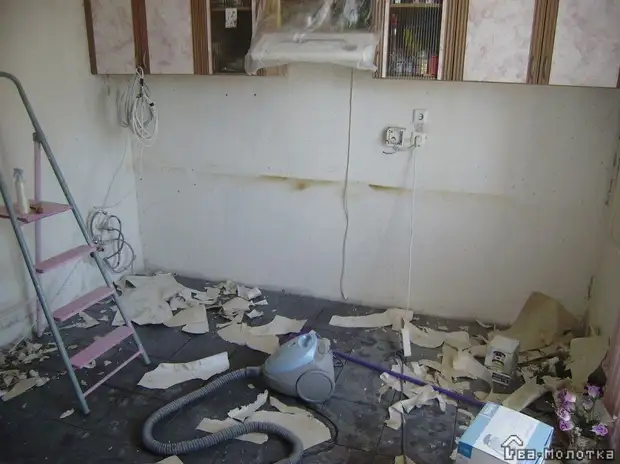
This pink-girl was my old kitchenette.
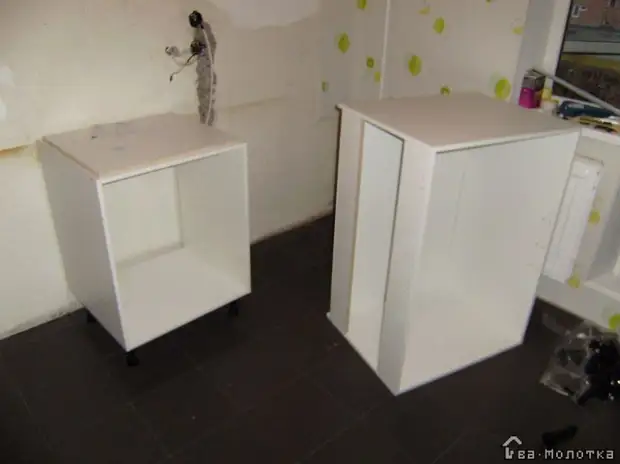
All kitchen furniture we ruthlessly dismantled and thrown out (including stove, hood and sink). Do not throw slippers into me - all this was in such a state that it was really ashamed to give someone (the stove so at all about two before the start of repair ordered finally broken).
Laying outdoor tile
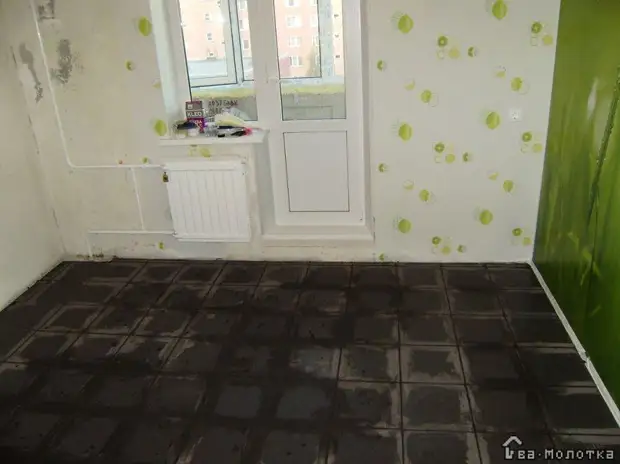
Next, we removed the old linoleum and began to independently lay outdoor tiles. All this was done on their own, because Initially, the budget for repairs was limited, and I wanted to do a lot.
Well, when her husband's hands grow, where it is necessary. And not simple, and gold!
Tip: If you want to repeat our "feat", note that the repair is done from above-down, and not from the bottom-up (as we did in inexperience). That is, if you plan to change absolutely everything, then start from the ceiling, then go to the walls (the sticking of the channels for the socket, plaster, putty, etc.). Only wallpaper, I probably advised to glue the last place, that is, after you make the floor.
For laying outdoor tiles with your own hands you will need:
- Tile glue
- Primer
- Platecores
- Toothed spatula (selected depending on the size of the tile)
- Conventional spatula 50-80mm
- Mixer construction
- Drill
- Crossings for seams (the size of the cross depends on what width of the seam you want to do between tiles)
- Rubber spatula + special spatula for seams (it usually happens in packs with grout)
- Level
- Bucket approximately 8-12l (for mixture)
- Water (breed a mixture and grout)
- Rag
- Marker (for marking)
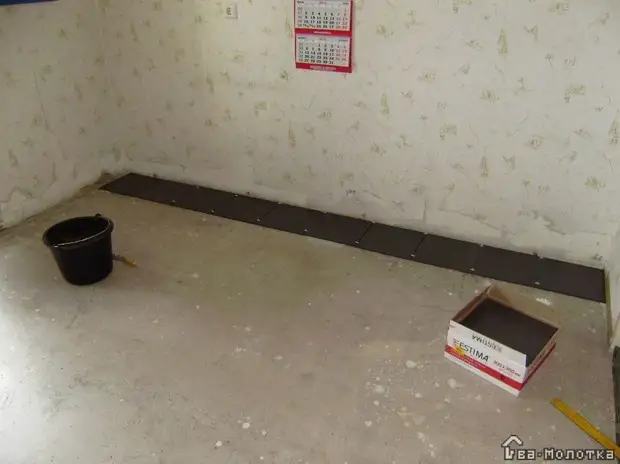
Tile laying process
First, we check whether the floor needs in alignment. This is done with the help of a regular construction level. If the difference is small, 2-7 mm, it will easily fix the tile glue in the laying process. But if you are not lucky, the height difference is more than 1 cm, you will have to look for a levelover or use special tile glue that removes irregularities up to 3 cm, but it is more expensive. Since in the kitchen, we did not leave the floor, then I will tell about alignment in detail when I describe repairs in the room.Next, the floor is impregnated with impregnating primer. If the surface of the floor is loose (crumbs, lifted, etc.), then we apply the firming soil. This is done for better adhesion of glue with the surface. Approximate exposure time from 30 minutes to 6 hours, depending on the soil (see on the package).
The next step is the selection of tiled glue. What criteria are selected tile glue: base, room humidity, location (inside / outside of the room), tile type. For example, you need to put a ceramic tile on the floor in the kitchen, in the corridor, in the room - the simplest and cheap glue will suit. If you need to shove the wall to the wall, then the glue is needed, say, the middle category (if you do not want the tile with a slit time). In our case, there was a glue of the middle category, because We laid a porcelain stoneware, which is harder than the usual ceramic tile.
Middle glue consumption up to 8 m.kv. from a bag of 25 kg.
We put the tile. We divor the tile glue (according to the instructions on the package) in small parts, approximately 5-7 kg. The mixture is divorced with the help of a construction mixer and drills (if you brew large portions, then the drill will mostly burn). After the mixture was missed, let it stand for 5-10 minutes and mix again.
There are two ways to lay tiles:
- make markup on the room and accurately calculate the tile so that the center lay the same amount of tiles from the center (this method will require certain skills of work);
- Start from the same wall and go to another (it turns out that one wall will have a solid tile, and the opposite may be trimming).
In the first version, the tile will be painted near each wall. We adhered to the second option - simply, quickly and conveniently. Further, everything is easy: we take the divorced construction mixture and use the toothed spatula to install it on the floor (you can apply to the tile itself or on the floor and the tile, they do everything differently, but we only applied to the floor). When you put glue, before sticking the tile, wipe it slightly damp rag to remove dust. Initially, it is better to make a small indentation from the wall (about 1 cm), in the future it will close the plinth, and there it will be possible to pave the wire, if necessary. An indent is being done so that there are no drops if the wall is not quite smooth. When laying a tile, do not forget about cross, so that the seams were smooth and neat. And most importantly, stack the tile by rows, and not as it fell. As you started, and move.
Be sure to dry dry the tile glue and do not go around the tile! It takes at least a day.
After that, start processing the tile seams with a special grout. In principle, it is possible to lift the seams with tiled glue, but then you will be very limited in the color scheme. Dilute the grout must be strictly according to the instructions. You can rub in any direction, as convenient, a rubber spatula is used for this. There is also a special spatula for grouting - it looks like a piece of wire, you use it to make the seam as accurate as possible. By the way, if you do not have a special spatula, just you can take a piece of wire. When finished, let the grout dry the clock 6 or better all day.
Then we clean the tile with a damp cloth, preferably the seams do not hurt much.
Ready!
Preparation of walls and transfer of sockets
Further, according to the plan, it was random and transfer the outlet, since the initial location of the sockets was categorically not satisfied.
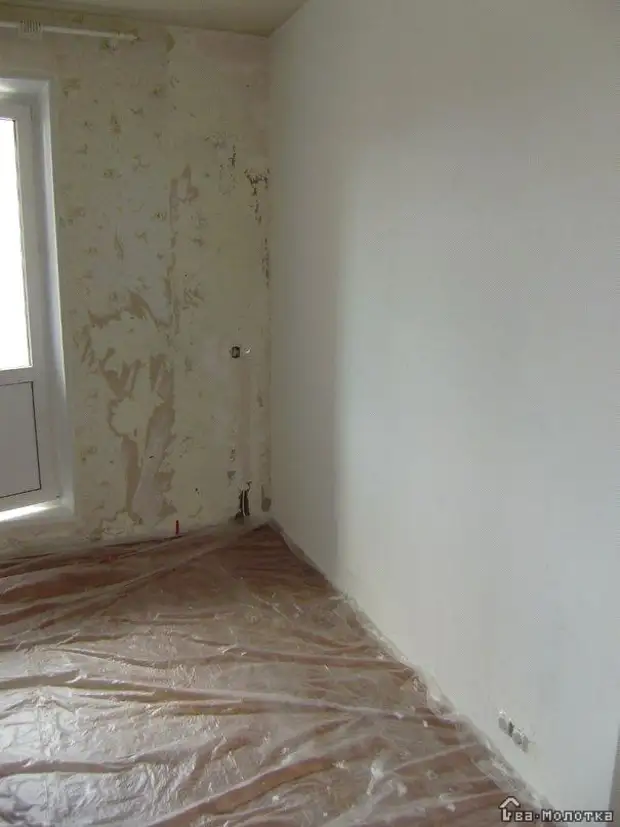
For the beginning, the old wallpaper was removed. Now there are a lot of special fluid removal fluids. But we save, do you remember? Therefore, we took ordinary water, divorced a little soap in it and poured into the spray gun. Everything is simple - we are processed part of the wall, give liquids to absorb wallpapers (2-3 minutes), and then remove them with a regular spatula. True, this method works only with paper wallpaper and with wallpaper on a paper basis, you will have to first remove the top layer, and only then described above the way to remove the paper from the walls.
After we made the markup for the socket and the wall set a little (hello, neighbors!) In order to protect the new floor used old linoleum.
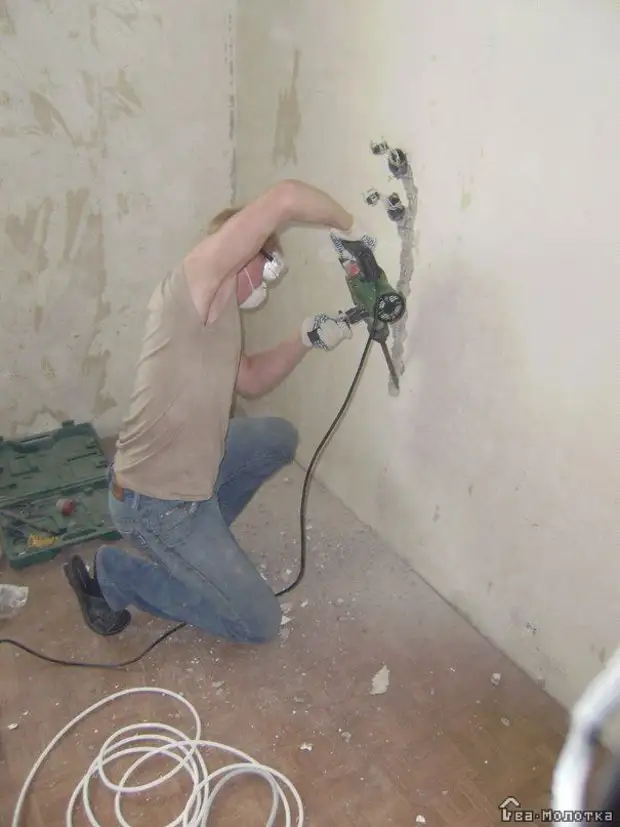
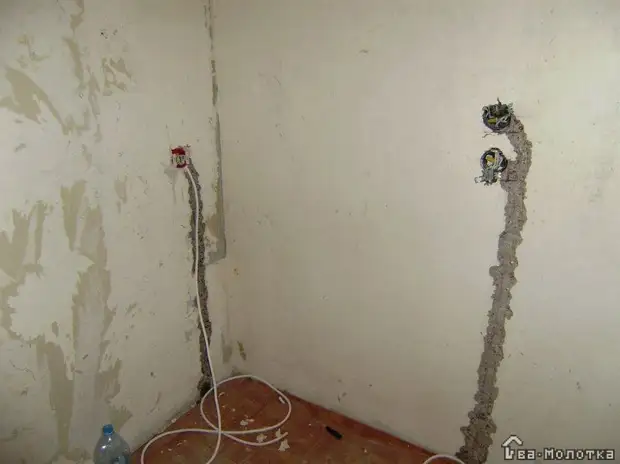
Further, when all the shifts were made, we moved the sockets and neatly all shook off and sawpathed.

WALLPAPER
We will need:
- Wallpaper (it is better to take vinyl or phlizilin wallpaper into the kitchen, as they can be wiped, and some even wash)
- Glue for wallpaper (depending on the type of wallpaper)
- Wallpaper smoothing spatula (plastic)
- McList (this is a big bruster for glue. Simply, if applied with roller glue, then it dries quickly because of what its consumption increases)
- Stationery knife
- Pencil
- Bucket 5 L.
- Scissors
Work process
We begin to glue wallpaper. If the wallpaper is vinyl, then the glue is applied to the wall and wallpaper, and if phliseline is only on the wall.Actually, there is nothing complicated in sticking wallpaper. If you have a single wallpaper or a drawing, it is not clearly traced, you can cut several bands of the desired length at once and start working. If the wallpaper has a picture, then it will have to customize it during sticking, so that everything looked with a single web, and the picky critics were looking for, where the seam was hidden.
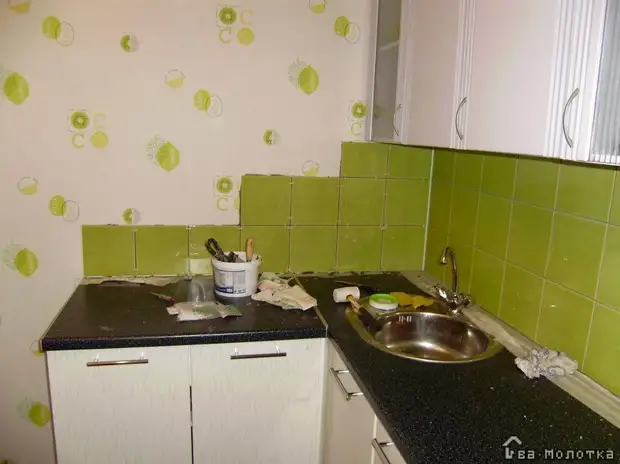
Our wallpapers did not have a clear figure, but a certain pattern was traced in the location of the decor elements, so we decided to customize them "on the eye". At first they pasted one canvas (with the first always easier). And then they applied the cloth to the already glued jack, caught the decor and only then cut off the roll.
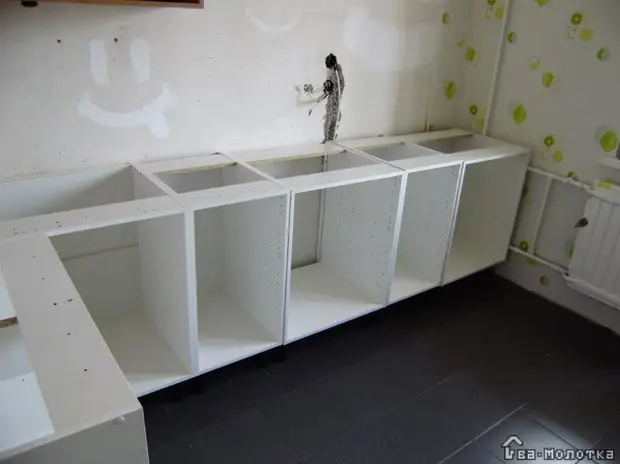
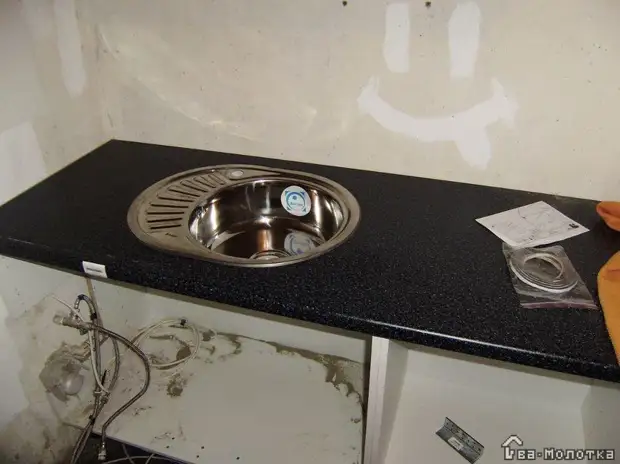
Build kitchen
When the walls were finished, we ordered a new kitchen. For the assembly of the kitchen did not pay, did not start (except for the economy there was another reason - we wanted to install sockets in the worktop, but we were not sure that the collectors would agree at all and could do it). At first, everything was simple - the frames were collected quickly using the instruction.
But with the worktop, it was necessary to tinker, as its length was 3 m long and 6 cm thick and this is a solid weight. The countertop was to cut into 2 parts. Made it with the help of a jigsaw.

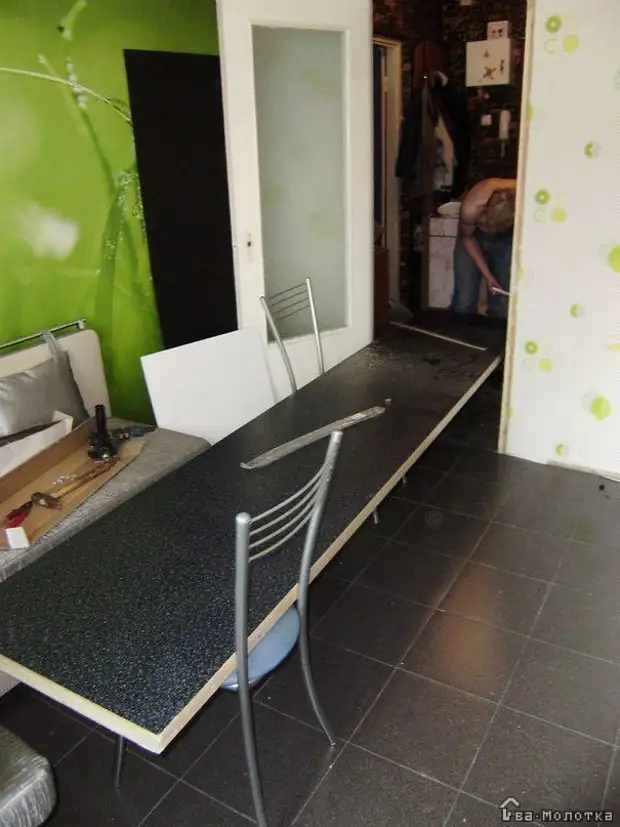
Actually, the photo shows how we coped. Next Stage: Cut the place under the sink and cooking panel. It is done very simply, the main thing is not to be mistaken when marking. What does that require:
- Drill
- Drill 10 mm on wood
- Lobzik with a tree filling
- Attentiveness
- Once again attentiveness
- And again attentiveness! (Death will die 7 times!)
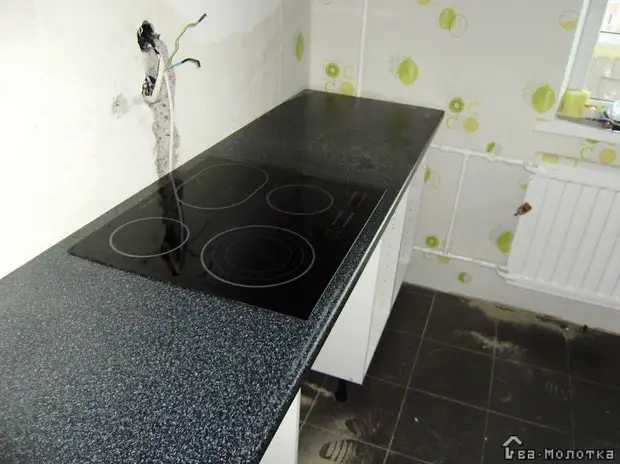
By making markup for the cooking panel, drill in each corner of the hole with a diameter of 10 mm (this is necessary so that the pink from the jigscription is calmly entered there). Next, take the jigsaw and carefully litter on the markup. After all sections, handle the sanitary silicone sealant and install the cooking panel. Finish, you can connect.
Now washing. Also make marking and carefully around the perimeter make a hole of 10 mm. Like that:
And just as neatly discharge. Next, all sections are handled by the same sealant and install the washing to which the pipes remained.
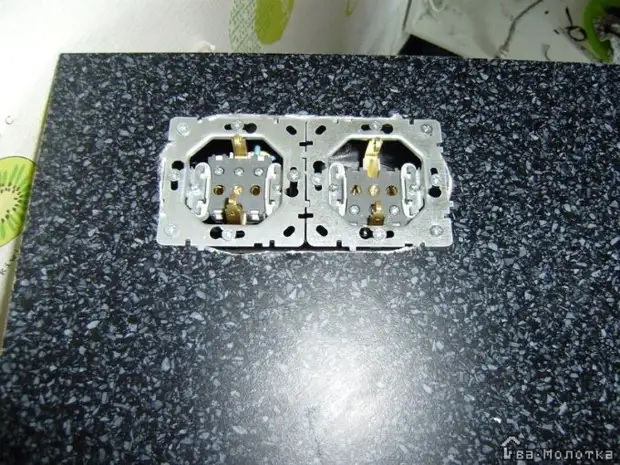
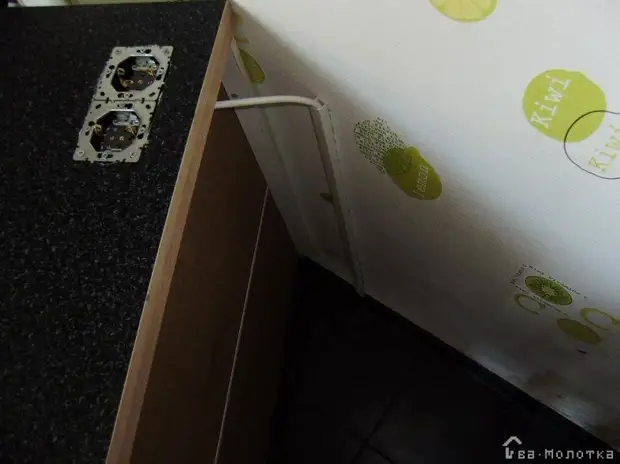
Absolutely for the same principle we set out sockets in the worktop. Since we laid the wiring in advance, there were no problems with the connection.
After everything was installed, we connected the cooking panel, the oven, installed the mixer in the sink and connected all the pipes to it. By the way, if you are not sure that you can handle the pipes, it is better to still call the plumbing professional.
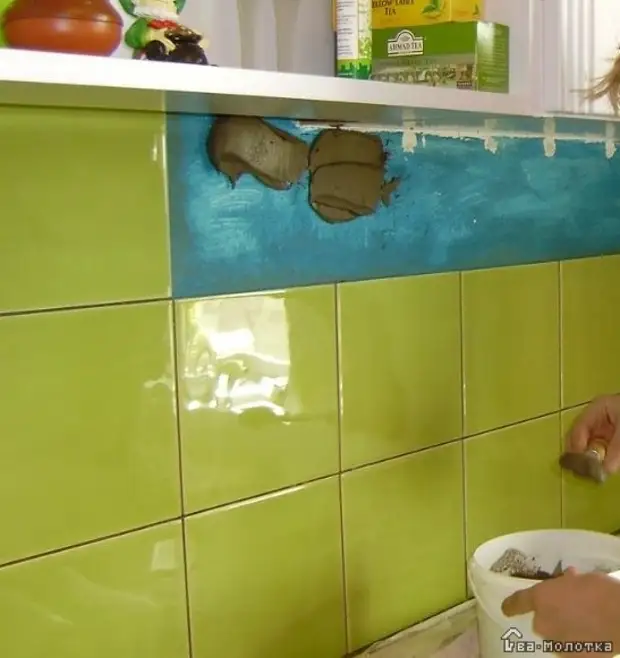
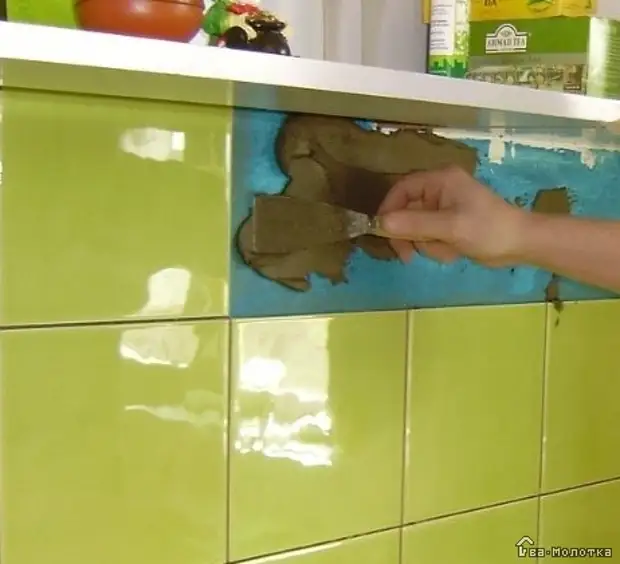
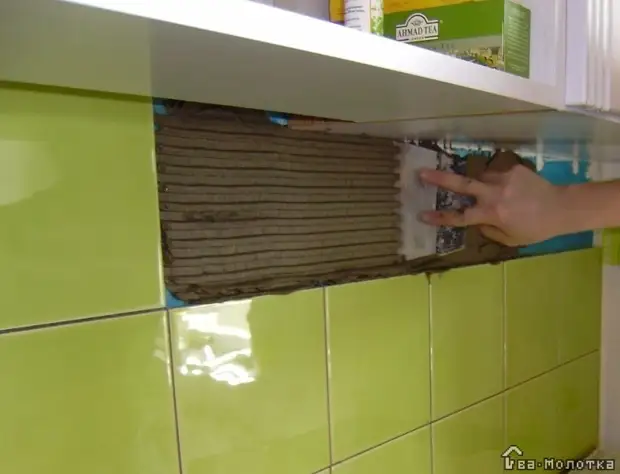
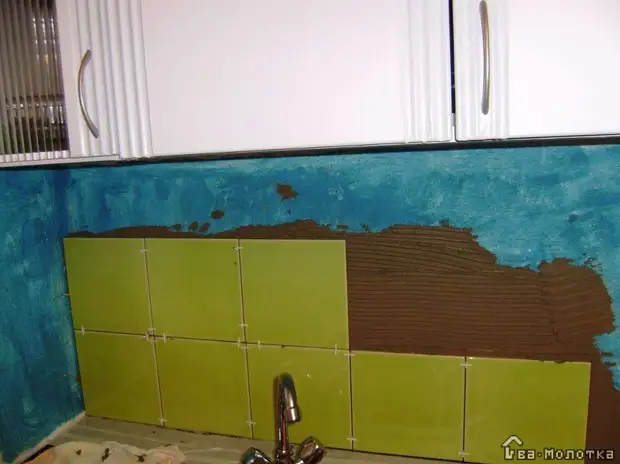
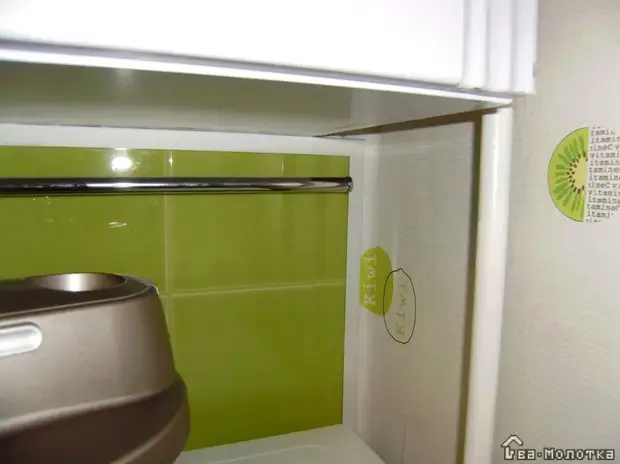
The wall in the area "Apron" was painted with oil paint, so it was necessary to primitive with a special soil Betonacton (in the photo blue). If we didn't do this, but began to glue the tile immediately on the paint, then the glue would very quickly move away from the surface and fell off with the tile.
When the soil is dry, we have begun facing the tile. The adhesive used the middle category, since the surface is vertical, and sometimes even with high humidity (in the sink area).
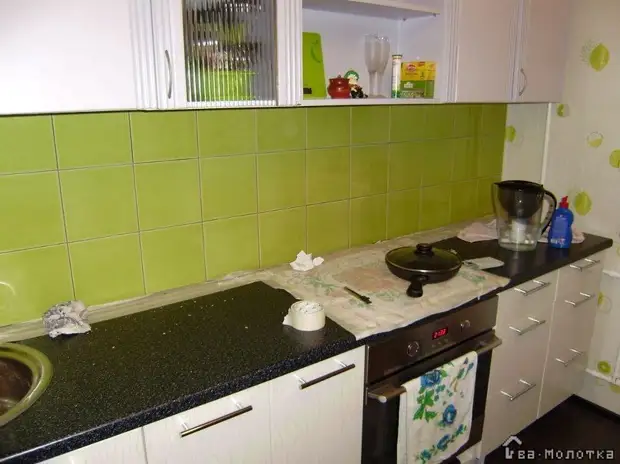
Long searched for the grout of the desired shade. Did not find. As a result, I bought a yellow grout and added green kel into it. I risked, of course, but everything turned out just wonderful! When the grout dried, the seams were treated with a special moisture protection impregnation. Then they made a neat edging with a simple plastic corner:
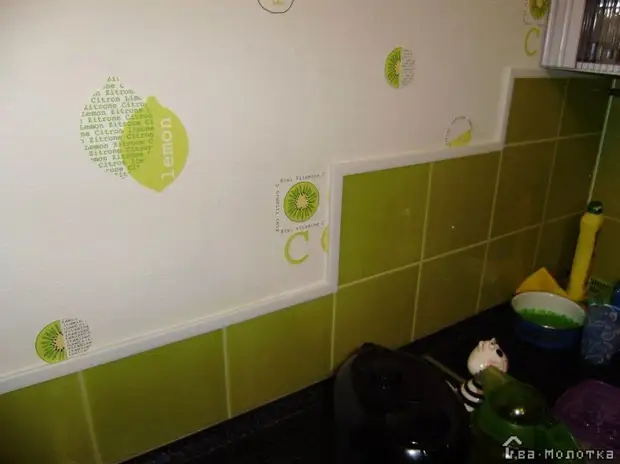
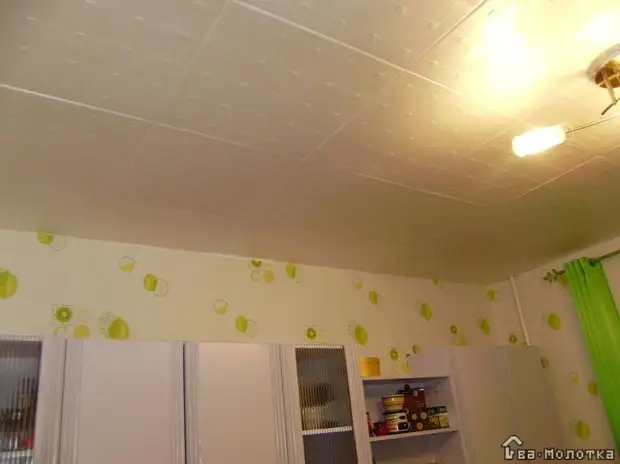
There was no longer left on the ceiling, so they just blocked the ceiling tiles of foam. An option is simple, but externally quite attractive, especially when the ceiling plinth occupied its place.
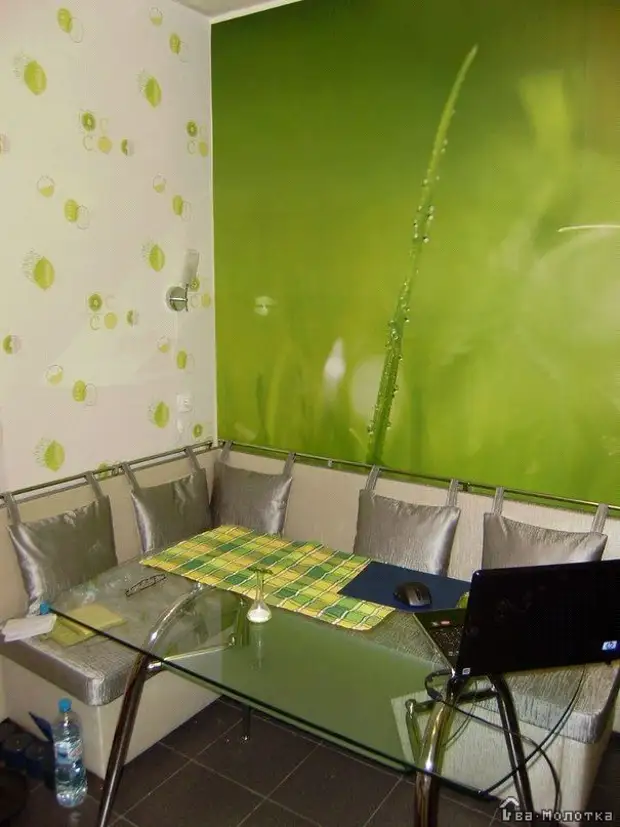
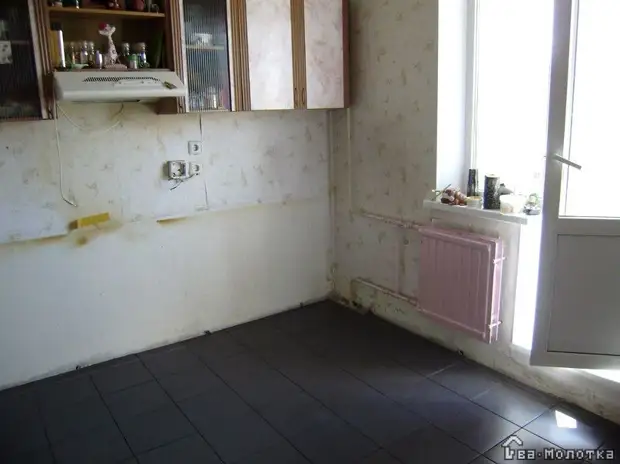
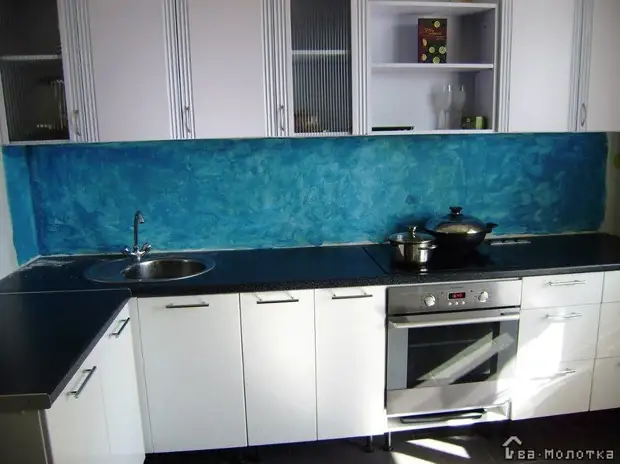
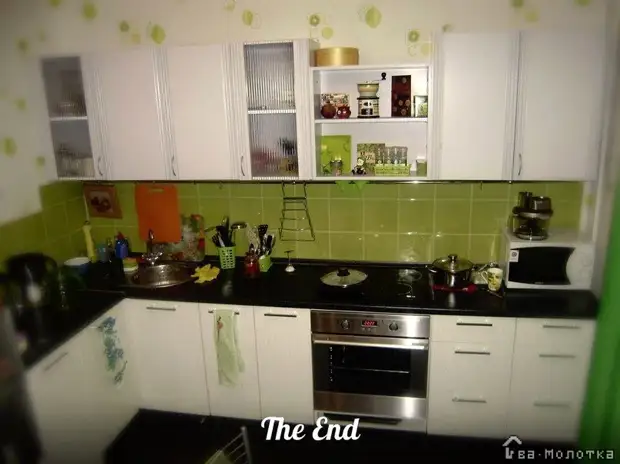
And that's what we have in the end!
- Istchonik