

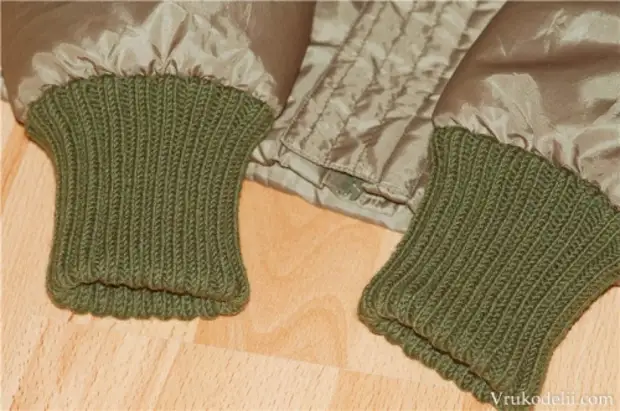
Here is your idea to solve the problem - short sleeves at the children's jacket - I will share the MK.
The idea is quite simple, and its result depends largely on accuracy of execution and from the right choice of materials. The easiest and most practical option seemed to me knitted cuffs. Here we will create them so that then no one guessed that they were not initially there!
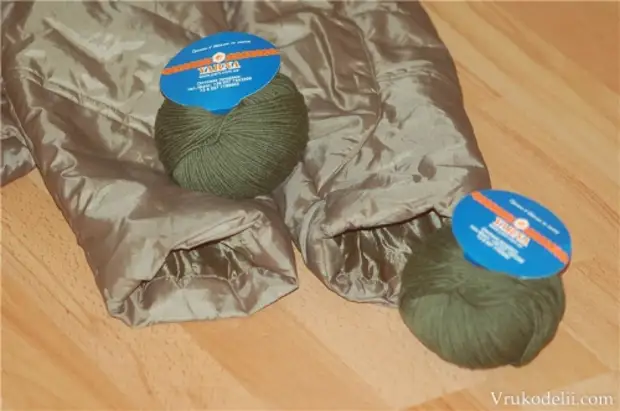
Materials and tools:
• First of all, this is yarn! I picked up the most suitable color. By tone it is quite difficult to pick up, I chose a darker shade of the main color of the jacket.
If there is no approximately your color, then it is better to choose something contrasting. As an extreme version - black.
• Under the yarn itself - I strongly recommend that in this case it is not to buy and buy "Merinos 100%" from Yarna Italian production 125 m / 50 g. For each cuff I went a little less than 1 meka. Outcome: 2 days you need to 50 g.
A good result when used for cuffs, this is this yarn, I guarantee. It will not grind even with an active toe and regular washing. Springs very well and keeps shape. Absolutely not ourselves. And therefore, ideal for our purposes.
• Sewing threads of the main color of the jacket.
• Sewing machine; Spokes number 2 / 2.5 / 3 (on your choice); Hook number 2.
Preparation for work:
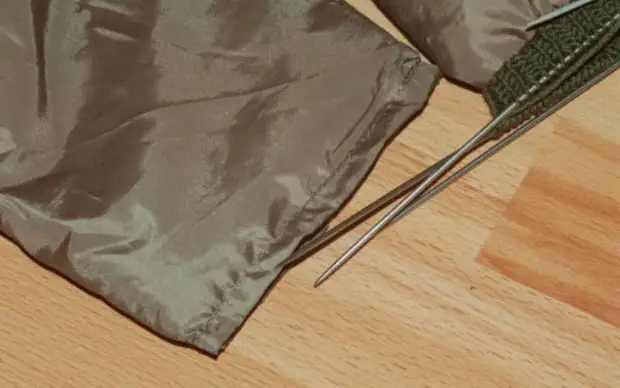
Not unpacking anything and inside without climbing, carefully tall needle moving the insulation from the edge of the sleeve. We need an empty internal space of 0.5 - 1.5 cm wide. Width directly depends on the density of the upper tissue. In our jacket, a thin cloak, but I still left myself a spare opportunity and created an "empty" strip along the edge of 1 cm wide.
Why is it needed? For it, we carry the machine seam, to which we will be tied to the cuff. If the fabric is thin, and you are confident that the cuff-related will be well sprinkled and can beautifully pull the main fabric, then the seam can be paved along the edge of the sleeve and at a distance of 0.5 cm. But if you have doubts about this issue, it is better Leave the band, in which you can then turn ordinary gum, which will help the yarn to pull the width of the sleeve.
Progress:
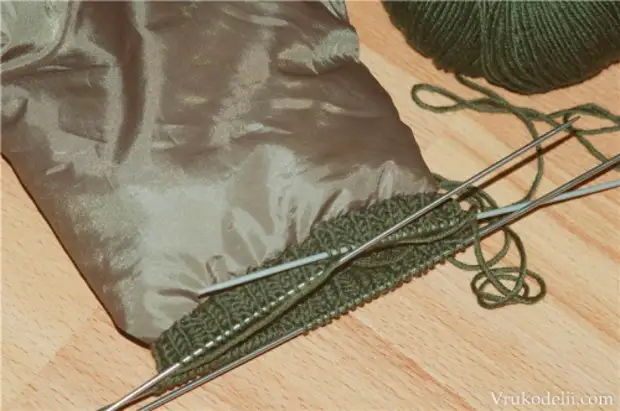
1. On the empty edge at the selected distance (in my case, at a distance of 1 cm), we deposit the machine line with the widest step, which is in your typewriter. If there are no cars - go in atelier.
Attention! The line we are making a thread of two additions: and upper, and bottom! Ends lines are well fixed. Here's what it looks like:
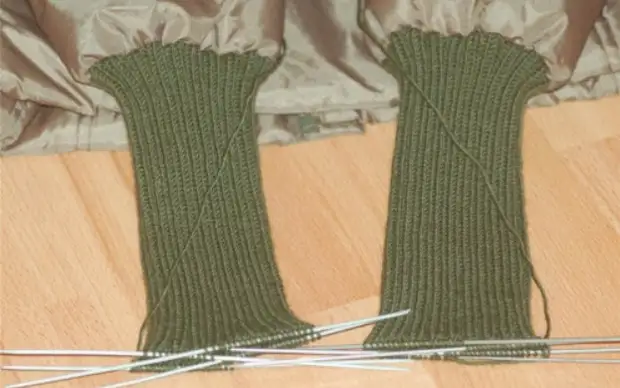
2. We take yarn and crochet through each chamber of the line stretch the loop in the direction from the edge of the sleeve to the top. Looped loops score. Who loves to mess around with circular - then on them, but it will be necessary to drag a lot, the cuff diameter is not big and it is not entirely convenient. I chose for myself a 5th spokes No. 2 for myself, distributing the loops approximately equally for 4 knitting needles. The knitting needles should take place above the seam, and not under it.
3. Next, knit a rubber band 2 x 2 in a circle double length of the finished cuff. Here's what it looks like:
We estimate the resulting elasticity of the associated gum and solve whether an additional rubber tape is needed. If your knit option does not cope with the main tissue of the jacket, then in the side seam of the sleeve below the laid lines are seam. Through the input of the English pin, they draw the elastic store gum and tighten the edge of the sleeves to the desired beautiful width.
4. If you knit on circular spokes, then just gently turn the sleeve inside out. With circular knitting needles it will work. With five stockings, this option will not pass. Therefore, all loops translate to auxiliary smooth, not a fluffy thread. Soak.
5. Gentively fix the end of the thread at the beginning of our knitting, so that the first bound loops of the cuff did not stretch, especially since it will be the face of the cuff.
6. We fold the finished cuff in half. Next, the usual sewing needle with a thread of two additions we grab all the open loops of the main yarn to each stitch of our laid seam.
Tip: If you had to stretch an extra elastic in the sowing sow, then for the convenience of sewing simply to the sleeve to put the object suitable in the diameter so that the sleeve and respectively the gum were in a stretched state during operation.
Everything! If you were neat enough, then you must have such an improved option.
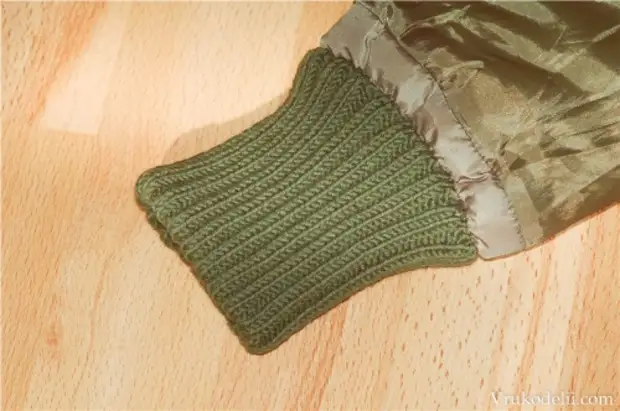
A similar cuff can be done at the bottom of the jacket if the time is tolerate and there is a desire. In the case of a special creative impulse (or masochism, read as you want) in the same way you can bind a hood.
In this case, you will receive a practically completely new and original jacket.
A source