
When you understand that the finished product is shorter or longer than necessary, it is upset. Perhaps you do not quite a standard figure and knitting instructions do not suit you in all respects, and you did not pay attention to it. Maybe you knit for the baby, who grows very quickly. Maybe in the process of knitting, you began to knit weaker and the tight than the sample, so your product turned into shorter than expected. Or maybe you were fascinated by watching your favorite TV series, and in order not to be distracted by measured straight on the knees, and also after the wine glasses. With everyone happens.
Fortunately, the change in the length after closing the loops is a pretty simple operation, and there are several different options, depending on your level of patience and what you want to get.
If the knitted product happened short
Elongation of knitted products
It would seem the easiest way to lengthen the knitted product, it is to dissolve the set of edges, raise the loops and pull down, isn't it? But no, not necessarily. Firstly, to dissolve the set edge, will leave a lot of time, and after that it is not so easy to choose a loop and knit from them.
It would be just unraveling cast edges, choose stitches back and knit down, right? Well, no, not necessarily. For a start, unpacking Cast-On Edge takes quite a long time, and as soon as it was unpacked, you can't just unravel - you will need to pick up and knit from it.
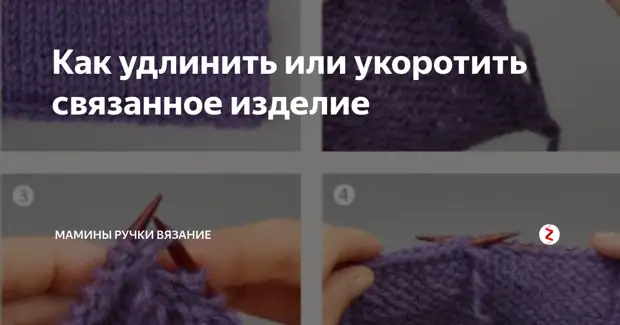
If you still chose this method, it is better before to dissolve the edge, raise all the loops (photo 1), and then decrease gradually, picking up the back of the loop (photo 2, 3 and 4)
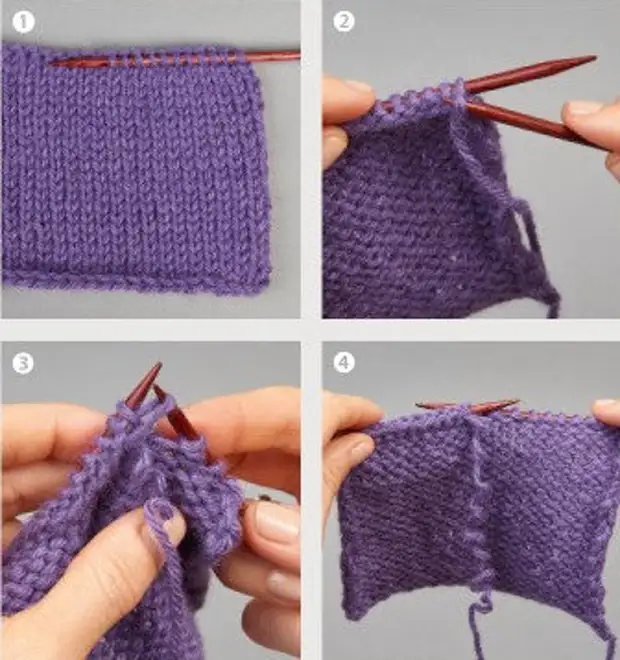
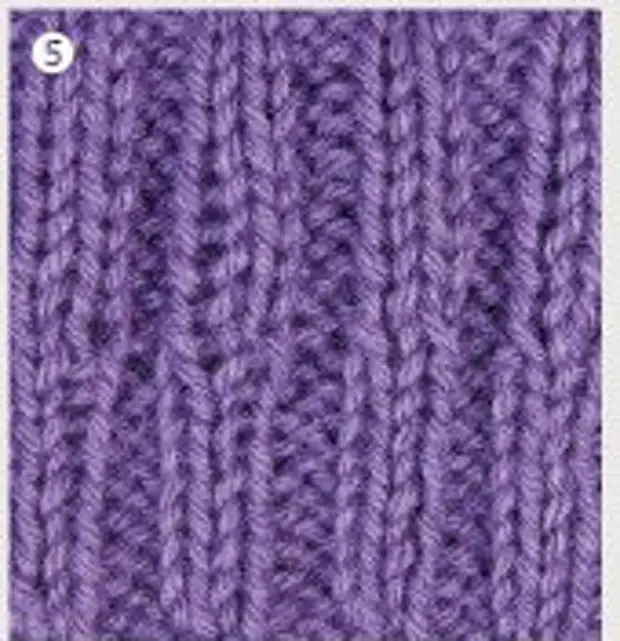
Nevertheless, the loops that you will pick up from the set of the edge will not match the next you can knit. If you are brought to the face, then this option is suitable because it is noticeable only around the edges. However, for gum This method is not suitable, as clearly seen in photo 5.
There is a way to bypass it - tied a pair of rows with a handful viscous, before continuing the gum, but you can use another way, more accurate.
The best way is to cut knitting in the place where you want to lengthen it, choose a loop, associate the necessary number of rows, and then attach it to another part with the suture of the "loop in the loop". So, find the place where there is no additions, ideally before the start of the formation of the waist (if you certainly lengthen the place from the end of the waist before the start of the bust).
So, look for a place where the magnification does not occur - ideally before the start of the waist formation (if you do not need to change the length between the end of the waist decreases and the beginning of the bust increases). The best, cut immediately after the end of the gum.
Before it, if the side seams are made, be sure to dissolve them, otherwise there will be a confusion.
Lift the loop on the long needles to a row below, the place where you are going to cut. And then cut the loop with scissors in a row above the hinges on the needle, in the center of the row - in order for the end remaining in the bottom row is quite long, to then connect parts. After you cut the loop, you can slowly pull the thread, a blurred loop loop, and picking up the top loops on the needles of the required size or slightly less to let it immediately knit (photo 6).
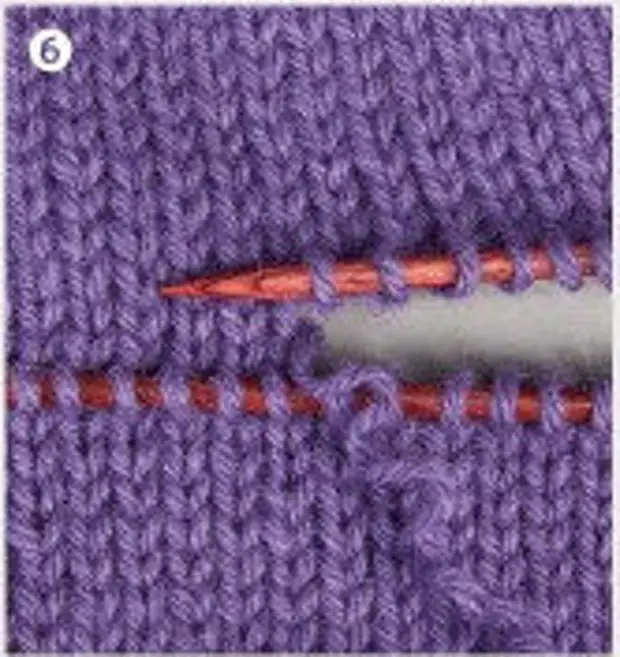
When you finish you should get two knitting needles with loops, one with the upper part of the product, the second with the bottom (or rubber band).
Determination of the direction of knitting!
If you extend the product, then you need to determine the correct direction of the advice. If this is a facial surface, then it does not matter the top you will be drawn or bottom, it will be unnoticed. However, if there is such a pattern on the product as a gum, arana or color pattern, it is better to knit in the same direction that you knit all products. Check if it is possible.
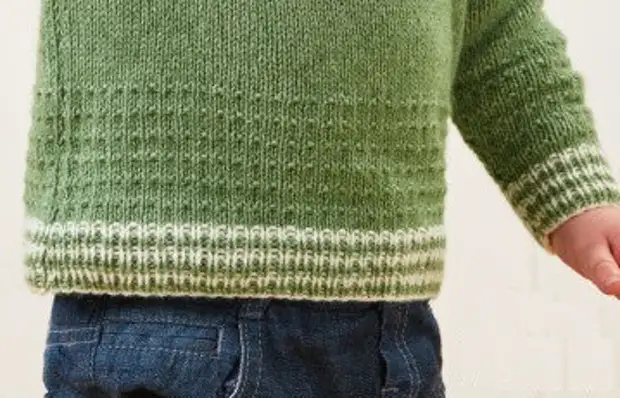
Depending on the original decor of the product, you can make a strip here. For example, the extension of the children's acknowledged sweater, from which the child has grown, you will never achieve similarity, even using the same yarn.
After you take the desired part, you need to connect two parts again together. Do it with the help of a seam on open loop, it is "suture loop in a loop." On the Internet, full of video instructions for this seam.
If you do not want to cut at all, and you need to carry out only a few rows from below, watch video lessons from Eunny Jang's, it explains perfectly and shows how to disguise the connection of the brass and a wide gum with a set edge.
How to shorten the associated product
If van needs to shorten the product, then naturally you can also cut it, remove an extra piece, and connect back. I tried to shorten the Pullover "Seven Sisters" which I knit in February. It was connected at the bottom up with a round coquette, and because of my body shape, he lay bad on his chest, and the neck was too close. I cut the loop and dissolved about 10 rows, after which it began to sew it (photo 7).
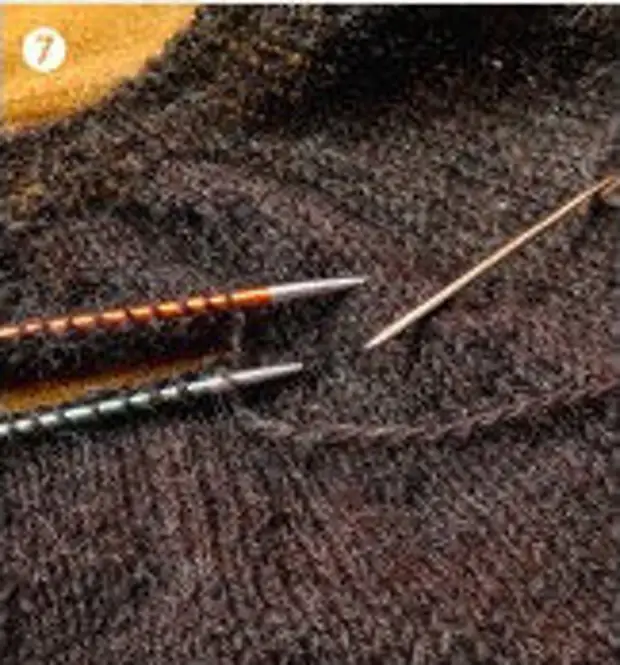
After about 100 p. I regretted this decision! But nevertheless, my skill in performing a seam "loop in a loop" has improved and I have a good fitting, so I am glad that I went to it. It would be much longer to dissolve all this before the start of the coquette.