
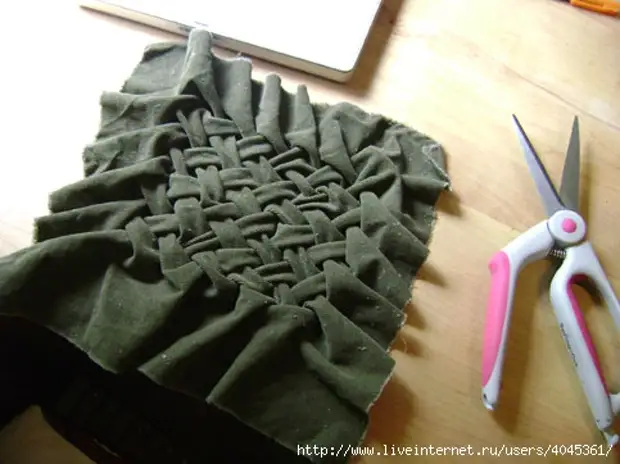
Today there was quite a chance that such an interesting thing is called "Canadian braid". In my opinion, very beautiful. I think it will be good to look not only on the pillow, but also on a handbag, for example.
The author Elena found a master class on the Bourgeois site and even tried to repeat. And we will learn from her.
I want to share this technique with you, "write Elena." I checked on myself - training takes half an hour, counting time on the cutting of the training flap and marking, and the results are very interesting. The technique is a little similar to the defenders, fashionable once.
So, the work order.
Take the flap fabric in size three times more than the finished job. That is, for every 10 cm finished folds there are 30 cm smoothly lying fabric. My advice is not too big for a start, but not too small flap, approximately 60, is better than a square. Fabric In principle, you can take any, which is beautifully draped, that is, it is not a thick, and this, which will not be too tinted under the marking pencil or felt-tip pen, that is, not knitwear. If knitwear into a cage - you can take it, then the markup will not need.
I cut the square of the tissue, placing a ruler and pencil \ felt-tip pen into squares, such a mesh. For the beginning you can take squares by a side of 2-3 cm, who has a line with an inch markup - place 1 inches. Location, of course, on the wrong side of the fabric.
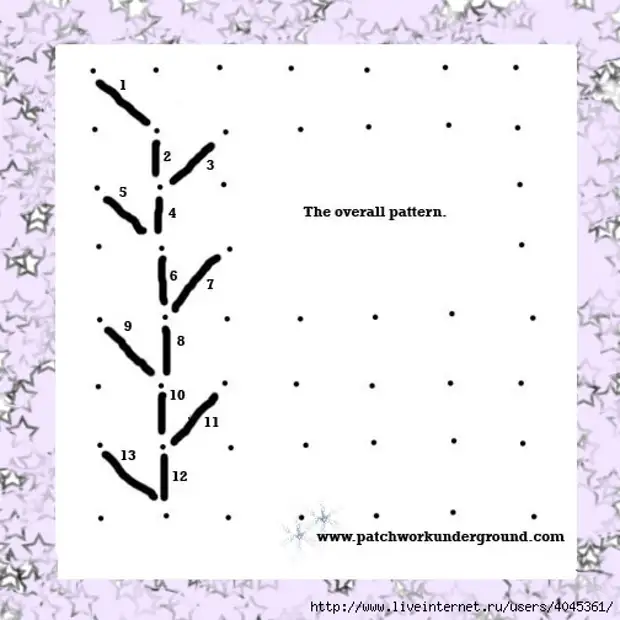
Look, here is the general scheme of work. You will return to it more than once. Therefore, it makes sense to draw it or print.
Basic principles of work, remembering which will be easily done first steps, and you will not notice how to create your first braid.
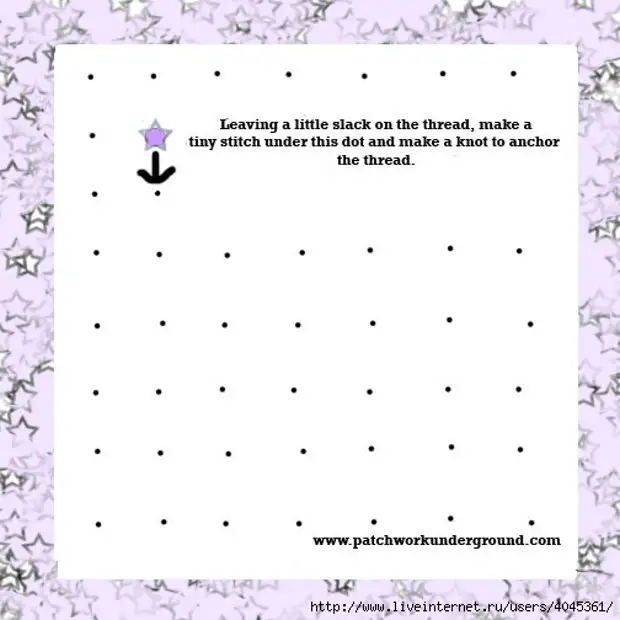
The principle is the first. Each stitch is completed by tricky. Suck - this is when the tiny stitch is done on the spot, and in the loop of the thread stretch the thread once again and fix the nodule.
The principle of the second. We make folds in a chess order - to the left, to the right, again to the left, again right and so on to the end of the row. A little bit like knitting if you knit the "rubber band" - facial, invalible, facial and invalid, and do not confuse with rhythm.
The principle of the third - between the folds there is always a stitch without a fold, just one mesh item. That is, if you made a fold - the next simple stitch, if you made a simple stitch - the next stitch with a fold.
So let's go!
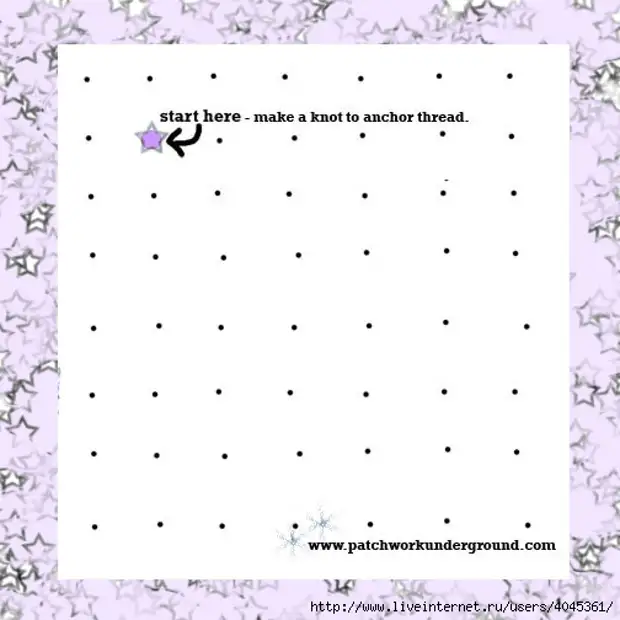
We take a needle with a thread, with a nodule at the end. We take our flap with a mesh marked. On the markup, from the wrong side, we make the first tiny stitch, as shown in the illustration, fix it with a clip.
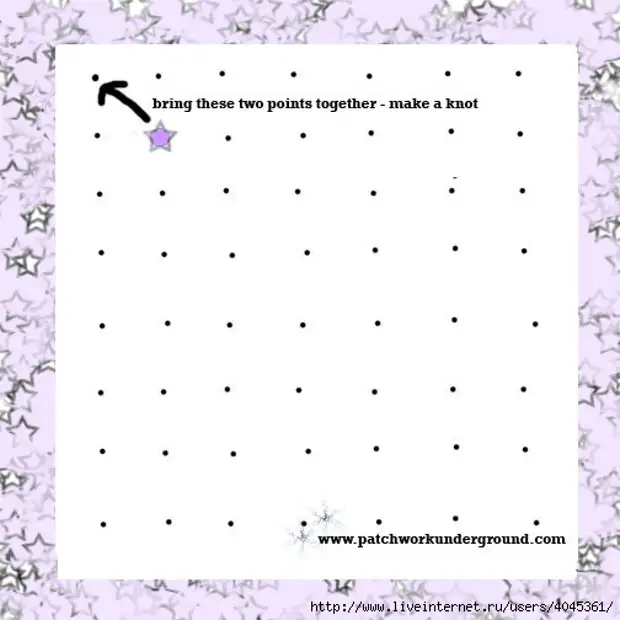
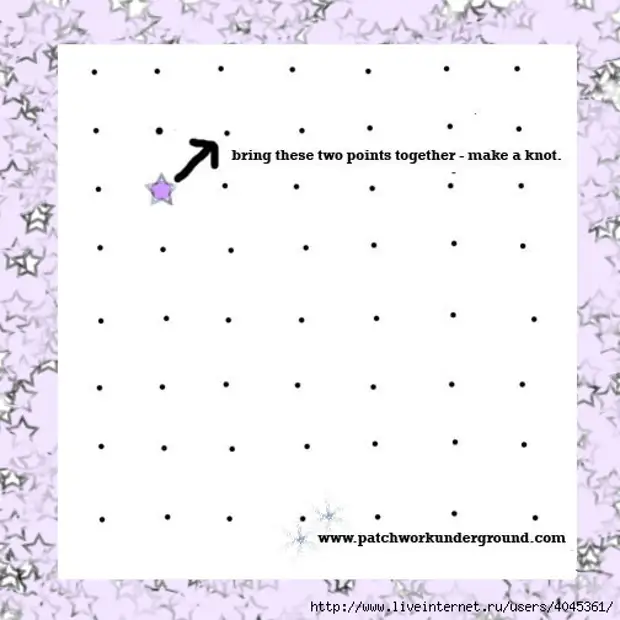
The next step. We stretch the needle to the left corner diagonally from the first stitch, we make a second stitch in this corner, we pull the tissue with a thread so that two points are combined, that is, we make the first fold. Fix stitch.
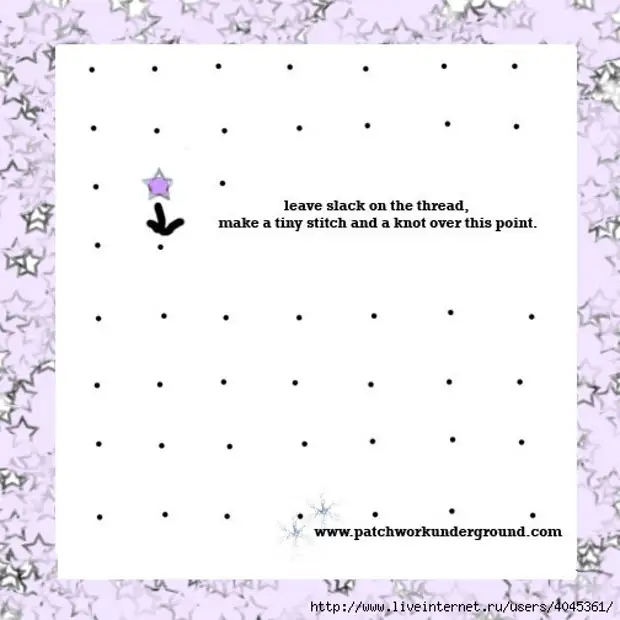
Third step. We make stitch down at the next point, do not tighten the fabric (!!) fix the stitch.
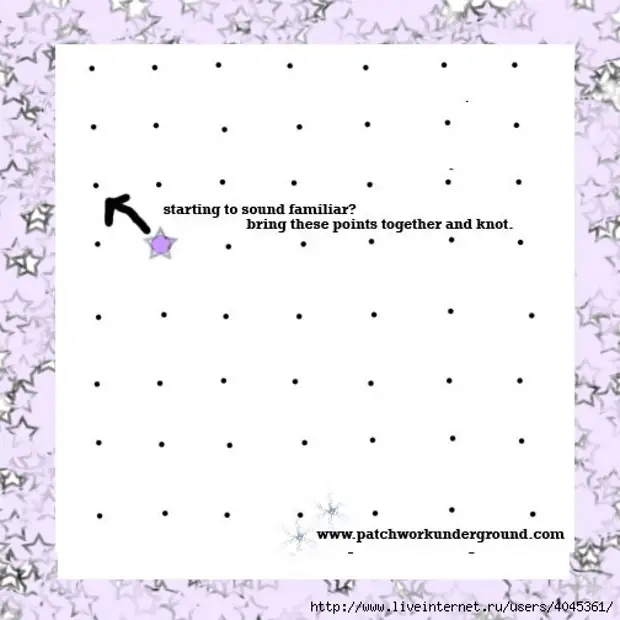
Fourth step. Making stitches again up diagonally, this time to the right, we pull the tissue with a thread as in the second step, fix the stitch.
The fifth step, as you probably guessed, stitch down with a crash without fold.
Thus, we pass a row from above to the bottom, fix the thread for the last time, cutting off the thread, go back to the top, deploy the second row.
The next top point with which the second series begins, we note, as shown in the illustration, not at the next intersection of the lines from the first, but through one.
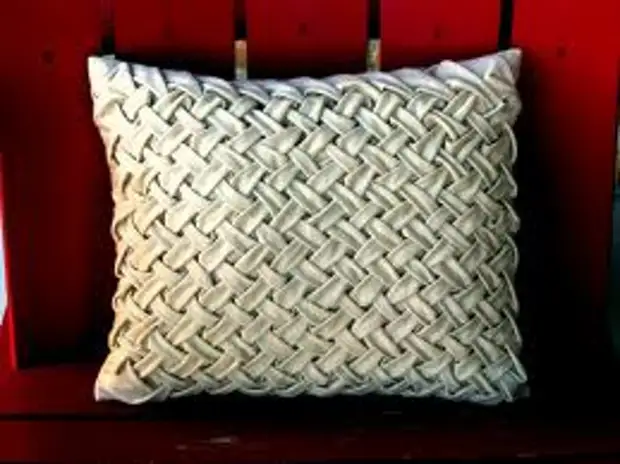
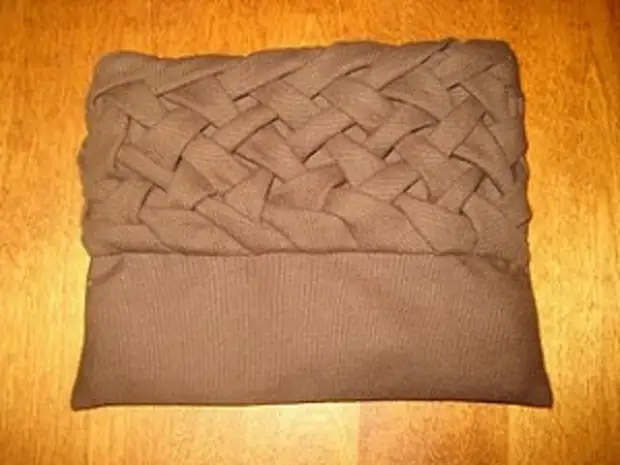
Here, see what a beautiful pillow can get. On the bag-clutch, too, will also be remarkably, such protection, such as cotton velvet, will be wonderfully.
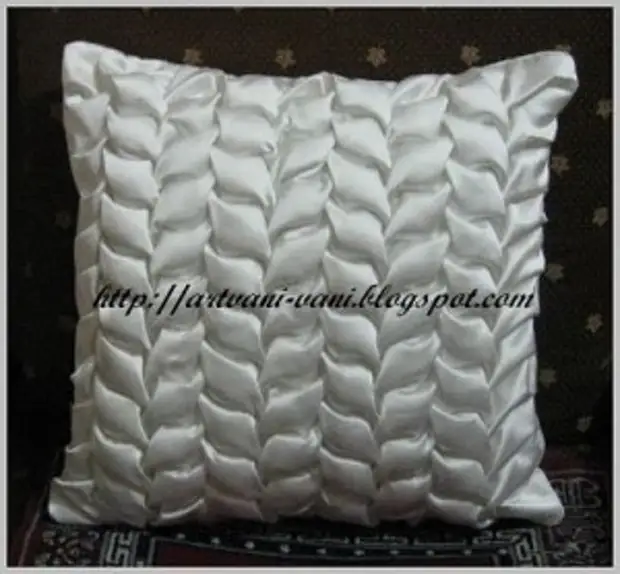
And here is another way to fold the Canadian braid, the spikes are obtained.
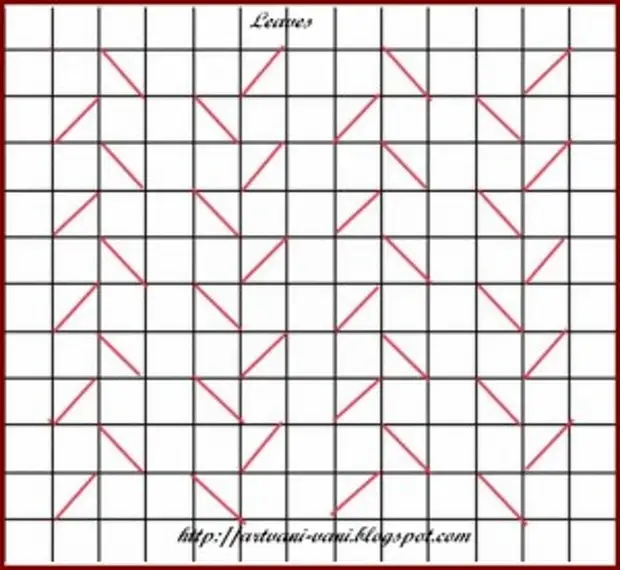
For "spikes", a slightly different folding algorithm is applied, here's a scheme. It becomes clear from it that stitches without folding in this case will not be horizontal, but vertical. And there are still covers in four sides of the square, it turns out a pattern similar to a four-leisted leaf of clover. In general, there is no limit of human imagination! "