In general, it was like this: I went yesterday I was in his studio, in order to continue doing great, ordered me cupboard for bottles ...... look at it and realize that I'm tired ....... need a break from orders And gain strength. Well, I can not only work on the orders, sometimes you need to give a splash of inspiration, can not be something to it for a long time "stagnated"))), and the "ferment"))))))))))))
And so, by chance, my eyes fell on a modest standing in the corner and already quite a while waiting in the wings, derevyashechku. And rushed !!!!!!!!!!!! Trackers, in the head, cheered up and interrupting each other began to push the ideas. In general, we advised them and decided to gang a panel))))
So, I start: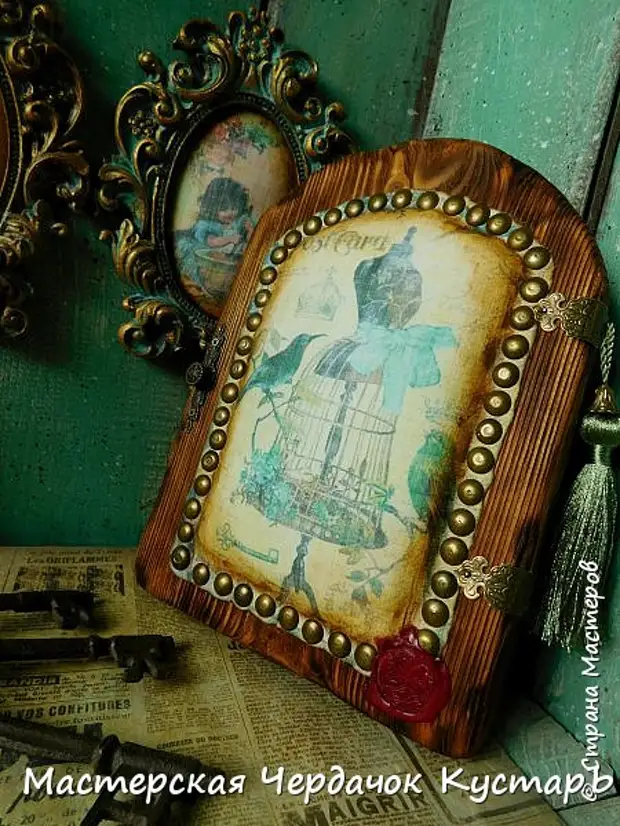

To implement our idea, we will need:
Wood
Lobzik, hammer, chisel, sandpaper, screwdriver with a grinding nozzle (can be without it)
Burner, lighter, metal brush or screwdriver with metal.
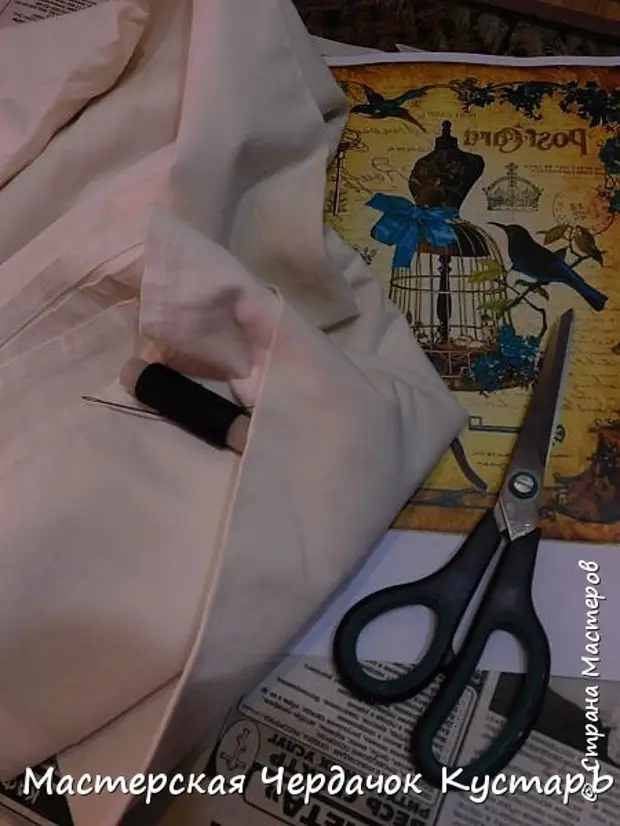
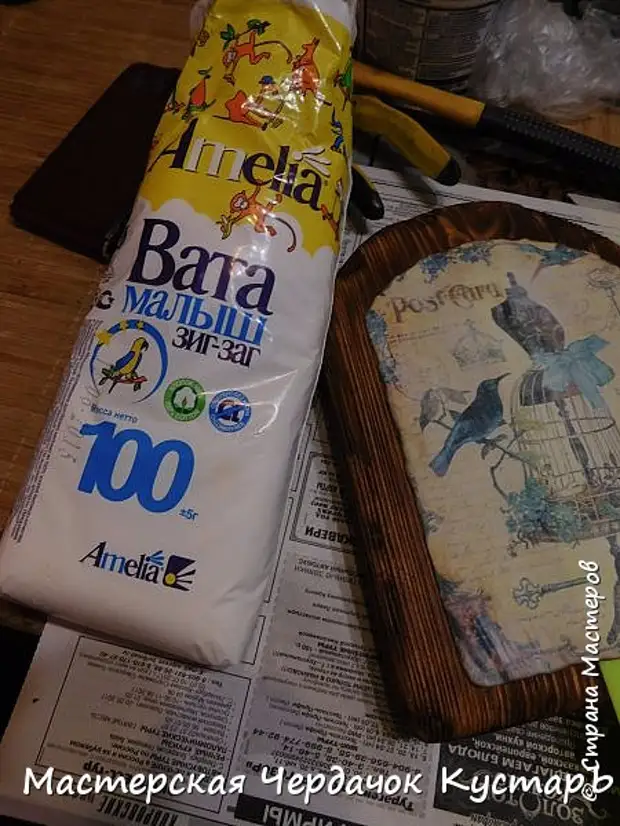
White, wool or sintepon fabric, printout (mirror), thread with needle, scissors
Iron, acrylic varnish, Dark wax, ornamental nails (with a hat), metal fittings for decor.
Using, foul materials, outlining the future bunch
And pubesome, drink.
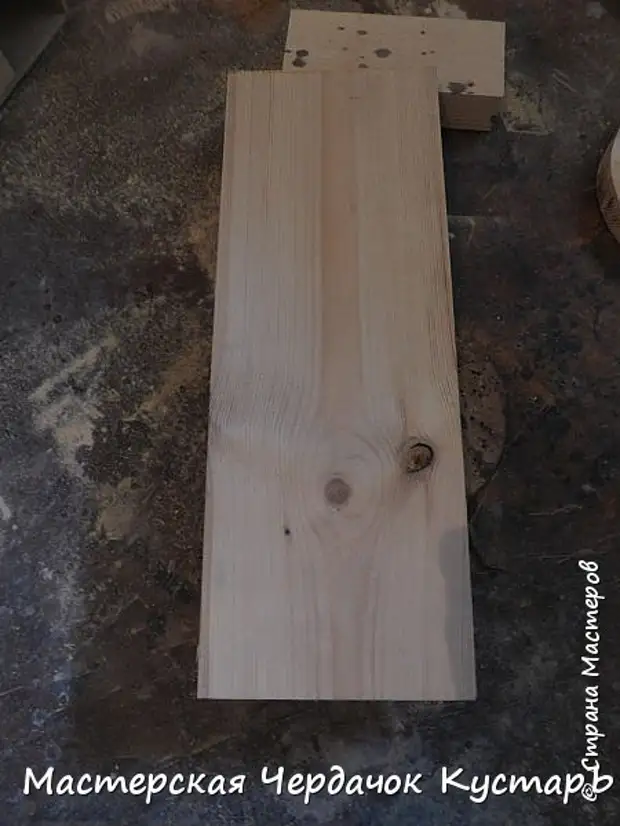
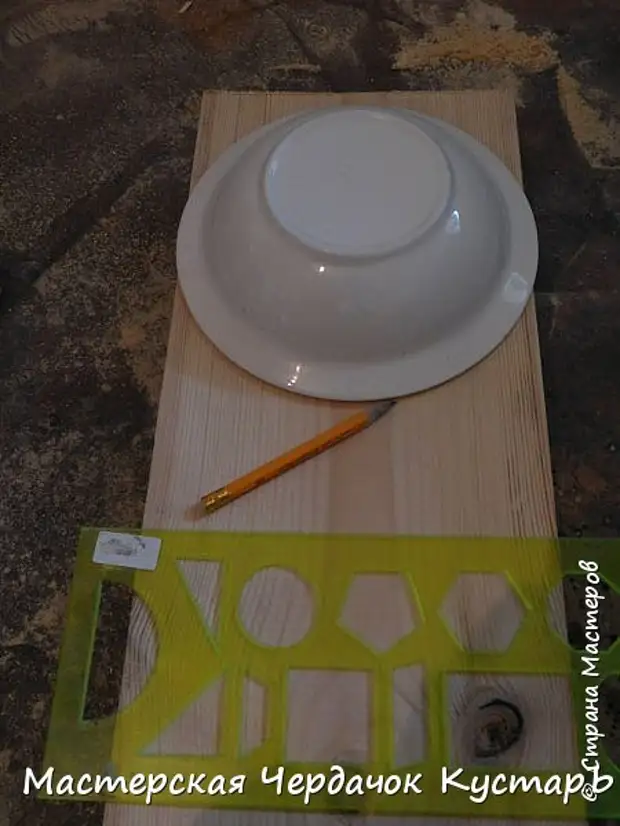
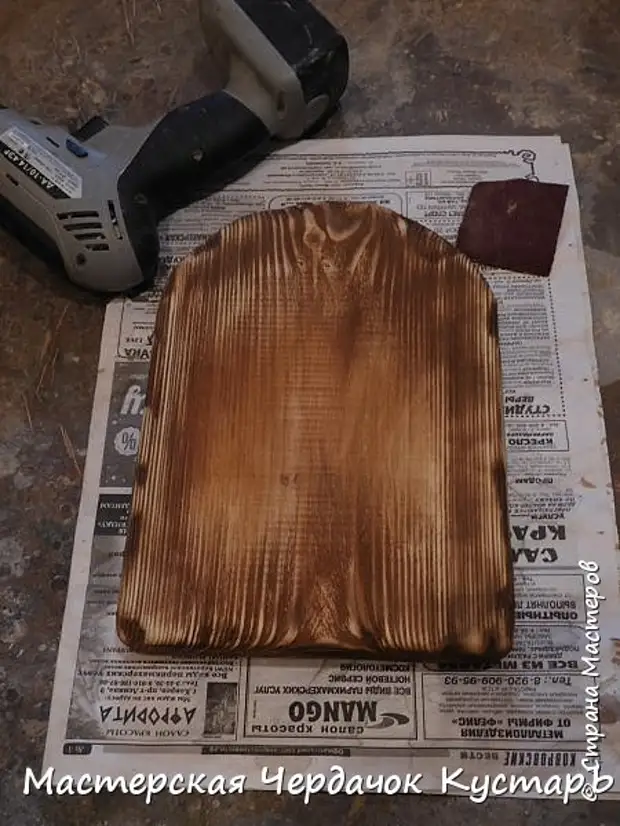
This is, just that case .... when you don't need to cut exactly))) (I think, now many are delighted)
Because As a result, we need an old plank with uneven edges. The more irregularities, the better.
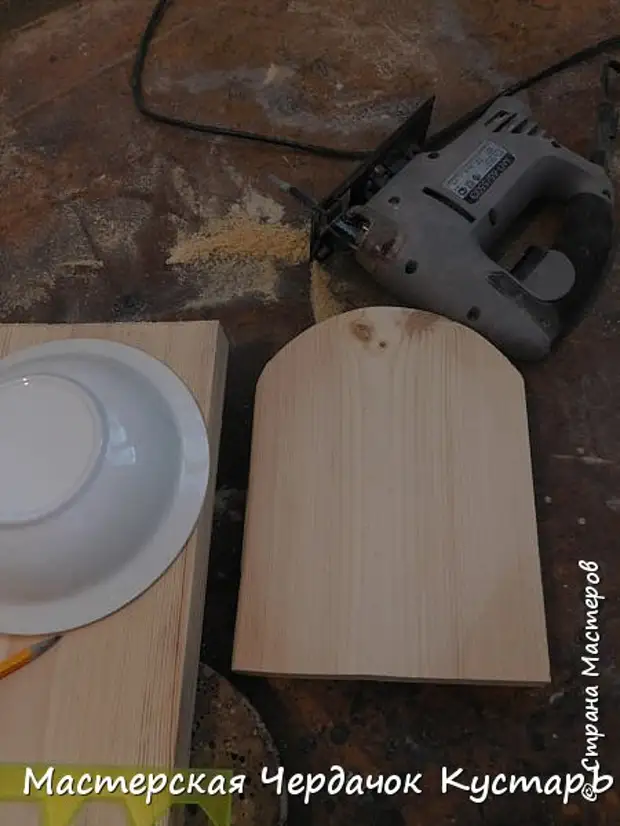
I spin all the ends. I did it on the grinding machine, but it is possible to manually with the help of sandwich, only it will be longer.
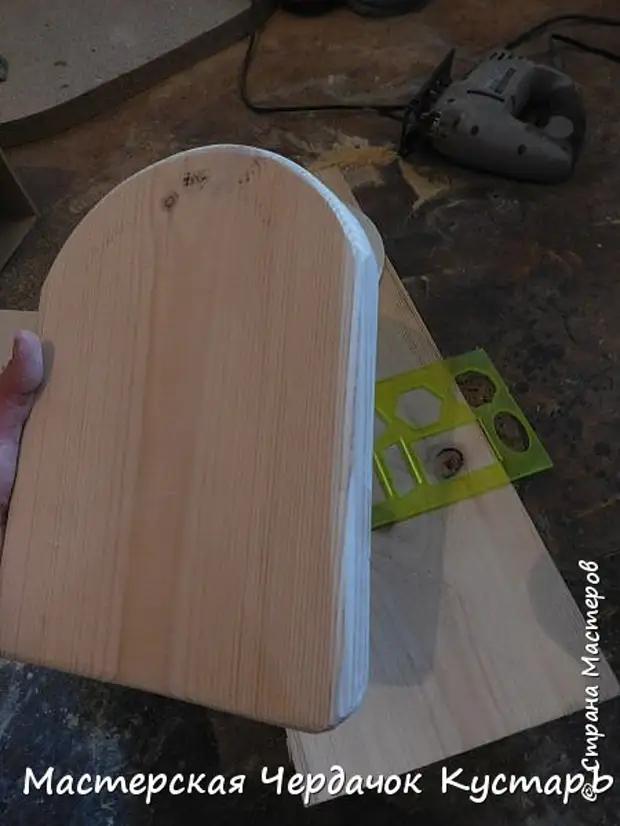
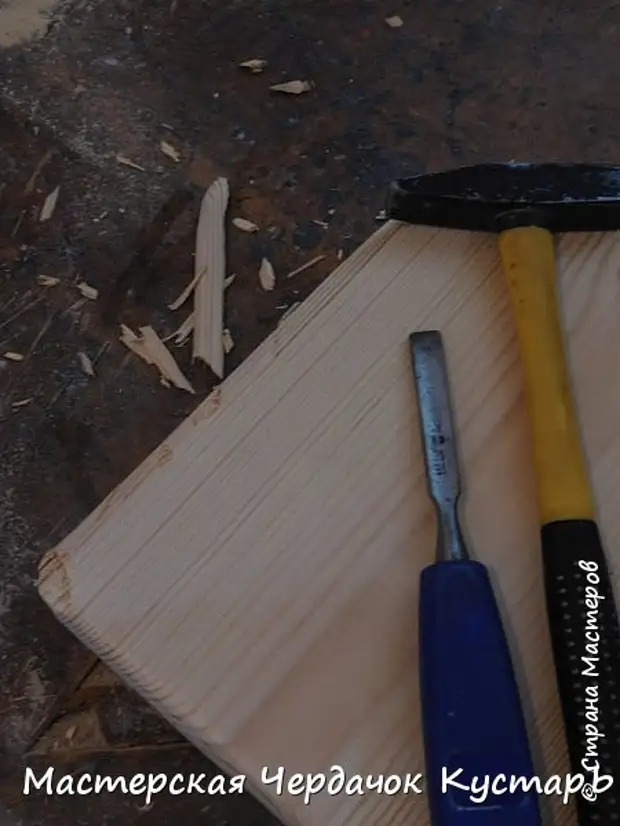
With the help of a chisel and a hammer, I do Skoli in all the ends of the plank, only on the front side, I do not do anything from behind.
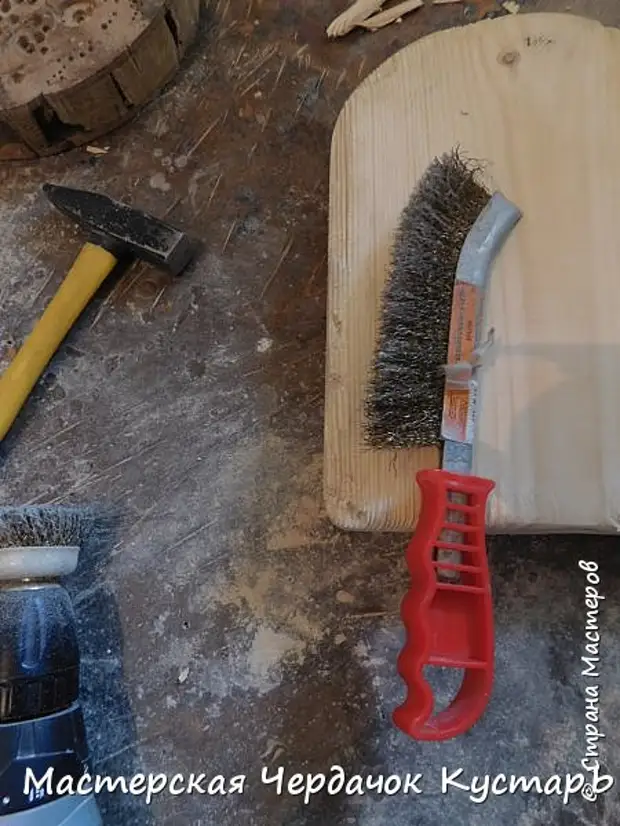
And here, show my met. Brushes, which will continue to work. This is a nozzle for a screwdriver.
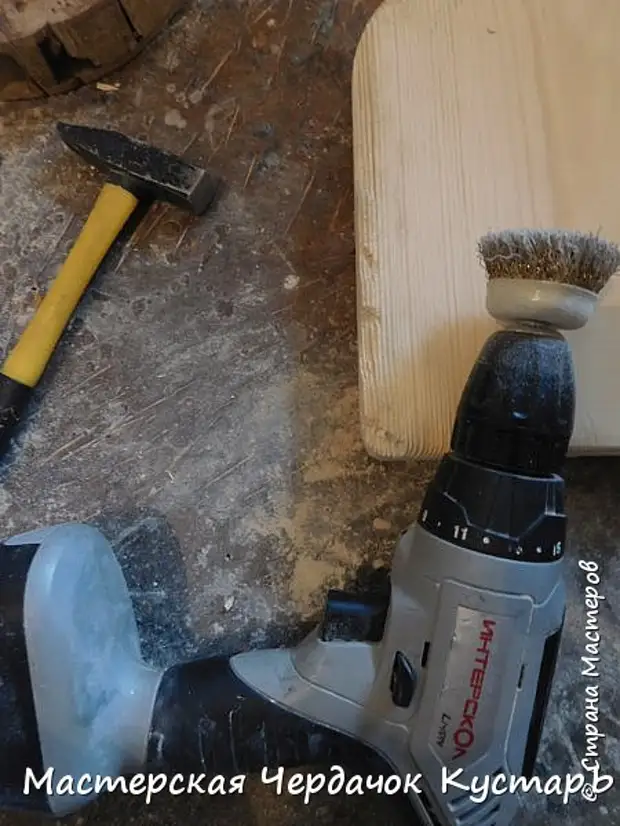
And this is a manual chalk. With these tools, I will remove soft fibers at the tree. It's easier to say: to be brought
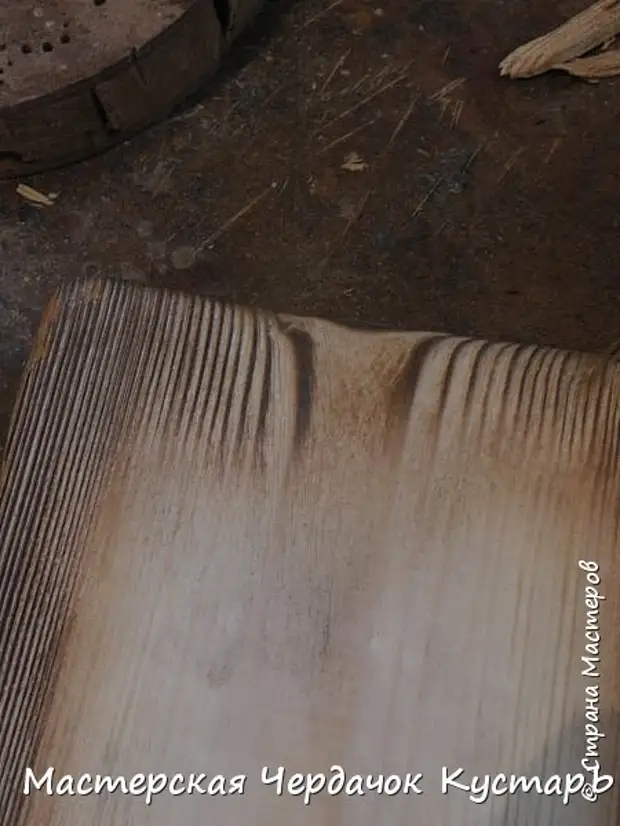
For a start, thoroughly burn all the ends.
ATTENTION: DANGER! Children should do this job. Or only in the presence of parents and in compliance with all safety rules !!!!
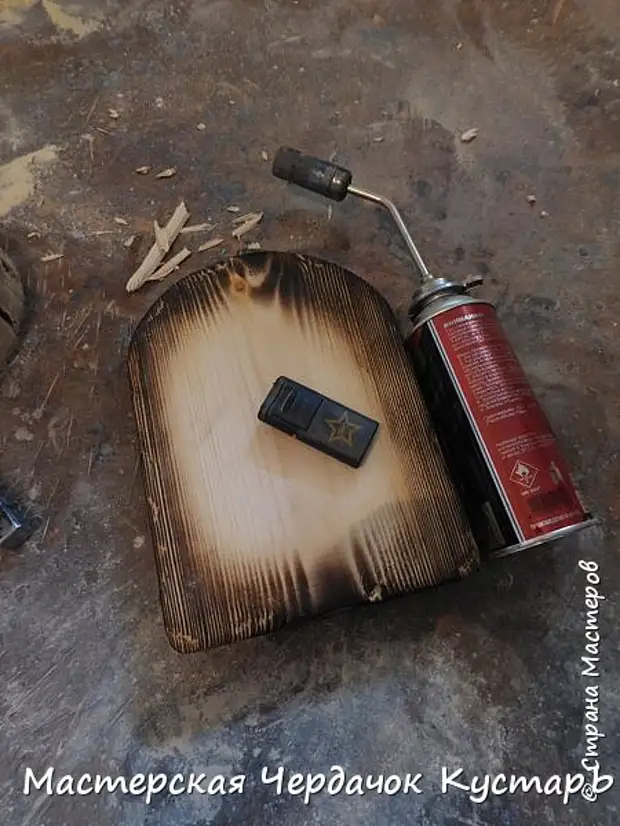
I do not know what to explain here?! I think about Brash, everything has long been known. In general, after the firing, cleaned the MET. Soft fibers.
I, several times, burned and cleaned, alone the same places in order to achieve more smooth transitions, in places of chips where we chose the ends.

In some places, even the straight set fire to end and for some time gave him burn, then that would as much as possible and easier to remove excess.
That's how I leave, it suits me.
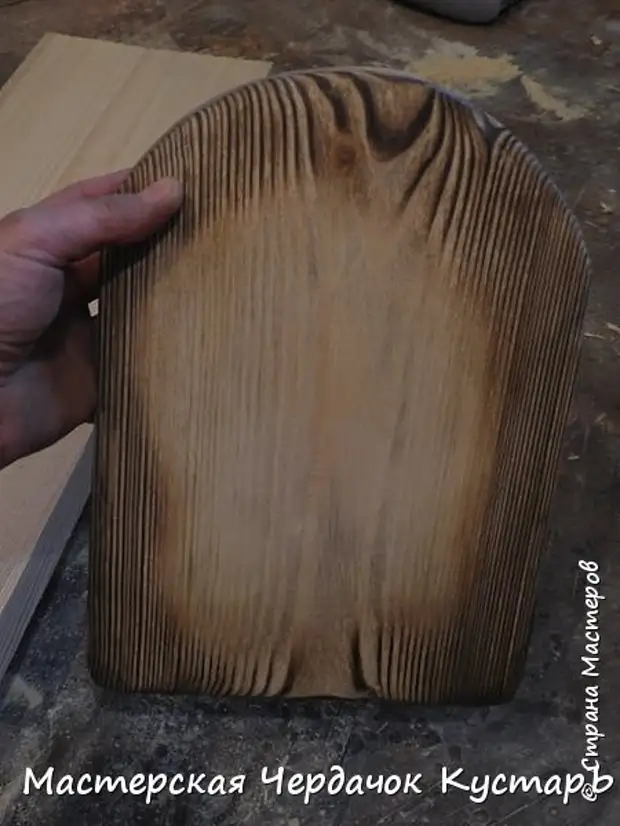
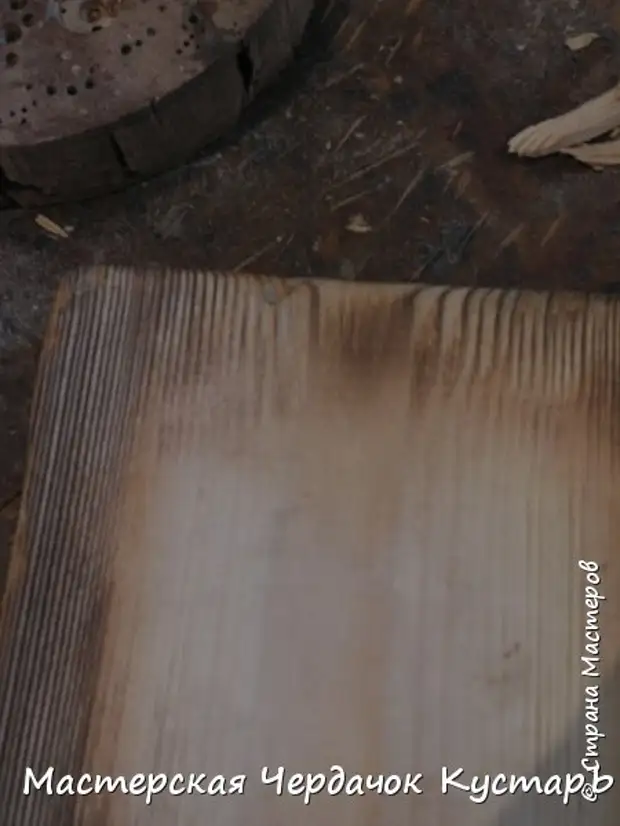
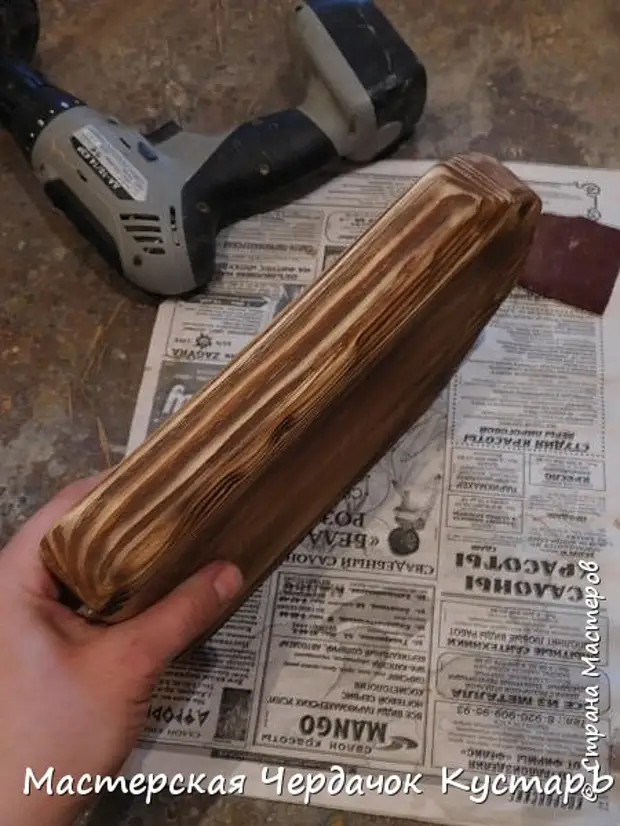
A little grinding surface, shallow sandpaper, to remove burrs.

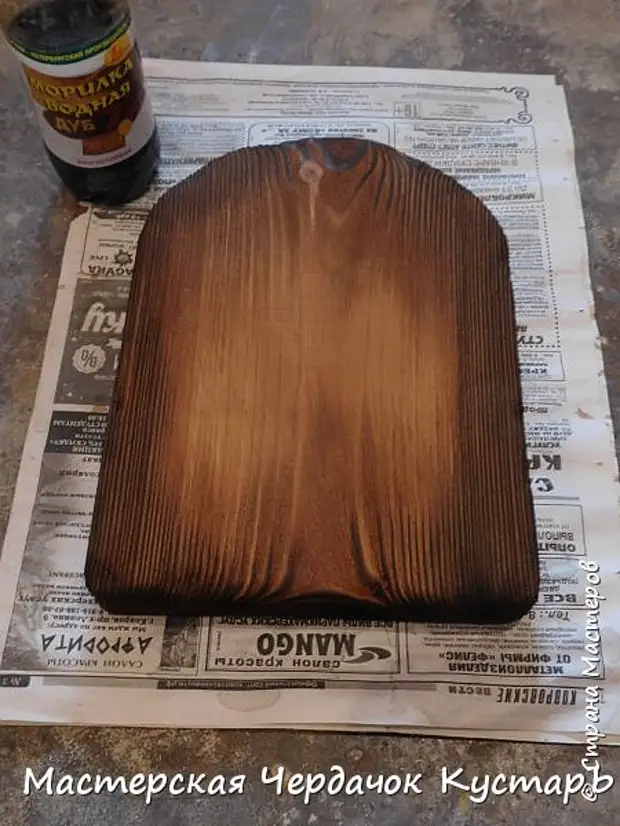
I do not like a water mill ..... it will dry for a long time, and the colors are blooming .... but, did not find the house, the right color of the non-aqueous veil .... therefore I had to use this.
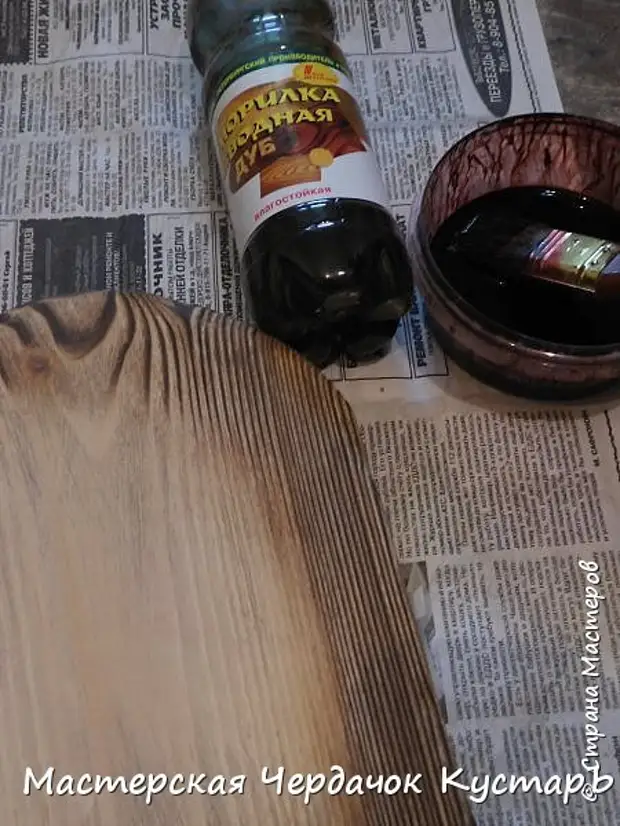
Brush, twice applied a veil, with an intermediate drying a hairdryer.
Further, sandpaper or manually, or use the screwdriver with a nozzle for grinding, passers-by around the perimeter of the plank - shooting, to white, all the fumes.
Here in the photo, I removed the Gar on the left side of the board, which would be visible to the result.

And here, already finished
On the ends, we are doing the tighter "Operation"
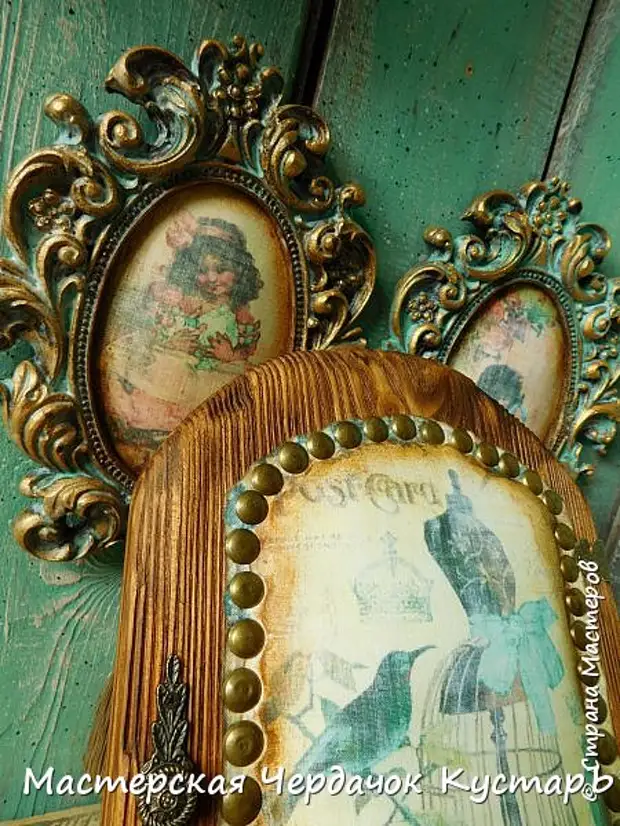
Caught! On dusty work is completed, it is possible to escape from the studio))) Dark wax rub the entire surface, giving it a silky and delicious color)))
Here, on the right, the plate is already skewed with wax, it can be seen how the color is different.
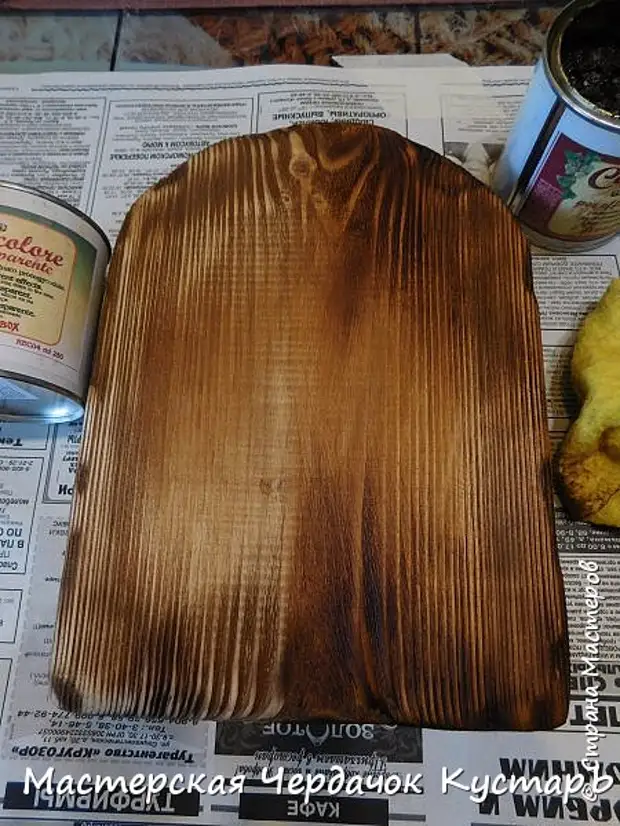
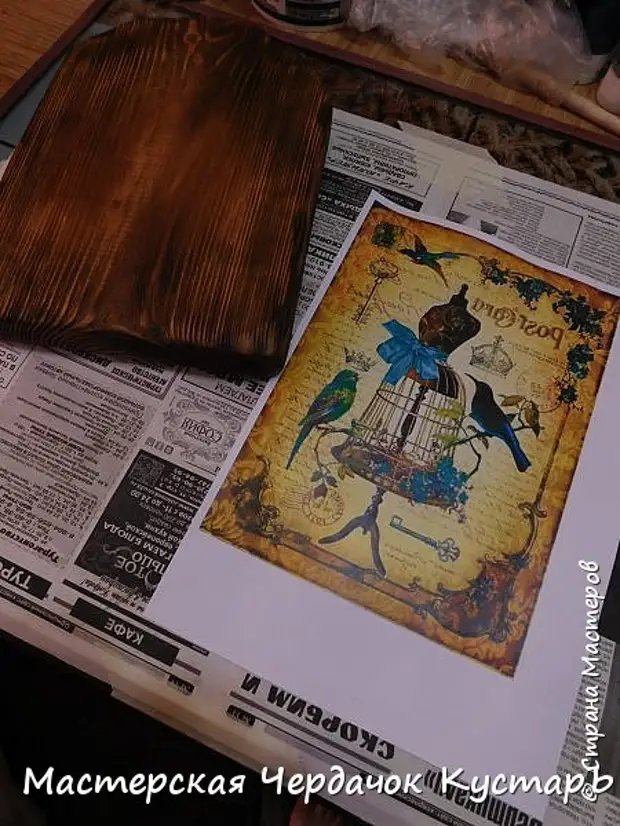
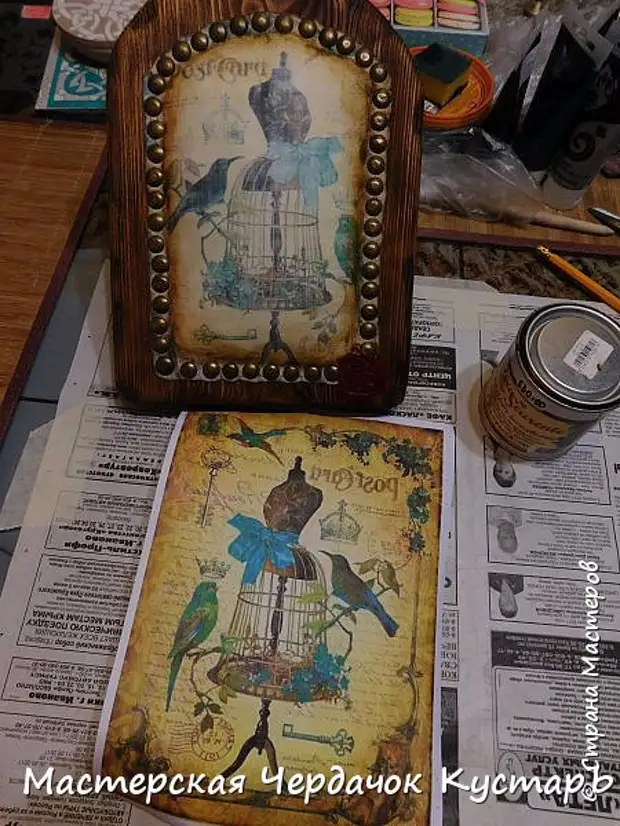
So, the first part of our work is completed. Go to the second, in my opinion, most exciting))))
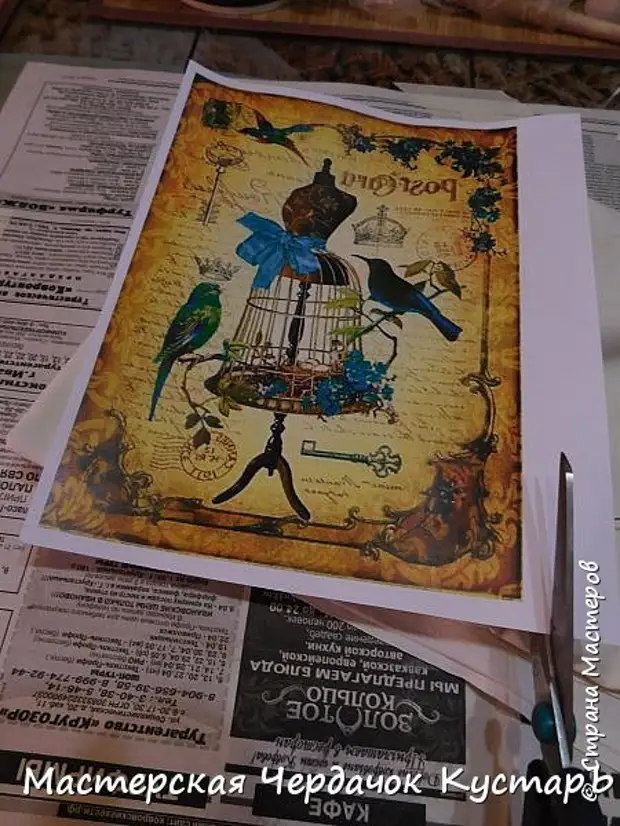
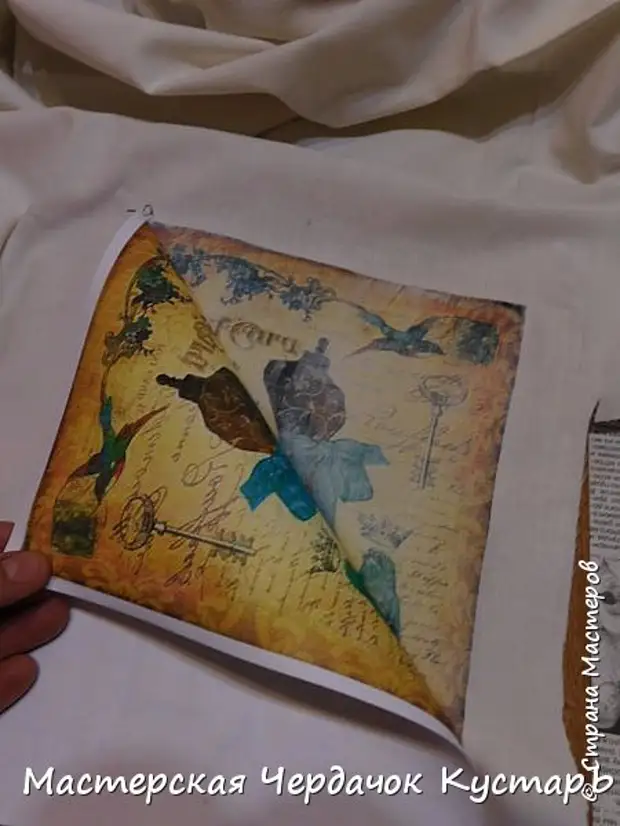
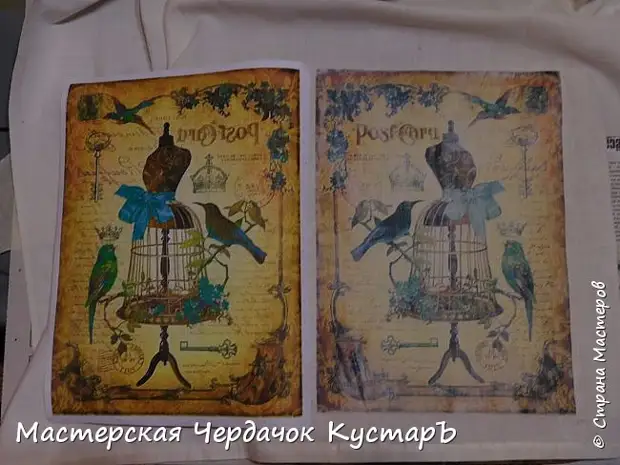
Make a printout otzerkalennuyu, after having adjusted it for us right razmerchik and otkorekktirovav colors (making it much brighter than the original)
Yes, regular office paper! ))))
Cooking white fabric, threads with needle, scissors.
Time, already in the evening, I work with evening lighting, so I apologize for the darkened photos.
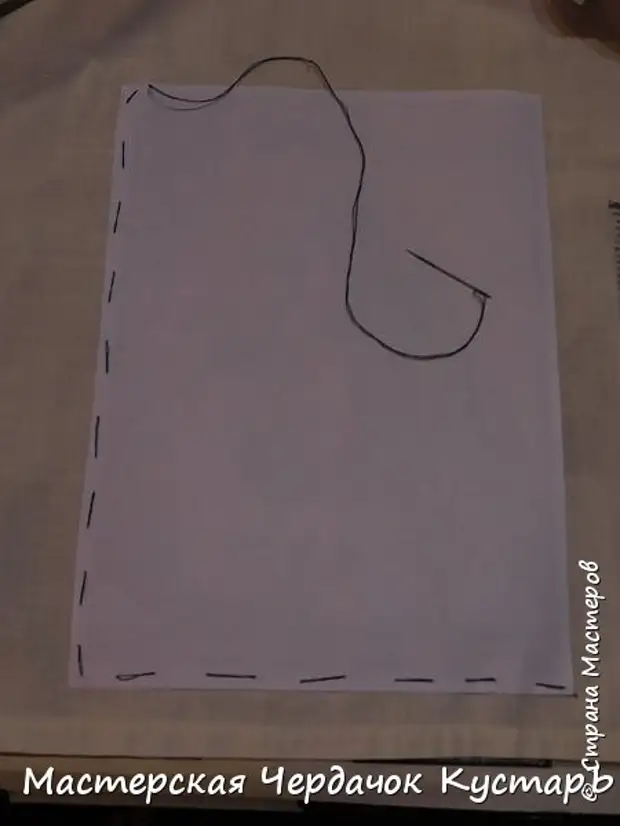
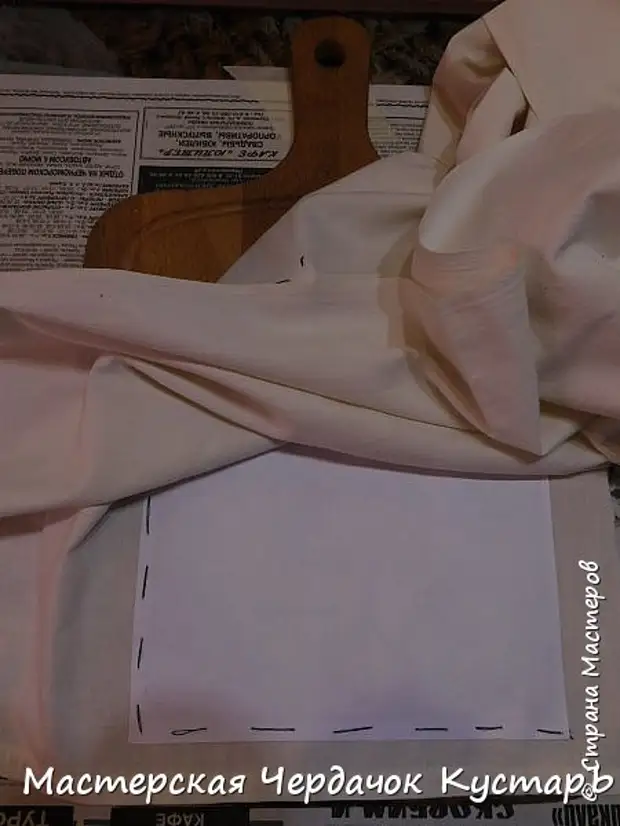
Cutting a printout in such a way that the white edges remained on the ends (in the future, we will sew on them)
Overturn printout "snout into the fabric"))))))))))))))) Oh, how skazanula! )))) Chur, I patented this expression !!! )))))))
And such large buckles to sew a printout of the fabric, only the bottom and to the left, I feel so comfortable.
Place under the fabric, something solid (on the ironing board "I will not make a face in the fabric" you don't have a solid surface.
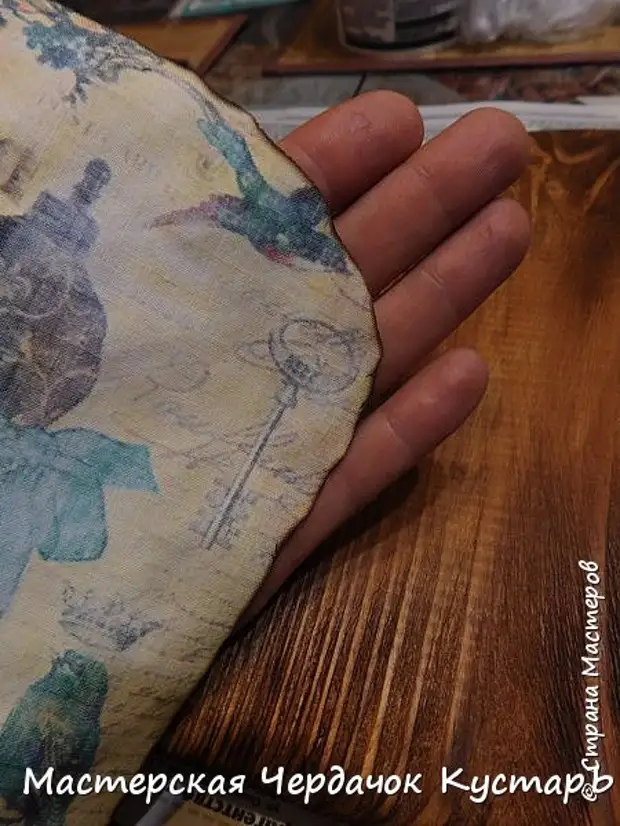
I do not know, I do not know how you have, and I have already seen a lot of iron! I heated it to the maximum and begin .... no not to iron, namely heated the printout.
Hold the iron strictly or the corner in relation to the printout. I stroke the printout of exactly the end, in small slow movements there and back, lingering for a long time for every five square centimeters. First I stroke for example horizontally, then vertically, or vice versa.
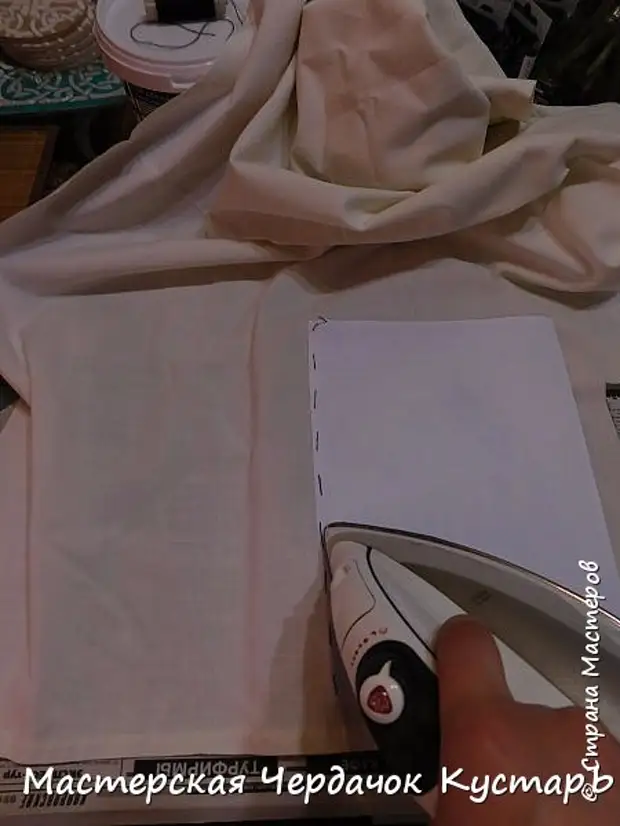
During ironing, under the influence of temperature, the paint on the printout as it would come to life and is transferred to the fabric. But do not wait for the "face in the fabric", the drawing on the fabric will eventually be bright. Not! It will be faded and dull, as if old. I just need it. If you want, that the drawing would be bright, then make a "muzzle in varnish."
This "magic" with an iron, of course I didn't come up with me, but I have already used this receiver for a long time and when working with a tree.
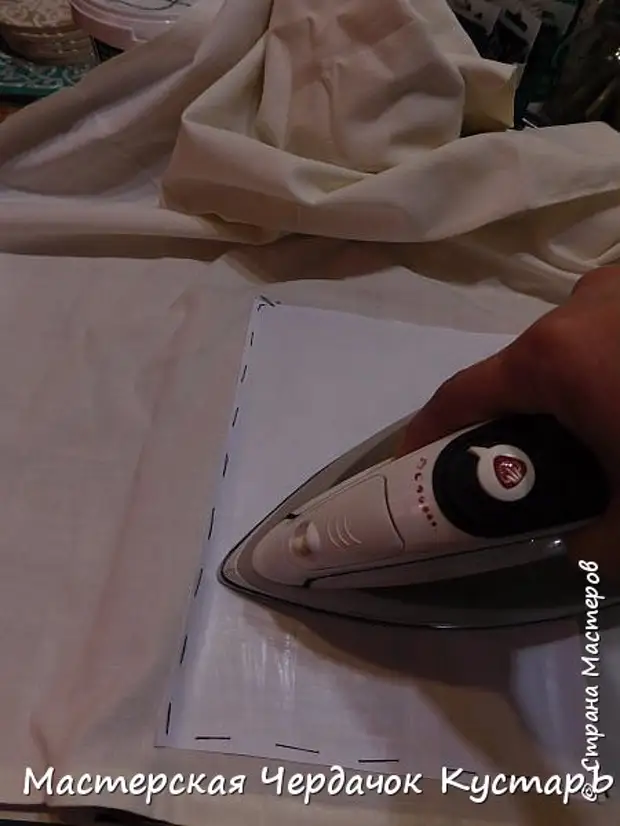
So, for what, I did not sew the top and right edge to the fabric .... I raise a print a little, what would look, did the drawing printed well?
I see that there are gaps and decide to smooth some more))))
That's better. I think it's enough with an iron.
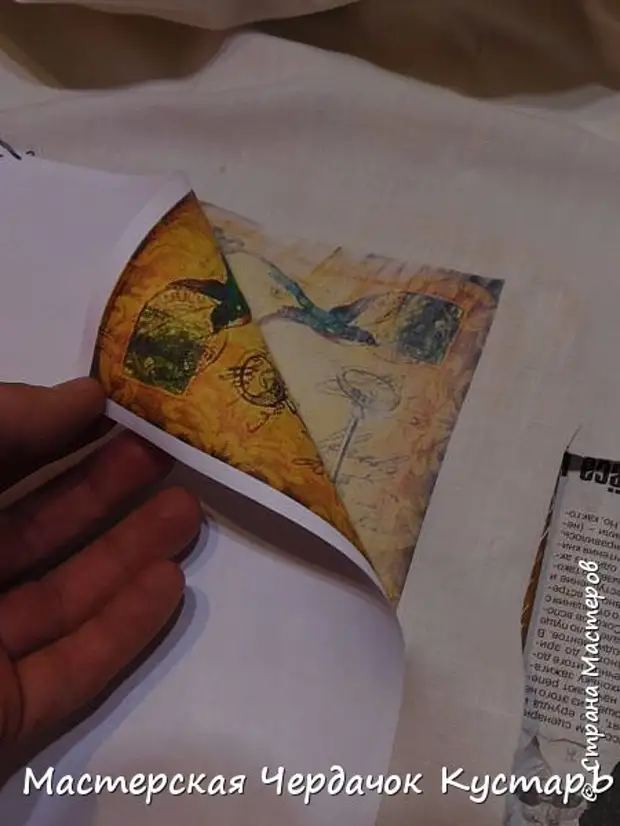
I pull the thread and shoot a printout, which when ironing, good already stuck together with a cloth, but still well removed.

The result of our ironing ..... Visible certainly gaps could be more torment iron .... but oh well, it is what it is.
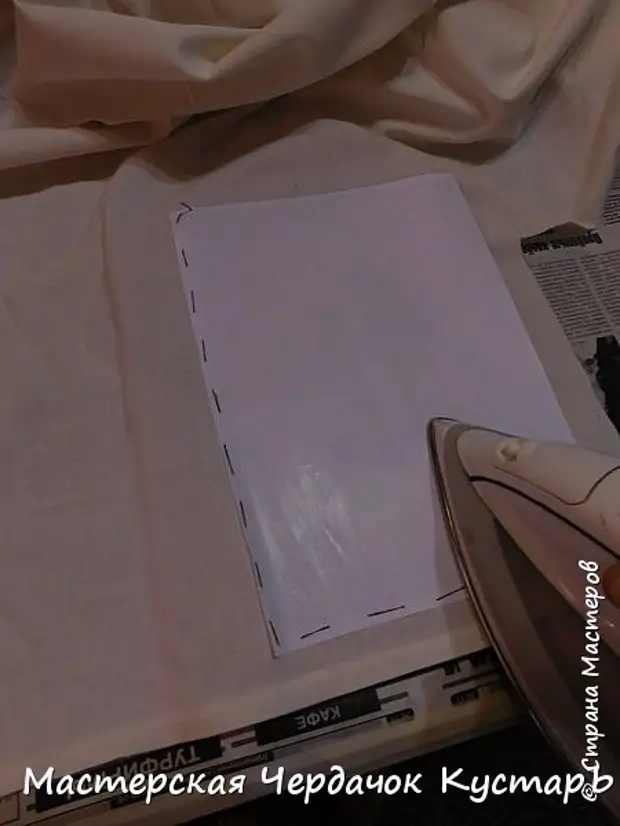
Sliced white surplus fabric. We pretend how the drawing will be located on the board.
I note extra borders
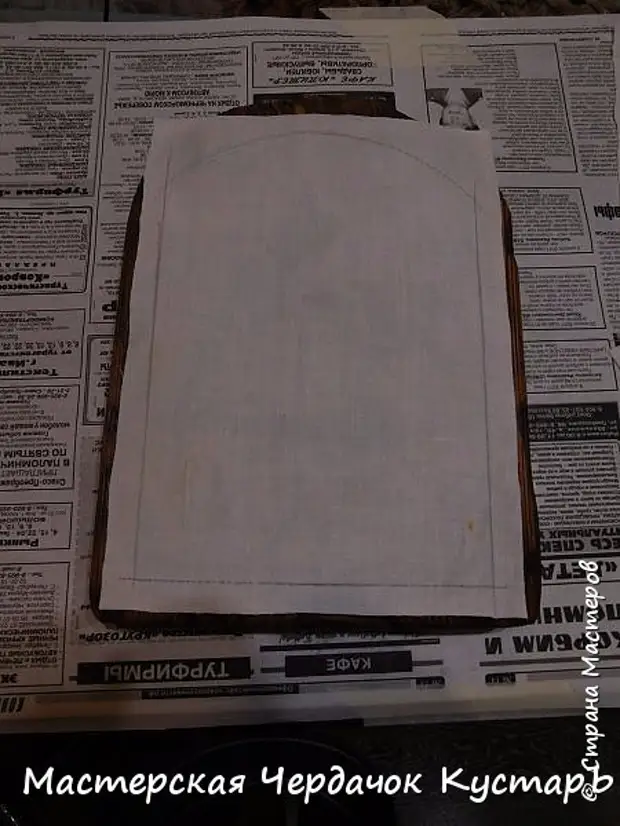
Cropped. The picture is ready for further work.
A little fastened fabric ends, only so that they would not be white.
Hot glue, we grab the edges of the fabric with the board.
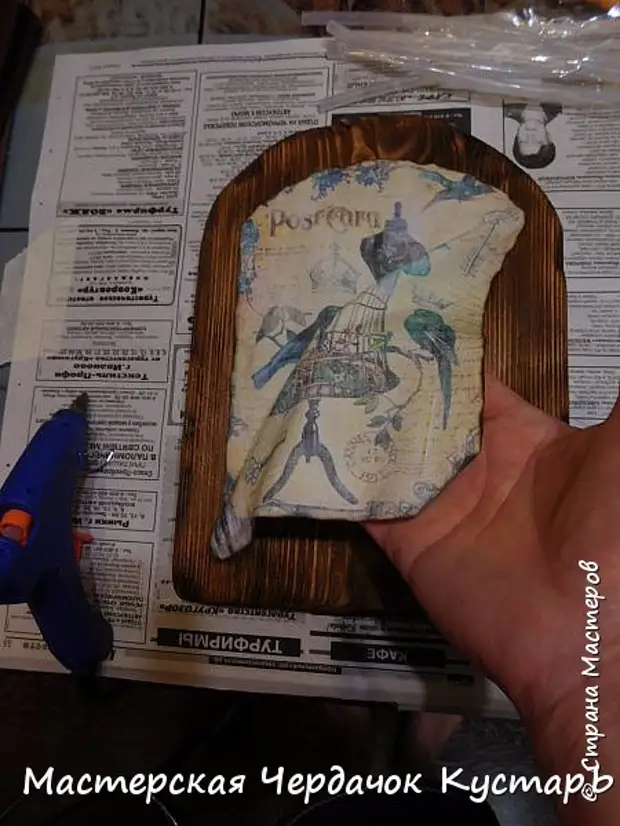
On the glue, we plant all the edges except the bottom. We do not need to be weave to be stuck "to death" to the blackboard, we just need to temporarily grab the cloth on the board, so we use hot glue.
I, there was a synthet board, and wool ..... I decided to stop on the cotton, but in general there is no difference.
Neatty, with the help of the line I begin to stuff your cotton in your pocket under the cloth.
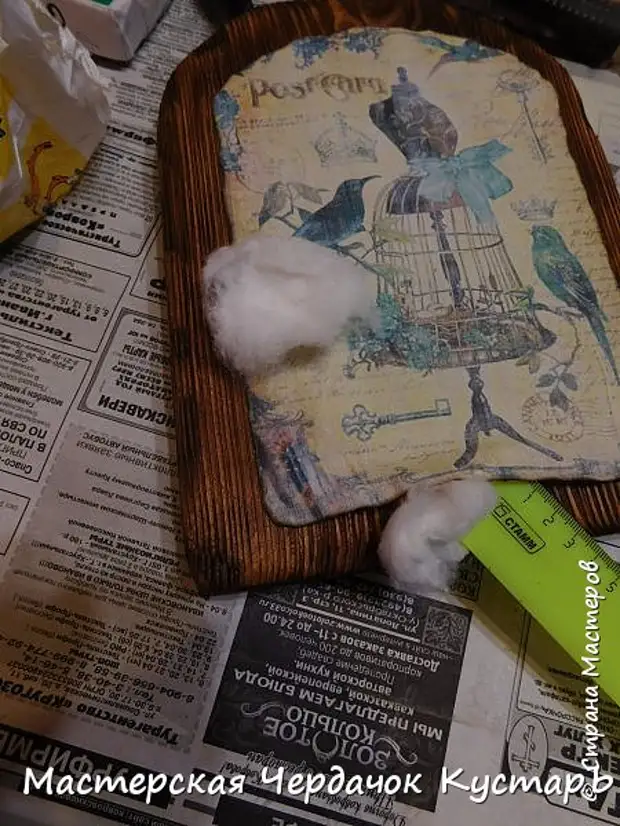
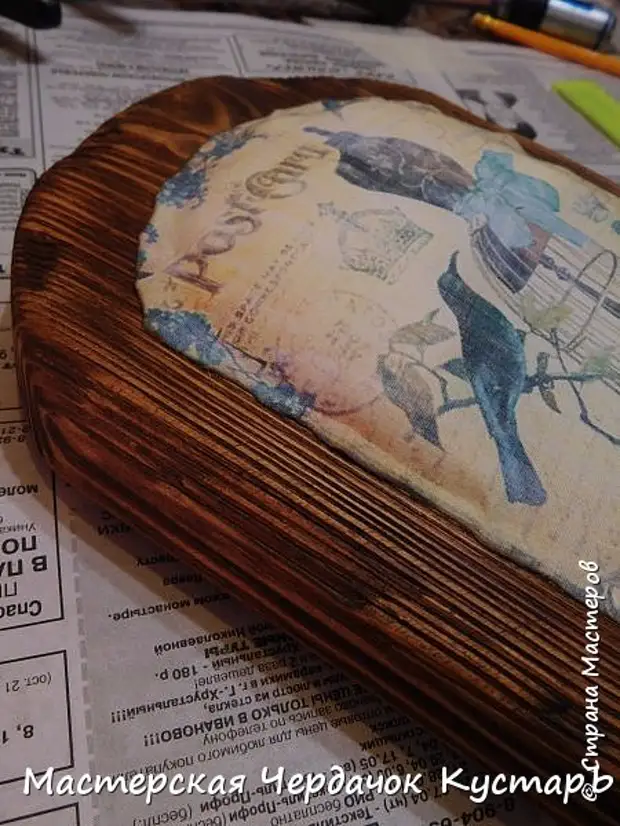
So, the fabric is stretched and the volume is obtained.
Preparing decorative nails and hammer.
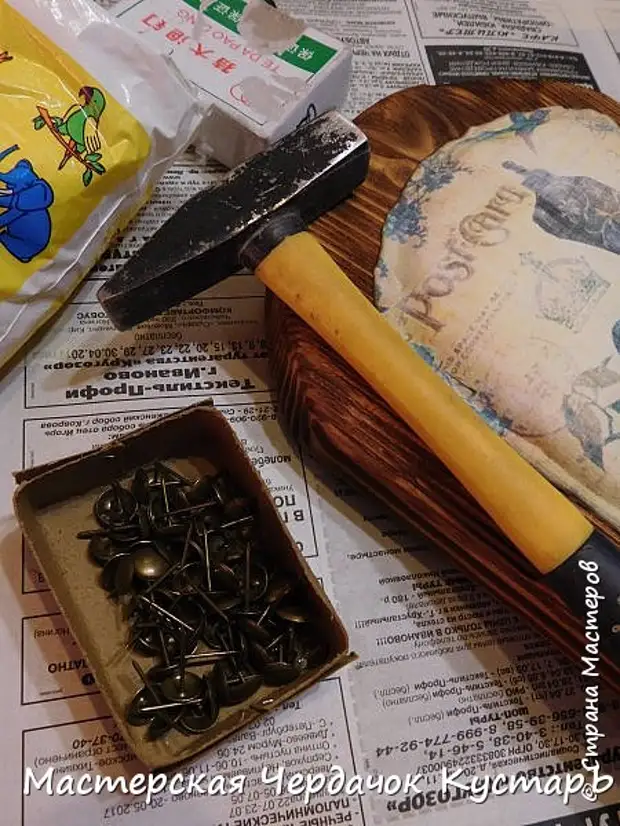
In the place where the pocket is already clogged with a cotton and tissue stretched, you can already score cloves around the perimeter.
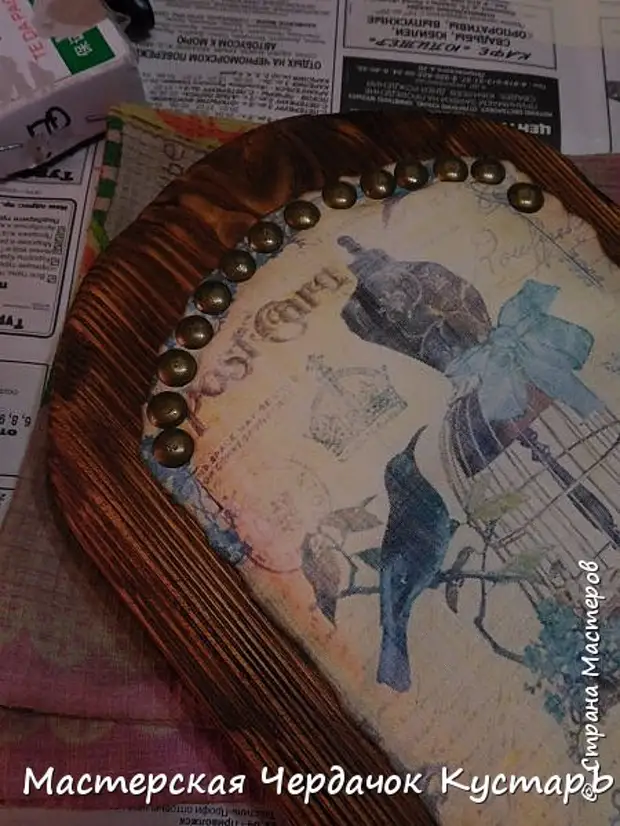
When the cloves scored and well fastened the fabric, then you can add a little cotton pocket.
And so, parts are scored by cotton, then on this section of the nails, then on another site again wata and again nails.
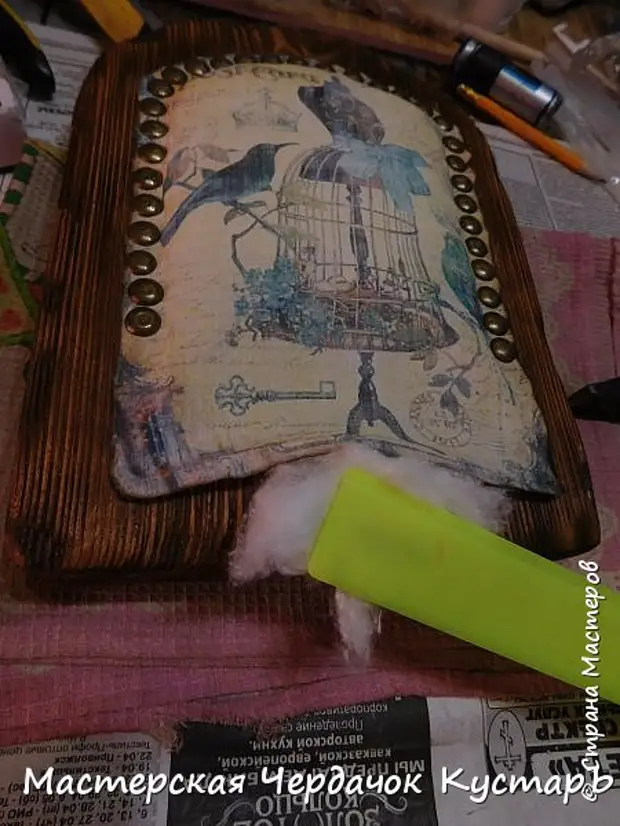
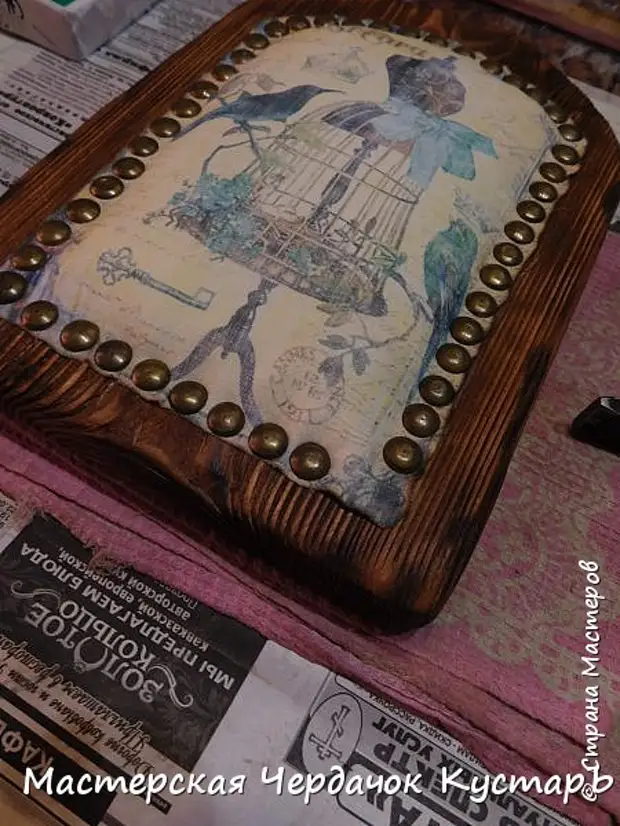
Almost finished.
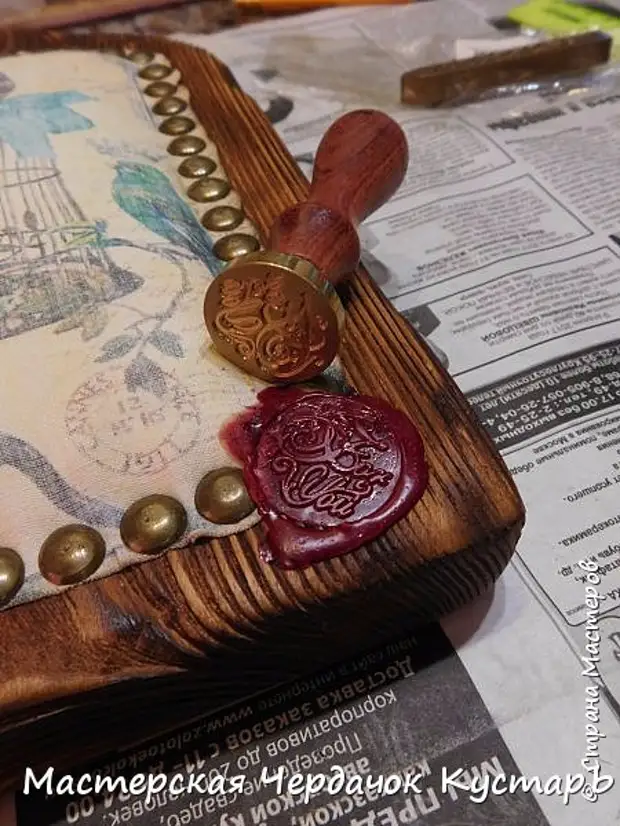
It was possible to finish the nails until the end, but I remembered about the masonry seal.
Therefore, I fix this corner of the fabric with a board, glue the moment of the crystal.
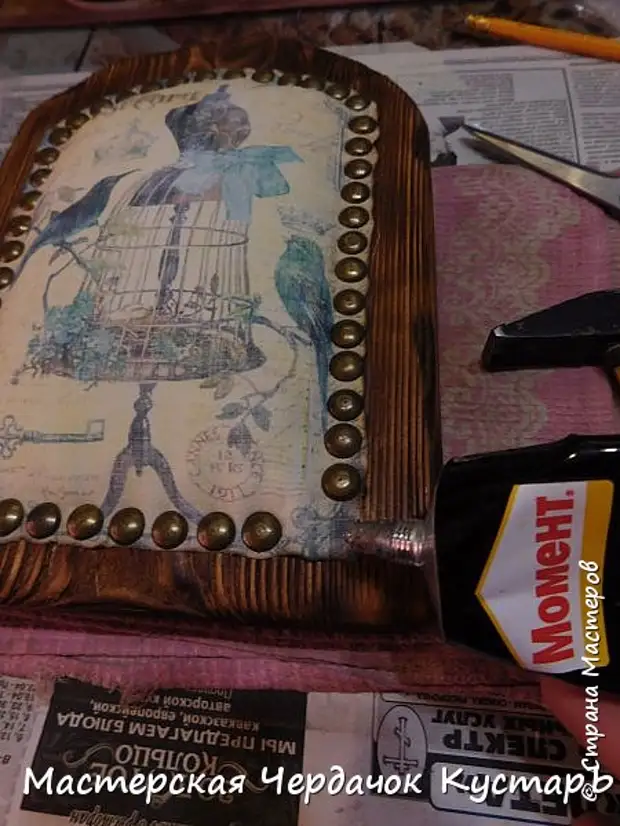
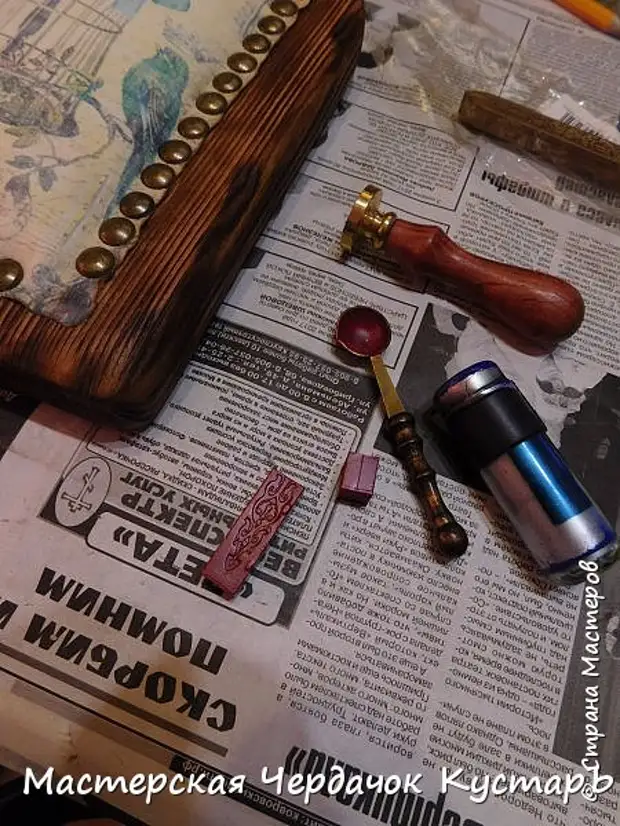
And I put a seal.
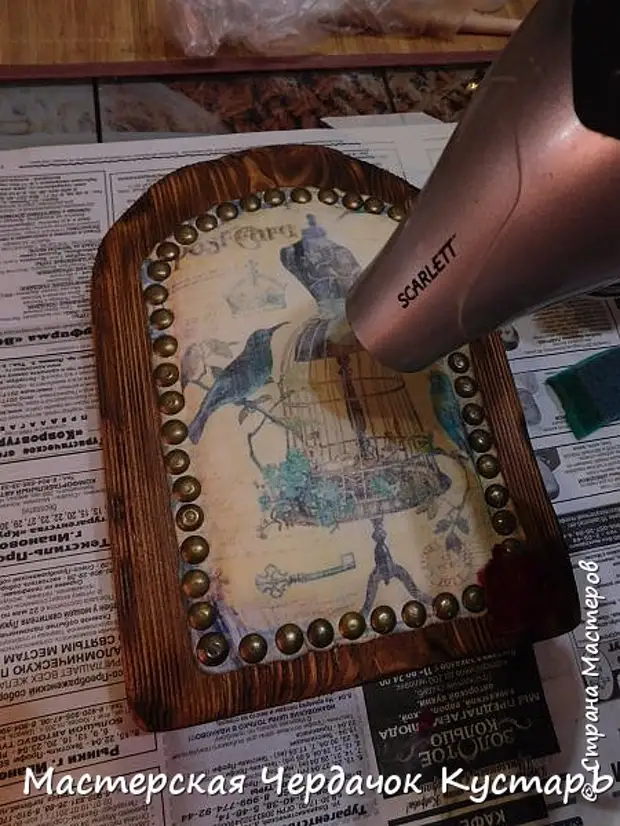
Our picture must be closed. Sponge and acrylic varnish.
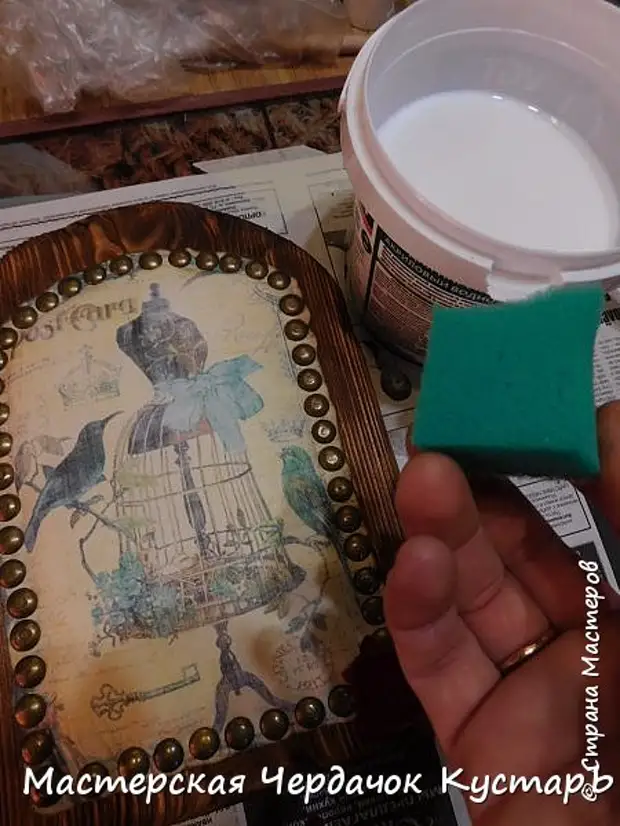
I nano varnish, as if I wrap a sponge picture.
And then dry hairdryer. And so, on 4 times.
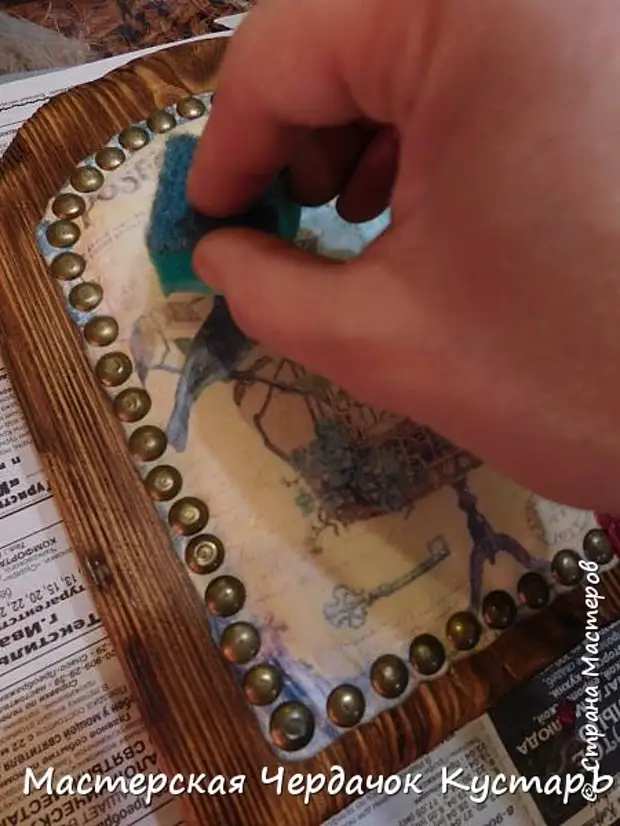
I decided that a little need to edit the picture around the perimeter. Dark wax on a cloth .....
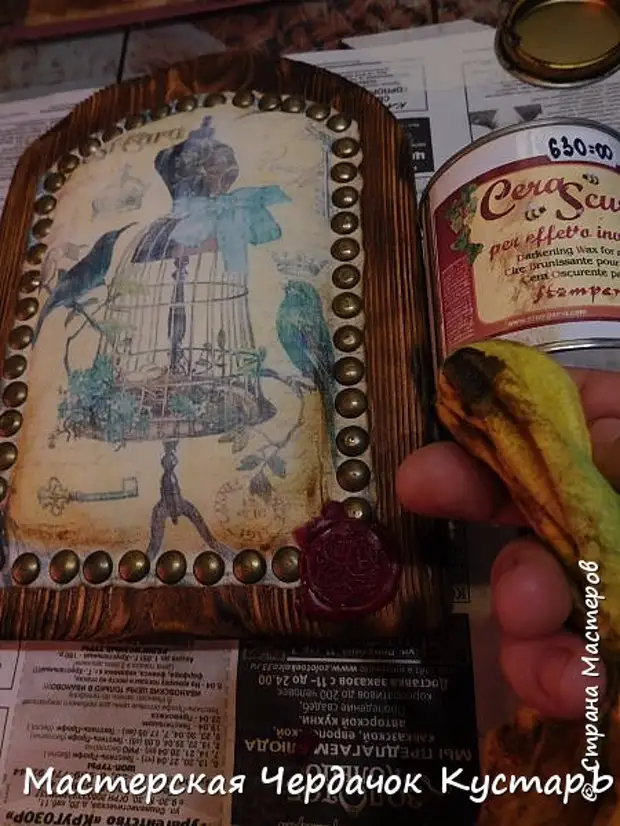
And I rub it into the fabric.
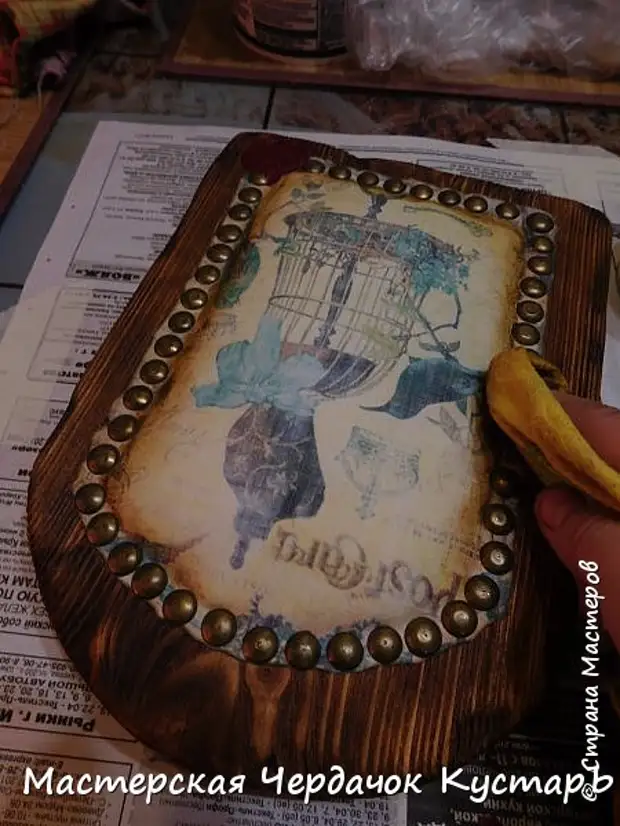
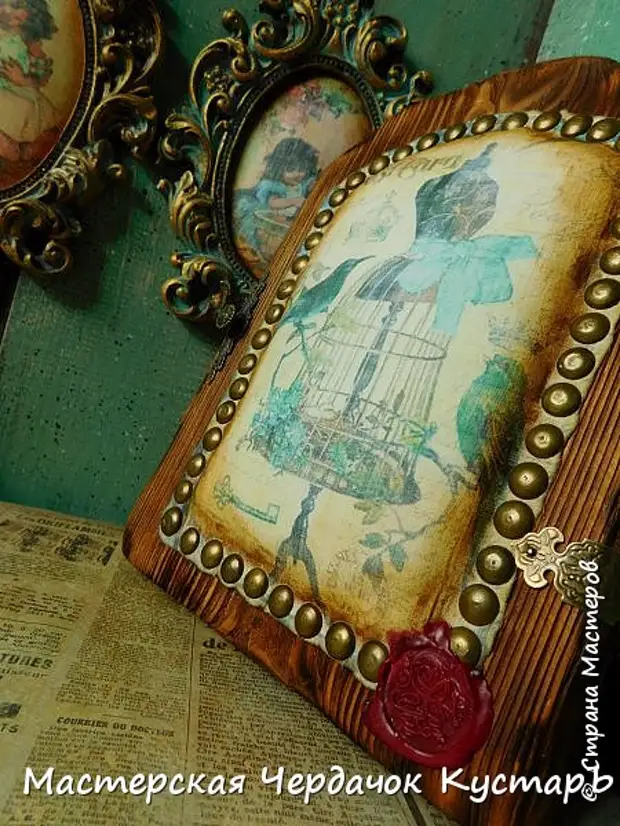
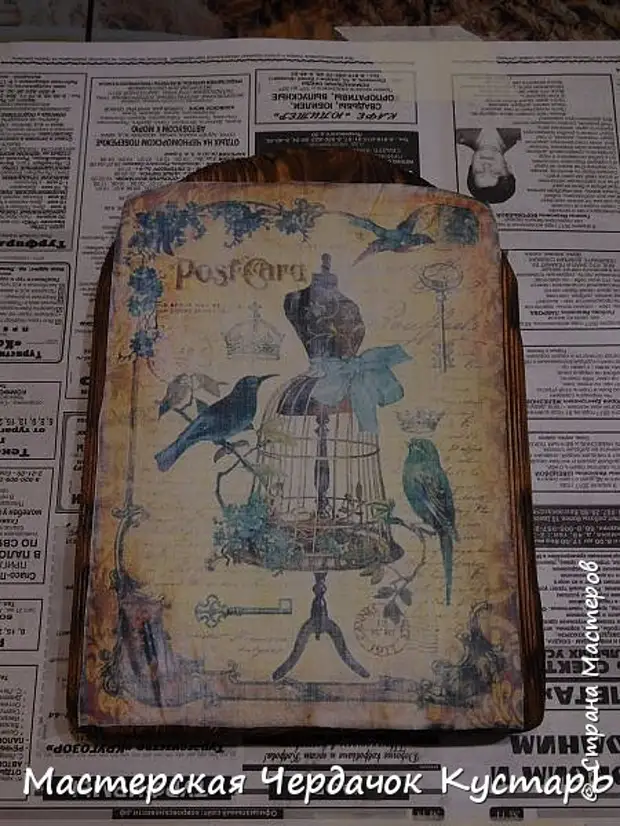
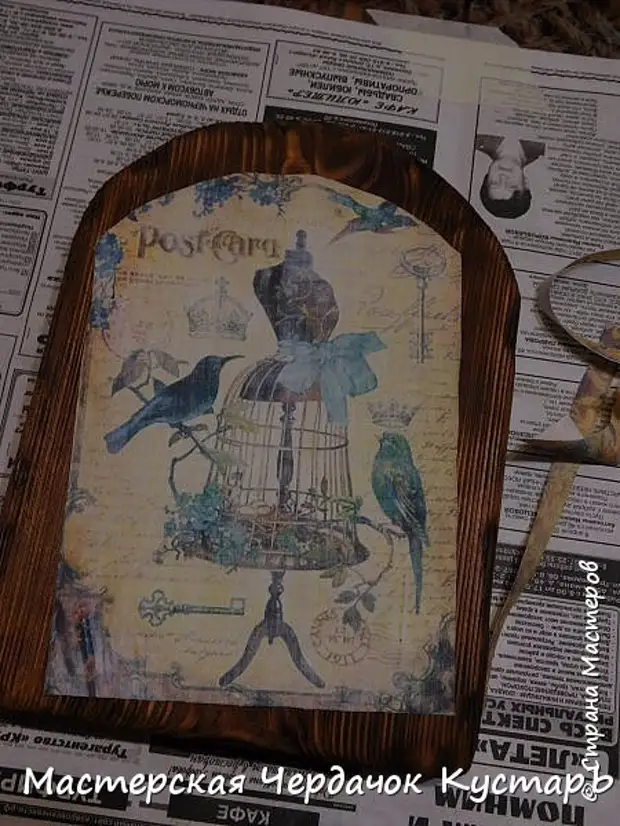
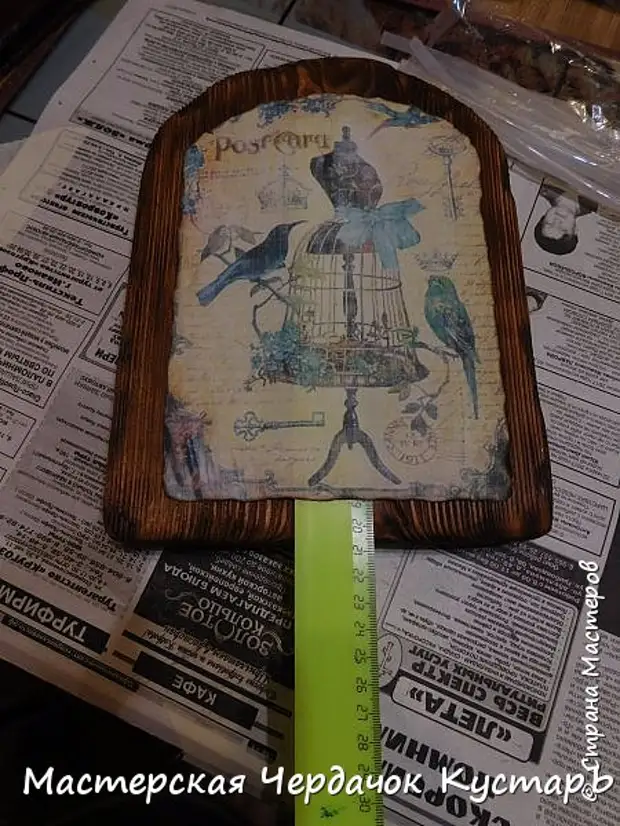
Actually, here is ready.
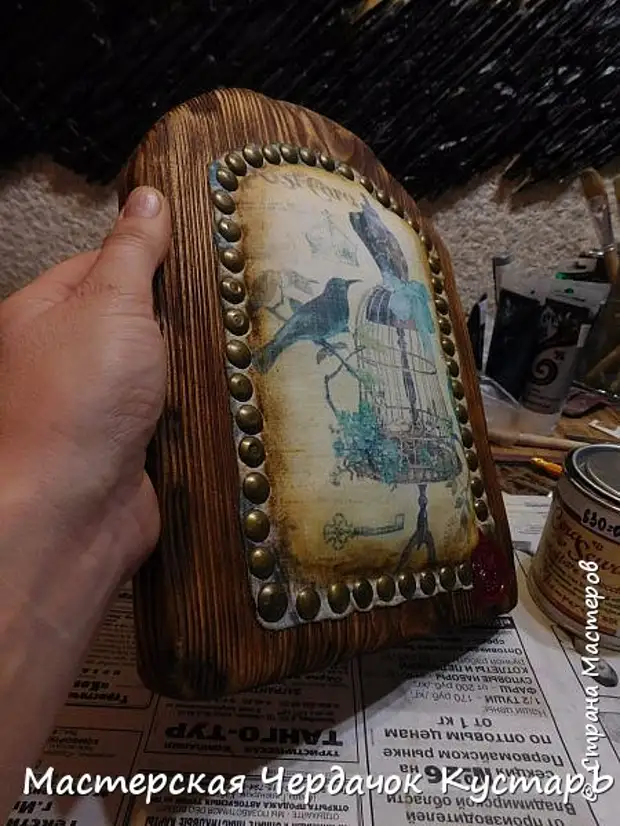
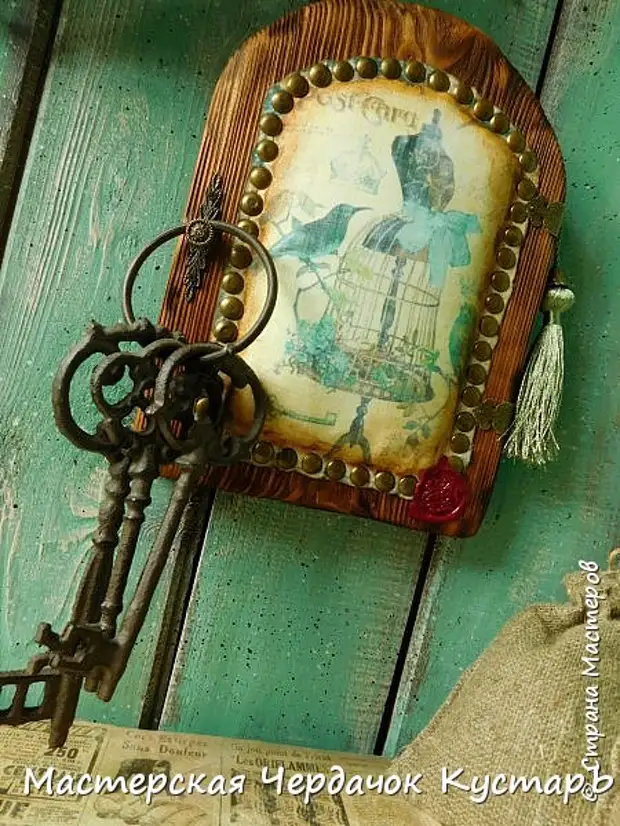
It remains to add some metal. Accessories. It was planned that it would be panel, but in the end, I decided that it would be a panel key.
And today, in the morning, set up a photo session to her in daylight. But this is another part)))))
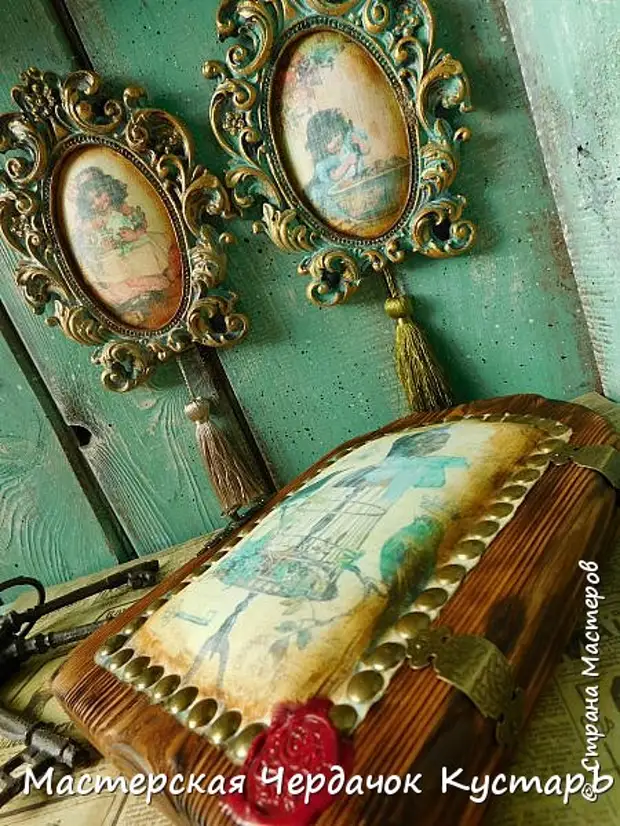
All decors in their places. Now you can twist)))